On this page, we will show you 4 methods to resolve error code 0x80042414 on Windows 10/1, helping you fixing the system image restore failed problem easily.

“How do I fix system image recovery failed? I am trying to restore a system image to a laptop running Windows 11, however I keep running into problems. The situation is that I've created a recovery drive, and the system image is detected. However, whenever I actually start the restoration, I am greeted with the 0x80042414 error. It seems like an extraordinarily rare occurrence. Please help! Thank you.
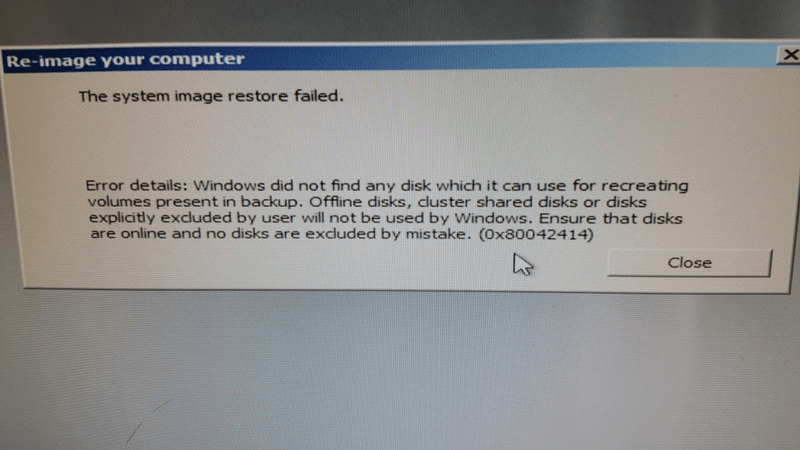
The error code 0x80042414 often surfaces during system image recovery attempts, accompanied by the message "Windows did not find any disk which it can use for recreating volumes present in backup." This suggests that the restoration tool is unable to identify a suitable target disk for the system image. But don't worry, on this page, we'll walk you through why this happens and how to fix it effectively.
Several factors can trigger the error 0x80042414 on Windows 10, including:
Now, let's get into the solutions to fix 0x80042414 - the system image restore failed on Windows 11 and 10.
Easily perform system backup and restore on Windows 11/10/8/7 without any errors.
Here are 4 solutions that can help you fix the system image restore failed on Windows 10/11, try them one by one until your issue is resolved.
The most common reason for error 0x80042414 on Windows 11 is corruptions in disk. Running CHKDSK can identify and fix disk errors that might be causing the restoration failure.
Step 1. Run Command Prompt from the Windows Start Menu if your computer can boot up. If not, go to Windows Recovery Environment and select Command Prompt.
Step 2. In the Command Prompt window, type chkdsk C: /f /r (replace 'C' with the appropriate drive letter) and press Enter.
Step 3. Allow the utility to scan and repair any detected issues.
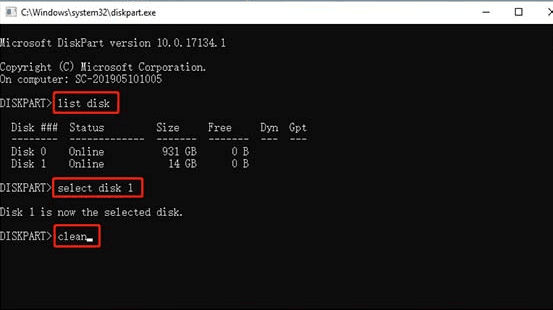
If the target disk has conflicting partitions or formatting, cleaning the drive may be helpful.
Step 1. Go into Command Prompt likewise, type diskpart, and press Enter.
Step 2. Enter the following commands one by one, pressing Enter after each:
Step 3. Close Command Prompt and try restoring the system image again.
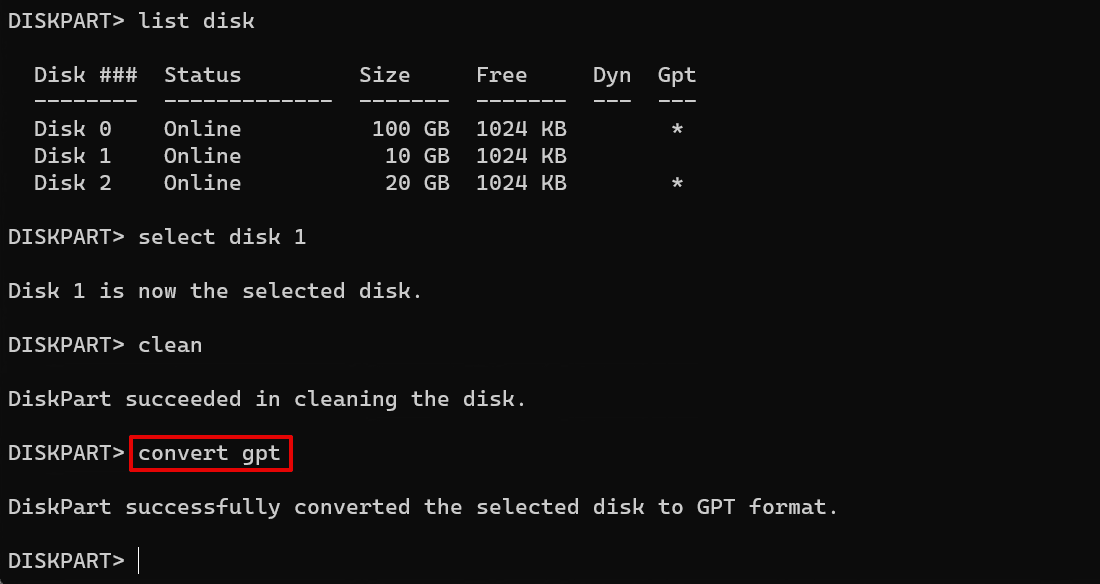
Matching the partition styles (MBR or GPT) between the source and destination disks is vital for a successful restoration. For example, if the system disk used to create the system image is a GPT disk, the target disk used to restore the system image can only be an GPTdisk. If your destination drive is an MBR disk, in such a case, it is necessary to convert MBR to GPT. Here is what to do:
Step 1. In Command Prompt, type diskpart and press Enter.
Step 2. Enter list disk to view disks and their partition styles ('*' under GPT indicates GPT; absence indicates MBR).
Step 3. If the styles differ, select the target disk (select disk X) and convert it using convert gpt or convert mbr as needed.
Another reason the system image restore failed on Windows 10 error is that there is no necessary driver for your disk. To fix it, you may need to download and install storage controller drivers for it.
Step 1. On another computer, visit the motherboard or storage controller manufacturer's website.
Step 2. Download the latest storage controller drivers. Save them to a USB drive.
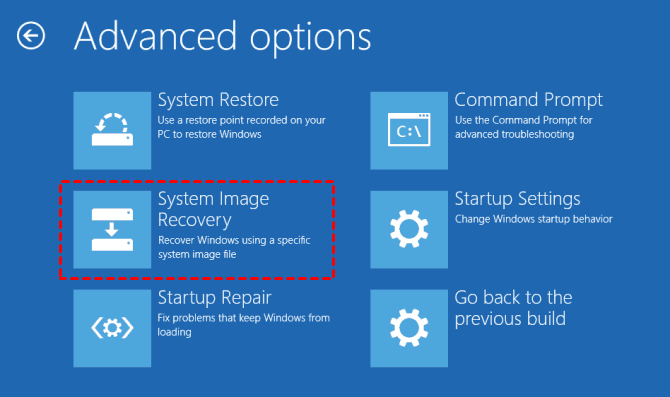
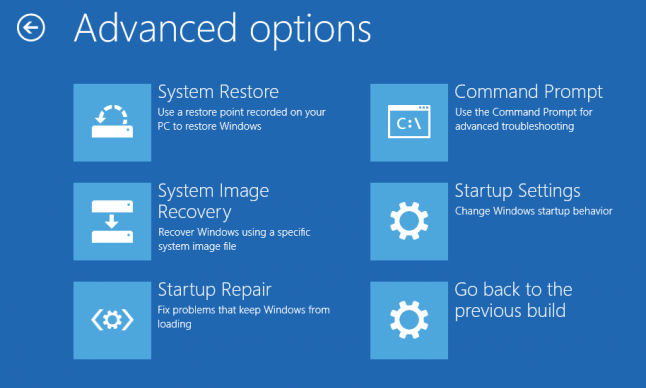
Step 3. Boot from Windows installation media with the downloaded storage drivers, and select Repair your computer > Troubleshoot > System Image Recovery.
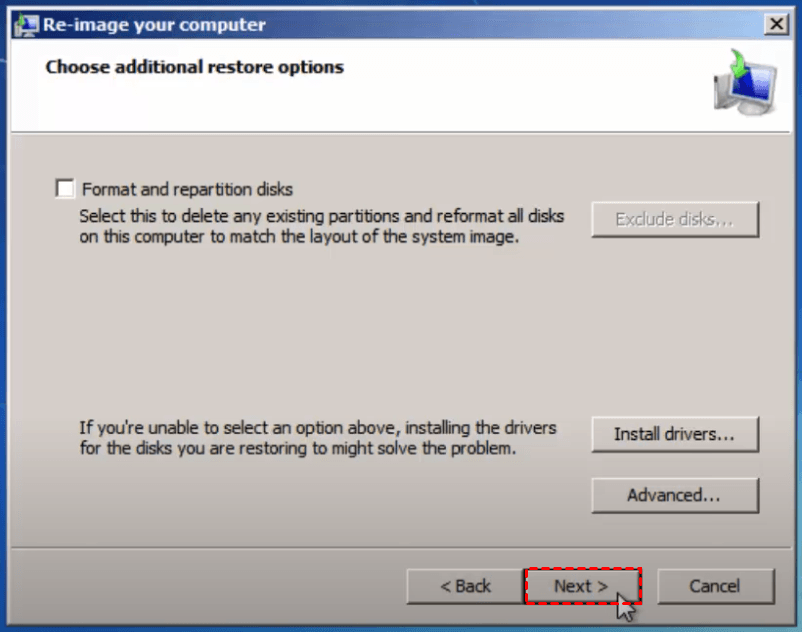
Step 4. Then, select the target system image from which you want to recover your computer and click Next.
Step 5. Click on Install drivers on the next screen.
Step 6. Then, select the Windows USB drive in Explorer and locate the downloaded storage controller drivers. Find the INF driver file for the storage controller, select it, and click Add Drivers.
Step 7. Wait for Windows to load the driver and click Next when it is done. Finally, tap on Finish to restore your computer from the system image.
To minimize the risk of encountering errors like 0x80042414, utilizing another reliable backup and restore software is essential. AOMEI Backupper Standard offers robust features to create and restore system images seamlessly.

Step 1. Open AOMEI Backupper and select Backup > System Backup.
Step 2. The system partitions will be selected by default. Choose a destination path where you want to store the system image.
Step 3. Click Start Backup to begin the process.
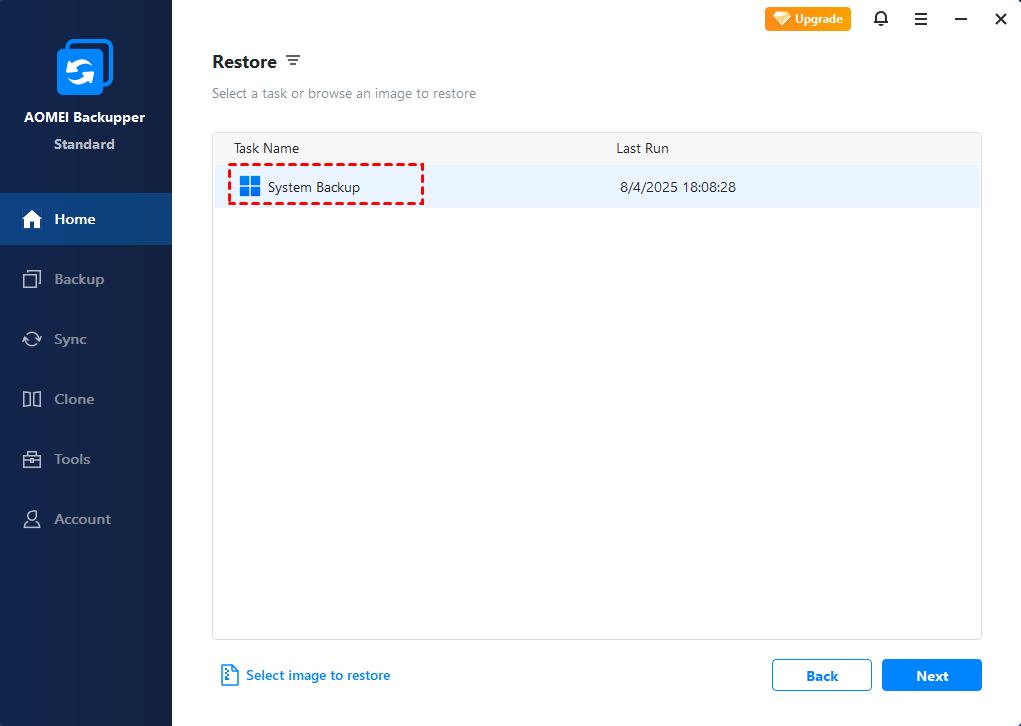
To restore a system image with AOMEI Backupper:
Step 1. Click on Restore > Select Task to choose the system image you created.
Step 2. Then, select Restore this system backup and tick Restore system to other location below.
Step 3. Pick your destination disk, and click on Start Restore to perform system image restore with no error.
Error 0x80042414 can be a frustrating obstacle when restoring a system image, but it’s not impossible to fix. By running CHKDSK, cleaning the target drive, and ensuring partition compatibility, you can successfully restore your system. For a hassle-free backup and restore experience, consider using AOMEI Backupper Standard to prevent future recovery failures. Also, this software comes with sync and clone functions that make it simple for you to transfer files between PCs as well as copy data from one disk to another.