Restoring keyboard settings on an Acer laptop is a simple yet crucial task to ensure smooth functionality and resolve common issues. This guide provides a step-by-step approach, covering language updates, accessibility feature adjustments, driver reinstallation, and hardware testing.

Restoring keyboard settings on an Acer laptop is essential for maintaining smooth functionality and ensuring a seamless computing experience. A misconfigured keyboard can cause numerous frustrations, from typing incorrect symbols to keys that stop responding. These issues often stem from incorrect key mapping, language mismatches, or accessibility features being accidentally enabled.
This guide will walk you through the step-by-step process to restore your Acer laptop keyboard settings for Windows 11/10/8/7, ensuring your device is back to optimal performance.

One of the simplest ways to fix keyboard issues on your Acer laptop is to perform a complete reboot. Follow these steps:
1. Power Off the Laptop:
2. Disconnect Power Sources:

3. Wait for a Few Seconds:
4. Reconnect Power Sources:
5. Power On the Laptop:
1. Open Control Panel:
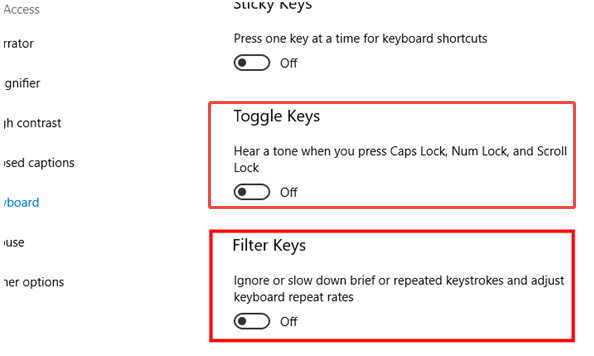
2. Access Ease of Access Settings:
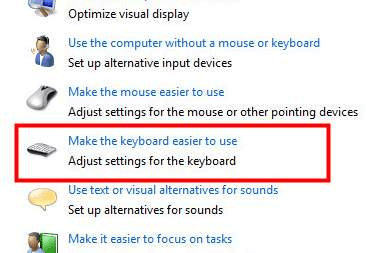
3. Turn Off Sticky Keys and Filter Keys:
4. Click Apply to save changes.
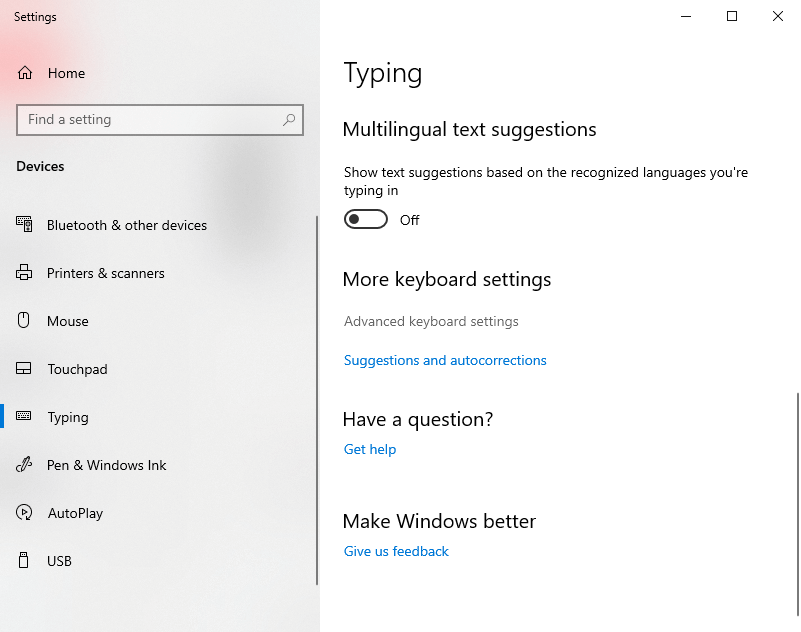
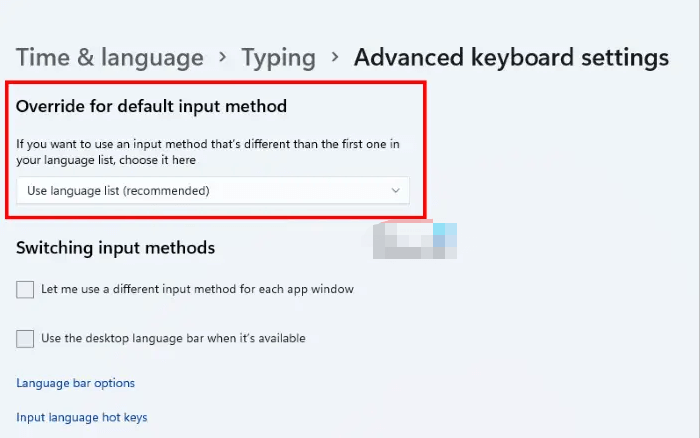
1. Access Advanced Keyboard Settings:
2. Reset Input Method:
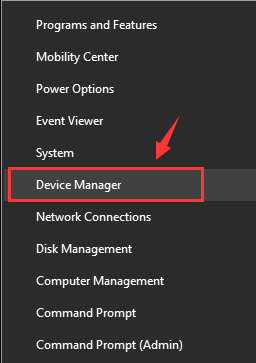
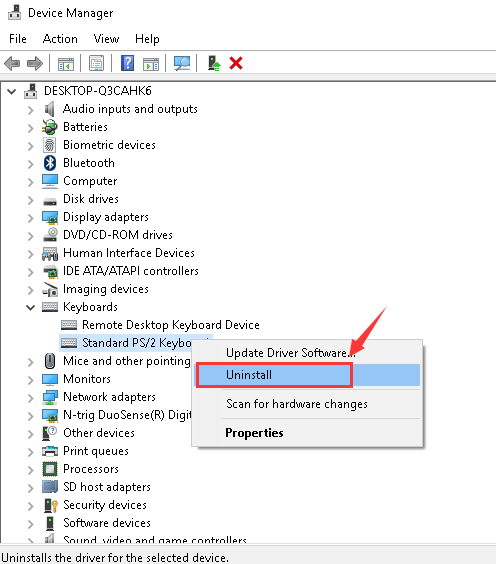
1. Open Device Manager:
2. Uninstall the Keyboard Driver:
3. Update the Driver:
1. Connect an external USB keyboard to your Acer laptop.
2. If the external keyboard works without issues, this confirms a hardware problem with the laptop keyboard. If the issue persists, it’s likely a software or driver issue.
To prevent future complications and safeguard your data, it’s crucial to back up your Acer laptop regularly. Regular backups can save you from data loss during unexpected system errors or keyboard malfunctions. One of the best tools for this purpose is the AOMEI Backupper Standard, which provides a range of features to ensure your system and files are always protected.

Regular System Backups: Perform comprehensive system backups regularly to safeguard your data and allow complete system restoration in case repairs fail.
Automatic Scheduled Backups: Set up automated and scheduled backups to ensure your system is consistently protected without requiring manual intervention.
Quick Recovery: Benefit from fast and efficient recovery tools to reduce downtime and quickly restore functionality after crashes or hardware repairs, such as keyboard fixes.
Backing up your Acer laptop is simple and effective with AOMEI Backupper. Follow these steps to protect your system and data:
Step 1. Launch AOMEI Backupper: Open the program and select Backup from the left-hand menu, then choose System Backup.
Step 2. Select Backup Destination: AOMEI Backupper will automatically select the necessary system partitions. Click the destination box to choose where to save the backup.
Step 3. Start the Backup: Click Start Backup to begin the process.
AOMEI Backupper offers additional features to optimize backups:
Options: Compress files to save space, split large backups into smaller parts, and enable email notifications for updates.
Schedule Backup: Automate backups by scheduling them to run daily, weekly, or monthly for continuous protection.
Backup Scheme: Use incremental or differential backups to save only recent changes. Automatically delete older backups to free up storage space (available in the Professional version or higher).
By utilizing AOMEI Backupper, you can ensure that your Acer laptop is always prepared for unexpected issues, reducing stress and maintaining productivity.
Restoring Acer laptop keyboard settings is a straightforward process that can resolve many common issues, from incorrect key mapping to non-functional keys. By following this guide, you can quickly diagnose and fix software-related problems.
For long-term peace of mind, remember to back up your data regularly using tools like AOMEI Backupper. If the issue persists, don’t hesitate to reach out to Acer support or consult a professional technician.