Learn how to safely erase BitLocker drive using specialized disk wipe software, Format or Diskpart. Scroll down for detailed steps.

“Hi, I am thinking about turning on BitLocker. My question is how can I erase a BitLocker encrypted partition without a Recovery key if I ever run into this issue? I know that without a recovery key your data is gone, but how can I erase a disk without a recovery key?”
– Microsoft Community
BitLocker is a full-disk encryption technology built into Windows that protects data by encrypting the entire hard drive. If your drive is BitLocker-encrypted, how can you erase it when you encounter severe hard drive failure or when you want to repurpose the drive? Please keep reading.
In this part, you’ll learn three ways to erase a BitLocker drive. Check them one by one.
🔔 Important Note:
Erasing a drive can cause permanent data loss, so ensure you've backed up all important files before proceeding.
AOMEI Backupper Professional is a powerful disk wiping tool that can securely wipe a BitLocker drive, even when it's encrypted. This process goes beyond simple deletion by using advanced algorithms to erase all data, making it impossible to recover.

Full Disk Wipe: Overwrites the entire drive, including all partitions, by writing zeros or random data to ensure permanent deletion.
Partition Wipe: Allows you to wipe individual partitions if you don't want to erase the entire drive.
Compatibility: Supports HDDs, SSDs, USB drives, and other storage media, providing a comprehensive solution for all types of drives.
Download and install AOMEI Backupper on your PC. Then follow the instructions below to wipe drive with BitLocker:
1. Open AOMEI Backupper. In the main window, click on the Tools tab and select Disk Wipe.

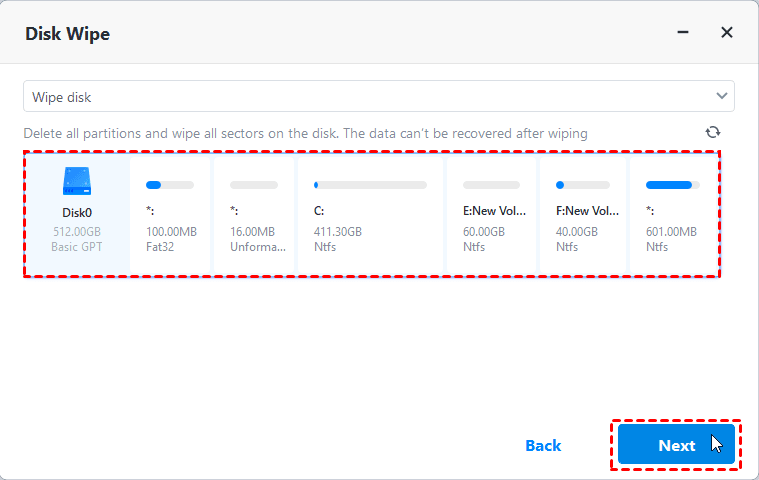
2. When asked to select the wiping type, select Wipe Disk and click Next.
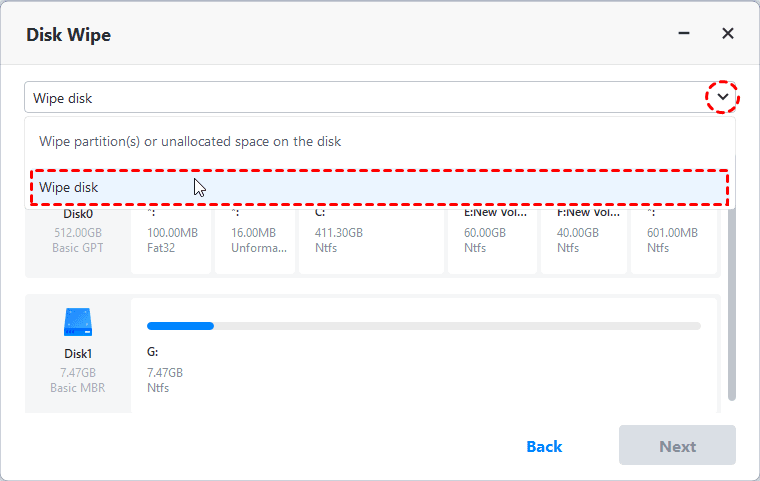
3. In the next window, select the BitLocker drive you wish to wipe and click Next.
Note: If you select a system disk, the program will prompt you to execute the operation in reboot mode.
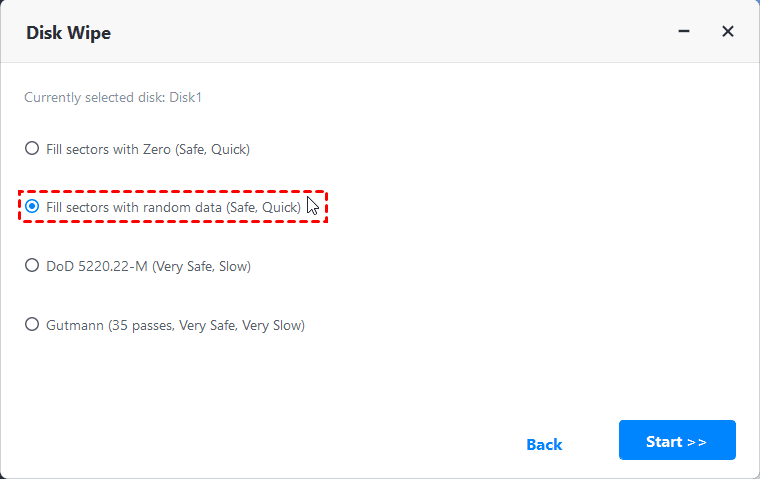
4. Choose a desired wiping method and click Start to begin disk erasing. Balancing data security and the wiping speed, Fill sectors with random data and DoD 5220.22-M are recommended.
The built-in Format feature can also help you erase a BitLocker-encrypted drive. Formatting will delete all data on the drive, including the encryption. Here’s a step-by-step guide:
1. Press Win + E to open File Explorer. Then find the drive you want to format.
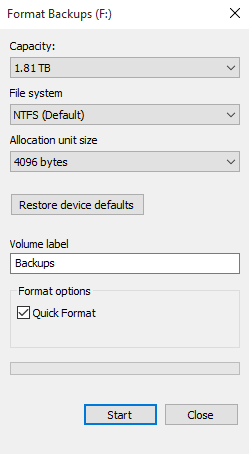
2. Right-click on the drive and select Format.
3. In the Format window, choose the following options:
4. Click Start and confirm the prompt to begin the format process.
This method is using Diskpart in Command Prompt to completely erase the drive. Follow the steps below:
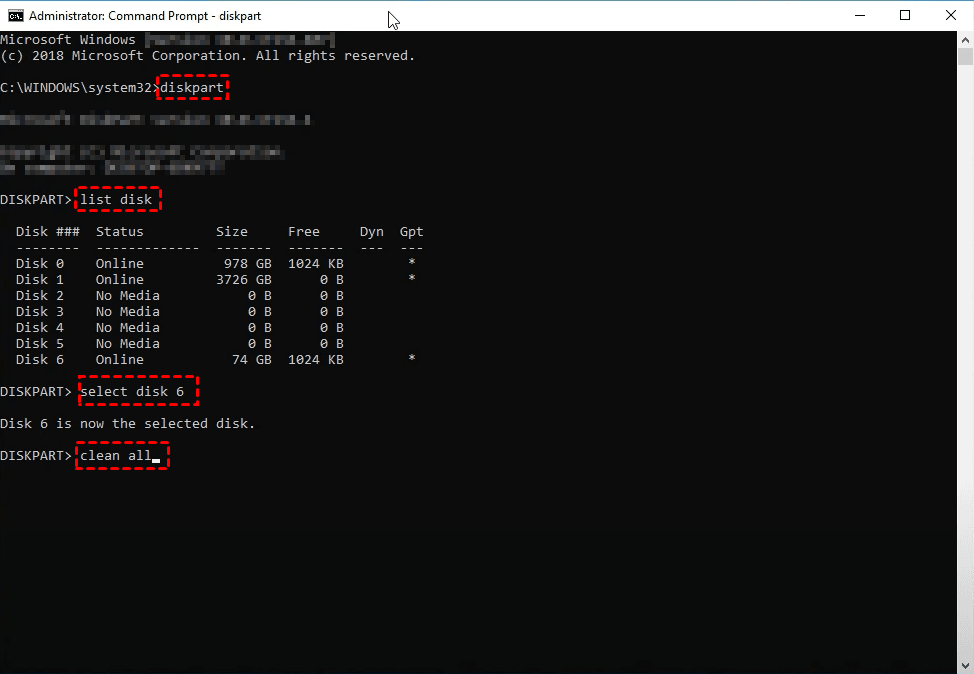
1. Search for “cmd” on the taskbar and run Command Prompt as administrator.
2. In the Command Prompt window, type the following commands and press Enter after each line.
3. After the operation is done, exit Command Prompt.
1. Does formatting a hard drive remove bitlocker?
Yes, formatting a disk removes BitLocker encryption and erases all data on the disk. For detailed steps, please refer to way 2.
2. How long does it take to wipe a BitLocker drive using Diskpart?
The time it takes to wipe a BitLocker drive depends on the drive's size and the method used. Using the clean all command can take hours, especially for larger drives, as it overwrites each sector.
3. Can I reuse the drive after wiping it?
Yes, once a BitLocker drive is wiped, it can be reused. If you can’t find the drive in File Explorer after wiping, it possibly becomes unallocated space. Use Disk Management to create a new simple volume and then it can be used again.
If you need to erase a BitLocker drive, AOMEI Backupper, the Format feature and Diskpart commands can give you a hand. Always back up important files before erasing the drive to avoid losing valuable data. For complete security, ensure to use reliable erasure methods and consider re-encrypting the drive if needed.
What’s more, AOMEI Backupper is not only disk wipe software but also disk clone software. You can use it to replace C drive with SSD. Why not give it a shot?