Buy a new SSD and want to add the SSD to your computer? This guide covers the installation steps and formatting options. Scroll down to learn more.

Upgrading to a solid-state drive (SSD) is one of the best ways to improve your computer’s speed, responsiveness, and overall performance. Whether you’re replacing an old hard drive or adding extra storage, knowing how to install and format a new SSD ensures a smooth setup. This guide will walk you through the entire process.
If you want to transfer OS to the new SSD without reinstalling everything, try this OS migration tool.
Before installing your new SSD, it's essential to prepare properly to ensure a smooth and hassle-free setup.
✅Back Up Your Data
If you're replacing an existing drive, back up any important files to an external drive or cloud storage. If you're installing a new SSD alongside your existing drive, this step isn't necessary, but it's always a good practice to have a backup in case something goes wrong.
✅Gather the Necessary Tools
Depending on your SSD type and computer, you may need the following tools:
✅Check Compatibility
Not all SSDs work with every system, so it's important to verify compatibility:
Once you’ve prepared your system, it’s time to install your new SSD. The installation process varies depending on whether you're using a 2.5-inch SATA SSD or an M.2 NVMe SSD. Follow the steps below based on your SSD type.
Step 1. Turn off your system and disconnect the power source. Open the desktop case or remove the laptop’s bottom panel.
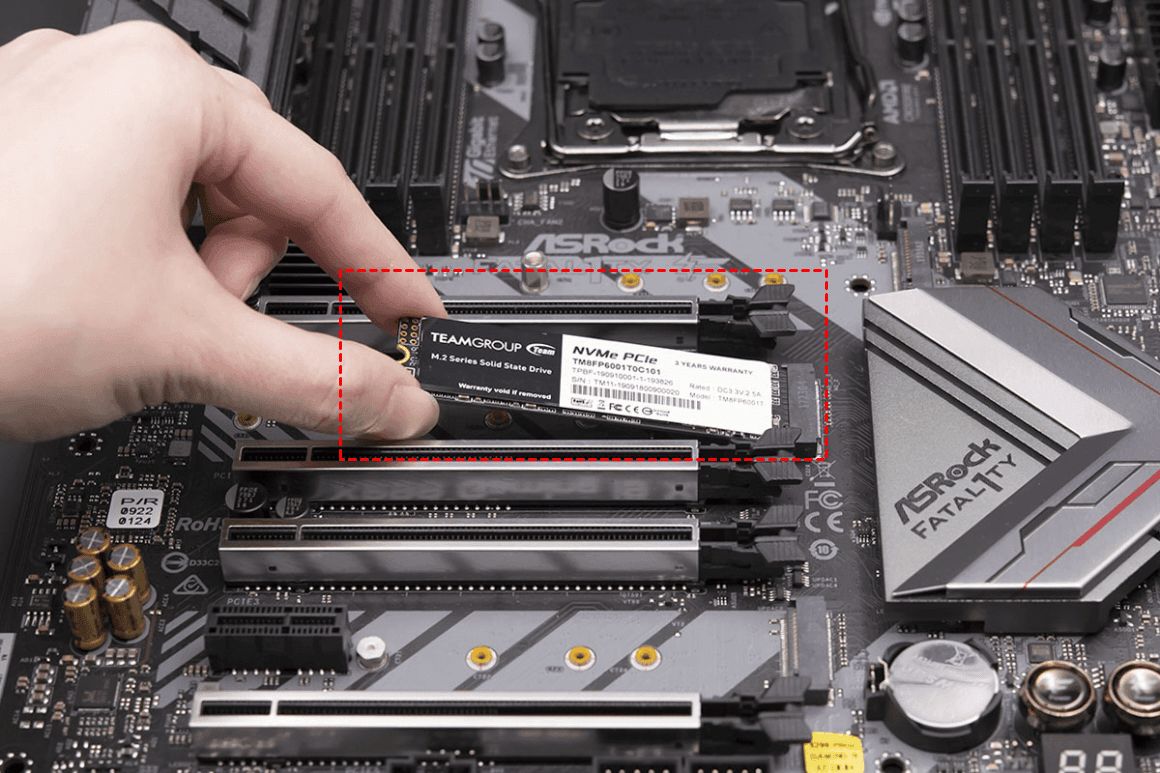
Step 2. Install SSD inside your computer.
👉For 2.5-inch SATA SSD
👉For M.2 NVMe SSD
Step 3. Reassemble the computer and power it on. Enter the BIOS/UEFI to verify that the system recognizes the SSD.
Once your SSD is installed, you need to initialize, partition, and format it before use. Windows 11 and Windows 10 provide built-in tools for this process, ensuring your SSD is correctly set up for storage or as a boot drive. Learn how to format new M.2 SSD or SATA SSD as follows:
Note: The following steps apply to adding a new SSD to your computer. If you are replacing an old hard drive, after installing the new SSD, you need to boot from Windows installation media to clean install Windows and format SSD.
Step 1. Press Win + X and select Disk Management.
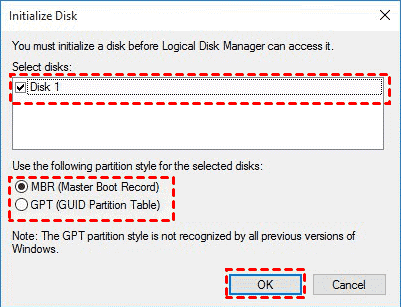
Step 2. In Disk Management, a pop-up window will appear asking you to initialize the disk. Choose the partition style (MBR or GPT) and click OK to initialize the SSD.
Note: GPT is recommended for modern systems and required for drives larger than 2TB. MBR is used for older systems but has a 2TB size limit.
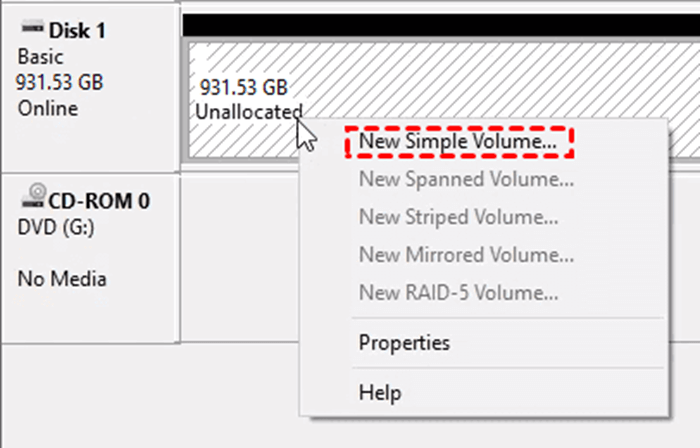
Step 3. Right-click the unallocated space on your SSD and select New Simple Volume.
Step 4. On the Welcome page, click Next.
Step 5. Specify the partition size (use the default maximum size for the entire SSD) and click Next.
Step 6. Assign a drive letter (e.g., D: or E:) and click Next.
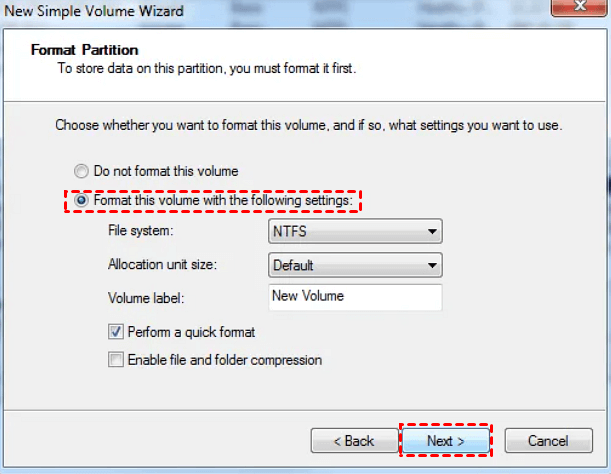
Step 7. Format the SSD and click Next.
Step 8. Confirm your settings and click Finish.
If you want to move your Windows installation to the new SSD without reinstalling everything, cloning the OS is the best option. This ensures all your files, programs, and system settings remain intact. AOMEI Backupper Professional is a reliable tool that simplifies OS migration with a few clicks.

Secure OS Cloning – Transfers Windows and boot partitions without data loss.
Supports Different SSDs – Works with SATA, NVMe, and PCIe SSDs.
Auto-Aligns SSD – Ensures optimal performance and lifespan.
Supports Bootable Cloning – Allows you to boot directly from the new SSD after migration.
Download AOMEI Backupper and follow the steps below to move OS to new SSD easily:
Step 1. Connect your new SSD to your computer using a SATA-to-USB adapter. If there is an extra drive bay or M.2 slot inside your computer, install the new SSD there.
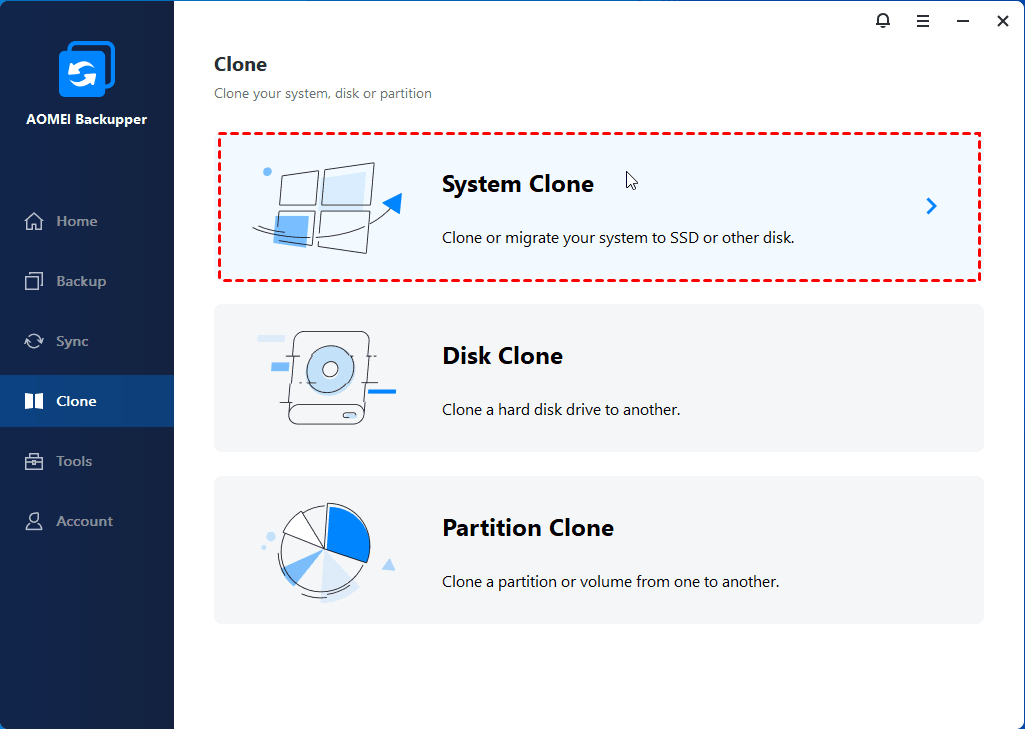
Step 2. Open AOMEI Backupper Professional and go to Clone > System Clone.
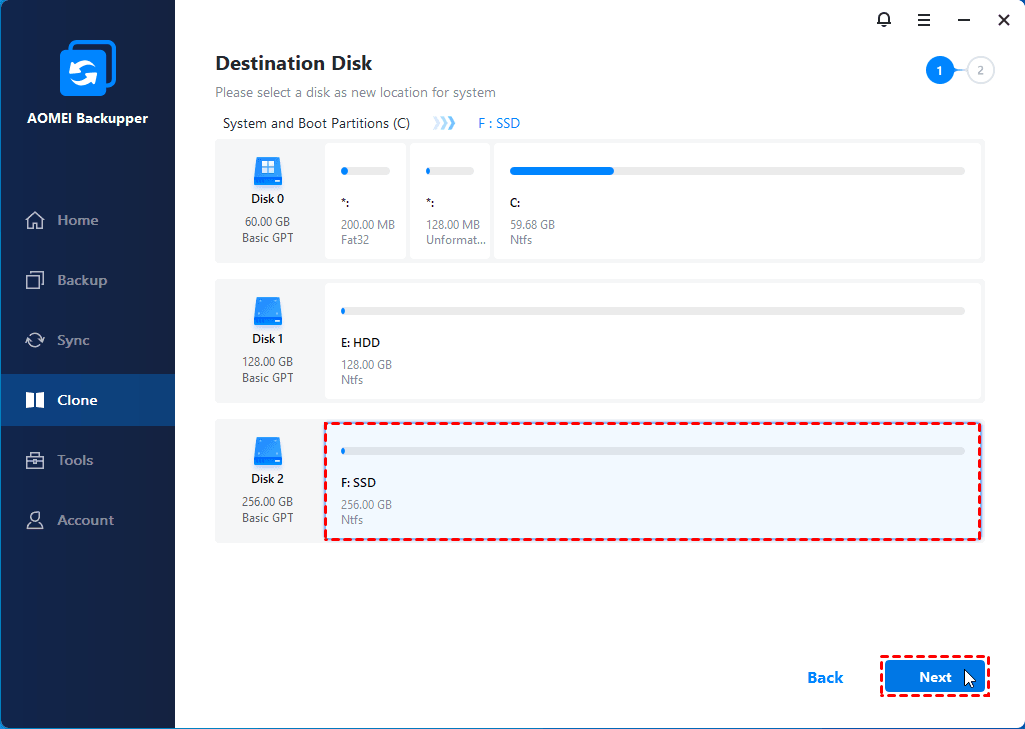
Step 3. The software will automatically select the system partitions required for booting. Choose your new SSD as the target drive.
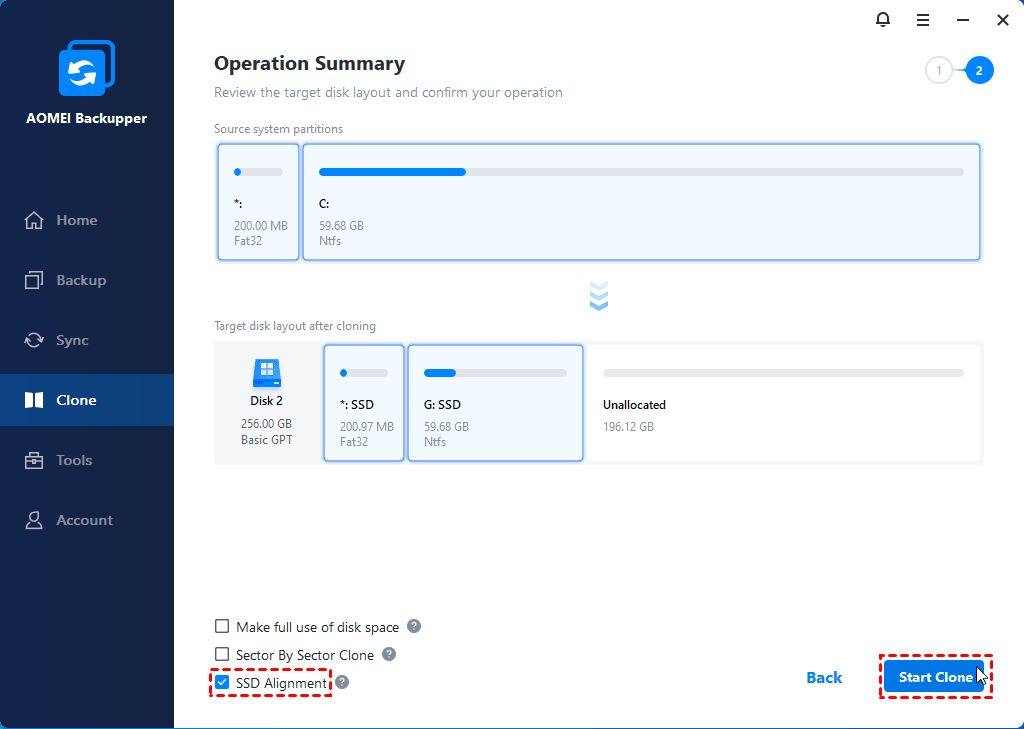
Step 4. Check SSD Alignment to optimize performance and extend SSD lifespan. Finally, click Start Clone and wait for the process to complete.
Step 5. Restart your PC and enter BIOS/UEFI to set the new SSD as the primary boot drive. Your computer should boot successfully.
Now you know how to install and format a new SSD in Windows 10/11. This guide covered everything you need to know, from preparing for installation to formatting and transferring your OS.
AOMEI Backupper is recommended for a seamless OS transfer, allowing you to migrate Windows to the new SSD without reinstalling everything. What’s more, it’s professional Windows backup software that can protect all kinds of data on your computer. Don’t hesitate to try it out!