ASUS Data Recovery: How to Recover Deleted Files on ASUS Laptops?
Learn to perform ASUS data recovery with professional ASUS data recovery software and use practical Windows backup software to prevent data loss on this page.
By Penny / Updated on April 3, 2024
Is it possible to perform ASUS data recovery?
Hey, folks! I had a totally frustrating moment and accidentally deleted some important files on my ASUS laptop. It’s running Windows 10. I checked the Recycle Bin, but no luck. So is it possible to recover deleted files on ASUS laptops? Thanks in advance.
Please don’t worry because data loss might be unavoidable during our lives and careers.
But even after permanent deletion, these files don’t immediately vanish from the drive. So where do deleted files go? They remain on your drive until overwritten by newly added files. So there exists a possibility to perform ASUS data recovery before data erasure.
How to recover deleted files on ASUS laptops?
In brief, if there’s no valuable file backup to restore deleted ASUS files, using powerful ASUS data recovery software definitely can be the most efficient and time-saving way.
Option 1. Recover deleted files on ASUS laptops via ASUS data recovery software
Let’s begin with MyRecover. Supported by AOMEI Tech, this prominent data recovery software excels in recovering deleted and missing files from computer hard drives, USB drives, SD cards, and other local storage devices.
For instance, it can recover about 50 types of pictures, including common images (JPG, JPEG, PNG, BMP, ICO, etc.) and other specific image file formats created by cameras (DNG, ORF, NEF, RAF, X3F, etc.).
Data Recovery Software for Windows:
- High-efficiency: Recover photos, videos (MP4, MOV, AVI, MWV, FLA, MKV, ASF, TS, 3G2/3GP, etc.), MS Office files, WPS files, folders, compressed files (ZIP, RAR, etc.), audio, websites, etc.
- Advanced scanning method: MyRecover runs Quick Scan & Deep Scan automatically to search all the recoverable files. Specify the filename, saved path, date, or size to filter your needed files.
- Convenience: Retain the original filename, path, and format for the deleted files.
- Excellent compatibility: Support NTFS, FAT32, exFAT, and ReFS file systems and be compatible with Windows 11, 10, 8, 7, or Sever PC.
- Notes:✎...
- After data loss, you’re advisable to stop loading new files to your storage device for a higher data recovery rate because data erasure definitely can decrease its recovery rate.
- Please remember to save your retrieved files in another drive instead of the original saved path.
- To recover more deleted/missing files from local hard drives, upgrading MyRecover is a better and more cost-effective choice.
Step 1. Install and run MyRecover on your ASUS laptop running Windows OS > hover the mouse over the drive that saves your wanted files before deletion > click Scan.

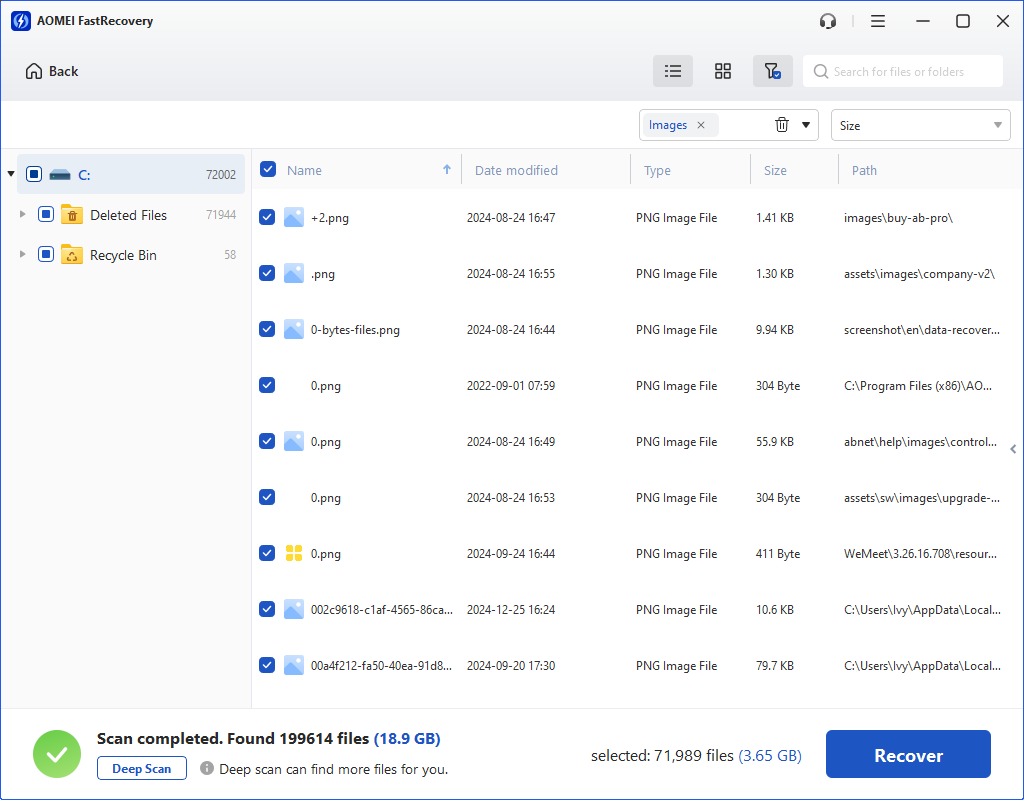
Step 2. After clicking Start Scan, MyRecover will automatically run Quick Scan and Deep Scan to detect all the recoverable files on your selected drive.
You can filter or preview your wanted files according to Filename, Type, Date, Path, Size, etc.
- Name: Enter the filenames of your desired files to narrow the search area.
- Date modified: Set the date (today, yesterday, last 7/30 days, etc.)
- Size: Filter the file size (<128KB, 128KB~1MB, 1MB~512MB, etc.)

Step 3. Under the Deleted Files/Recycle Bin/Other Missing Files folder > choose the files you want to retrieve > click Recover x files.
Option 2. Recover deleted files on ASUS laptops via Windows File Recovery
If you prefer a free alternative data recovery tool, you could try to recover lost files using Windows File Recovery because this free file recovery software aims to recover deleted/lost files from HDDs, USB drives, or SD cards by entering the corresponding command lines.
- Please note that it does not support cloud storage recovery or network file shares.
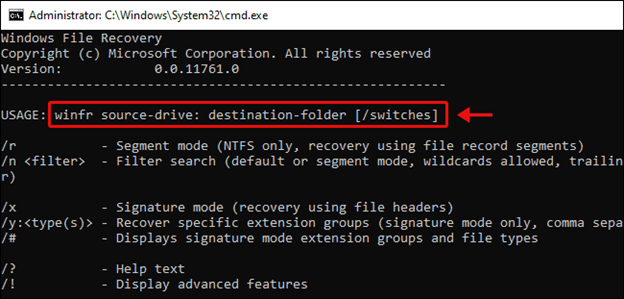
As mentioned above, you need to replace your selected mode and switches with the following basic format command because this ASUS data recovery software does not offer a graphical user interface (GUI).
▶winfr source-drive: destination-drive: [/mode] [/switches]
- Notes:✎...
- Designed to recover Word, Excel, PPT, PDF, ZIP, MP3, MP4, JPG, PNG, etc.
- Windows File Recovery only works with Windows 10 build 19041 or later.
- Please ensure the source drive (where to store your needed files before data loss) is different from the destination drive (where to store your recovered files).
- Two basic (Regular & Extensive) modes and two advanced (Segment & Signature) modes can support four (NTFS, FAT, exFAT, and ReFS) file systems in Windows.
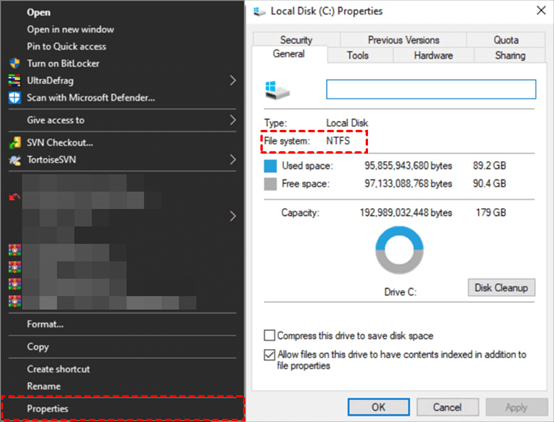
Step 1. Figure out the file system of your source drive: Open File Explorer by pressing the “Win + E” keys > click This PC > right-click on the source drive > click Properties.
Or the following form also can give you a hand.
|
File system |
Examples |
|
FAT and exFAT |
SD cards, flash or USB drives (< 4GB) |
|
NTFS |
Computers (HDD, SSD), external hard drives, flash or USB drives (> 4GB) |
Step 2. After checking the file system of your source drive, select the basic “Regular” or “Extensive” mode with the following form.
|
File system |
Scenarios |
mode |
|
NTFS |
Deleted recently |
Regular |
|
NTFS |
Deleted for a while |
Extensive |
|
NTFS |
Formatted disk |
Extensive |
|
NTFS |
corrupted disk |
Extensive |
|
FAT and exFAT |
Any |
Extensive |
Step 3. Select some common switches from the form below.
|
Switch |
Description |
Supported modes |
|
/y: |
Recover specific extension groups, comma-separated |
Signature |
|
/p: |
Saves a log file of the recovery operation in a different location than the default location on the recovery drive (for example, D:\logfile). |
All |
|
/a |
Overrides user prompts, which is useful in a script file. |
All |
|
/u |
Recovers undeleted files, for example, from the Recycle Bin. |
NTFS Segment |
|
/k |
Recovers system files. |
NTFS Segment |
|
/g |
Recovers files without primary data streams. |
NTFS Segment |
|
/e |
To keep your results manageable and focus on user files, some file types are filtered by default, but this switch removes that filter. |
NTFS Segment |
|
/e: |
Specifies which file types are filtered. |
NTFS Segment |
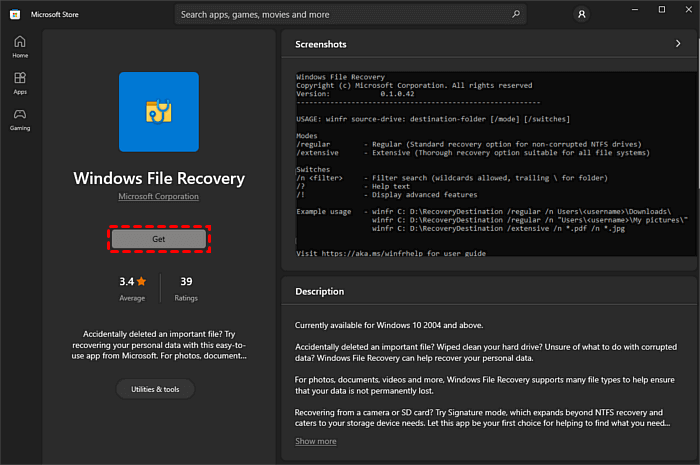
Step 4. Download Windows File Recovery from the Microsoft Store by clicking the “Get” button. After installation, “Open” it on your computer.
Step 5. For example, if you attempt to recover deleted MP4 videos from the original F drive and save them to the D drive, enter “winfr F: D: /extensive /n *.mp4” in your command prompt window.
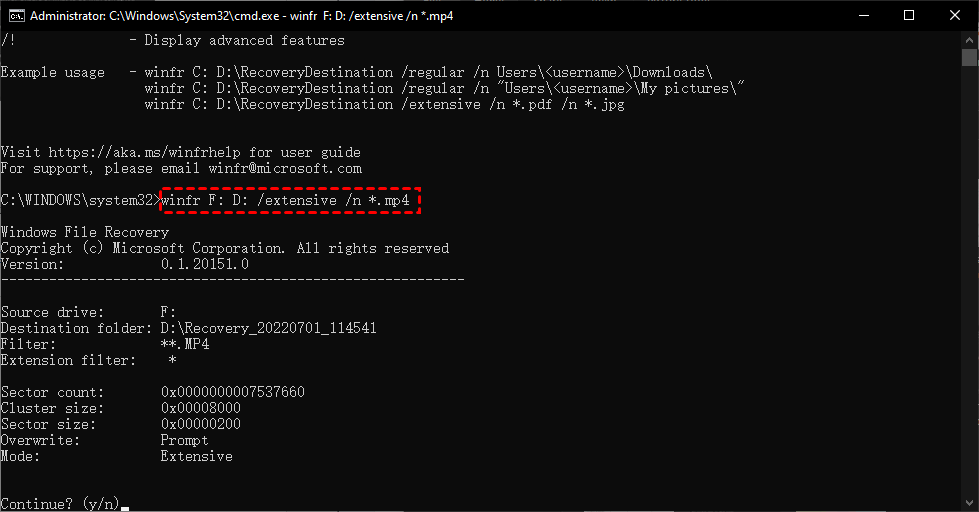
Step 6. Press “y” to go on. After the recovery process, you can go to the specified saved path to check your recovered MP4 files. If you want to stop the process, press the “Ctrl + C” keys.
Related suggestions
When it comes to problems regarding how to recover deleted files on ASUS laptops, you can restore files from backups or utilize user-friendly ASUS data recovery software like MyRecover.
To avoid data loss from the start, it’s essential to make regular backups. You can use Windows backup features or opt for another free Windows backup utility like AOMEI Backupper Standard.
If you want a user-friendly experience with greater flexibility in backup options, AOMEI Backupper Standard is a more practical choice compared to Windows features.
Furthermore, it offers easier steps and more versatile backup choices to suit your needs.
- Key features of AOMEI Backupper Standard:✎...
- Enable to back up files, folders, partitions, disks, or systems to an internal/external hard drive, USB stick, Network, or Cloud drive.
- Implementing intelligent backup strategies allows you to create daily incremental backups, effectively conserving storage space.
- By scheduling backups, you can ensure the continuous protection of your valuable data.
Step 1. Launch AOMEI Backupper on your Windows PC. Under the Backup tab, select the “File Backup” option.

Step 2. Click “Add Folder/Add File” to add the folder or files you prefer to back up.

Step 3. Click “Schedule Backup” to enable Daily, Weekly, Monthly, Event triggers or USB plug based on your needs. Then click the “Start Backup” button.