Fixing the Frozen: A Guide to Unstuck Chkdsk on Windows 10 and 11
This article delves into the common problem of 'chkdsk got stuck Windows 10 11', offering readers a comprehensive guide to understanding and resolving this issue.
By Lori / Updated on February 23, 2024
Ever found yourself staring at a screen that seems to have taken a vow of stillness while running chkdsk on Windows 10 or 11? Yep, we've all been there. The dreaded 'chkdsk got stuck Windows 10 11' scenario is like the digital equivalent of getting your shoelace caught in an escalator: unexpected and annoyingly inconvenient.
But fear not! This article is your knight in shining armor, here to rescue your computer from the depths of stuck-ness. We'll walk you through several methods to unstick chkdsk, delve into the features of MyRecover for when you need to get back lost data, and generally get your digital life back on track. Ready? Let's dive in.
Why Does Chkdsk Get Stuck on Windows 10 and 11?
Before we charge headlong into fixing the problem, it's worth understanding why chkdsk decides to take an unscheduled break. Essentially, chkdsk (short for Check Disk) is like the librarian of your computer's file system, meticulously checking books (files) and shelves (sectors) for any damage or misplacement.
However, if it encounters too many issues or gets confused by the system's complexity, it might just freeze up, overwhelmed by the chaos. Factors like software conflicts, corrupted files, or outdated system versions can also throw a wrench in the works.
Method 1: Exercise Patience
Detailed Steps:
Assess the Situation: Before jumping to conclusions, observe the chkdsk process. Sometimes, it's processing data in the background, especially if the drive is large or heavily used.
Monitor the Activity: Check your computer's HDD LED light for any signs of activity. Continuous or regular blinking usually indicates that chkdsk is still working.
Method 2: Force Restart and Rerun Chkdsk
Detailed Steps:
Force Restart: If the chkdsk process doesn't progress after an extended period, perform a force restart by holding down the power button until the computer shuts down.
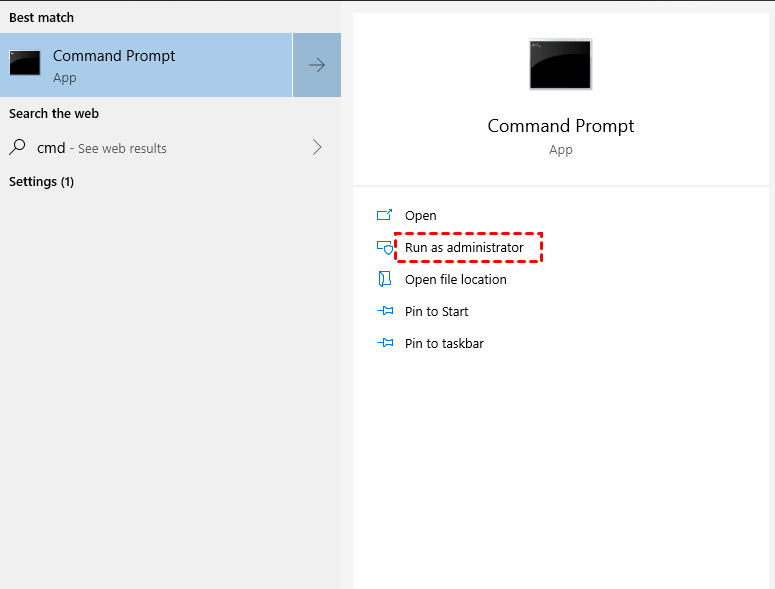
Open Command Prompt: Once your system reboots, access the Command Prompt with administrative privileges. You can do this by typing "cmd" in the Start menu, right-clicking on Command Prompt, and selecting "Run as administrator."
Rerun Chkdsk: In the Command Prompt, type chkdsk /f (to fix errors) or chkdsk /r (to locate bad sectors and recover readable information) followed by the drive letter. Press Enter and wait for the process to complete.
Method 3: Enter Safe Mode
Detailed Steps:
Restart in Safe Mode: Restart your computer. As it's booting up, press the F8 key (or Shift + F8 in some systems) to open the Advanced Boot Options menu. Select "Safe Mode with Command Prompt."
Run Chkdsk: Once in Safe Mode, open Command Prompt as an administrator and execute the chkdsk command as previously described.
Method 4: Utilize Windows Error Checking Tool
Detailed Steps:
Open This PC: Navigate to 'This PC' in your file explorer.
Properties: Right-click on the drive you wish to check, and select 'Properties'.
Check Disk: Go to the 'Tools' tab, under 'Error checking', click on 'Check'. Follow the on-screen instructions to let Windows check and fix the disk errors.
Method 5: System Restore or Reset
System Restore:
Access System Restore: Type "Create a restore point" in the Windows search bar and select it. In the System Properties window, click 'System Restore'.
Follow Instructions: Choose a restore point before the chkdsk issue started and follow the prompts to revert your system to that state.
System Reset:
Settings: Go to 'Settings' > 'Update & Security' > 'Recovery'.
Reset this PC: Click 'Get started' under 'Reset this PC'. Choose 'Keep my files' for a less drastic option and follow the instructions.
Discovering MyRecover: Your Data Recovery Hero
Features:
Deep Scan: MyRecover delves deep into your drive to find lost files.
Preview Capability: Check which files can be recovered before proceeding.
Broad File Support: Whether it's documents, photos, or videos, MyRecover can handle various file types.
Recovery Steps:
Installation: Download and install MyRecover on your computer.
Select Drive: Launch MyRecover, select the affected drive, and start the scanning process.
Preview and Recover: Once the scan is complete, preview the recoverable files. Select the ones you need and click 'Recover' to save them to a safe location.
Conclusion
Navigating through a 'chkdsk got stuck Windows 10 11' issue might seem daunting, but with the right approach and tools, it's a manageable obstacle. By following the detailed methods outlined above, you can effectively resolve the chkdsk freeze and prevent potential data loss.
For those unfortunate instances where data is lost, remember that MyRecover stands ready to assist in retrieving your valuable files. With patience, persistence, and the right tools at your disposal, overcoming technical challenges becomes a less intimidating journey.
FAQs
How do I know if chkdsk is genuinely stuck?
If there's no disk activity (no blinking light) for several hours, chkdsk might be stuck.
Can running chkdsk cause data loss?
While chkdsk is designed to fix disk errors without causing data loss, there's a small risk when repairing severely corrupted files.
Is it safe to force restart my computer if chkdsk is stuck?
It's generally safe, but as a precaution, back up important data regularly to avoid potential loss.
How often should I run chkdsk?
Running chkdsk every few months or when you suspect disk errors is a good practice.
What should I do if none of the methods fix the chkdsk issue?
If chkdsk remains stuck after trying these methods, consider consulting a professional or exploring advanced repair options, such as using bootable repair tools or contacting Microsoft support.