How to Fix 100 Disk Usage? 17 Fixes!
Learn how to fix 100 disk usage via 17 feasible methods to address this issue on this page. Moreover, you also recover deleted files from hard drives after fixing 100 disk usage.
By Penny / Updated on April 3, 2024
Why is my disk at 100?
I’m running Windows 10 and have been seeing 100% disk utilization in Task Manager even though nothing is running on the machine. What’s worse, this has caused my PC to run slow. Why is my disk at 100 in Task Manager and how do I fix 100% drive usage? Thanks.
-A user from the Microsoft Community
As described above, the performance of your programs is beginning to degrade or cease to function as your Windows OS runs at a reported 100 disk usage. If you want to restore the seamless functionality of your PC, it is imperative to identify possible reasons and take measures to fix 100 disk usage.

Let’s begin with the causes of the Windows 10 disk at 100 before adopting the following fixes.
- Outdated Windows update files
- Outdated or corrupted device driver
- Incorrect Windows services
- Virus or malware
- Synchronization software conflicts occur
- Temporary files
- Damaged or corrupted file systems
- Disk errors
Part 1. How to fix 100 disk usage in Windows 10/11?
The following fixes depict how to fix 100 disk usage in Windows 10/11. If needed, you can try them one by one.
Fix 1. Check Windows updates
How to fix 100 disk usage in Windows 10 or 11 PC? Installing the latest updates usually can fix many problems because Windows updates can efficiently fix previous bugs and bring new practical features.
Please get more details on another page to delete Windows update files Windows 10/11 if needed.
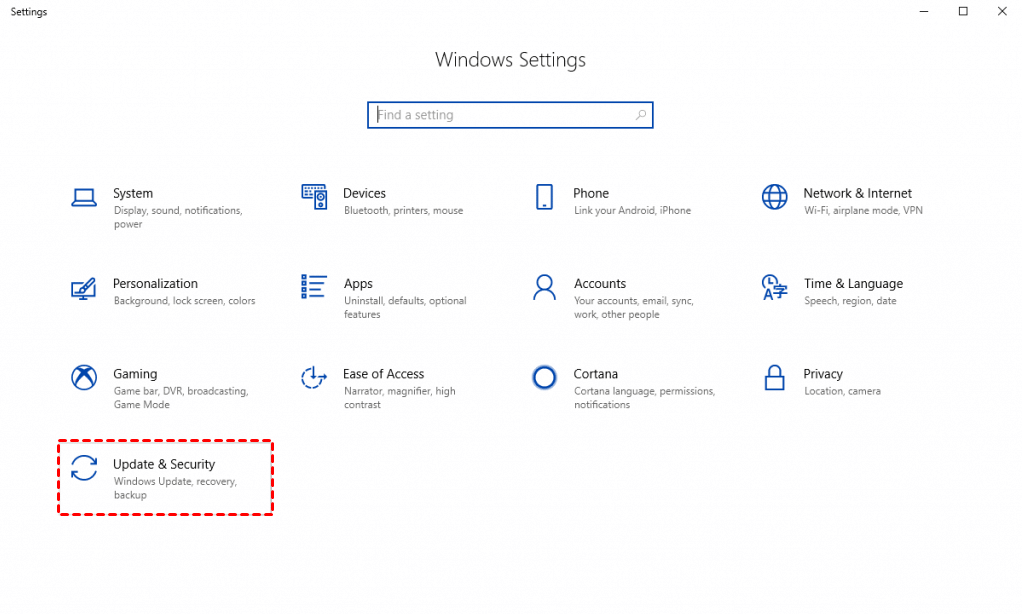
Step 1. Press Win + I to open Windows Settings > click Update & Security.
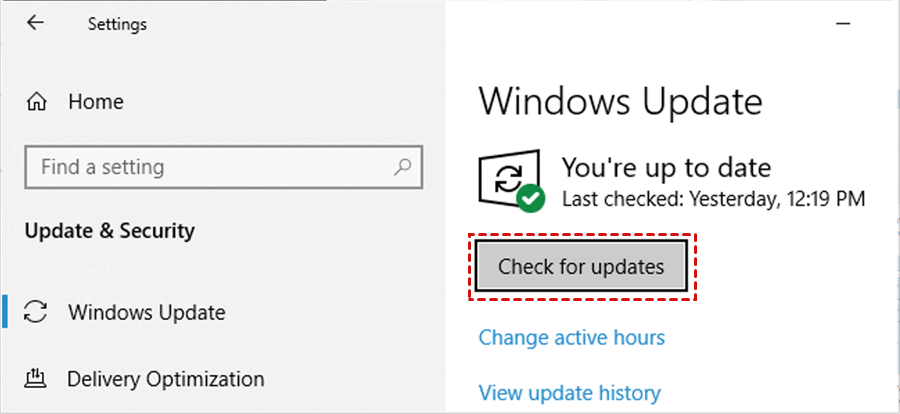
Step 2. Click Check for updates to confirm if there are available update files.
Fix 2. Disable unnecessary background apps
In computing, if one program uses up all your hard drive’s speed, it definitely can slow down your other applications due to hardware limitations. In this case, please open Task Manager to check the running state of your PC and disable unnecessary backup utilities.
» Press Ctrl + Shift + Esc to open the Task Manager tool > click Details to find the app with high disk usage > right-click on it > select End task to close it.
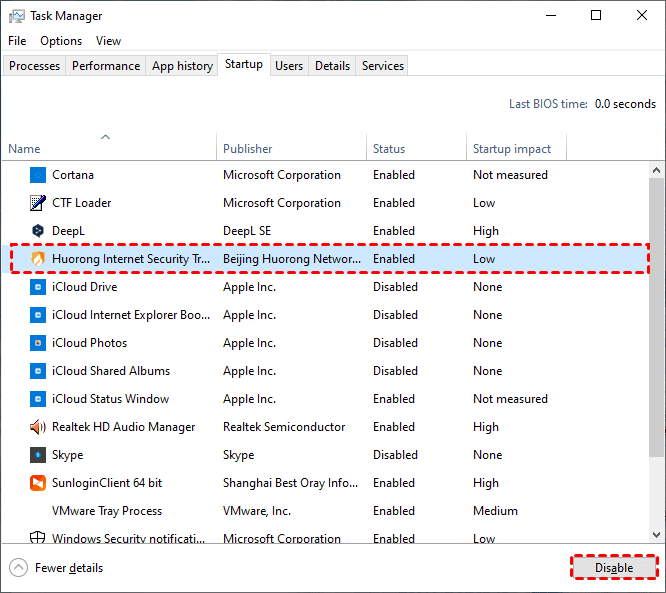
Fix 3. Check your Startup list to reduce disk usage at boot
If your PC’s disk usage hits 100% as soon as you start up, it could be due to many apps that launch automatically. Please refer to the steps below to check and reduce disk usage.
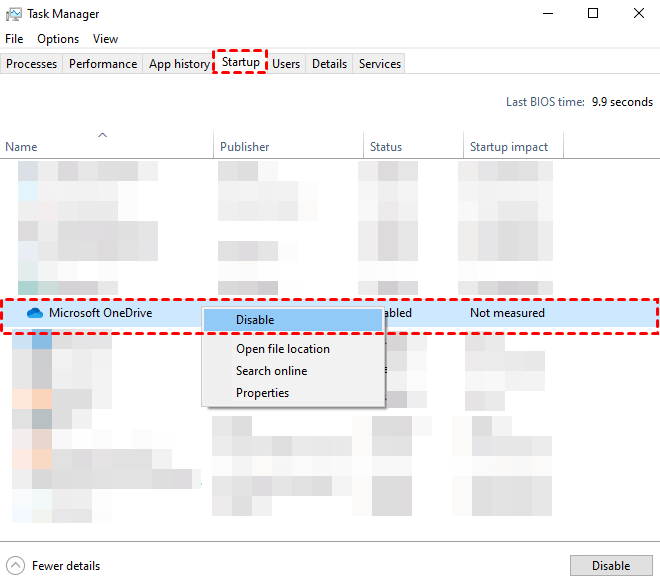
» Press Ctrl + Shift + Esc to open the Task Manager tool > click Startup > right-click on one enabled software > click Disable.
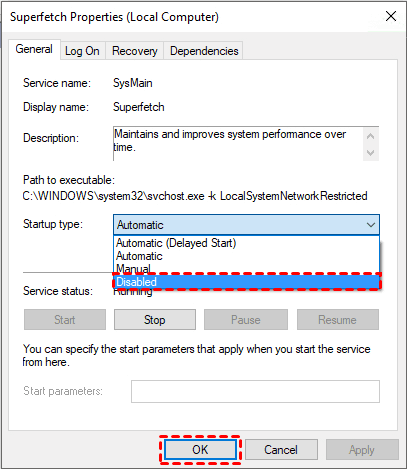
Fix 4. Disable SuperFetch service
The SuperFetch service studies your program usage and loads data into memory, cutting down the startup time for those apps. But sometimes, SuperFetch could use up resources, load the wrong files, and waste memory, which can keep hard drives busy.
🎈 Disable from Windows Services
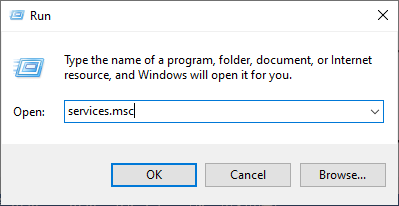
Step 1. Press Win + R to open the Run window > type services.msc in the box > click OK or hit Enter to open SuperFetch.
Step 2. After entering the interface of SuperFetch Properties, click the drop menu beside Start Type > select Disabled > click OK to save these changes.
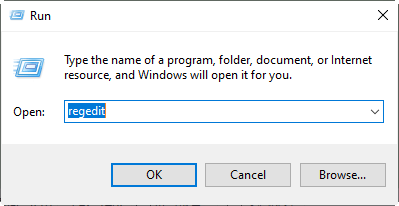
🎈 Disable from Registry Editor
Step 1. Press Win + R to open the Run window > type regedit in the box > hit Enter or press OK to open your Registry Editor.
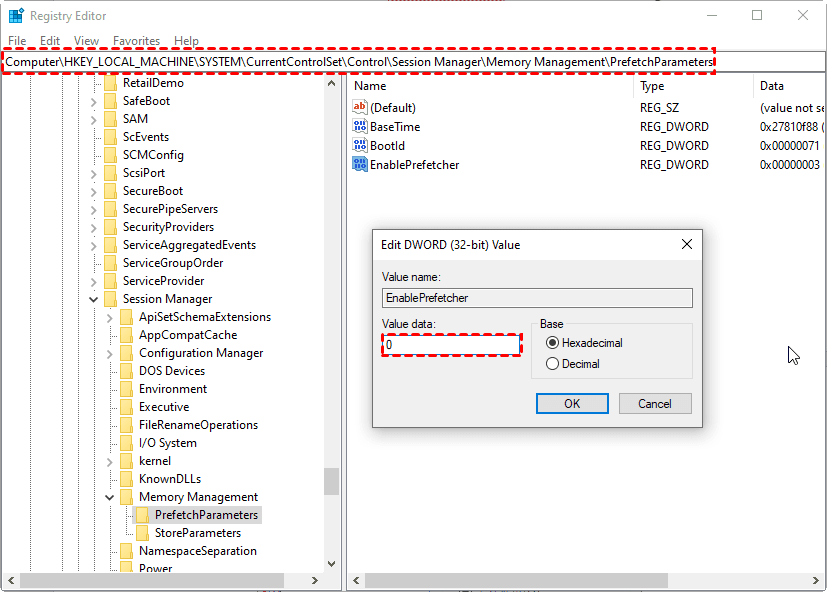
Step 2. Go to the following path:
HKEY_LOCAL_MACHINE\SYSTEM\CurrentControlSet\Control\Session Manager\Memory Management
Step 3. Click PrefetchParameters in the left panel > double-click in the right panel to open EnablePrefetch > set the Value data as 0 > click OK.
Fix 5. Check the amount of RAM being used
Thanks to virtual memory (swap or paging file), we can operate apps on computers that demand more memory than what’s physically accessible.
However, there’s a catch: virtual memory involves transferring data between RAM and the OS’s paging file. If this occurs frequently, the repeated use of your paging file could result in the 100 disk usage problem. Please refer to the steps below to check the amount of RAM.
» Press Ctrl + Shift + Esc to open Task Manager > click Performance > Memory to see a detailed report of memory usage on your Windows.
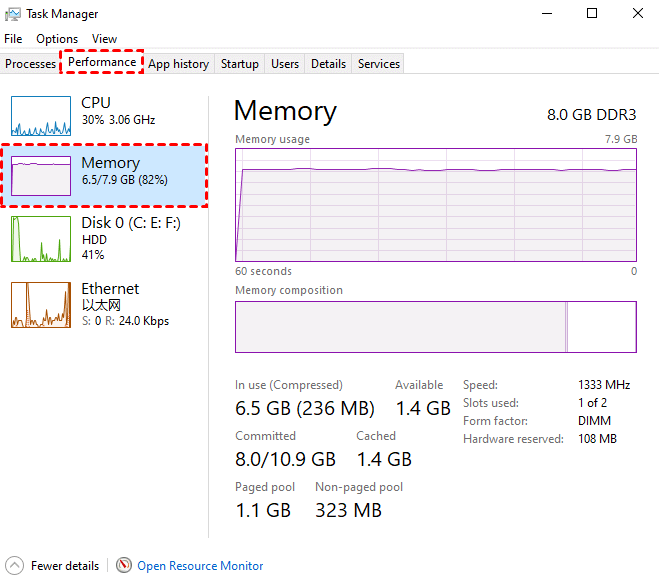
If you have little available RAM and your paging file is almost filled, please close your unused apps to reduce RAM usage. If the issue still exists after restarting your computer, please consider alternatives or upgrading your RAM.
Fix 6. Reset the virtual memory
To some degree, virtual memory is an extension of your PC’s physical memory. If your computer’s physical memory is not sufficient for specific tasks, the Windows operating system holds files in virtual memory and shifts them to back actual memory. Let’s show how to fix 100 disk usage in Windows 11/10 by resetting virtual memory.
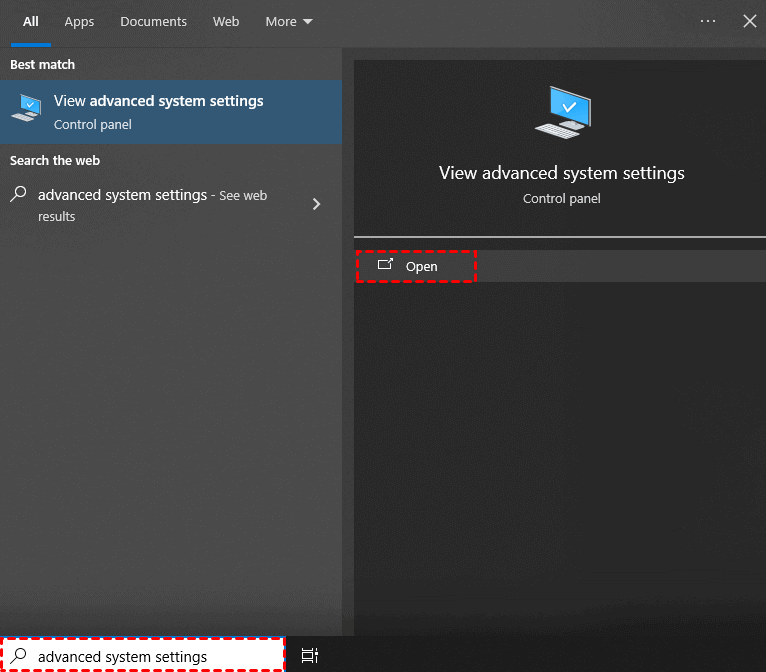
Step 1. Type advanced system settings in the search bar > Open it.
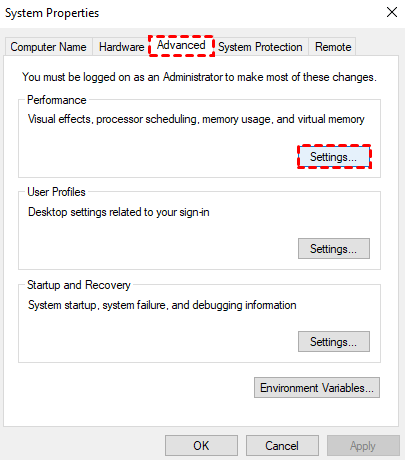
Step 2. In the System Properties window, click Advanced > Settings.
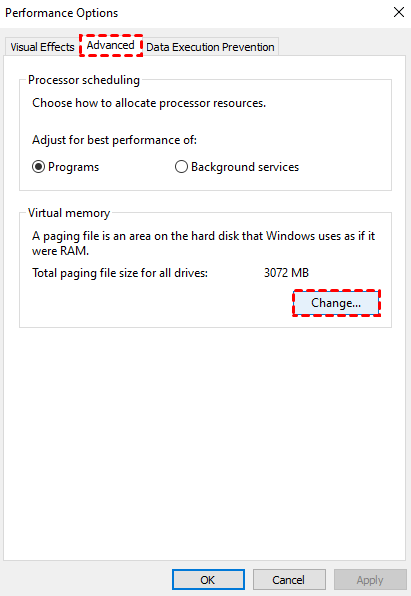
Step 3. In the Performance Options window, click Advanced > Change.
Step 4. Please ensure you’ve ticked Automatically manage paging file size for all drives > click OK.

In addition, you can also select No paging file > click OK. After rebooting, it can prevent the use of virtual memory and improve your system’s disk performance.
Fix 7. Update the device driver
As stated earlier, an outdated device driver is a major reason for your disk showing 100 in Task Manager. So it’s possible for you to solve this issue by updating this disk device driver.
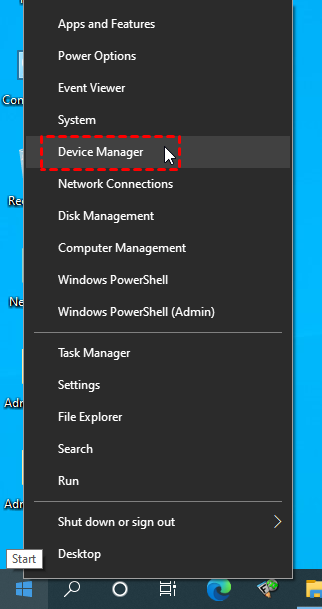
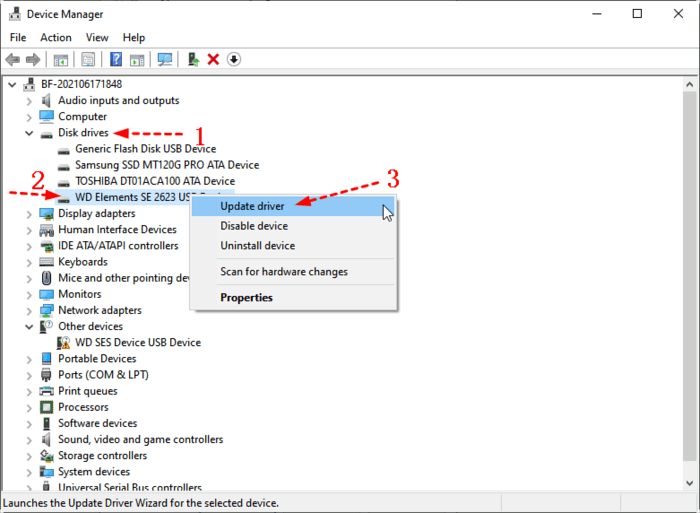
Step 1. Press Win + X and select Device Manager to open this Windows built-in tool.
Step 2. Expand Disk Drives > right-click on the drive at 100 disk usage > select Update driver.
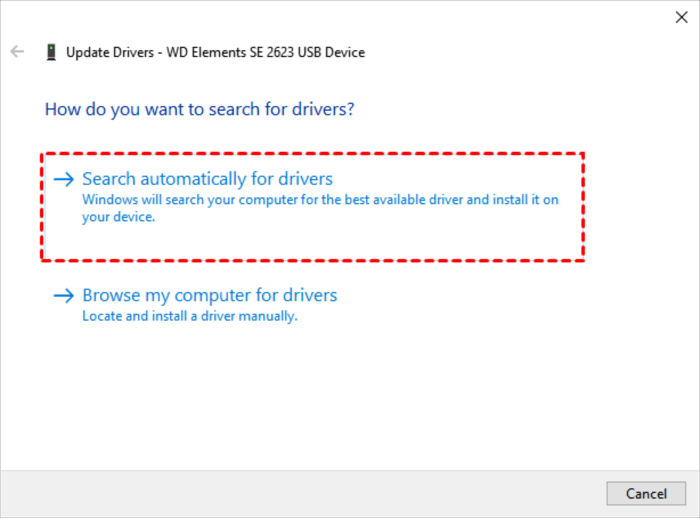
Step 3. Click Search automatically for drivers. Please wait patiently.
Fix 8. Perform a full scan to remove detected viruses
“Why is my disk at 100 in Task Manager?” Without a doubt, viruses or malware is also responsible for PC 100 disk usage. If you’re unwilling to download a third-party utility to remove ransomware viruses, you can make good use of Windows built-in features to search and remove detected viruses.
If your files appear after deletion, you can also try this fix to permanently delete them.
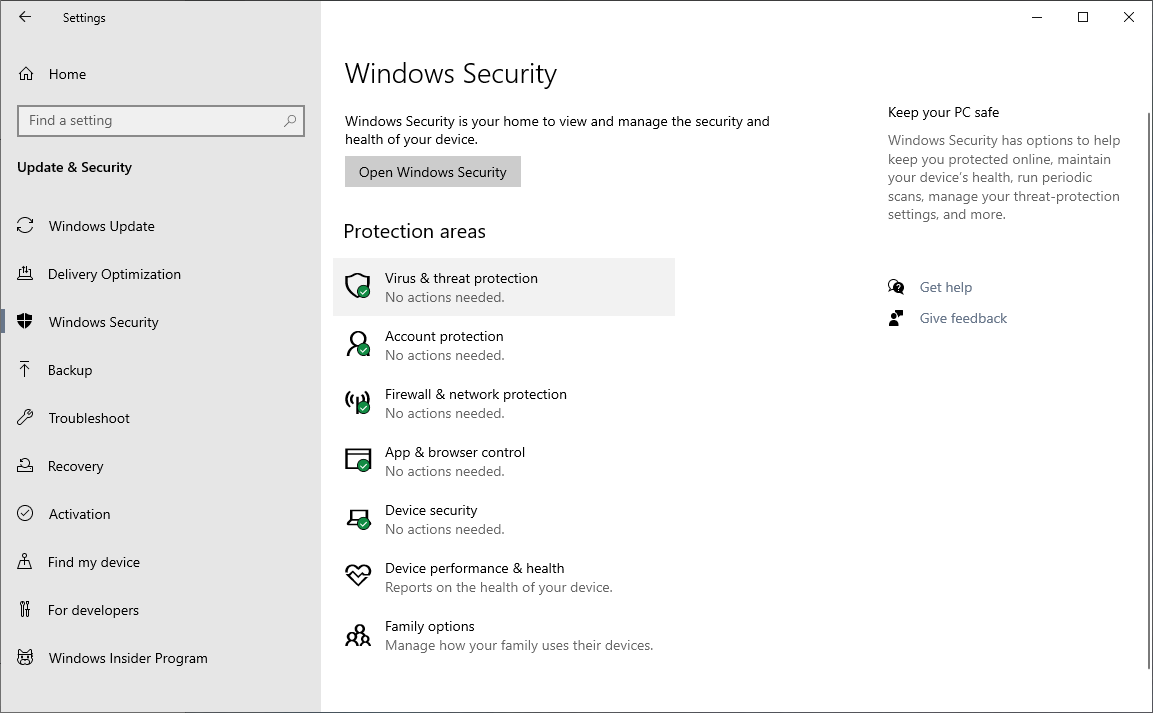
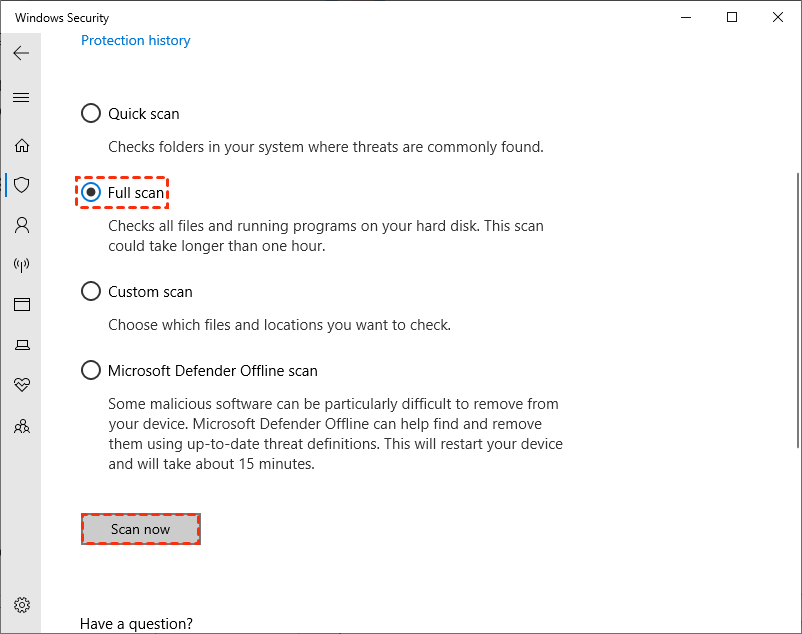
Step 1. Press Win + I to open Windows Settings > click Update & Security > Windows Security > Virus & threat protection.
Step 2. On the Virus & threat protection screen, click Scan options.
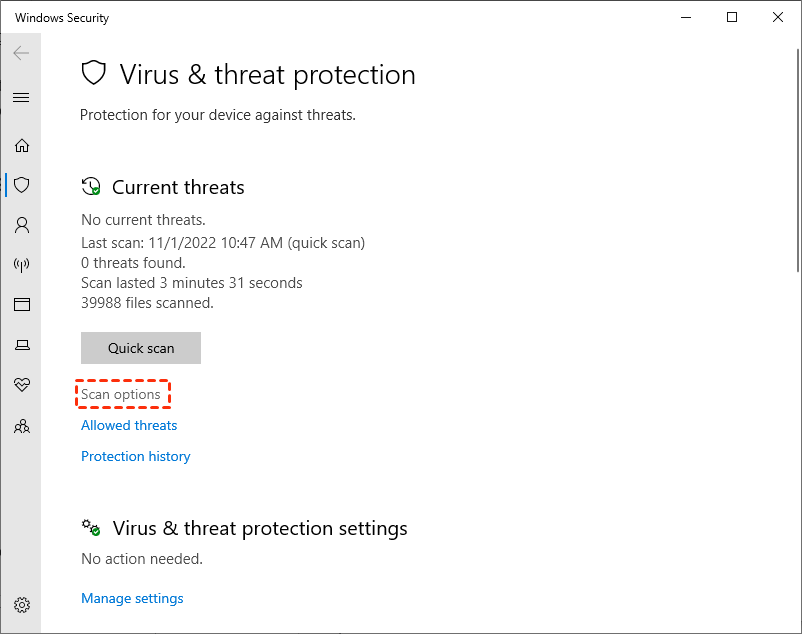
Step 3. Select Full scan > click Scan now.
Fix 9. Temporarily disable your Antivirus software
Although Windows Defender usually suffices for antivirus needs in Windows 10, some users still worry about security and add third-party antivirus software like Norton or Kaspersky.
But these can conflict with the system and lead to the disk showing 100 in Task Manager. So you’re advisable to temporarily disable them.
» Press Ctrl + Shift + Esc to open Task Manager > click Startup > locate one third-party antivirus tool > Disable it.
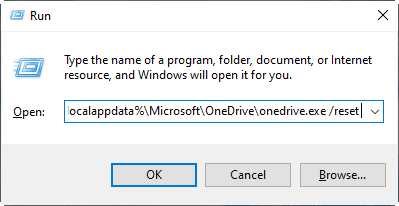
Fix 10. Reset your Synchronization software
Undoubtedly, using syncing tools like OneDrive can save limited space. But sometimes it can get stuck while syncing files, causing 100 percent disk usage Windows 10/11 PCs.
At the moment, you’re advised to reset your synchronization software to solve this issue. Let’s take OneDrive as an example.
» Press Win + R > type %localappdata%\Microsoft\OneDrive\onedrive.exe /reset in the Run window > hit Enter or press OK to reset your OneDrive.
Fix 11. Change settings in Google Chrome and Skype
Several users have reported that changing settings in Google Chrome and Skype could reduce the high disk usage Windows 10/11.
🎈 Change Google Chrome settings
Step 1. Open your Google Chrome > click the ⋮icon> select Settings.
Step 2. Click Privacy and security > Cookies and other site data > turn off Preload pages for faster browsing and searching.
Step 3. In the main menu, expand Advanced > click System > disable Continue running background apps when Google Chrome is closed.

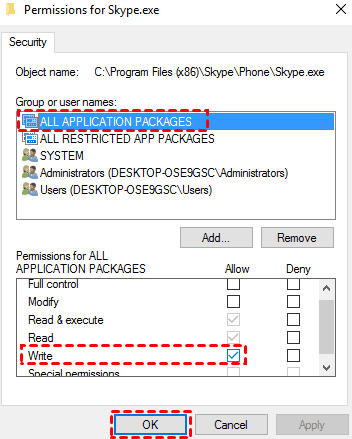
🎈 Change Skype settings
Step 1. Close your Skype > press Win + E to open File Explorer > go to C:\Program Files (x86)\Skype\Phone.
Step 2. Right-click on your Skype.exe > select Properties > click Security > Edit.
Step 3. Select ALL APPLICATION PACHAGES > tick the Allow box next to the Write permission > click OK to save your modifications.
Fix 12. Manage Windows search
Windows Search renders great convenience for users to locate files, but it can become a problem when it stops working. In this case, your indexing service might continuously scan your hard drive without success. This also is one of the possible reasons for Win10 disk usage 100.
If your Windows Explorer Search is not working, you can seek help from the Windows search service, too.
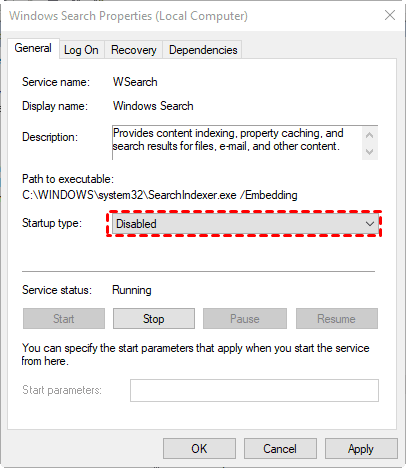
Step 1. Press Win + R to open the Run box > type services.msc in the window > click OK or hit Enter to open it.
Step 2. In the list of services window, double-click Windows Search to open it > click General > select Disabled beside Startup type > click OK.
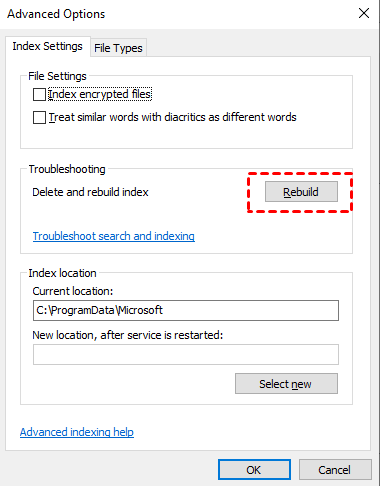
Besides, you also fix this problem by rebuilding and enabling the index that the Search service uses.
Step 1. Type indexing options in the search bar > Open it.
Step 2. In the Indexing Options window, click Advanced > click Rebuild in the interface of Advanced Options.
Fix 13. Change power options from Balanced to High Performance
In Windows 10, the default power settings is Balanced. To address the issue of 100 disk usage in Task Manager, please consider switching it to the High Performance power option.
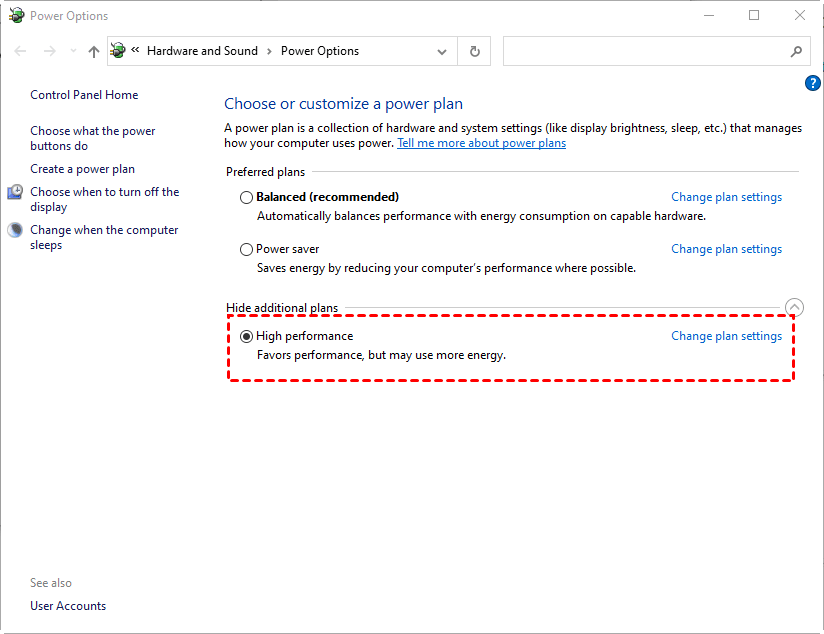
Step 1. Press Win + I to open Windows Settings > click System > select Power & sleep on the left > click Additional power settings.
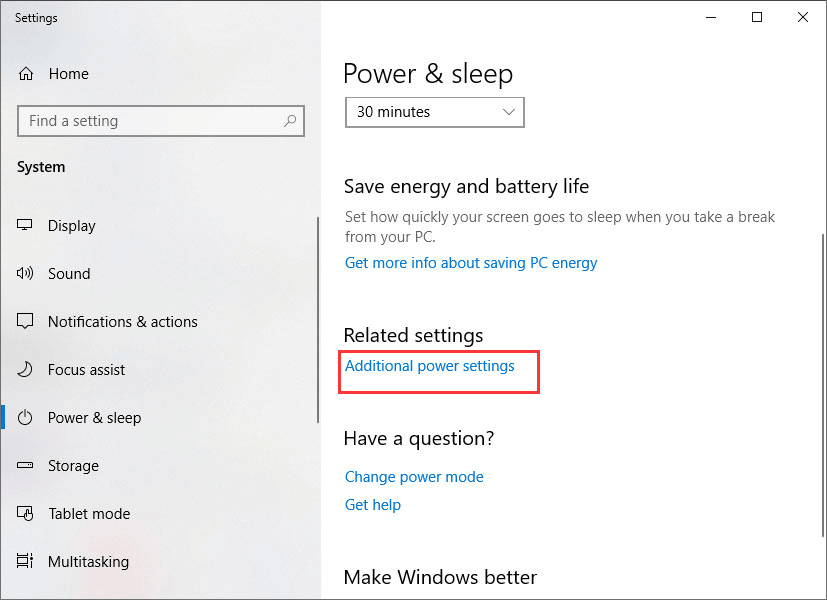
Step 2. After entering the interface of Power Options, click Show additional plans > tick High performance. After clicking Show additional plans, it will turn into Hide additional plans.
Fix 14. Delete temporary files
For Windows PCs, temporary files play an important role in saving data, creating copies, and managing settings. These temporary files definitely can occupy disk space and slow down the performance of your Windows.
So how to fix 100 disk usage in Windows 10 or 11? Please try to delete temporary files manually without automatic settings.
Are you wondering does Windows automatically deletes temp files? Yes, it does. If it happens to be your case, please get more details on another page.
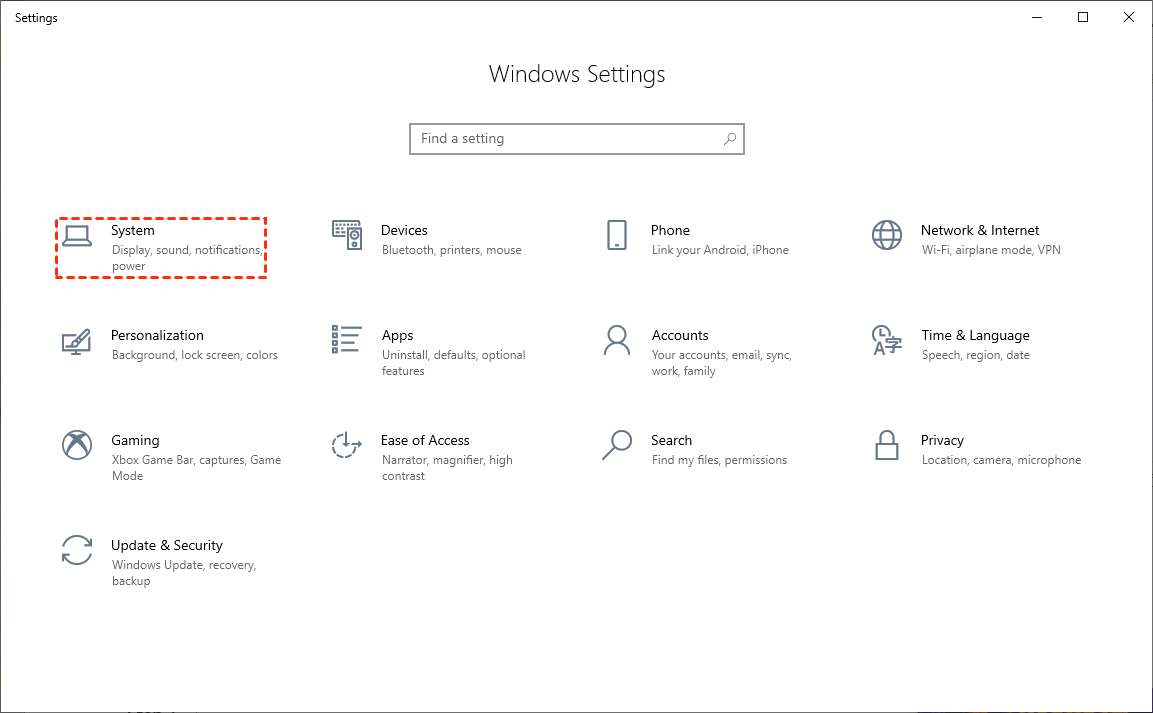
Step 1. Press Win + I to open Windows Settings > click System.
Step 2. Click Storage > Temporary files.
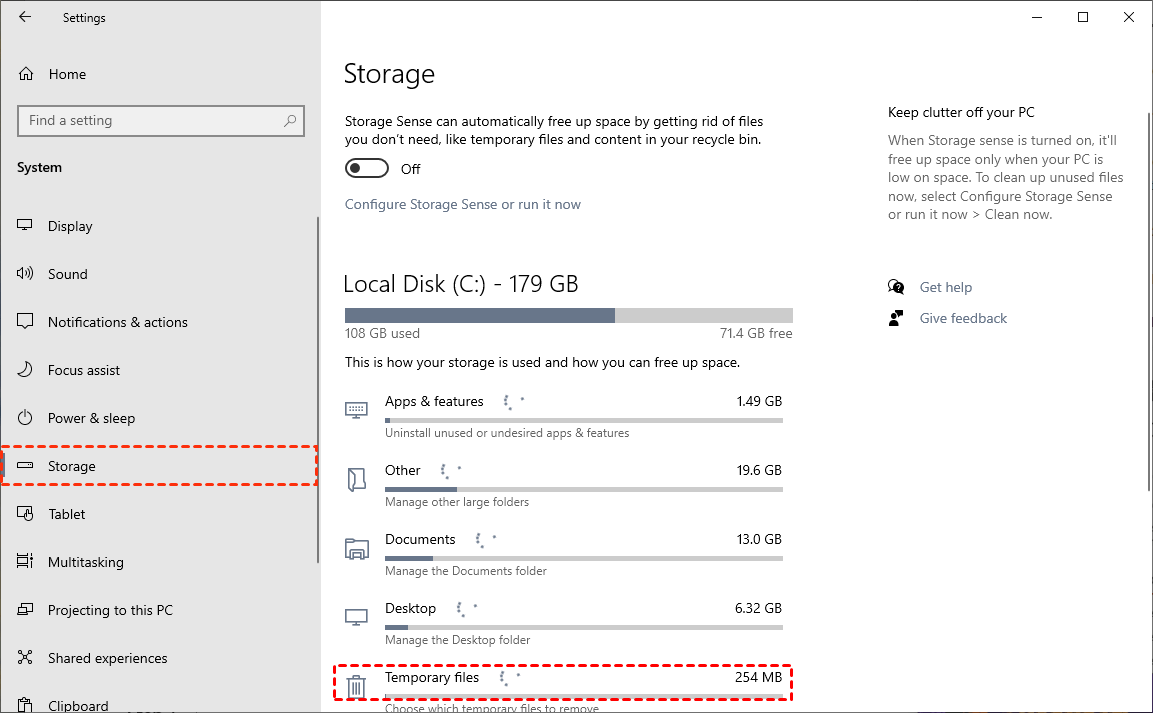
Step 3. Tick Temporary files > click Remove files to reduce the used disk space.
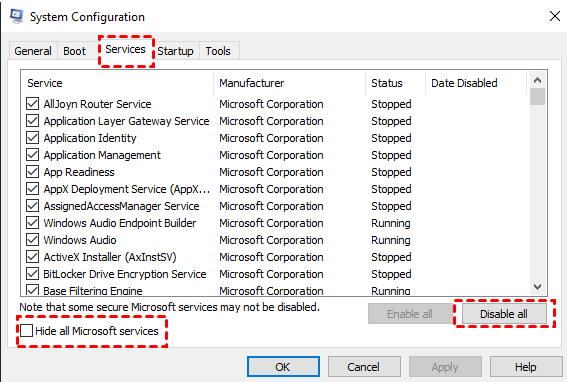
Fix 15. Perform a clean boot
How to stop 100 disk usage in Windows 10? Executing a clean boot can eliminate the Windows 10 100 disk usage problem or greatly reduce software conflicts and bugs.
Step 1. Press Win + R to open the Run box > type msconfig in the box > press OK or hit Enter to open the System Configuration window.
Step 2. Click Services > Hide all Microsoft services > Disable all.
Step 3. Switch to the Startup tab, click Open Task Manager > disable all the startup items.
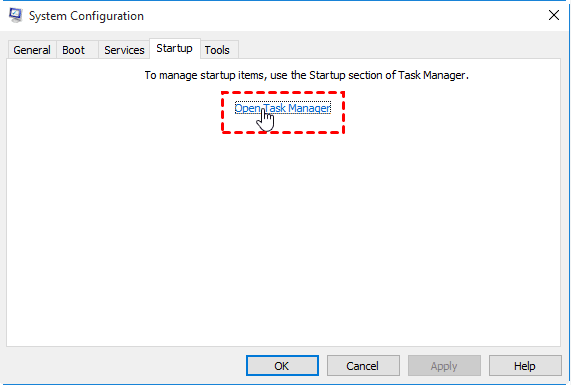
After that, restart your Windows 10 and open Task Manager again to check whether the 100 disk usage problem has been fixed or not.
Fix 16. Fix hard drive issues via CMD to reduce disk usage
Corrupted file systems or bad sectors can lead to the disk showing 100 in Task Manager. If you’re not sure if there exists damaged file systems or bad sectors, you can run CMD to confirm and repair detected errors.
-
Windows 8 and later users need to enter the inbox Deployment Image Servicing and Management (DISM) before running the System File Checker.
-
Please do not close the command prompt window before the verification process.
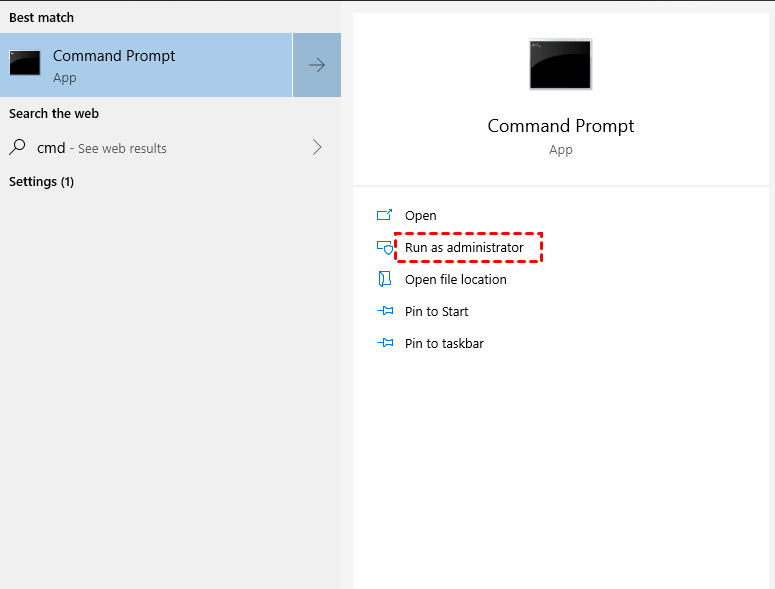
Step 1. Type cmd in the search bar and click Run as administrator to open the command prompt window.
Step 2. Type DISM.exe /Online /Cleanup-image /Restorehealth in the window.
When you see The operation completely successfully, type sfc /scannow in the window.
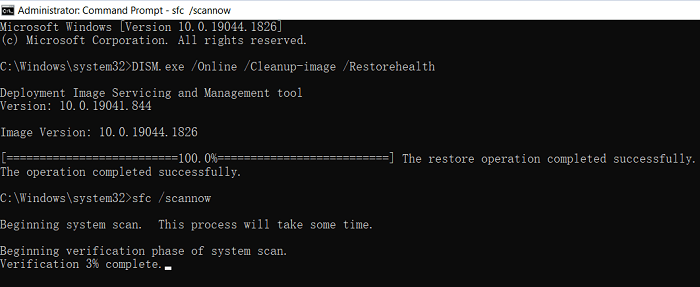
After seeing Verification 100% complete, type “exit” and hit “Enter” to close the window.
Fix 17. Run CHKDSK with parameters to repair the disk
If your disk running at 100, it might be caused by bad sectors. So you can use CHKDSK to analyze them and mark them as problematic.
Please run CHKDSK with the /f, /r, /x, or /b parameters because CHKDSK only checks a volume’s file system instead of correcting detected volume errors. Similarly, if there’s no data to recover detected, bad sectors may also be responsible for this issue.
Step 1. Type cmd in the search bar and click Run as administrator to open the command prompt window.
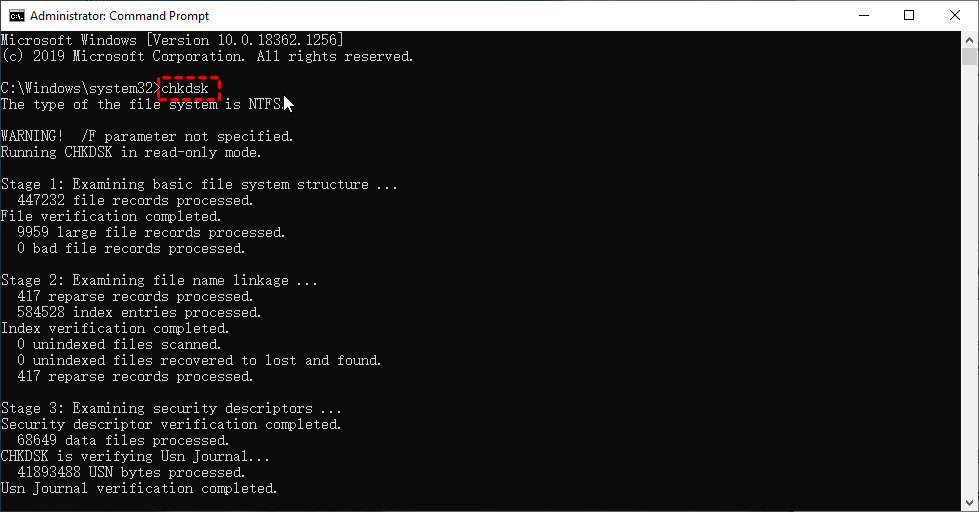
Step 2. Type chkdsk in the command prompt window.
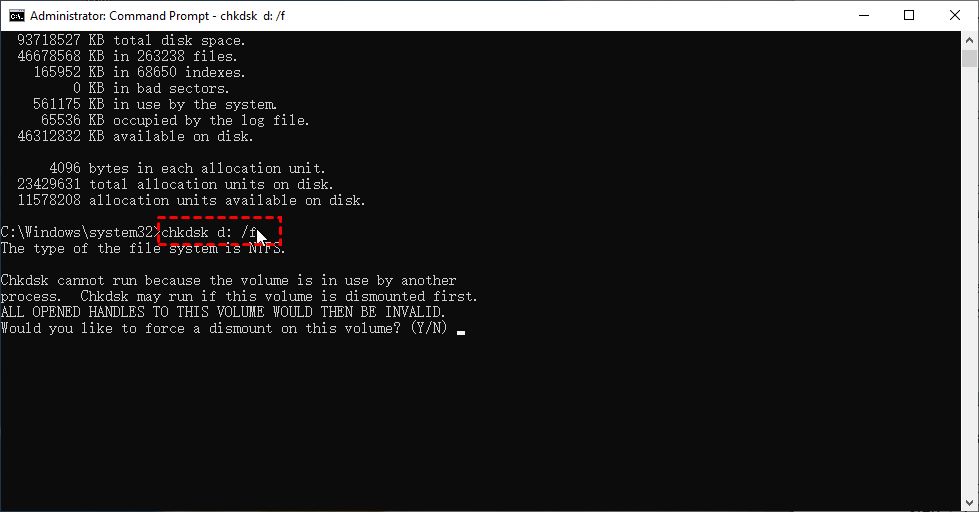
Step 3. Type chkdsk d: /f or chkdsk d: /r in the window according to your situation.
Part 2. How to recover deleted files from hard drives after fixing 100 disk usage?
To some extent, it might be unavoidable to suffer data loss during the repair process. If you’ve deleted files from previous high disk usage drives, can you recover deleted files from hard drives without backups?
If you cannot, you may have no recourse but to seek help from one of the best Windows data recovery software like MyRecover to retrieve them.
Supported by its advanced scanning method and its high data recovery rate, MyRecover is good at recovering deleted and lost files from computer drives and other local storage devices.
💚 Please stop loading new files to your Windows to prevent data coverage. After data erasure, it can decrease its Windows data recovery rate.
💚 After recovery, please save your recovered missing files in another drive instead of the original fixed drive.
💚 Upgrading MyRecover is a more cost-effective choice for those users who prefer to recover plenty of deleted or missing files.
-
Recover 200+ types of files: images, audio, videos, MS Office files, WPS files, folders, compressed files, websites, etc.
-
Combined scanning method: MyRecover can automatically run Quick Scan and Deep Scan to detect all the recoverable files on your selected local drive.
-
Easy-to-find: After recovery, MyRecover can keep the original format, filename, path, and size for the deleted files.
-
Excellent compatibility: Support Windows 11, 10, 8, 7, or Server PC and 4 file systems (NTFS, FAT32, exFAT, and ReFS).
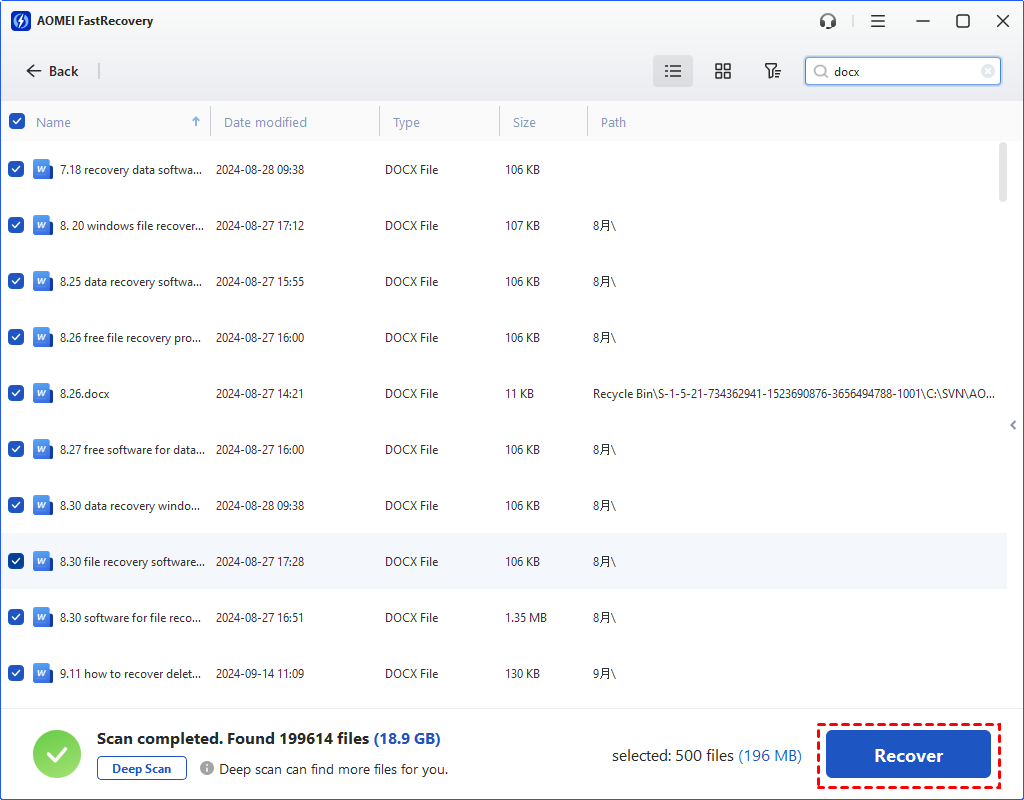
Step 1. Launch MyRecover on your Windows > hover the mouse over the drive that saves your needed files before data loss > click Scan.

Step 2. After clicking Start Scan, MyRecover can automatically run Quick Scan and Deep Scan to detect all the recoverable files on your chosen drive.
During scanning, you can filter/preview your desired files according to Filename, Document Type, Path, Size, Date, etc.
- Name: Enter the filename of your wanted files to narrow the search area.
- Date modified: Set the date (today, yesterday, last 7/30 days, etc.)
- Size: Filter file size (<128KB, 128KB~1MB, 1MB~512MB, etc.)

Step 3. Under the Deleted Files/Recycle Bin/Other Missing Files folder, select the files you intend to retrieve > click Recover x files.
Wrapping up
“Why is my disk at 100?” How to fix 100 disk usage? If you’re bothered by these issues, please refer to the above methods to fix 100 disk usage. If you intend to recover deleted files from hard drives after fixing 100 disk usage, using professional data recovery tools like MyRecover could be your top choice.
Furthermore, if you’re concerned about avoiding data loss, it’s highly recommended for you to perform regular backups. This free AOMEI Backupper Standard is a valuable resource for this purpose.

This Windows backup software presents users with more extensive backup choices and simpler operational procedures compared to the built-in Windows features.