This guide will show you how to recover data from hard disk in Windows 7, including the method to recover data formatted hard disk using CMD.

Although Microsoft has discontinued support for Windows 7, many users still use the system due to its good capabilities. However, without new security update support, Windows 7 has become less stable than before. System crashes or virus attacks can force you to format the hard disk in order to get the computer back to normal.
After the format, the first task is to recover the files from hard disk if there is no available backup. Well, usually, the deleted files on the hard disk are marked as deleted files, waiting to be overwritten by new data. It’s possible to recover data from formatted hard disk in Windows 7 as long as the data has not been overwritten.
First, you can try to recover data from formatted hard disk in Windows 7 using CMD. If it is unsuccessful, you can rely on Windows 7 data recovery software to help you scan the hard disk and find deleted or hidden files.
Command Prompt (CMD) is one Windows built-in utility. This command-line interpreter application provides you with a command-line interface to interact with the system. It’s a good assistant to help us fix Windows-related issues. In addition, it can also help us recover deleted data or find hidden files. Next, let’s see how to recover data from formatted hard disk with CMD.
Step 1. Go to the search bar > type command prompt > Right-click Command Prompt and choose Run as administrator > Click Yes to continue.
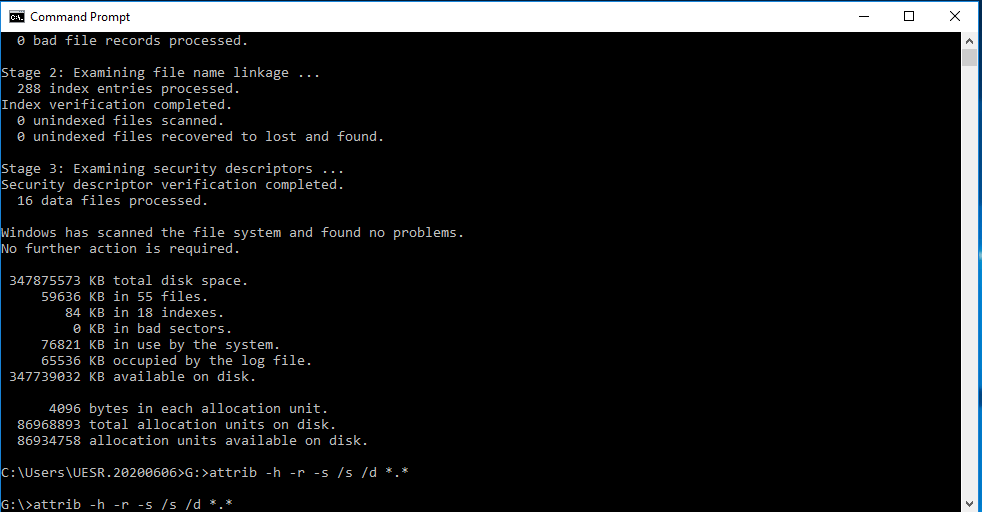
Step 2. Type chkdsk F: /f to the window and hit Enter. Replace F with the drive letter in which you lost files > Wait for the command to complete.
Step 3. Type F (the name of the drive letter) and hit Enter to continue.
Step 4. Type attrib -h -r -s /s /d *.* and hit Enter.

Step 5. Wait for the command to finish.
When the process is complete, all the recovered files will be saved in a newly created folder on the drive. The recovered files will be saved in .chk format. You can change the extension back to a normal format and save them to another location.
If you cannot recover deleted data via the CMD command, then you can let the professional data recovery tool help you scan the hard disk and find all deleted and missing files. AOMEI FastRecovery is recommended here. It’s one easy-to-use data recovery tool designed by AOMEI, the leading benchmark of the data security industry.
Main Features of ADR for Windows
● Supports Data Recovery in Various Situations. System crashes, accidental deletion, virus attacks, disk formatting, etc.
● Supports Any Kind of Disk-based Storage Media. SSD, HDD, USB flash drive, external hard drive, SD card, etc.
● Recover Any Types of Files in Original Format. Documents, texts, pictures, videos, audios, emails, compressed files, etc.
● Highly-Compatible. Supports NTFS, FAT32, exFAT, ReFS in Windows 11/10/8/7. (Compatible with 64-bit and 32-bit OS.)
● High-Speed. With an advanced scan engine and robust data recovery algorithm, ADR for Windows can find and recover deleted or lost data at a very high speed.
In a word, ADR for Windows is designed to recover data in various situations. You can click the download button to get the tool and follow the steps below to recover data from hard disk in Windows 7.
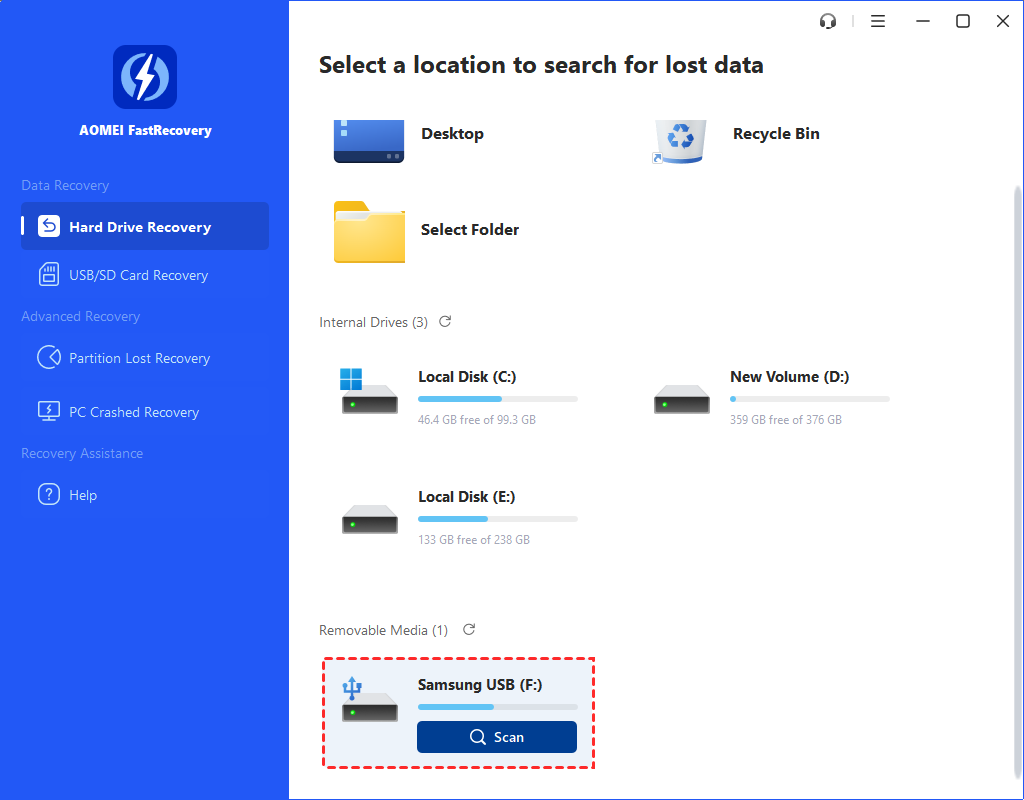
Step 1. Launch AOMEI FastRecovery > Hover the mouse over the formatted drive saved deleted files before, and click Scan.

Step 2. The tool will scan your hard drive via Quick Scan & Deep Scan. Quick Scan aims at finding deleted data, while Deep Scan searches other lost data.

Step 3. When the scanning is complete, you can choose the deleted data or lost files that you want to restore > Click the Recover button and select a destination to save the files.
That’s all about how to recover data from hard disk in Windows 7. You can first try cmd command to see if it can help you find the file you need. If it can't find what you want, then you can use ADR for Windows to recover missing files.
PS: We can never predict when data loss will occur. To ensure data security, you may choose to backup files in Windows 7 to external hard drive or USB flash drive. In this way, you won't have to worry about data loss.