What if you accidentally deleted files in Windows 11? Worry not, this article provides 10 effective methods to recover deleted files on Windows 11 step by step. Scroll down to learn more.


Windows 11 is Microsoft's latest operating system, making great improvements in UX and performance while taking advantage of the computing and memory power of next-generation processors, but it still has data loss risk.
Don't worry, this step-by-step guide will show you the 10 best ways to recover deleted files on Windows 11, no matter what the reason is.
| Scenarios | Recommended methods |
|---|---|
| ✔ Recently deleted | |
| 🔥 Permanently deleted | |
| ✔ Hardware-related |
You may not want any data loss, but sometimes you may find that you can't find a file and it has most likely been deleted. Instead of moaning and groaning, get the possible reasons and recover your files immediately.
No matter what the situation is, right-clicking to delete, using the "Delete" or "Shift + Delete" keys, or due to hardware issues, you can use the following methods to recover files that have been deleted.
Ctrl + Z (also called Undo Delete) is a Windows feature to take the previous action back. You can use it when you realize you delete files mistakenly.
Step 1. Make sure the folder where your photos are located is in focus.
Step 2. Press CTRL + Z on your keyboard.
Step 3. Alternatively, you can right-click anywhere in the folder and choose the Undo Delete option.
The previous action you make on deleted files will go after a restart.
You can always go back only one action at a time. So it’s impossible to undelete Windows 11 files for a while ago.
Recycle Bin is also a good place to find deleted files in Windows 11. If your files are there, you can recover them. But if you use the “Shift + Delete” keys or it’s on a formatted drive, your files are removed immediately, in which case try data recovery software.
Step 1. Double-click the Recycle Bin icon on your Desktop.
Step 2. Find and select the recently deleted file. Right-click the file and select the Restore option.
The deleted files will be restored to original location.
To restore multiple files, hold Ctrl and select all of them. Then, select Restore the selected items instead.
What if you cannot find deleted files now? Try data recovery software - AOMEI FastRecovery. It helps to recover permanently deleted files in Windows 11, 10, 8, 7, etc., especially useful for recently deleted files.
Step 1. Launch Windows data recovery software- AOMEI FastRecovery. Hover the mouse over the drive containing deleted files on Windows 11 and click Scan.
Step 2. The software will run Quick Scan & Deep Scan automatically and find all the deleted or lost data on Windows 11. During scanning, you can search or filter files to find them quickly. Once found, preview or select them to recover immediately.
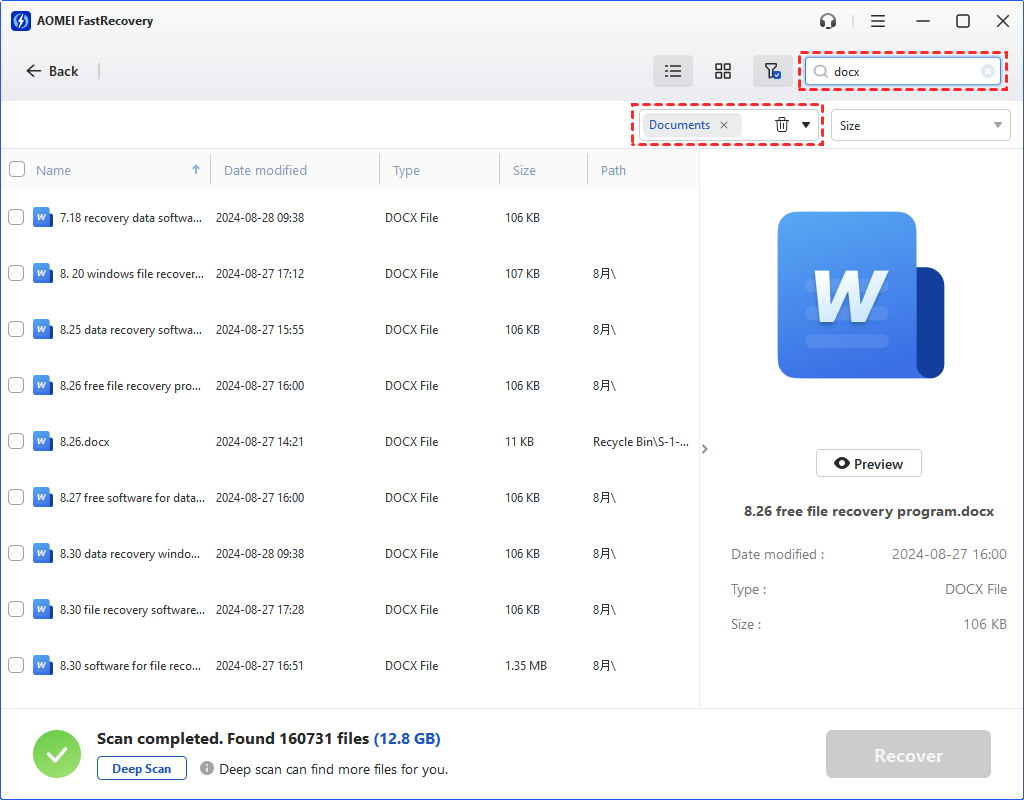
To recover deleted Word documents, click Filter > Type and select Documents. Then, input DOCX in the Search for files or folders box. It will list all of the deleted Word documents in the following window.
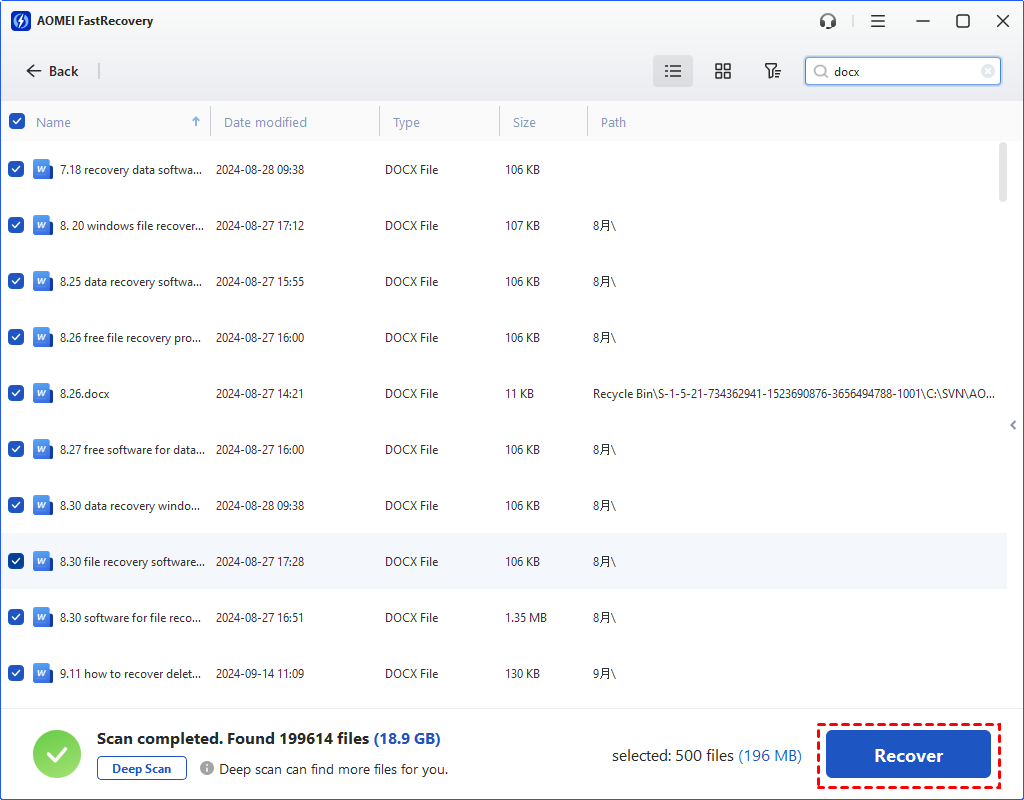
Step 3. Select all the deleted or lost data you want to recover and click Recover XX files to start data recovery.
Select a new location to store the deleted or lost files. Retrieving files to original location may overwrite deleted data, resulting in data recovery failure.
Besides, you still can use it to recover files from formatted hard drive, recover data from SSD, recover deleted photos from SD card, etc.
Except for Windows 10 or 11, you still can use it to recover deleted files from Windows Server 2016, 2019, 2022, etc.
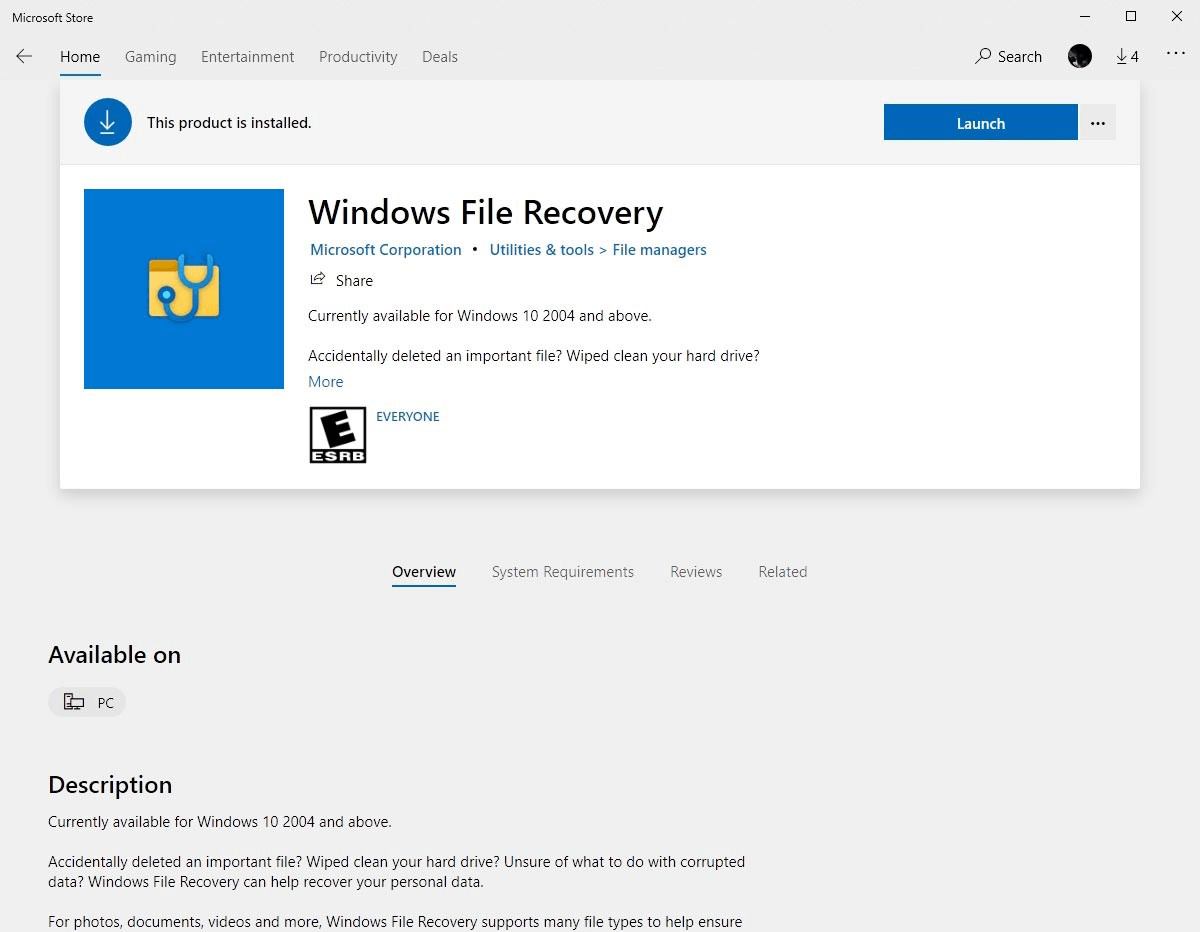
Microsoft also provides users with a Windows file recovery software, Windows File Recovery, which is a challenging command line tool, requiring you to learn the syntax, recovery modes, and switches. Try this if you are a professional or IT technician.
Step 1. Open the Store app and search for Windows File Recovery. Then, click Install to get this free file recovery software for Windows 11.
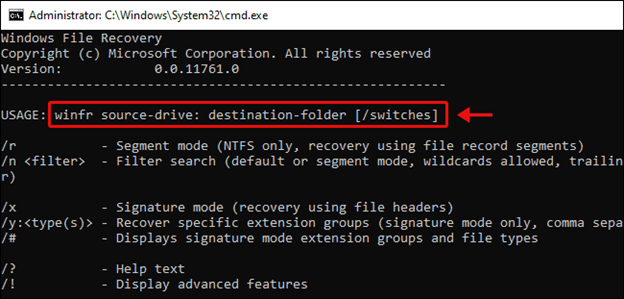
Step 2. Open Powershell or CMD with administrator priority. Type the command based on syntax and your situation. Then, type Y to start the file recovery. Below are 4 examples:
winfr source-drive: destination-drive: [/mode] [/switches]
Winfr C: D: /regular /n \Users\\Documents\
Winfr C: D: /regular /n *.pdf /n *.docx
Winfr C: D: /extensive /n *piano*
Winfr C: D: /extensive /n \Users\\Pictures\*.JPEG /n\Users\\Pictures\*.BMP
Step 3. Try Segment mode if you’re still unable to find or recover deleted file. It is usually used with the /r switch.
winfr C: D:/r /n \Users\\Documents\xyz.docx
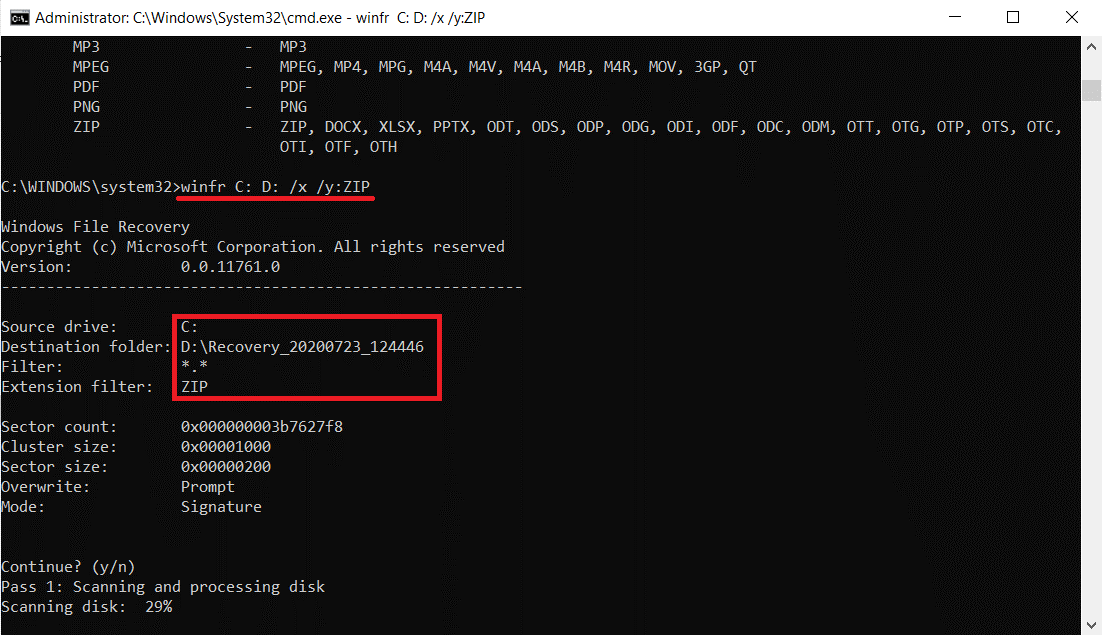
Step 4. To recover specific file types, try Signature mode. It requires /x and /y switches to specify file type. Type winfr /# to confirm the supported file types if you are not sure.
winfr C: D: /x /y:ZIP
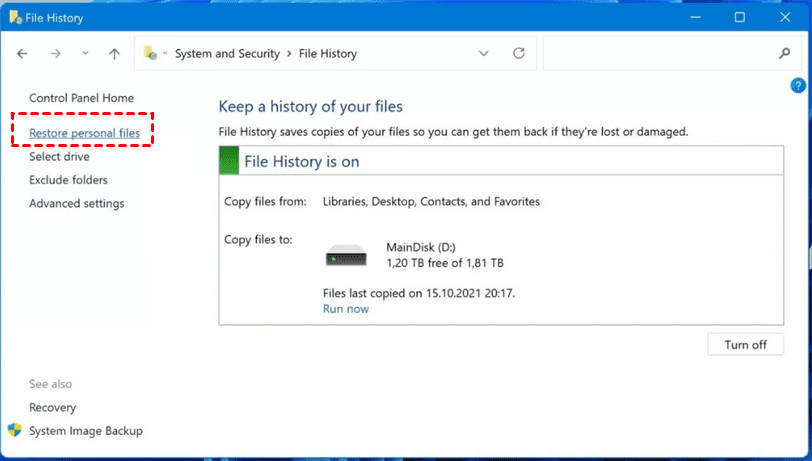
If you turn on File History, it will automatically save a copy of your user files, such as Documents, Music, Pictures, Videos, and Desktop folders. You can then retrieve delete files in Windows 11 from it, even if it’s not in the Recycle Bin folder.
Step 1. Go to Control Panel > System and Security > File History.
Step 2. Click the Restore personal files option.
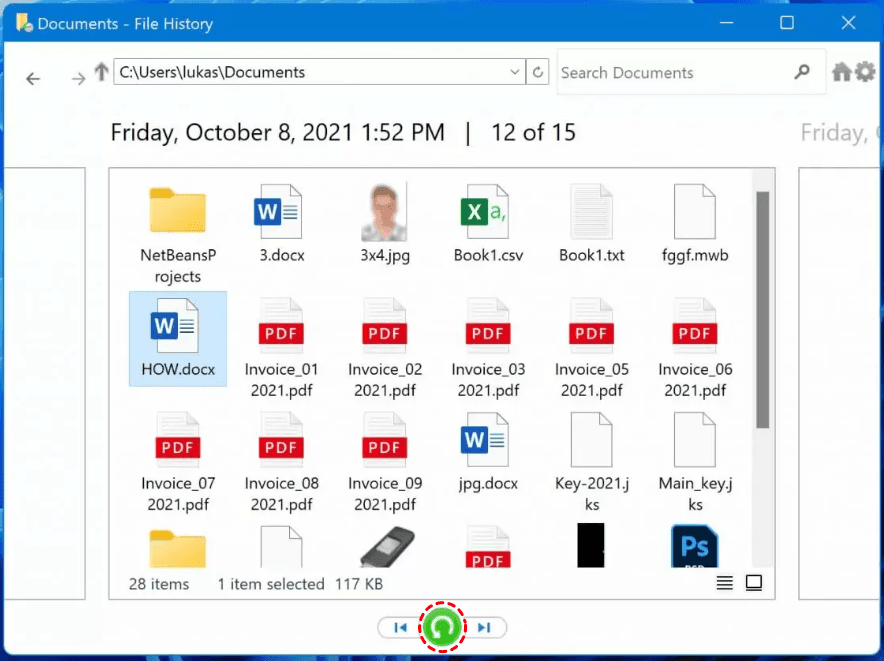
Step 3. Go back in time until you find the deleted files. Select it and click the green restore button.
Previous Versions come from File History or restores. If you enable either of them, you can restore files to previous versions and get deleted files back quickly.
Step 1. Select the folder containing deleted files. Right-click it and select Properties.
Step 2. Switch to the Previous Versions tab and check if there is a previous version. Or click the Open button to confirm it.
Step 3. Then, select the previous folder version and click Restore. If there are any new data, you need to backup them first or move them out.
OneDrive is integrated into Windows 11 backup settings. If you set up it and backup files to OneDrive, you can retrieve deleted files in Windows 11 with an internet connection.
Step 1. Log in with your OneDrive account first.
Step 2. Search for the files you want to recover. Then, select them and click the Download button.
Step 3. Select a location to save the downloaded files.
CHKDSK is a command tool to scan the file system and meta of a disk for logical and physical data and fix any found error, especially useful for corrupted files.
Step 1. Press Win + X and select the Windows Terminal option.
Step 2. Type chkdsk drive letter: /r and press Enter on your keyword. It will start the scanning process and repair the corrupted files if there are any.
The file may be hidden by malware instead of being deleted. At this point, you can use the ATTRIB command to unhide your files.
Step 1. Open Windows Terminal.
Step 2. Type attrib -h -r -s /s /d drive letter:\*.* and press Enter.
If you create a complete backup of your system before upgrading to Windows 11, you can restore Windows to previous version with Backup and Restore (Windows 7). Be sure your computer supports the Windows recovery environment.
Step 1. Go to Settings > System > Recovery and click the Restart now button.
Step 2. In the recovery environment, click Troubleshoot > Advanced options > See more options and select System Image Recovery.
Step 3. Select a working system image and complete all the steps of system restore. If your system image is on external disk, you need to connect it first.
Whether your files are recently deleted or permanently deleted, you are able to recover your files with one of the methods above. But some data loss can be avoided if you protect them well, or get back quickly.
In general, recently deleted files will be much easier than permanently deleted files. However, there is more than one method to recover deleted files in Windows 11 in both situations. Among them, data recovery software AOMEI FastRecovery is suitable for both cases and is the most efficient.
Data loss is painful and can be avoided if you protect it well. Human error is a leading data loss cause, so be careful when you do any operations that may cause data loss. Besides, you can choose to create a local backup and offsite backup like cloud backup to protect them well.