Windows 10: There Is a Problem with This Drive – How to Fix
Here in this post, we list 4 solutions to the issue Windows 10“There is a problem with this drive” as well as the way to recover problematic drive. Read the content carefully and then take them into practice.
By Ellie / Updated on April 3, 2024
The scenario: There is a problem with this drive
Hello, so I keep getting an error when I plug in my USB to multiple computers. It keeps saying: "There's a problem with this drive. Scan the drive now and fix it."
I would scan it, but it freezes? I don't really know what it's doing. Basically, it would just sit like this and do nothing. I had this going for over five hours and it did nothing. Can anyone help me to fix windows 10 there is a problem with this drive?
From Microsoft Community

Why does Windows say there is a problem with this Drive?
Before fixing the error “Windows 10 there is a problem with this drive”, let’s figure out why the issue happens. Usually, the issue occurs mainly because of the following reasons:
- Inappropriate device removal. If you remove your storage device before ejecting it safely would lead to the problem and have a bad effect on the data stored in it.
- Virus attack. If the device is infected by the virus, then the issue may happen also.
- The file system is damaged. When you insert your storage device into a computer, the message “There’s a problem with this drive” may appear if the file system has been damaged or compromised by corruption.
How to recover files from the problematic drive
In general, the error Windows 10 “There was a problem repairing this drive” would prevent you from accessing your files. For this reason, it is recommended to recover your data with MyRecover from the removable and problematic drive before acting on the fixes.
With MyRecover, you’re able to recover data from the external hard drive. And you can enjoy the following advantages:
- ★Tips:
- Get the file restored with a few clicks. The operation of MyRecover is fairly easy. Even though you are new to the computers, you could recover files from the problematic hard drive easily.
- Over 200 different file extensions are supported by data recovery software. It can recover a variety of files, including deleted PPTX files, videos, and so on.
- Work excellently with HDD/SSD/ SD card/USB flash drive in Windows 11/10/8/7 SP 1& Server.
Click on the blue button and get one to enjoy right now!
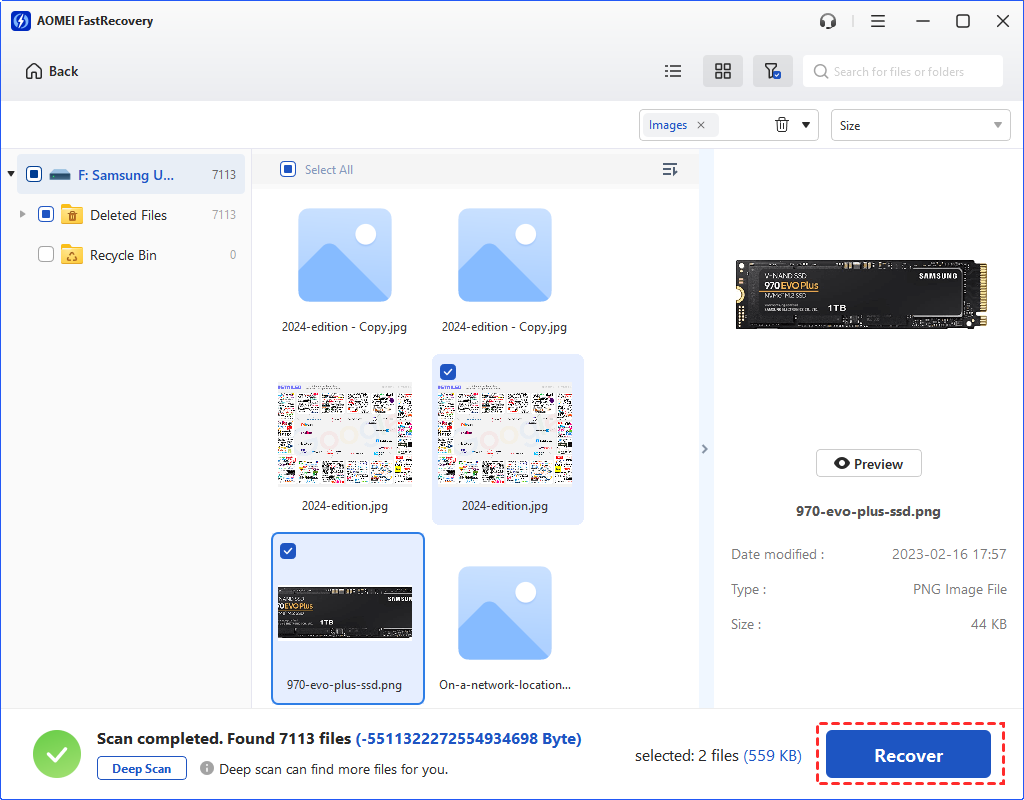
Step 1. Install and run the software > hover the mouse over the drive, and click Scan.
Step 2. Scanning duration depends on the data size of the partition. You could directly select files to restore or wait for a full result.
Step 3. Go to Deleted files > select the photos you want > click Recover x files. If didn’t find the wanted files, go to Other missing files > Images to check if your files are there.
With this wonderful tool, you won’t meet any trouble restoring permanently deleted files in Windows 10/8/7 and 11 as well.
How do I fix Windows 10 “There is a problem with this drive”?
Here in this part, the fixes to the issue “ There is a problem with this drive” on Windows 10 will be illustrated to you. For most users who encounter the issue, they would try the “Scan and fix(recommended) option to fix the error. If the issue has been fixed in this way, then congratulations! But if it’s not, keep reading the following solutions and take them into practice.
Fix 1. Use the Quick Removal option
Step 1. Type device manager in the search box and select it.
Step 2. Click Disk drives on the Device Manager window.
Step 3. Right-click the listed USB drive or SD card and select Properties.
Step 4. Click the Policies tab and then Quick removal on the Properties window. And then, click OK to apply the setting. Then the issue “There’s a problem with this drive” may have been gone.
Fix 2. Troubleshoot hardware devices
Hardware and Devices troubleshooter is a Windows built-in tool, which is used to fix errors with external storage devices.
Step 1. Type Troubleshooter or Troubleshooting in the search box and select it from the list.
Step 2. Click Configure a device under the Hardware and Sound link.
Step 3. In the pop-up window, click Advanced and tick Apply repair automatically.
Step 4. Click Next to start the pending operation and repair the issues its found via the details and instructions.
Fix 3. Check and repair the file system
If your problem is caused by file system corruption, you can try the following solutions and find the one which works for you.
Step 1. Right-click the USB drive or SD card and select Properties from its context menu.
Step 2. Click the Tools tab and Check option under the Error-checking section. And then, press OK to open the next window.
Step 3. Click Scan and repair drive option to fix the issue. Wait for a while until it is finished.
Fix 4. Fix the issue with a Partition manager
If the solutions above are still not working for you, then you could try a third-party software AOMEI Partition Assistant, with which you can scan missing or corrupted file system.
Step 1. Free download AOMEI Partition Assistant Standard and open it.
Step 2. Right-click the partition you want to check, select the Advanced and Check Partition option.
Step 3. Tick one of the check options and click OK.
Step 4. In the window, click OK to restart now and wait for the final result.
Conclusion
This post explains how to repair Windows 10 there is a problem with this drive, including using the Quick Removal option, troubleshooting hardware and devices, checking and repairing the file system, and using AOMEI Partition Manager. However, before performing the operation, remember to recover any data that may have been lost in the drive.