S3 Inventory is a valuable tool for gaining insights into your S3 buckets, so what can you do with S3?

Amazon S3 Inventory is a feature in Amazon Simple Storage Service (S3) that generates reports containing detailed information about the objects in your S3 buckets. It allows you to get a comprehensive view of your S3 storage, making it easier to manage large-scale data, ensure compliance, and optimize costs.

To set up Amazon S3 Inventory on your S3 bucket, follow these key steps to generate the AWS Inventory CSV in your specified destination bucket.
You can choose either your existing bucket or a dedicated bucket for storing inventory logs. It's common for companies to use a centralized bucket to organize inventory data for easier analysis. Before you start, ensure that your destination bucket has a policy granting the necessary permissions; otherwise, the inventory files may not be created properly.
💡Steps to configure AWS S3 inventory:
1. Navigate to the S3 bucket for which you want to create an inventory report.
2. Go to the "Management" tab, choose "Inventory," and click "Create inventory configuration."

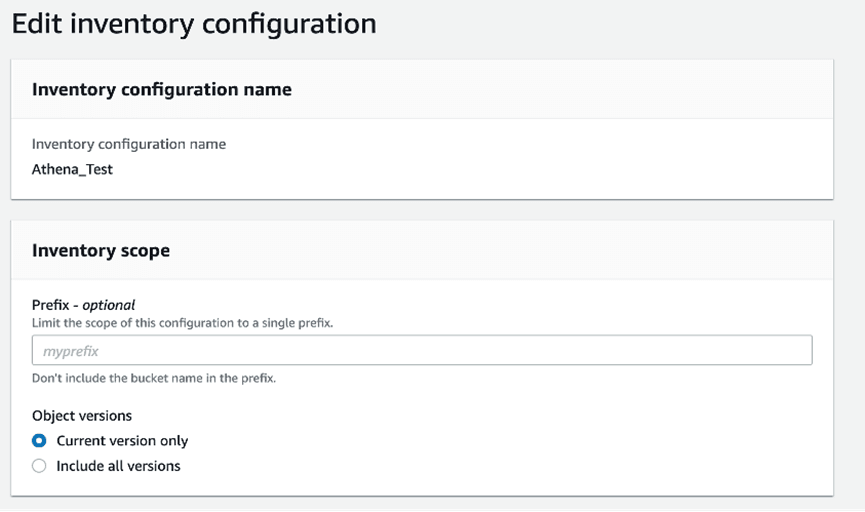
3. Set up a name and scope by choosing the name, prefix, and depth of inventory.

4. Specify destination bucket.
🔰The destination bucket must be in the same AWS Region as the bucket for which you are setting up the inventory. The destination bucket can be in a different AWS account.
🔰Under the Destination bucket field, you see the Destination bucket permission statement that is added to the destination bucket policy to allow Amazon S3 to place data in that bucket.
5. Select report format and schedule, then click Enable the inventory report. Choose from Daily or Weekly for frequency. For output, you can choose from CSV, Apache ORC, and Apache Parquet.
6. Choose Fields including (like size, encryption, storage class, etc.), compression, and encryption options.
Once configured, the inventory report will be generated according to your schedule. After 24–48 hours, you should have an inventory report in your specified report bucket.
AOMEI Cyber Backup is a comprehensive backup solution designed to protect your data across various environments. Whether you are a small business or a large enterprise, it provides robust and scalable backup options. It supports multiple backup types, including system, disk, partition, and file backups, ensuring that your data is protected against accidental deletion, hardware failures, and other data loss scenarios.
Why Choose AOMEI Cyber Backup?
Backing up your virtual machines to Amazon S3 with AOMEI Cyber Backup is a straightforward process. Follow these steps to ensure your data is securely backed up:
1. Bind Devices: Launch AOMEI Cyber Backup web client, navigate to Source Device > VMware> + Add VMware Device to add vCenter or Standalone ESXi hosts as the source device. And then click … > Bind Device.
2. Create Backup Task: Navigate to Backup Task > + Create New Task, and then set it up according to your needs.
3. Start Backup: Click Start Backup and select Add the schedule and start backup now or Add the schedule only.
📢 While the Free Edition covers most of VM backup needs, you can also upgrade to enjoy advanced features: Batch VM Backup: batch backup large numbers of VMs managed by vCenter Server or on standalone ESXi hosts. Backup cleanup: Configure a retention policy to auto delete old backup files and save storage space. Restore to new location: Create a new VM in the same or another datastore/host directly from the backup, saves the trouble of re-configuring the new VM.
To manage your archive tasks of VMware ESXi backups to S3 in "Backup Archive". For example, stop archiving, re-enable archiving, pause all archiving and start all archiving.
S3 Inventory assists in data management, compliance, cost optimization, and data recovery. By following these steps in this article, you can set up Amazon S3 Inventory on your bucket and use the generated reports to gain valuable insights into your S3 objects.