Hyper-V's Export and Import feature allows you to easily copy and move a Hyper-V VM to a target location and then restore the VM to the state it was in when you exported it. So, can the Hyper-V export and import feature be considered as an effective VM backup alternative?

Hyper-V Export and Import are features in Microsoft’s Hyper-V virtualization platform that allow you to move virtual machines (VMs) between different hosts or save copies of VMs for backup and disaster recovery purposes.
Here, we will introduce the detailed steps to export and import Hyper-V virtual machines.
Exporting a Hyper-V virtual machine can use Hyper-V Manager or PowerShell.
1. Launch Hyper-V Manager from the Start menu.
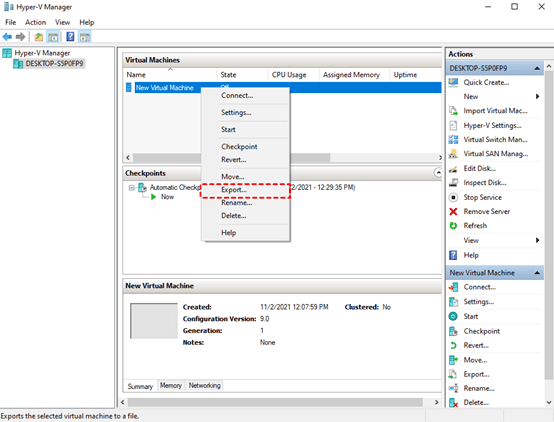
2. In the Hyper-V Manager, locate and select the VM you wish to export.
3. Right-click on the selected VM and choose “Export” from the context menu.
4. In the dialog box that appears, specify the destination folder where you want to save the exported VM files.
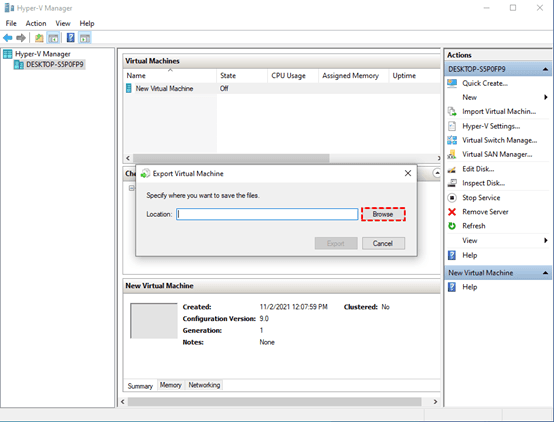
5. Click “Export” to begin the process. Hyper-V will create a copy of the VM in the specified location.
In addition, you can also use the PowerShell scripts to export Hyper-V virtual machines. Before starting, ensure that:
1. To ensure you are exporting the correct one. Use the following command to list all available VMs:
2. Export Hyper-V VMs using PowerShell, and specify the destination path where you want to save the exported files.
If you need to export VMs regularly, you can automate this process by creating a PowerShell script. Here is an example script that exports a list of VMs to a specified path:
Below are detailed steps for importing Hyper-V VMs.
1. Open Hyper-V Manager. Select the Hyper-V host where you want to import the virtual machine.
2. Select Import Virtual Machine in the Actions pane to open the Import Virtual Machine wizard.
3. Click Browse to locate the folder containing the exported virtual machine files.
4. Choose Import Type:
5. Specify a location for where to store the virtual machine files and virtual hard disks.
6. Review the summary and click Finish to complete the Hyper-V importing virtual machine process.
Having the entire folder of the virtual machine allows you to quickly import it using the Hyper-V Manager tool. However, if you only have a .VHDX file without any configuration files, you may get the "Hyper-V Did Not Find Virtual Machines to Import from Location" error.
1. Use the Import-VM cmdlet to import the VM. You need to specify the path to the folder containing the exported VM files.
2. If you want to perform in-place registration of the selected VMs, you should first delete the source VM with the same ID by entering:
3. If you want to configure a new ID for the VM, you can use the -GenerateNewId parameter:
💡Tip: After importing the Hyper-V virtual machine, you can run Get-VM to verify that the VM has been imported successfully.
By following these steps, you can also export and import Hyper-V virtual machines using either Hyper-V Manager or PowerShell efficiently.
To perform the Hyper-V Import VM process, there are many options and various considerations. The best practice for the Hyper-V Importing VM process is to use AOMEI Cyber Backup which centrally export multiple VM backups at once, securely and efficiently. You can also set up an automated backup policy to export VM data on a regular basis, even while the Hyper-V VMs are running.
⊹ Automated Backup Scheduling: Set up automated backup schedules to regularly export VMs without manual intervention. ⊹ Archiving VMs: Support cloud archiving, allowing you to free up local storage. ⊹ Centralized Management: Manage backup tasks from a centralized interface across multiple Hyper-V hosts. ⊹ Quick Recovery: Facilitate quick importing process via VM recovery, minimizing downtime and ensuring business continuity.
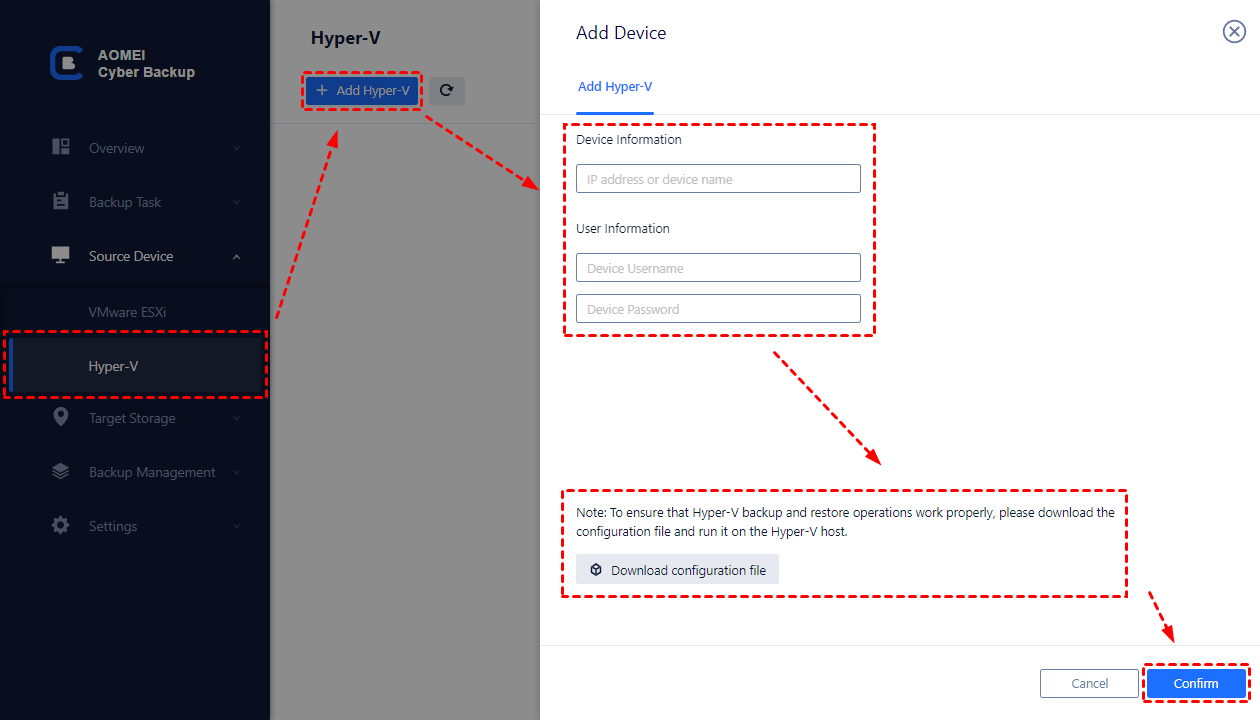
Step 1. Bind Devices: Access AOMEI Cyber Backup web client and navigate to Source Device > Hyper-V > + Add Hyper-V. Enter your Hyper-V host information and click the Confirm button. Then the VMs hosted on it will be added.
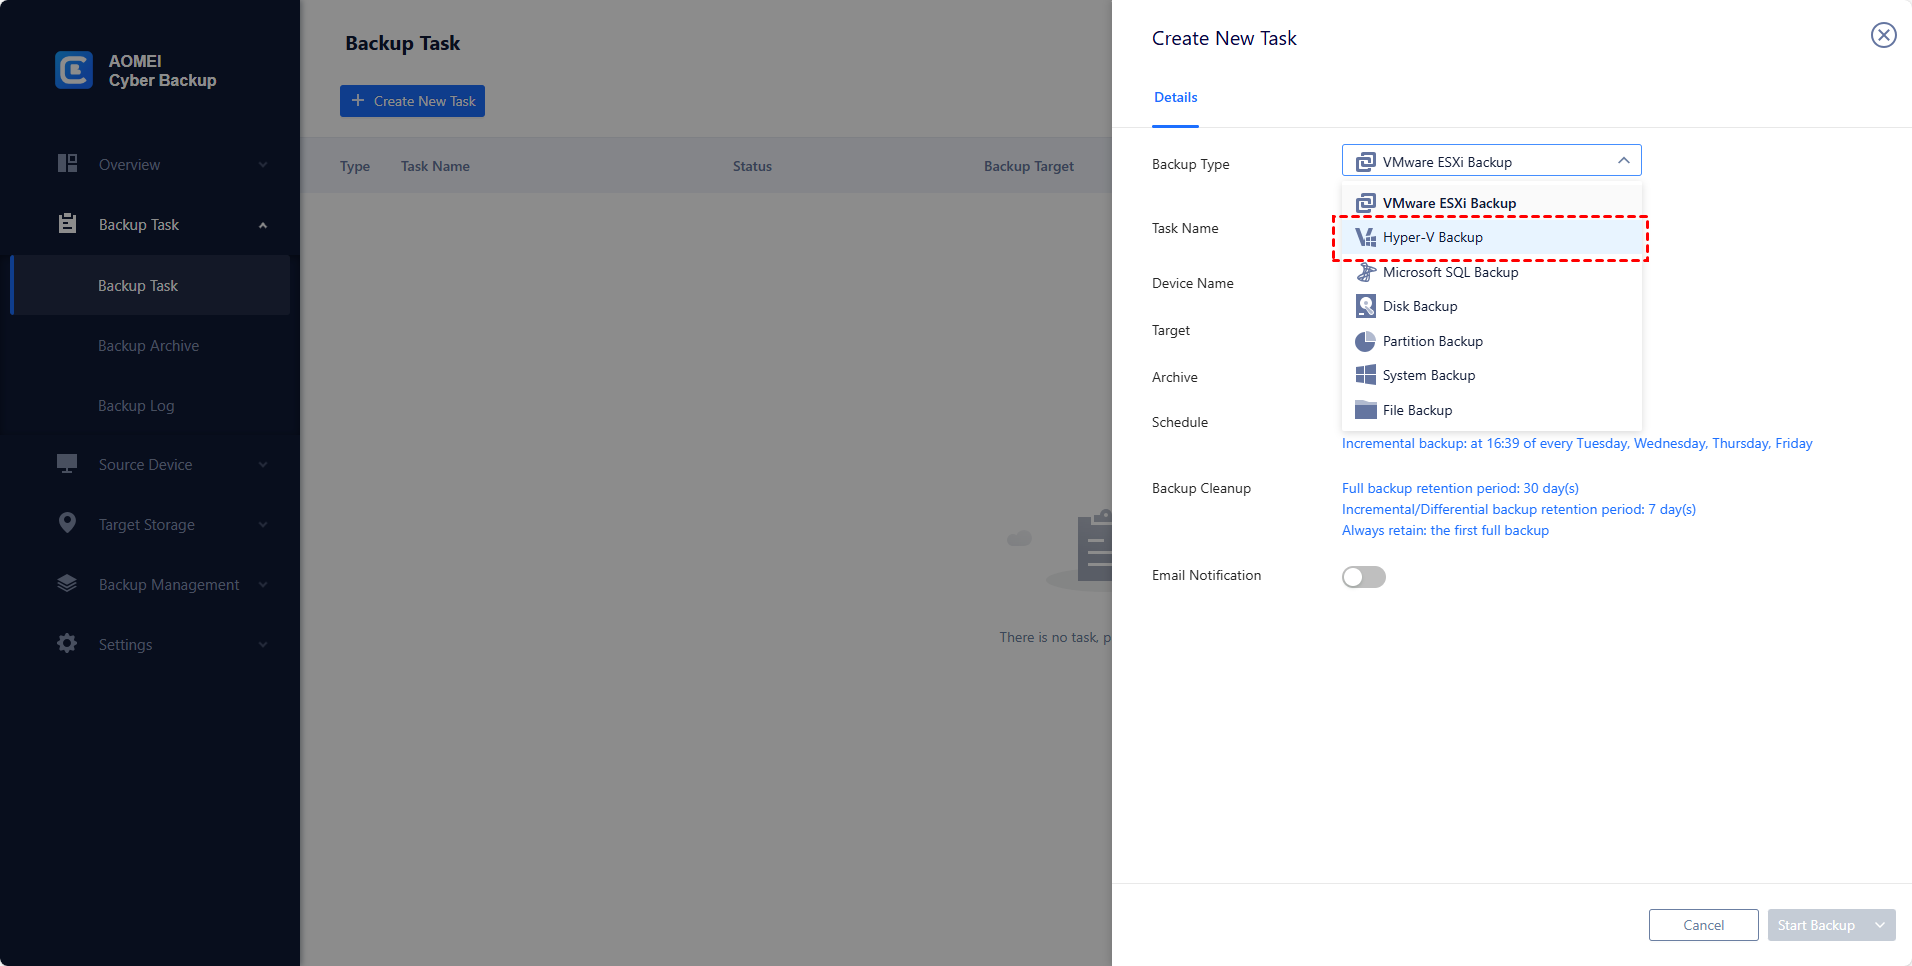
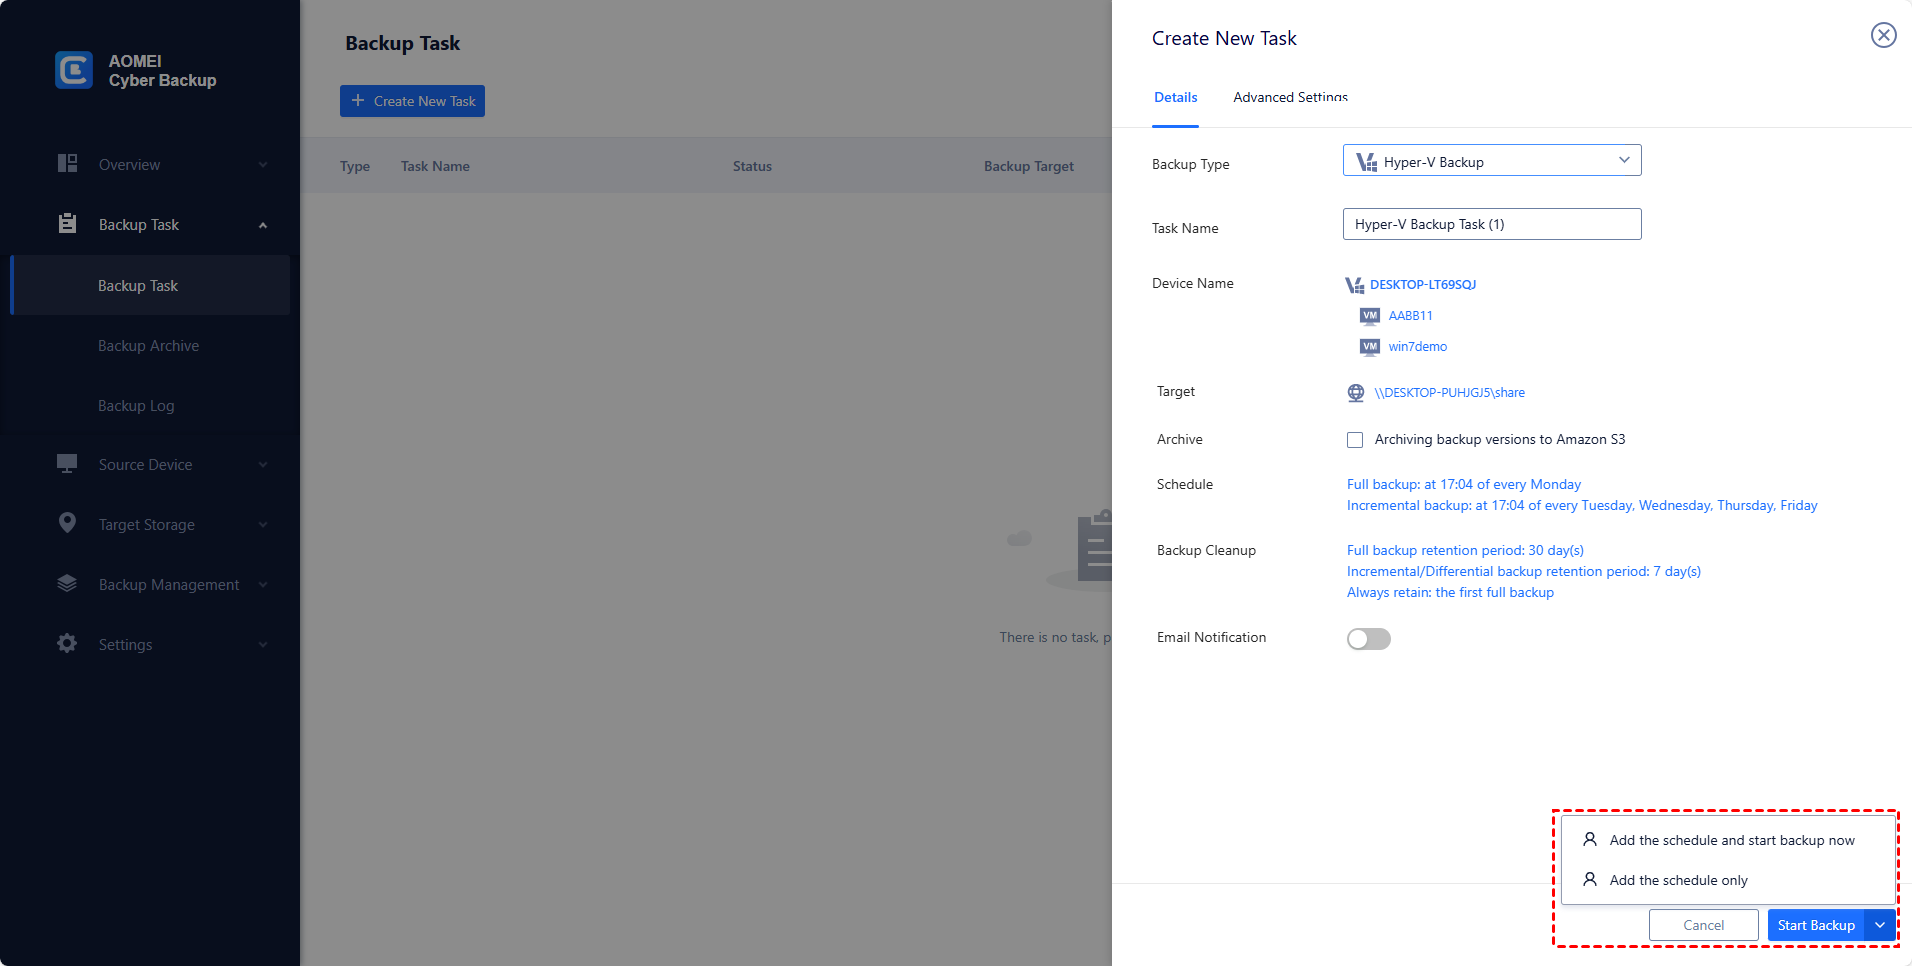
Step 2. Create Hyper-V Backup: Navigate to Backup Task and click + Create New Task. Specify the Task Name, Backup Type, Device, Target, and Schedule as needed.
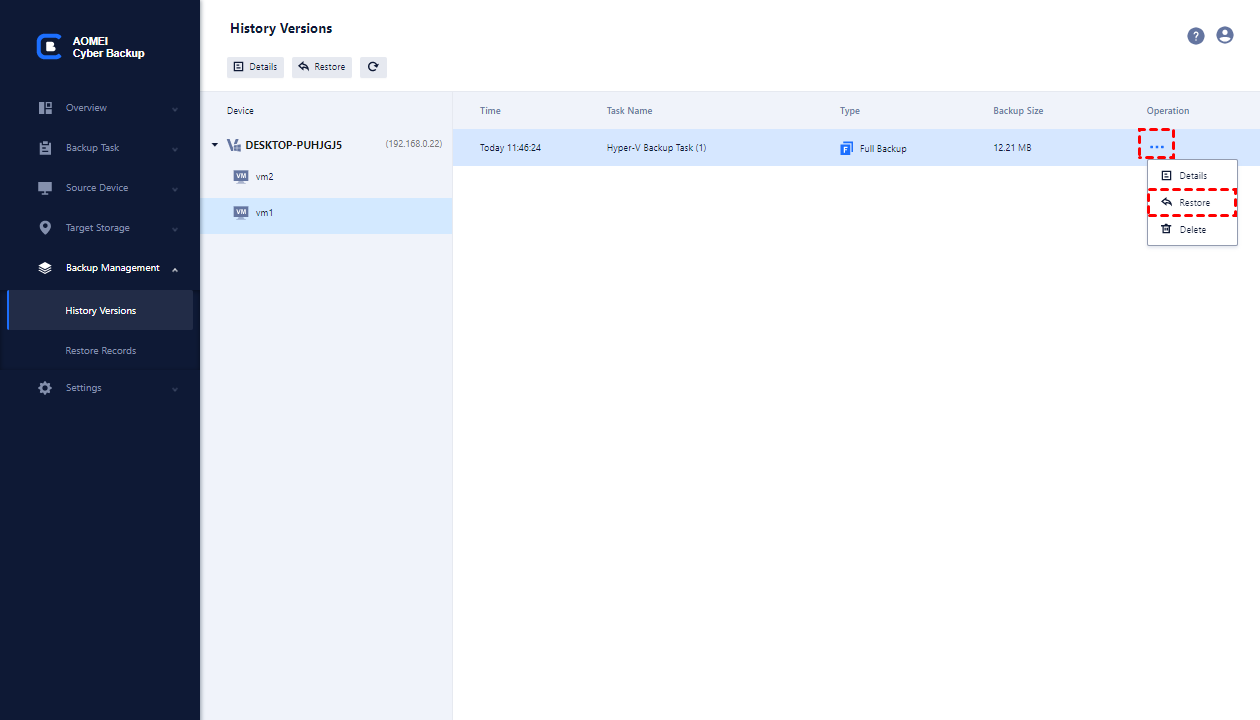
Step 3. Restore: When you want to restore VMs: Navigate to Backup Management > History Versions and select the VM you want to restore, all restore points related to the VM will be listed on the left.
Hyper-V Export and Import are powerful features that facilitate the backup, migration, and restoration of virtual machines. Exporting a VM creates a full copy of the VM, which can be used for backup or migration. Importing a VM brings it back into Hyper-V, allowing you to restore from backups or move VMs between hosts easily. By following the steps outlined above, you can efficiently manage your Hyper-V virtual machines and ensure their availability and integrity across different environments.