By performing instant recovery for VMware, organizations can reduce the time required to restore operations after data loss events, whether due to hardware failures, software corruption, or cyberattacks.

VMware Instant Recovery enables rapid recovery of virtual machines (VMs), allowing businesses to restore critical applications and data in minutes rather than hours or days. The process works by creating a “temporary” VM that runs directly from the backup.
Besides rapid recovery, implementing VMware instant recovery also offers advantages, including:

To effectively perform instant recovery for VMware VM, several prerequisites are needed:
✦ Ensure that a usable recovery backup is successfully created and that the backup is compatible with your VMware environment.
✦ [For VMware vSphere 8.0 and later] You cannot perform an instant recovery for a virtual machine that has a disk on a vVol datastore and is on an ESXi host 8.0 or later.
✦ Recovery of CSVs (Cluster Shared Volumes) is not supported.
✦ If you restore a workload to a production network, ensure that the original workload is shut down.
VMware snapshots capture the current state, data, and configuration of a virtual machine. Snapshot are not backups, but are often used as a means of quickly restoring VMware VM data, and are especially useful in testing, updating, or recovery scenarios.
The following are the steps on how to effectively utilize snapshots for VMware instant recovery:
How to create snapshots of VMware ESXi VM
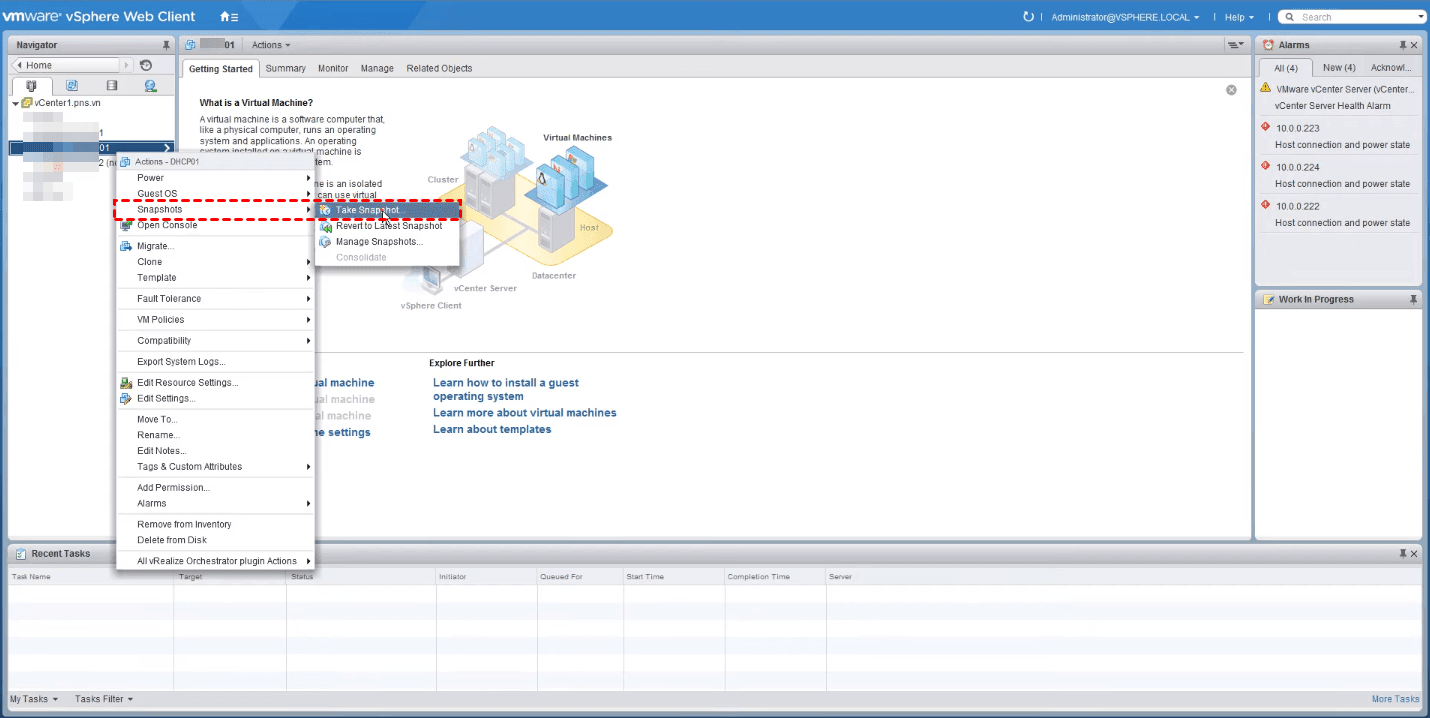
1. In ESXi Web Client, right-click on the VM and select Snapshots > Take Snapshot.

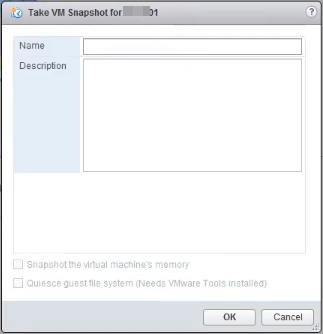
2. Enter a Name and Description for the snapshot.

3. Click OK to create the snapshot for VMware VM.
How to revert to a snapshot for instant recovery of VMware VM
1. Right-click on the VM and select Snapshots > Manage Snapshots.
2. Select the desired snapshot and click Revert.
2. It will pop up a Confirm window, and click Yes to revert to the selected VM snapshot.
*Note: If you select the suspend this VM when reverting to selected snapshot, you need to manually power on the VM later if you check this option.
After confirming that the instant recovery for VMware was successful, it’s important to delete unnecessary snapshots. This helps free up storage space and improves VM performance.
Use snapshots in conjunction with regular backups. While snapshots are useful for quick recoveries, backups provide a more comprehensive disaster recovery solution.
AOMEI Cyber Backup is a comprehensive backup solution designed specifically for VMware and Hyper-V backup needs. By providing enterprise-grade features such as centralized management, automated backup schedules, and flexible recovery options, AOMEI Cyber Backup ensures that businesses remain seamless in the face of data loss, system crashes, or unexpected outages.
Why Choose AOMEI Cyber Backup
🔰Instant VM Recovery: The ability to instantly restore ESXi VM backup points allows organizations to stay up and running while processing backups, significantly reducing business downtime and financial losses. 🎯Automated Scheduled Backup: Regular backups significantly minimize the risk of data loss and expedite the recovery process. This structured schedule for backups makes recovery more predictable and easier to manage, ensuring that systems can be restored to a recent state without requiring human intervention. ✨Role-based Management: Other team members can be assigned as Viewers, Monitors, Backup Operators, and Restore Operators with different permissions to work together efficiently and securely. 🔆Agentless VM Backup: It supports VMware ESXi, eliminating the necessity for additional software installation on a single machine. This not only reduces resource consumption but also greatly simplifies maintenance.
※How to Set up Instant Recovery for VMware
Step 1. Create VMware ESXi VMs Backup and then start VM instant recovery.
Step 2. Create a New Instant Restore as follows:
✐ Click "Task" > "Instant Recovery" > "New Instant Recovery". Here we take "Restore from task" as an example.
✐ Select Source and choose the virtual machine and backup version.
✐ Select the device to be restored to in "Restore to". Choose the target device.
✐ Set the hardware settings for the new virtual machine, such as CPU quantity, CPU Cores, and memory size.
✐ Enter a name for the new virtual machine.
✐ Click "Start Restore" to start the instant restore.
After creating VM instant recovery, start the migration process timely by selecting “Start Migration” from the task menu or details page to resume normal business operation.
Instant recovery for VMware is a powerful tool by enabling organizations to recover from data loss events swiftly, and it not only safeguards critical information but also ensures business continuity.