Sysprep emerges as a key tool for optimizing Windows Server 2019 VM deployments. How to use it in your VMware environment properly?

Sysprep empowers VMware users to create standardized VM templates, laying the foundation for rapid scalability. The ability to clone VMs based on these templates enhances efficiency, making it easier to replicate and deploy multiple instances with consistency.
🔰 Time and Resource Efficiency
By automating the deployment process, Sysprep significantly reduces the time and resources required for deploying Windows Server 2019 VMs on VMware. This efficiency is particularly advantageous for organizations looking to scale their virtualized infrastructure rapidly.
💡 Enhanced Security and Stability
Sysprep mitigates security risks by eliminating duplicate SIDs, ensuring a secure and stable virtual environment. The removal of duplicate SIDs is essential for avoiding conflicts and maintaining the integrity of the VMware setup.
🚩 Scalability and Consistency
Sysprep's template-driven approach facilitates easy scalability, allowing organizations to expand their virtualized infrastructure effortlessly. The consistency achieved through Sysprep ensures that each Windows Server 2019 VM instance is uniform, reducing the likelihood of configuration errors.
To assist you in harnessing the full potential of Sysprep, next is a step-by-step guide to create VMware template of Windows Server 2019 Using Sysprep.

📌 Make sure you have the latest Windows Server ISO file downloaded.
📌 Make sure you have VMware vSphere version 6.5 or above.
What are the main steps involved to create a VMware template? Let's take a look at the VMware Windows Server 2019 template best practices:
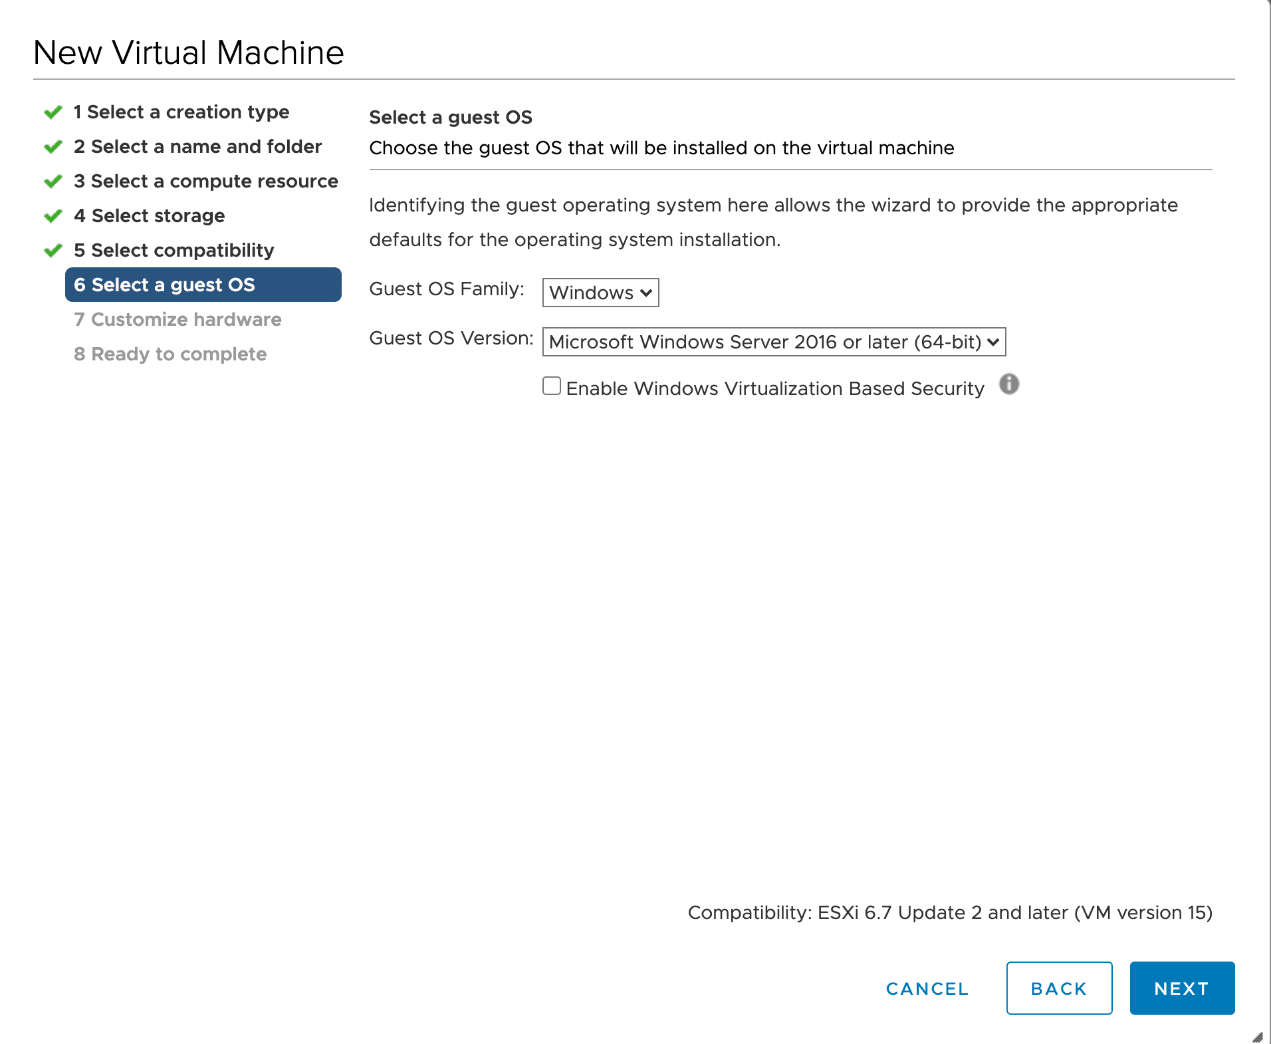
1. Deploy a new virtual machine and install Microsoft Windows Server 2016 or later (64-bit) as the guest OS.

2. After creating the new VM, then power on your new VM and install Windows Server.
Install VMware Tools on the virtual machine.
1. After the VM restarts, log back in and click Local Server in the left pane of Server Manager. Consider following these extra steps when creating a Windows template:
2. Right-click the Start > Run.
3. Type in c:\windows\system32\sysprep\sysprep.exe, and press Enter.
4. Select Generalize, select Shutdown from the Shutdown Options dropdown list, and click OK.
5. In vCenter, in the left pane, right-click the VM, click Power, and click Shut Down Guest OS.
6. After the VM completes the shutdown process, right-click the VM, click Edit Settings. Change CD/DVD drive 1 to Client Device and click OK.
7. Right-click the VM, click Template, and click Convert to Template. Click Yes to create the VMware template of Windows Server 2019 using Sysprep.
Utilizing VMware templates in your infrastructure helps ensure that you can efficiently deploy new Windows Server 2019 servers as needed in a simplified and consistent manner.
Using other tools such as AOMEI Cyber Backup in conjunction with VMware vSphere templates is a great way to further extend the capabilities of VMware templates in your environment.
For enterprise owing multiple VMs, Hyper-V backup is necessary for business development. Here, I will offer a centralized VMware backup solution – AOMEI Cyber Backup to provides comprehensive protection for your VMware ESXi data and information based on easy steps.
With the reliable VMware backup tool, you can securely back up and restore your virtual machines.
🐱💻 Comprehensive Data Protection: AOMEI Cyber Backup provides versatile backup strategies, allowing users to create full backups of entire virtual machines (VMs) and incremental backups to efficiently track changes in data. 🔰 User-Friendly Interface: The software boasts a straightforward and intuitive interface, ensuring that the backup and recovery process can be effortlessly completed through a centralized console, eliminating the need for complex configurations. ⏰ Automated VM Backup: Schedule VMware backups for individual virtual machines, and the tasks will run automatically, enhancing the efficiency of the backup process. 🔔 Timely Recovery: Effortlessly restore a VM from any backup point directly, eliminating the necessity of restoring a full backup and each subsequent backup point. This feature simplifies the restoration process and provides flexibility in data recovery.
You can click the following button to download AOMEI Cyber Backup for a free trial.
1. Click Backup Task >> Create New Task to start protecting multiple virtual machines.
2. In the opened wizard, select VMs for backup and configure Target and Schedule.
3. Click Start Backup.
✍ While the Free Edition covers most of the VM backup needs, you can also upgrade to Premium Edition to enjoy: ✦ Batch VM backup: batch backup large numbers of VMs managed by vCenter Server or on standalone ESXi hosts. ✦ Backup Cleanup: Configure retention policy to auto delete the old backup files and save storage space. ✦ Restore to new location: Easily make a clone of a virtual machine in the same or another datastore/host, without reinstalling or configuring a new VM.
AOMEI Cyber Backup for Microsoft Hyper-V is the secure and easy solution to virtual machine backup solution that organizations need for today’s Hyper-V environments.
Mastering the art of creating a VMware template for Windows Server 2019 with Sysprep is pivotal for streamlined virtual machine deployment. By leveraging Sysprep's powerful features within the VMware environment, users can ensure scalability, and customization.
This comprehensive guide has unveiled the unique benefits, best practices to create a VMware template of Windows Server 2019 using Sysprep, empowering you to optimize your virtualized infrastructure efficiently and future-proof their deployments.