Don’t know how to transfer Procreate files to new iPad? With guides on this page, you'll learn how to transfer procreate files to another ipad easily, 4 effective ways are covered.
How Do I Transfer Procreate Files to New iPad?
I recently got a new iPad Pro which I have set up with my Apple ID. Before I got the new iPad I was using my mum's iPad and logged in as her Apple ID. I just used her iPad just for Procreate. Now I have downloaded Procreate on my new iPad and want to transfer my drawings from my mum's iPad. Can you transfer Procreate to another iPad? If you can, please give me some suggestions.
- Question from Apple Community

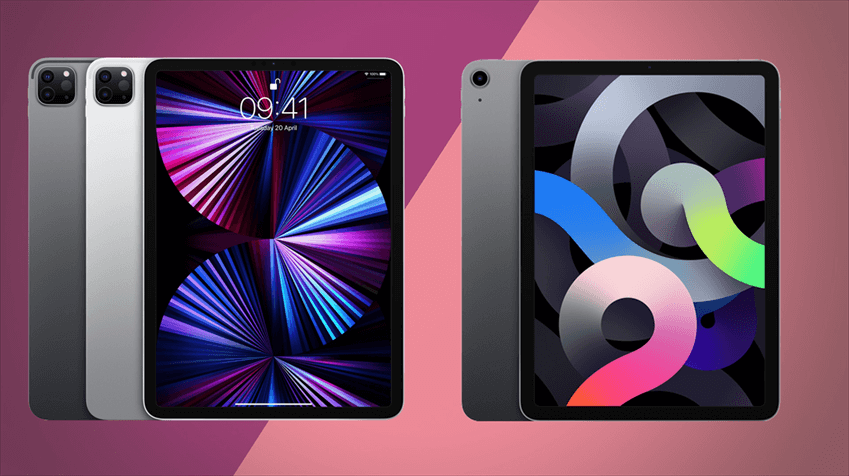
iPad is a powerful tool for artists, if you use Procreate to draw and sketch on iPad, you can have a great experience. Especially the latest iPad Pro comes with M2 chip gives a stable and smooth drawing experience. But when you have a new iPad and need to send Procreate to the new iPad, you may wonder if you need to buy Procreate again.
Actually, you don't need to buy Procreate brushes again on a new iPad, we will introduce 4 free ways in this post to help you solve the “how to transfer Procreate files to new iPad” problem to increase your brush library on a new iPad.

Please continue to read and learn how to transfer Procreate files to a new iPad in 4 effective ways. Let’s start with the first one.
There are a few ways to transfer Procreate to a new iPad. But AirDrop may be the most direct and simple way, and you need to pay attention to the fact that this way can only be used on devices that support the AirDrop function.
Follow the instructions below to transfer Procreate files.
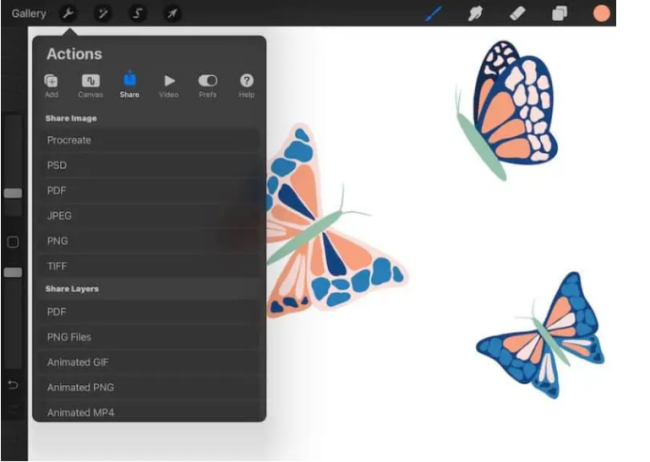
Step 1. Open Procreate > Look at your top toolbar in Procreate > tap the wrench on the far left side to open the Actions panel > tap the share button.

Step 2. Select which format you want to share with.
Step 3. Click on AirDrop to transfer Procreate files to another iPad.
☛Tip: It is a common problem that AirDrop not work now and then, many users have reported the problem before. If you also encounter this problem when using AirDrop to transfer Procreate files, don't worry, we provide 3 other ways for you.
iTunes is an official tool for Apple users to manage various files, users can transfer Procreate files to iOS devices, including iPad, through iTunes on their PC. Follow the steps below to learn how to transfer Procreate files to another iPad.
Step 1. Connect your old iPad to your PC with a USB cable and run iTunes. Tap the iPad button and choose This Computer on the right panel.
Step 2. Then tap Back Up Now and begin to transfer the data on the old iPad to the computer with iTunes.
Step 3. Connect your new iPad to your computer with a USB cable and run iTunes. Next tap the Device icon and choose Restore Backup on the right panel.
Step 4. Choose the right backup version and click Restore to begin the process.
Note: iTunes will copy all the data to another iPad and everything on the target iPad will be overwritten. Thus if there are some important data on the targeted iPad you’d better backup your iPad. Moreover, for users who only need to transfer Procreate files, this way is not the best option.
iCloud offers two options for data transfer: iCloud backup and iCloud sync. The former aims to migrate all files to the new device and the latter is used to sync specific items. Both of these options can be used to transfer files, please read the following steps to learn how to transfer files procreate to new iPad. You can choose the one you preferred.
★iCloud Backup
Go to Settings on your old iPad > Your Name > iCloud > Backup > Enable the iCloud Backup > Create backup now.
★iCloud Sync
Click on Settings on your old iPad > tap your Apple ID > choose iCloud > choose the Procreate files you want to transfer > click on it to turn it on one by one.
Note: iCloud only provides 5GB for free, thus if your Procreate files are large you may encounter the issue of iCloud storage is full, but purchasing more storage space on iCloud will cost a lot. Please scroll down to get the free way to transfer Procreate files.
The above 3 ways all work effectively but if your files are too large transfer via iCloud will cost a lot and transfer via iTunes will cause data loss. Don’t worry, please read on to get the best way to transfer Procreate files to new iPad. AOMEI FoneBackup for iOS, a free iOS data transfer and backup tool, provides you with unlimited data transfer opportunities and unlike iCloud and iTunes, it supports selective transfer, easily providing full protection for your device.
Exclusive features of AOMEI FoneBackup for iOS:
Please continue to learn how to transfer procreate files to a new iPad.
Step 1. Scroll the QR code to download AOMEI FoneBackup for iOS on both iPad.
Step 2. Open AOMEI FoneBackup for iOS and allow it to use the WLAN services & access the files on the device. Next place two iPad together and go to Connect Device. Tap the avatar on either iPhone to establish a connection.
Step 3. On the source iPad: Go to File Transfer > click Files > click the “+” icon and choose files you want to transfer > click Send button.
Step 4. On the target iPad: receive files, you can view the files in the Procreate app.
Note: ※ AOMEI FoneBackup for iOS has one desktop app named AOMEI FoneBackup for desktop for Windows users. If you not only want to transfer files from an old iPad to a new iPad but also want to backup data and transfer data to PC, the transfer to computer feature and the custom backup feature can do you a favor.
This post introduces 4 effective ways to fix the “how to transfer Procreate files to new iPad” problem, you can choose one of them you prefer to complete the transfer process. AOMEI FoneBackup for iOS is undoubtedly the best choice for transferring all your data between iOS devices with simple steps and security.