How to Clone Apps with CloneApp on Windows 11/10
Want to know how to clone an App in Windows 11 using CloneApp? Read this post to learn how to use CloneApp on Windows 11/10 and get a more easy to use Windows cloning software for system migration.
Last Updated March 11, 2025
CloneApp Overview
If you're planning to fresh install Windows but don't want to spend an entire weekend setting up all your old programs, settings, and system tweaks, you may turn to CloneApp for help. CloneApp is a portable and powerful tool designed to help users backup and restore applications, settings, and configurations.
Unlike conventional backup software that primarily focuses on files and folders, CloneApp specializes in preserving software settings. Supported more than 250 Windows programs, this tool helps to save time during system migrations or reinstalls by preserving App settings, eliminating the need to reconfigure software manually.
- Extensive application support: It supports backup for a wide range of popular Windows programs, including CCleaner, WinRAR, VLC media player, and more. (complete list)
- Registry and directory backup: It focuses on backing up configuration files located in Windows program directories and registry, ensuring comprehensive preservation of application settings.
- Portability: Being a portable tool, CloneApp doesn't require installation. Users can run it directly from external storage devices, making it convenient for on-the-go backups.
If you are looking for how to use CloneApp on Windows 11/10, keep reading for detailed guides and a one-stop alternative solution for system migration.
How to Clone Apps with CloneApp on Windows 11/10
To utilize CloneApp on Windows 10 or 11 for backing up and restoring application settings, you could follow the stepwise guidelines below.
Step 1. Download the CloneApp software on your computer, and run the CloneApp.exe file file with no need to install it.
- ★Tips:
- To fully backup program settings, you need to run CloneApp as an administrator by right-clicking on the Clone App.exe file and selecting "Run as administrator" from the pop-up menu.
- By default, CloneApp backs up your programs and registry settings to a folder named Backup in the same directory as the CloneApp software. It keeps the backup files of each program in a separate folder. (You could change the saved location in Options)
Step 2. Click on Clone from the left, and check the boxes next to these programs you want to backup. You could click the Select Installed button below to back up all your installed programs supported by CloneApp.
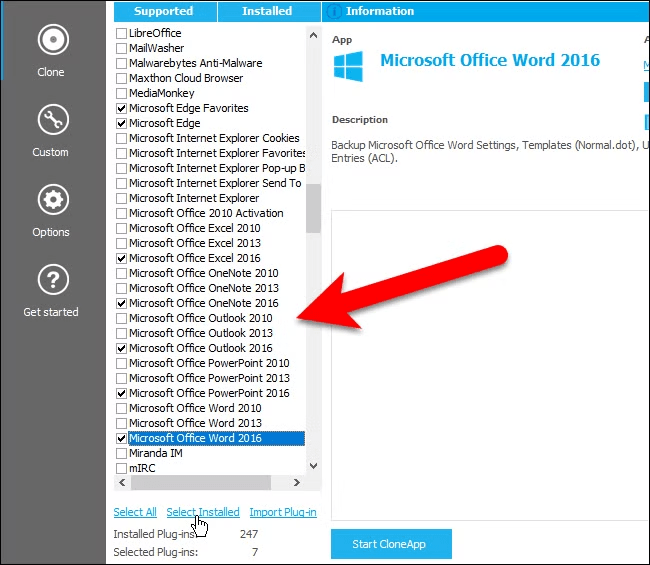
Step 3. To preview the folders and registry entries that will be backed up for the selected program, you can click What is being backed up in the upper right corner.
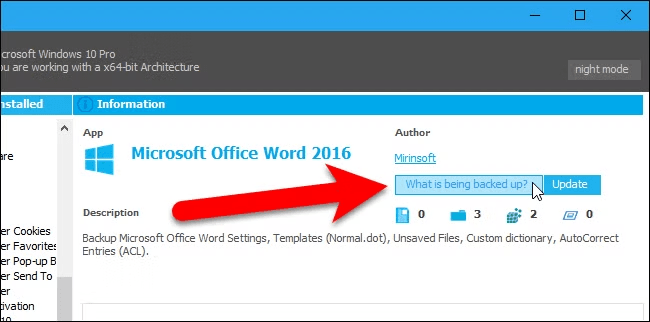
Step 4. Then, click on Start CloneApp to back up your select programs and wait for the backup progress to complete.
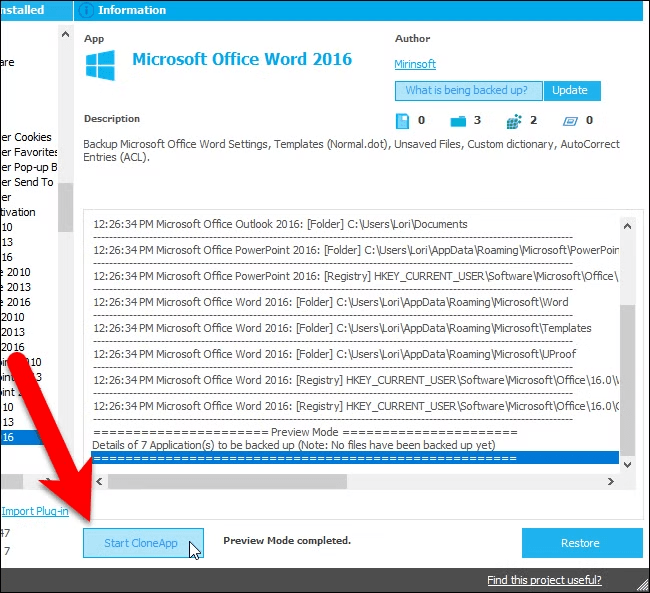
That's all about how to clone an App in Windows 11 and 10. By saving the entire CloneApp directory to a USB flash drive, cloud storage, or other place that is accessible from a new computer, you could transfer programs to new computer by restoring the backed-up program files with the following steps:
- Run the best clone App for PC CloneApp in administrator mode on the new computer > click Restore in the lower-right corner.
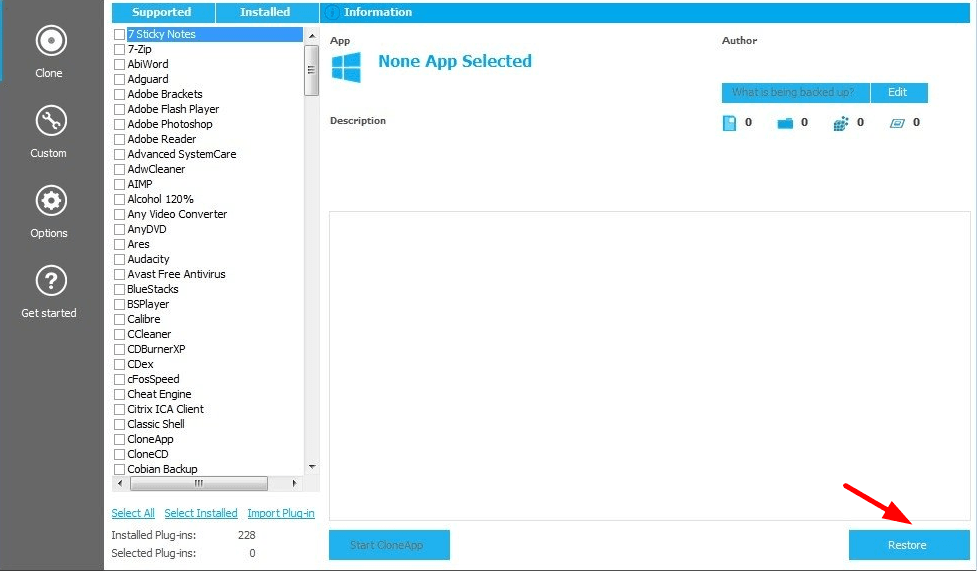
Flexible Way to Clone Windows to Another Computer
While CloneApp excels at backing up application settings, it doesn't offer full system cloning capabilities. If you need to clone Windows 11 to new computer, a more comprehensive tool is required. This is where AOMEI Backupper shines. It allows users to clone entire disk, including installed Apps, files, and settings, or clone only the OS effortlessly from one PC’s hard drive to another drive without restoration.

- Versatile cloning functions - Support disk cloning, system cloning, and partition cloning. And it offers Intelligent Clone to clone only used sectors as well as Sector by Sector Clone to clone all sectors from one drive to another.
- Backup and restore - Except for cloning, it also provides system backup, disk backup, partition backup, file backup, and various backup functions, and supports dissimilar hardware restore to restore system image to a new computer with different hardware.
To clone Windows 11 to new computer using AOMEI Backupper, download and run this software on your computer, and try it with the following guide.
Step 1. Connect the new computer hard drive to your old computer via a slot or a USB-to-SATA cable and make sure it is detectable. Open AOMEI Backupper, and click on Clone > Disk Clone.
- Note:✎...
- If you only want to clone only the Windows system, use the System Clone option instead. It will select your system drive and system-related drives to clone automatically.
Step 2. Select the source disk on the Windows 11 computer and click Next. Usually, the disk contains your operating system, installed programs and files, etc.
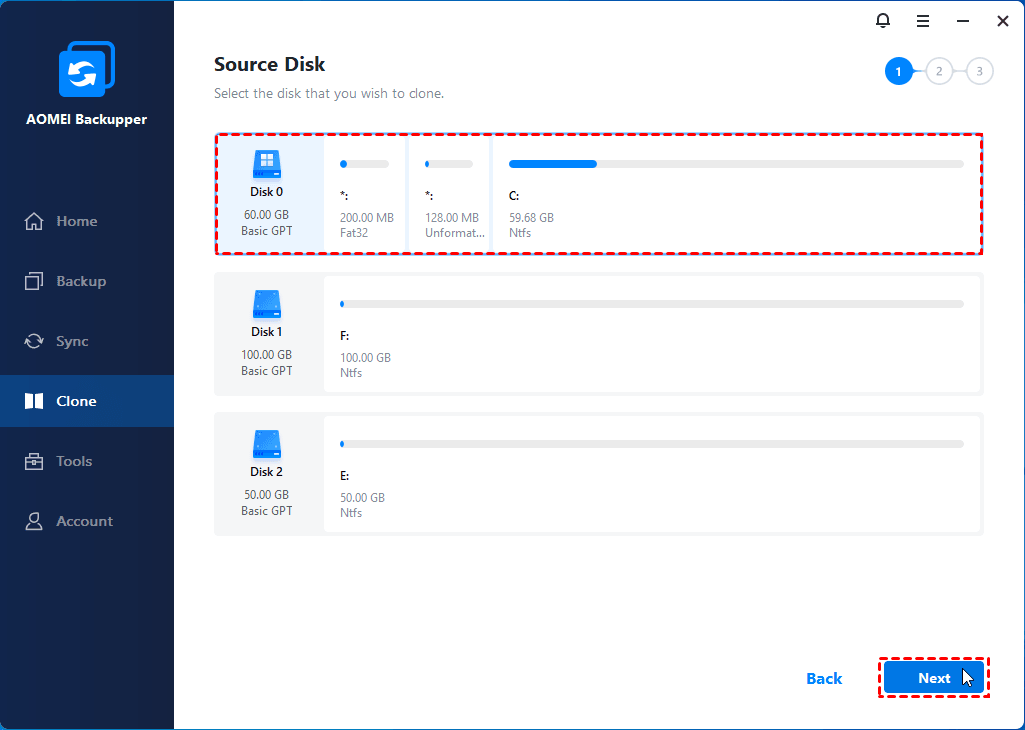
Step 3. Choose the connected new drive as the destination disk, and tap Next.
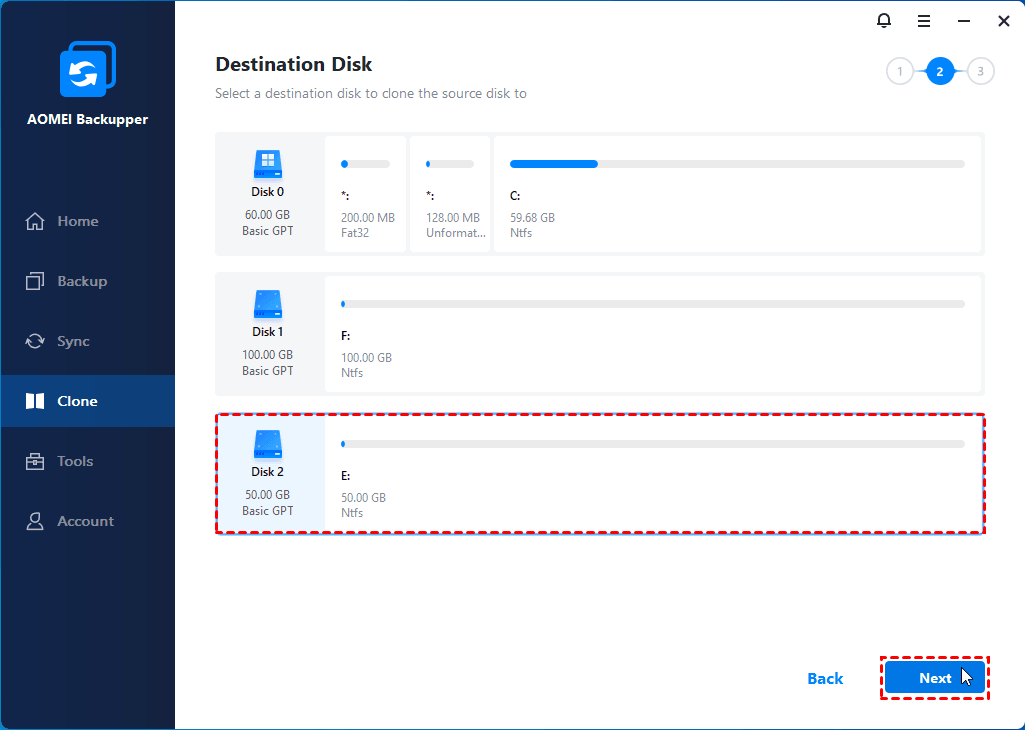
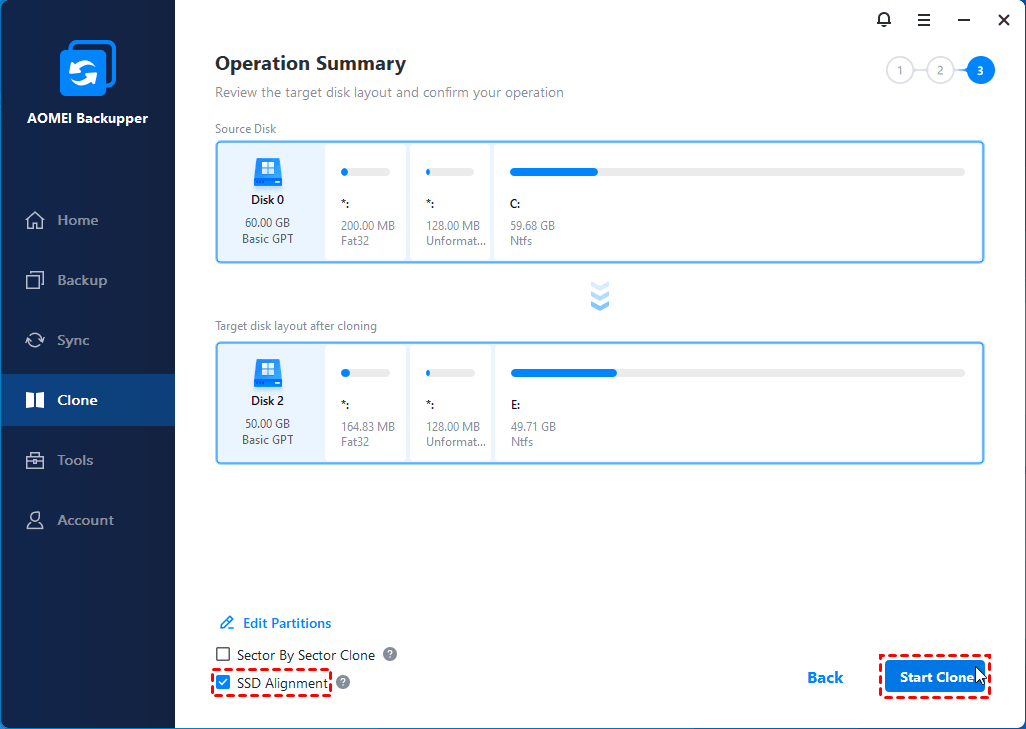
Step 4. If you are cloning to an SSD, tick SSD Alignment to accelerate the reading and writing speed of the target SSD, then click Start Clone to begin the Windows clone to another computer with this professional clone App for PC on Windows 11.
- ★Tips:
- It is suggested to backup files on the destination drive in advance if they are important, as the cloning process will erase all data on it.
- The Sector By Sector Clone is only available while cloning to an equal size or larger disk.
Summary
Cloning applications and system settings can save a lot of time and effort, especially when migrating to a new PC or reinstalling Windows. Using CloneApp on Windows 11 or 10 is convenient for cloning individual Apps, while AOMEI Backupper provides a complete system cloning solution. With this tool, it is simple to migrate Windows to another disk or clone hard drive to SSD for new computer.
Whether you need to backup and restore Apps or move your entire Windows OS or disk, these tools make the process smooth and efficient.