You will learn the best free disk image software for Windows 11 in all aspects and how to use it to create a disk image in 2 easy ways.

A disk image is an exact replica of your drive (HDD, SSD, USB, etc.), encompassing all your programs, settings, and data. This method effectively secures the data on your disks. Notably, if the disk is a system disk, it includes the operating system, system files, drivers, and everything required to boot your computer.
Disk imaging can easily resolve issues such as boot failures, system crashes, and malware infections. Additionally, it’s a crucial tool for migrating to a larger disk or high-performance SSD. To accomplish this, you’ll need the best free disk imaging software for Windows 11.
For creating a disk image or cloning a disk in Windows 11, AOMEI Backupper Standard is an excellent choice. With its backup features, you can easily back up the disk and focus on long-term data protection. You can also quickly upgrade the hard drive and improve computer performance with its cloning feature.

Either way, thanks to its user-friendly interface, you can use it smoothly in Windows 8/10/11/7/XP/Vista. The same is true for the green hand.
To get started, get the Windows 11 imaging software - AOMEI Backupper Standard free download on your computer! For sever users, try AOMEI Backupper Server.
You can follow the graphic tutorial below to create disk image by the best free disk image software in Windows 11. To improve data security, it's suggested to follow the 3-2-1 backup strategy - keep at least 3 copies of your data and save them in 2 different locations, at least one offsite.
Step 1. Launch the free imaging software for Windows 11, AOMEI Backupper Standard. Then, click Backup > Disk Backup.

Step 2. Click Add Disk to choose the disk you want to make a disk image.
Step 3. Select a destination path to store your disk image. Click the inverted triangle and choose one of ways in the following:
>> Select a local path: It allows you to backup Windows 11 to an internal or external disk as long as it's recognized by Windows. And you need to connect it in advance.
>> Add Share or NAS Devices: It is to backup Windows 11 to network location or NAS. You need to add it by clicking this option, inputting the network location, and selecting a shared folder on it.
>> To backup Windows 11 disk to cloud drive, click Select a local path and select the desktop folder of your cloud drive (e.g.: C:\Users\Username\OneDrive).
Step 4. Click Schedule Backup and enable it, then select Daily, Weekly, Monthly, Event triggers or USB plug in feature.
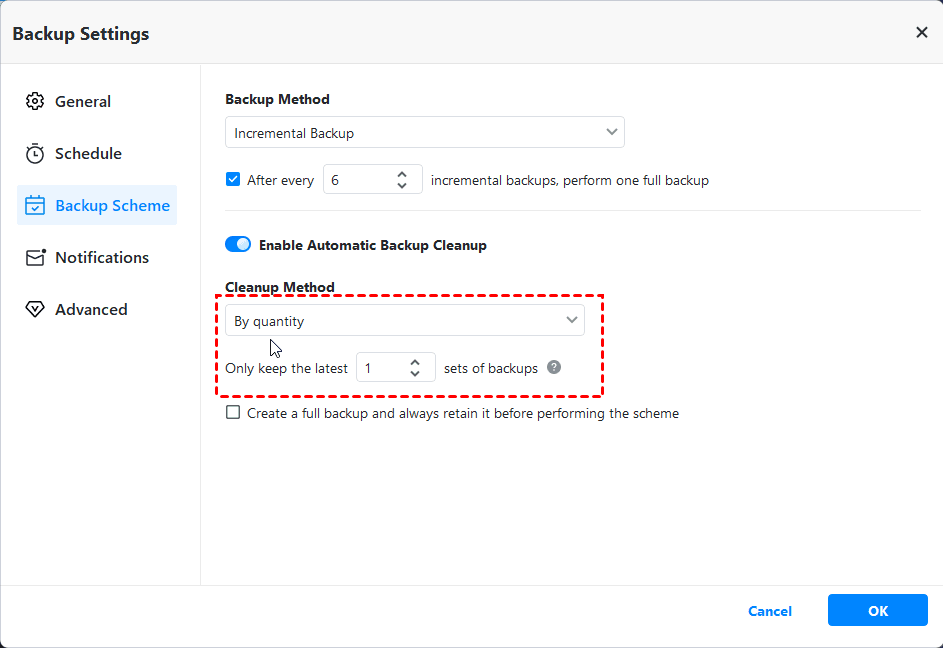
Besides, you can also click Options to write comments, set email notifications, choose the compression level and select the splitting ways you want for your disk image. In the Professional or higher version, you can also try:
>> Differential Backup: Backs up all changes since the last full backup, offering a balance between speed and redundancy.
>> Automatic Backup Cleanup: Select one of the cleanup methods to automatically delete older backups.
Step 5. Confirm the backup settings and click Start Backup to create a disk image in Windows 11.
In addition, backup is a good habit to protect data, but it's time-consuming to install backup software and perform further operations if you have multiple computers or servers. Given this, you can choose to create portable version via AOMEI Backupper Technician or Technician Plus edition.
If you want to clone disk to larger disk or replace HDD with SSD quickly, try Disk Clone feature in AOMEI Backupper Standard. Follow the steps below to clone hard drive in Windows 11 for free.
Note: The free version only supports cloning data disks. To clone a disk with Windows installed, please upgrade to higher editions.
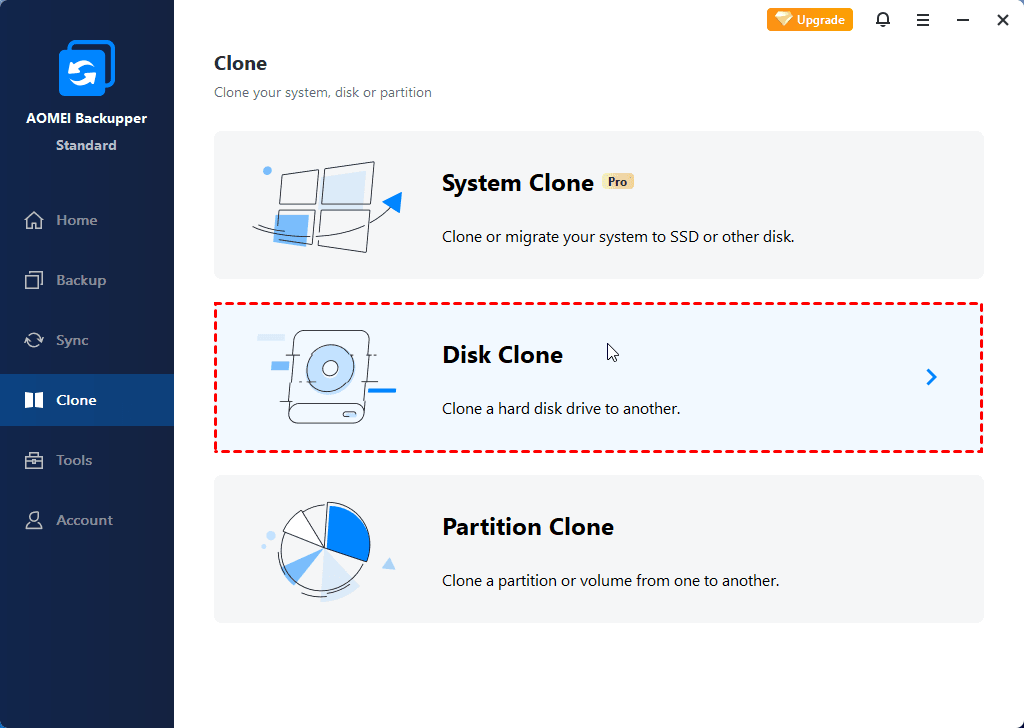
Step 1. Open the AOMEI Backupper Standard, click Clone > Disk Clone.
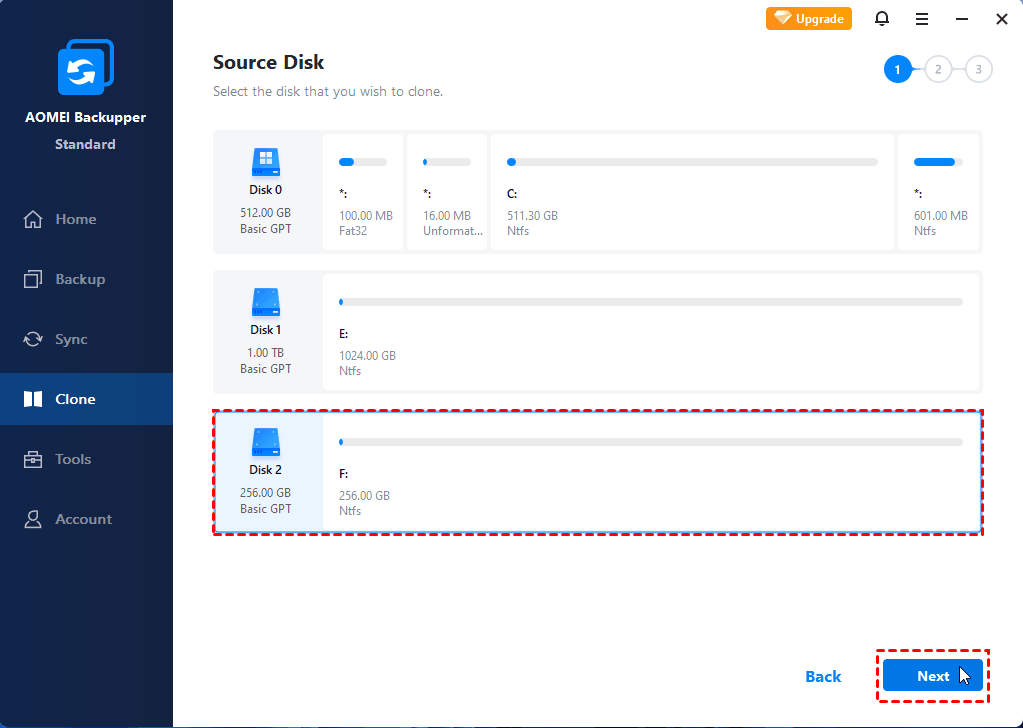
Step 2. Choose the disk you want to clone as the source disk. Then, click Next.
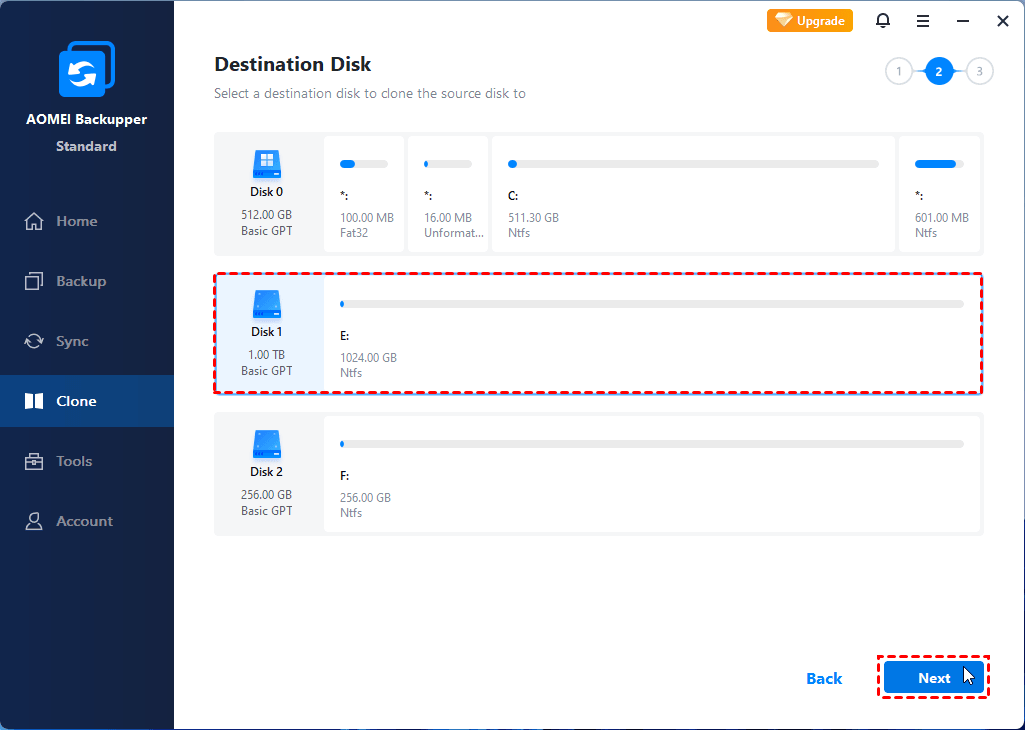
Step 3. Choose the destination disk to store the disk image. Then, click Next.
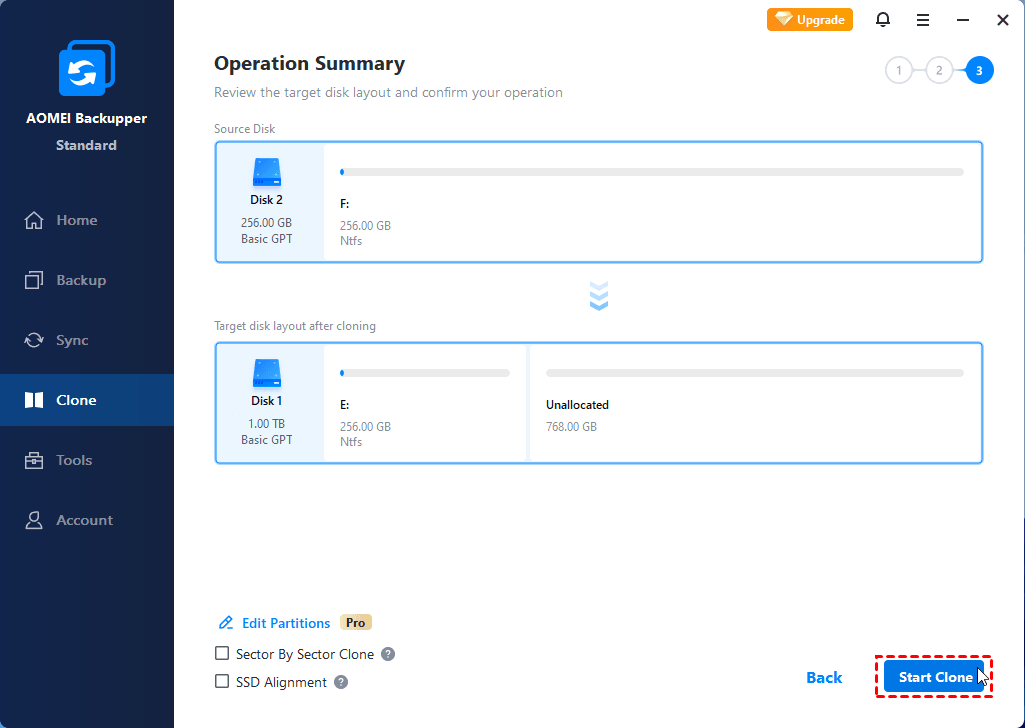
Step 4. Confirm your operations and click Start Clone. If it is an SSD disk, click SSD Alignment to accelerate the reading and writing speed of it.
Other useful cloning options:
👉 Sector By Sector Clone: Clone all sectors, whether they are used or not, so you won't miss any hidden partitions.
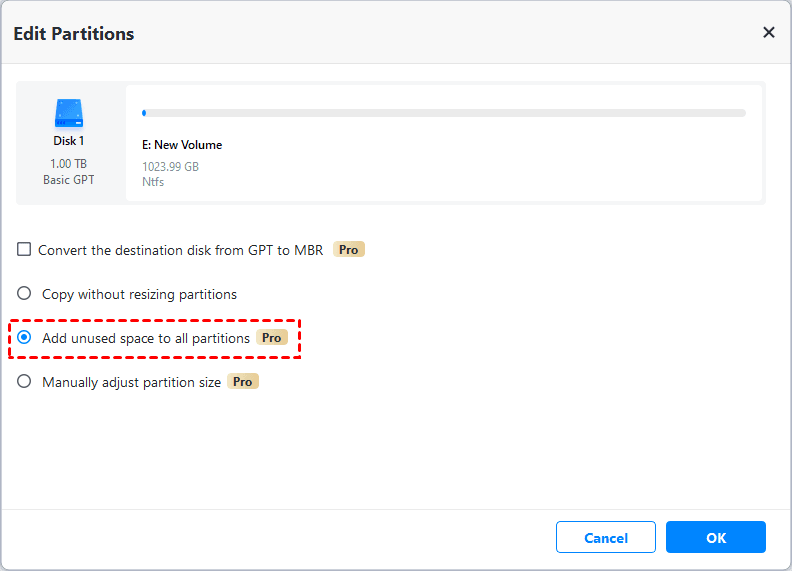
👉 Edit Partitions: Change the partition size or convert disk type of the destination disk. Thus, you can avoid unallocated space after cloning and boot failure due to disk type. (Some options are available in paid versions.)
Disk imaging creates a compressed file of the entire disk, requiring restoration for use, and is ideal for long-term data preservation. Disk cloning, on the other hand, directly copies data to a new disk, making it ready for immediate use, which is perfect for quick upgrades. Each method has its strengths, so choose the one that best suits your needs:
| Feature | Disk Imaging | Disk Cloning |
|---|---|---|
| Operating Principle | Creates a compressed image file of the entire disk, requiring restoration for use. | Directly copies data to a new disk, ready for immediate use. |
| Data Integrity | Preserves current data and can include future changes with scheduled backups. | Copies only existing data; destination disk is fully overwritten. |
| Size | Typically smaller due to compression and selective backups. | Exact size of the original disk with no compression. |
| Usage Time | Requires more time due to imaging and storage needs. | Faster as it directly transfers data without extra storage. |
From the above, you can see the biggest advantages of disk imaging are data integrity and image size. While for disk cloning, the biggest advantage is its portability and less time usage. You can select one of them to start the process with the all-in-one complete software - AOMEI Backupper.
#1. Does Windows 11 have disk imaging software?
Yes, Windows 11 includes the Backup and Restore tool, which can create disk images.
#2. Does Windows 11 have built-in disk cloning software?
No, Windows 11 lacks native disk cloning software, but third-party tools like AOMEI Backupper can handle this task, like migrating the hard drive to another disk or migrating the HDD to SSD.
#3. Can I save Windows 11 disk image to a USB-C SSD?
Yes, as long as Windows 11 recognizes the USB-C SSD. If your removable SSD is not detected, use the following steps to troubleshoot it:
Try a different USB-C port on your computer.
Try a different USB-C cable — some cables only support charging or may be faulty.
Update drivers for Universal Serial Bus controllers using Device Manager.
Disk imaging or cloning is essential for resolving computer issues and ensuring smooth operation. This article introduces the best free disk imaging and cloning software for Windows 11, AOMEI Backupper Standard.
Depending on your needs—whether long-term data protection or a quick system upgrade—you can choose the appropriate method and get started with this all-in-one software. Don’t hesitate to download this software to explore all the wonderful features!