Are you finding ways to access iPhone photos from PC? Get solutions in this full guide and Method 1 might be most useful!

iPhone camera captures lots of beautiful photos for photographers. Then you may want to transfer pictures to your PC to keep it safe, clear your iPhone's storage, or share content with others. The job is not difficult, and now we will discuss 7 ways on how to make it efficiently.
As one of the most excellent iPhone data transfer software, Aomei FoneBackup can help you easily move photos from iPhone to your Windows computer and vice versa.


Click the download button to get AOMEI FoneBackup, and we will give you detailed instructions on how to transfer photos from iPhone to computer with USB.
Connect your device to the computer with a USB cable > Open AOMEI FoneBackup and choose Phone Transfer > Click iPhone to PC and tap Get Started.
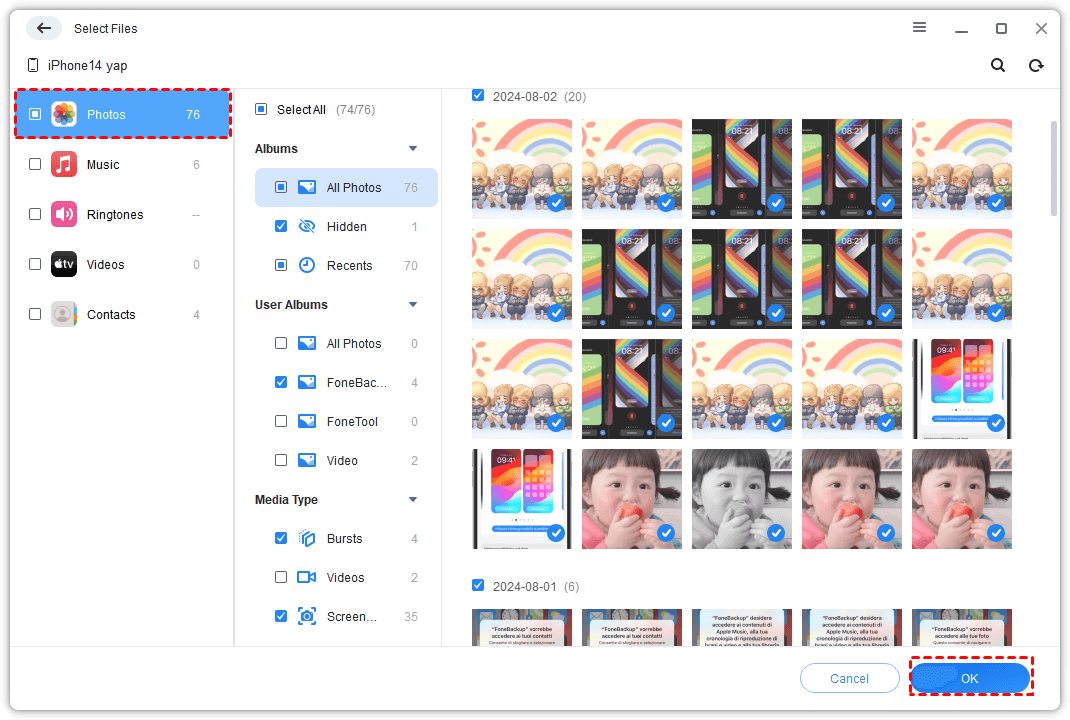
Check the icon to preview and select the photos or videos you’d like to transfer to the computer > Click OK to continue.

Select a storage path and check other settings from Transfer Settings> Tap Start Transfer to begin the task.
You can also go to Phone Transfer and choose PC to iPhone to import pictures on computer to your iPhone.
Windows File Explorer allows you to easily access iPhone photos and videos on the PC via a USB cable.
This way can only recognize the iPhone media files stored in your DCIM folder, while Method 1 can access all your iPhone photos/videos saved different folders.
Step 1. Connect your iPhone to the PC using a USB cable.
Step 2. Once the iPhone is recognized, Explorer should auto-launch. Or you can manually access it by tapping the Start Menu or finding it in the Taskbar.
Step 3. Navigate to This PC and you will find your iPhone listed as a Portable Device. Click on your iPhone to access its contents.
Step 4. Within the Portable Device, locate and enter the Internal Storage folder. Find where your photos are stored and choose the files you want to transfer.
iTunes is an official tool that allows you to move photos.
Step 1. Download the latest version of iTunes on your PC and launch iTunes. Connect your iPhone to your PC using a USB cable.
Step 2. If prompted, unlock your iPhone and click Trust This Computer if needed > Click the device icon.
Step 3. Choose file sharing, in the list on the left, select the app on your device that you want to transfer a file from.
Step 4. Select the pictures you want to transfer in the list on the right > Click Save to > Select where you want to save the file, then tap Save To to save photos in the location you specified on your computer.
Except for wired connections, you can also rely on iCloud to get your photos of iPhone. It is noted that iCloud only offers 5 GB of storage space for free users to sync their data.
Step 1. Enable the iCloud Photos option on your iPhone by going to Settings > Photos > iCloud Photos.
Step 2. Go to iCloud.com on your PC, and sign in with the same Apple ID, then click the Photos icon to download photos to your PC.
If you need an efficient way to download all iCloud photos to PC, Aomei FoneBackup’s iCloud manager feature can also help you a lot. Its fast download speed and stable transfer process can help you download 1000 + iCloud photos to the PC in 15 minutes (My iCloud > Manage iCloud).
OneDrive is another wireless service that can help you move photos/videos from iPhone to PC quickly. It provides users with up to 10GB of free storage to store files.
Step 1. Download OneDrive on both your iPhone and Windows computer.
Step 2. Launch the OneDrive app on your iPhone and tap the blue plus icon.
Step 3. Tap Upload and then Photos or Videos. If it asks for permission to access more photos, grant them.
Step 4. Choose the data you need to upload and select Done in the top right to begin the task.
Step 5. Open the app on your computer, and choose the files to download.
Google Drive provides users with even more free storage space, offering a generous 15 GB of storage. For people who need a wireless way to transfer lots of images, it will be more suitable.
Step 1. Download Google Drive on your iPhone, then open the app and sign in.
Step 2. Choose the + icon > Tap Upload > Click Photos > Select the photos you want to upload to Google Drive.
Step 3. Then go to the Google Drive website on your Windows PC to download the files.
Dropbox is a free cloud drive that provides users with up to 16GB of free storage. Because of its high compatibility, it is widely used by users to export photos to PC from iPhone.
Step 1. On your iPhone, download Dropbox in the App Store. Install and open it.
Step 2. Tap Settings > Camera Upload.
Step 3. Switch on Background Uploading to make sure that you don’t need to open Dropbox every time to store photos and videos.
Step 4. When the uploading process is completed, you can launch Dropbox or go to Dropbox.com on your Windows PC to download the iPhone photos.
You can use the iCloud service to finish the process. Just turn on iCloud Photos on your iPhone and Mac to keep your photos and videos up to date across all your Apple devices.
Usually, there are several reasons why you can't import photos from iPhone to Windows PC: your PC might not recognize the HEIC files on iPhone, the USB cable you're using might not be able to transfer files, or the USB port on your computer might not be working.
If you have turned on iCloud Photos, you might need to download the original, full-resolution versions of your photos to your iPhone before you import them to your PC.
In the above content, we have shown 7 effective ways to let you know how to transfer photos from iPhone to PC, rest assured to learn and operate, all methods have been verified.
To get the easiest way to finish the transfer process, you can use the professional iPhone data transfer software - AOMEI FoneBackup. Its fast transfer speed and safe transfer process will help you efficiently make it. Don't miss out on this best option!