Everything about Directory Services Restore Mode on Windows 7
What is Directory Services Restore Mode on Windows 7? How to use it? Follow this guide to get a clear answer and get a freeware to backup your Windows PC for protection.
By Jonna Updated on July 21, 2023
What is Directory Services Restore Mode?
Directory Services Restore Mode (DSRM) is a unique boot mode that provides administrators with the ability to repair or recover Active Directory (AD) databases and associated components. This specialized mode is designed for scenarios where regular AD operations are not feasible or when significant issues have been encountered.

It is important to note the distinction between Directory Services Restore Mode (DSRM) and Safe Mode. While DSRM is specifically designed for recovering Active Directory databases, Safe Mode is a diagnostic mode that attempts to start the system with minimal drivers and services. Active Directory will still attempt to start in Safe Mode, and if it fails, you may not be able to log on to the system.
In the following, we will show you how to start Directory Services Restore Mode on Windows 7.
How to Boot into Directory Services Restore Mode on Windows 7
There are two methods available for booting into Directory Services Restore Mode on Windows 7. Let's explore each method.
Way 1. Boot to DSRM with F8 Key
If you have physical access to a domain controller, accessing the Directory Services Restore Mode is relatively straightforward. Follow these steps to open Windows 7 Directory Services Restore Mode:
Step 1. Start or reboot your Windows 7 computer.
Step 2. Before the computer starts booting into Windows, press the F8 key repeatedly.
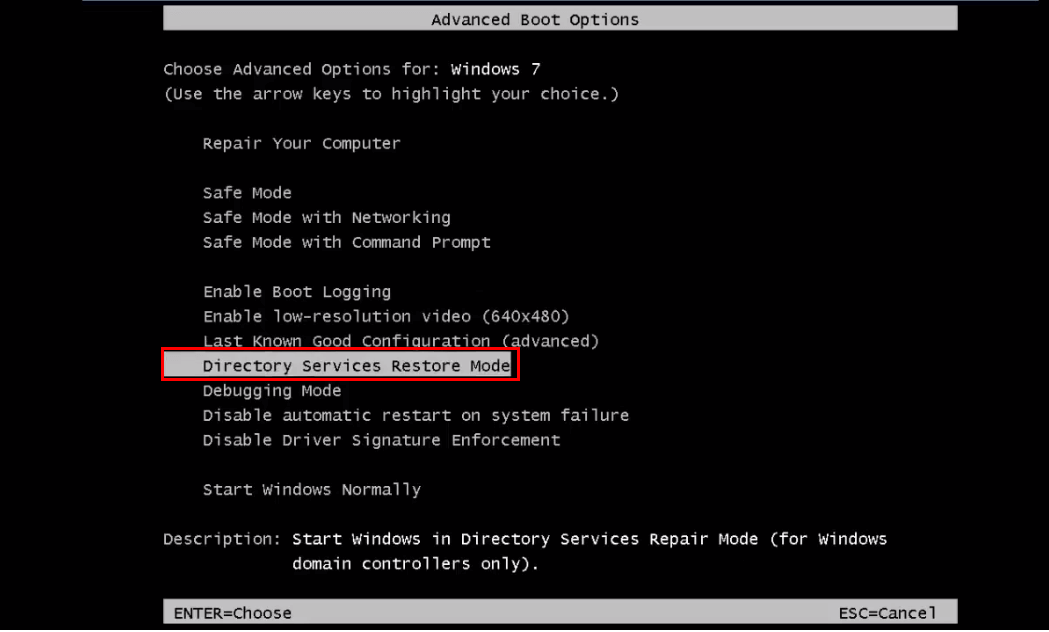
Step 3. The system will display the Advanced Boot Options menu.
Step 4. Use the arrow down and up keys to select Directory Services Restore Mode from the menu. Then, press Enter.
Way 2. Boot to DSRM using msconfig.exe
If the F8 key does not activate the Advanced Boot Options menu, an alternative method to boot into DSRM mode is by using msconfig. Here's how to use Directory Services Restore Mode with the msconfig.exe utility:
Step 1. Press the Windows key + R to open the Run dialog box, and type msconfig.exe to press Enter.
Step 2. When the System Configuration window appears, navigate to the Boot tab.
Step 3. Under the Boot options section, check the box next to Safe boot and select Directory Services Repair Mode.
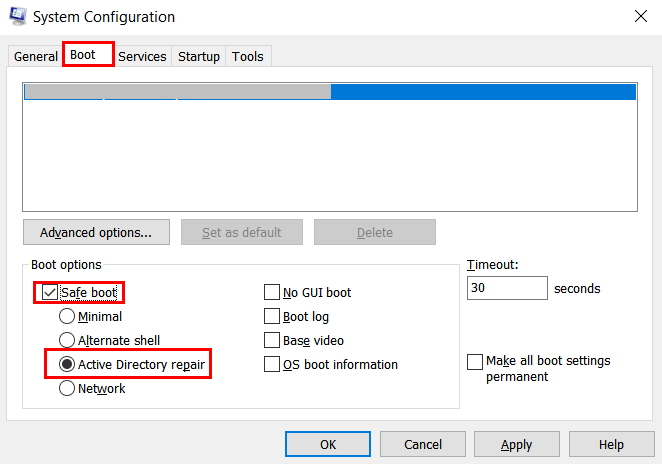
Step 4. Click OK to apply the changes.
Step 5. Then, restart your computer, and Windows will now boot into DSRM automatically.
How to Reset the Directory Services Restore Mode Password
If you have forgotten your Directory Services Restore Mode (DSRM) administrator password, you can change or reset it using the following steps:
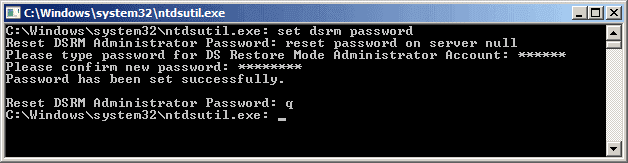
Step 1. Open Command Prompt and make it run as administrator. Then, Type ntdsutil.exe and press Enter.
Step 2. Type set dsrm password and press Enter.
Step 3. At the DSRM command prompt, you have two options:
- To reset the password for the server you're currently working on, type reset password on server null and press Enter. Then, you would be prompted to input your new password. Note that no characters will appear on the screen as you type the password.
- To reset the password for another server, type reset password on server servername (replace "server name"with the DNS name of the specific server) and press Enter. Enter the new password when prompted.
Step 4. At the DSRM command prompt, type q and press Enter to exit the DSRM environment.
Step 5. You will now be back at the Ntdsutil command prompt. Here, type q again to press Enter to exit the Ntdsutil utility and return to the regular command prompt.
Recommended: How to Backup Your Computer for Disaster Recovery
During the process of booting into DSRM mode on Windows 7 or resetting the DSRM password, it is important to exercise caution and follow the correct procedures. Incorrect usage or modifications in DSRM can have significant consequences for the Active Directory infrastructure and potentially lead to data loss on your computer.
To ensure the safety of your operating system and critical PC data, it is highly recommended to use professional Windows backup software like AOMEI Backupper Standard. This software offers a range of valuable features and options for backup and restore purposes:
🧊 System/Disk/Partition/File Backup: You can perform backups at various options, including system backup for creating full image backups of PC to ensure system functionality after recovery.
🧊 Schedule Backup: You are able to schedule backup in Windows 7 at specific frequencies, including daily, weekly, monthly, event triggers, and USB plug in.
🧊 Full/Incremental Backup: It utilizes incremental backup as the default method, which only backs up changed files to save time and disk space, and full backup is also available.
🧊 Bootable Media Creation: It enables you to create bootable USB or CD/DVD media, to help you boot computer from the created media in case of system failure.
Now please download AOMEI Backupper Standard, and follow the detailed steps below to create Windows 7 system image. If you are a server user, please turn to AOMEI Backupper Server.
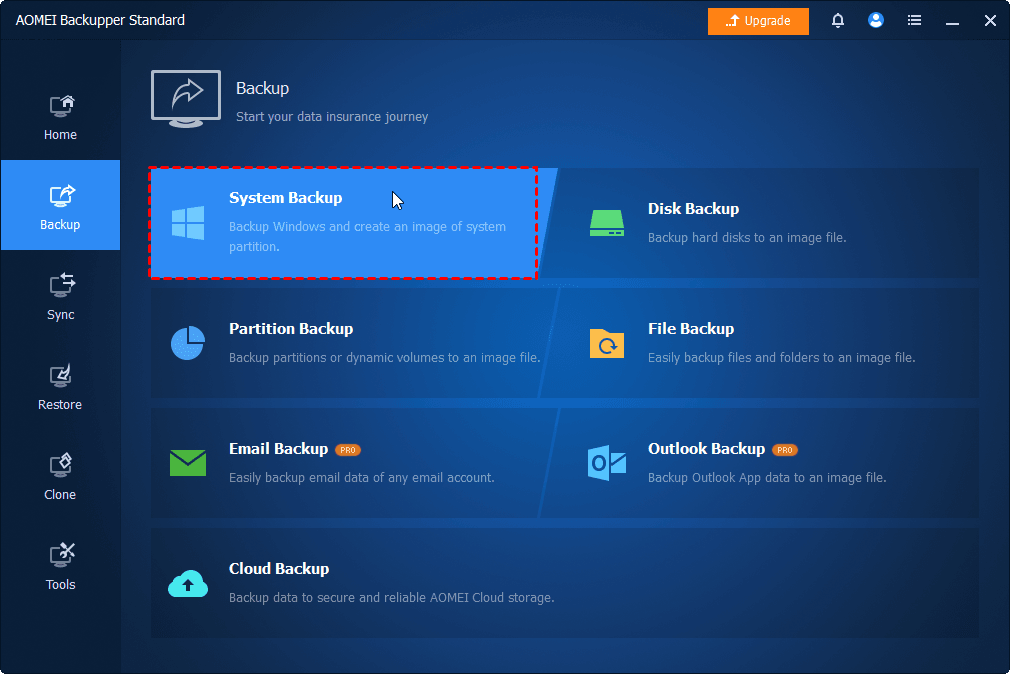
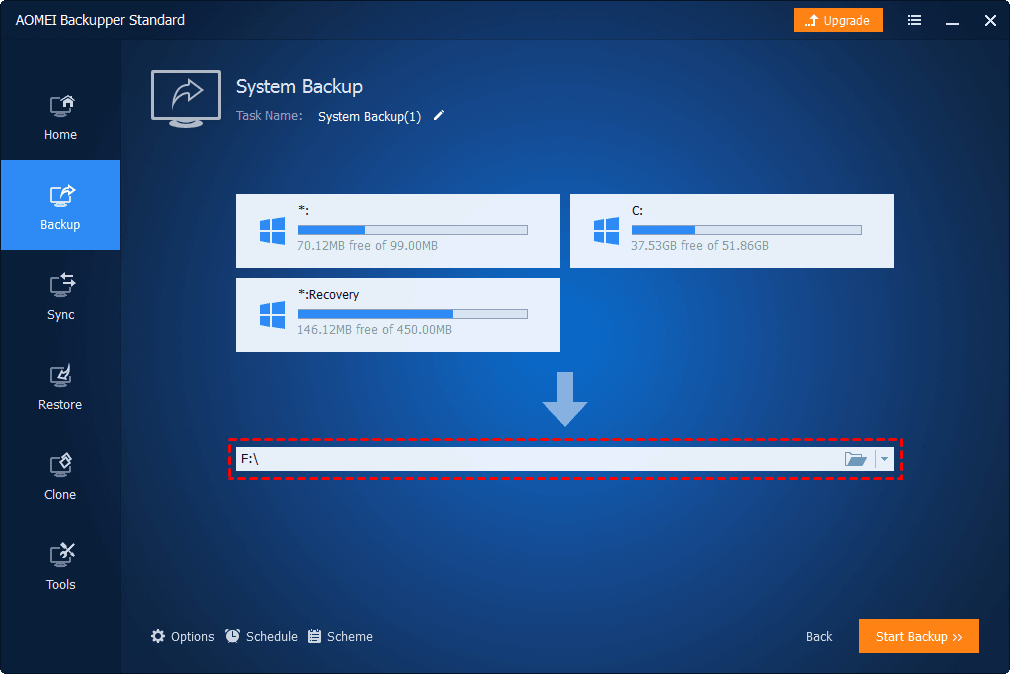
Step 1. After installing AOMEI Backupper Standard, launch it, head to Backup then select System Backup.
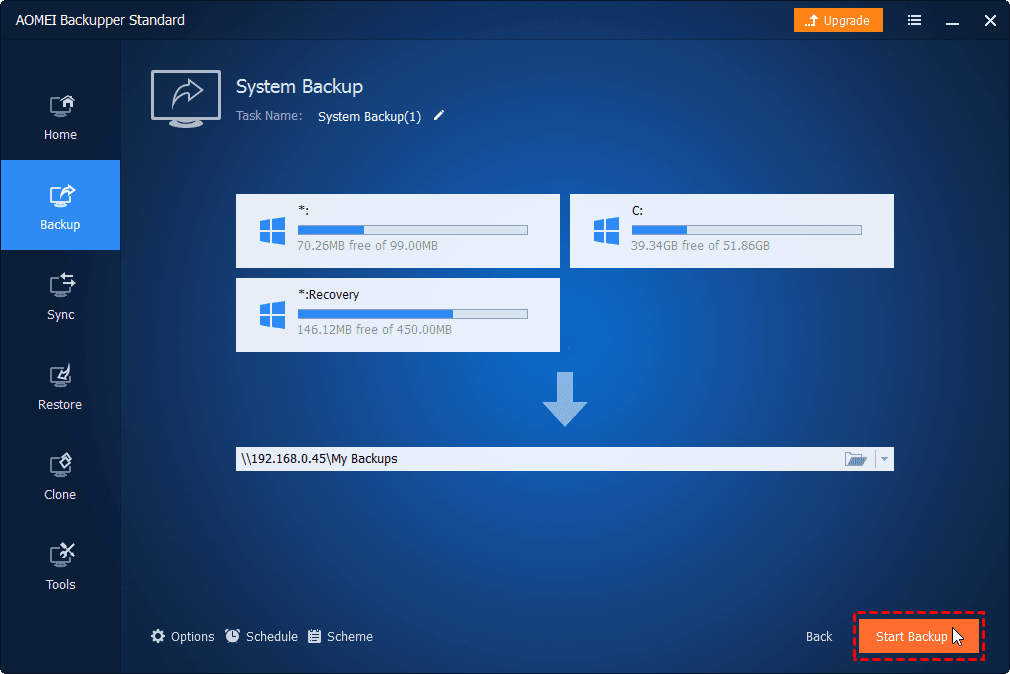
Step 2. Choose a destination path where you want to save the Windows 7 system image file. This can be a local drive, external USB drive, NAS, network location, or cloud drive.
Step 3. Click the Start Backup button to begin creating the system image for Windows 7.
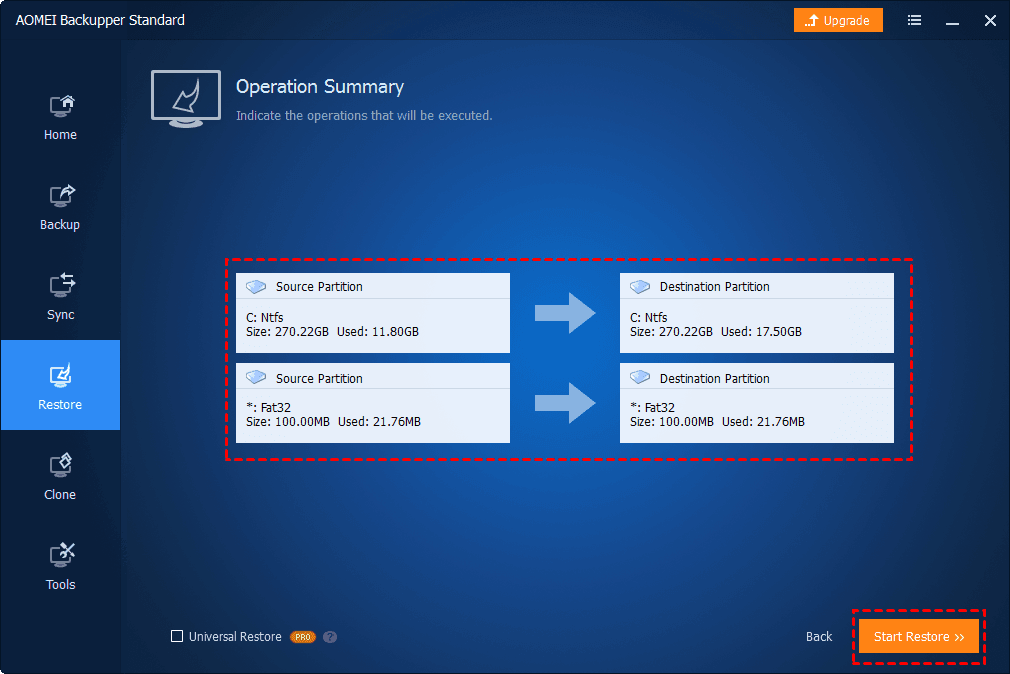
To restore your system or individual files from the backup image, you can easily navigate to Restore > Select Task > choose Windows 7 system image backup > select a restoration path to initiate the system restore process. Remarkably, it even enables you to restore system to dissimilar hardware if you need to use the system image on a different computer (Pro version).
In the End
By now, you have gained a complete understanding of what Directory Services Restore Mode on Windows 7 is and how to initiate it or reset password when needed.
Besides, there is a freeware AOMEI Backupper Standard that can help you backup your Windows computer to multiple destination paths for protection. Its advanced edition has more features like deleting old backup images to release disk space. Just get it and explore more functions.