Upgrade Windows 7 32 bit to 64 bit without Losing Data
You will learn how to upgrade Windows 7 32 bit to 64 bit without losing data with the help of free backup software and installation media.
By Ivy Updated on October 20, 2022
Can you upgrade Windows 7 32 bit to 64 bit?
It's no surprise that many users want to upgrade Windows 7 32 bit to 64 bit. The benefits of using a 64-bit operating system are most apparent in performance when you have a large amount of random access memory (RAM) installed on your computer, typically 4 GB of RAM, up to 16 TB. However, the maximum RAM limit for Windows 7 32-bit is 4GB. Here is an example from Microsoft.
“I'm running windows 7 32 bit but I want to upgrade to 64 bit. And I want to keep all my data and software safe. Can I upgrade Windows 7 32 bit to 64 bit without losing data? Will this cost me anything or is my product key still valid for windows 7 64 bit?”
However, in all version or edition of Windows (XP/Vista/7/8/10, Home/Pro/Ultimate/Enterprise), there is no “Upgrade” option that can directly upgrade to 64 bit. The only way to upgrade Windows 7 32 bit to 64 bit is to clean install a 64 bit operating system. As you may know, the clean install process will delete all the installed programs and personal data etc, leaving only a fresh version of Windows. That's what users don't want to see.
To avoid data loss during the process, it's suggested to backup files to external hard drive in advance. Then, if your computer is compatible with 64-bit operating system, you can feel free to upgrade Windows 7 32 bit to 64 bit without losing data. The entire process is below.
Step 1: Check the current hardware’s compatibility
Before you upgrade Windows 7 32 bit to 64 bit, you need to check the hardware compatibility of your computer first. It can help you to know if you are able to upgrade.
Check system type of your computer
To make sure you can successfully clean install Windows 7 64 bit, the first thing is to check the system type of your computer. If the system type is x64-based PC, you can upgrade Windows 7 32 bit to Windows 7 64 bit. If the system is x84-based PC, you cannot upgrade your Windows.
To check system type:
1. Open the Start menu.
2. Search for System Information and press Enter.
3. Look for System Type. If the system type is x64-based PC, you can upgrade Windows 7 32 bit to Windows 7 64 bit. If the system is x84-based PC, you cannot upgrade your Windows.
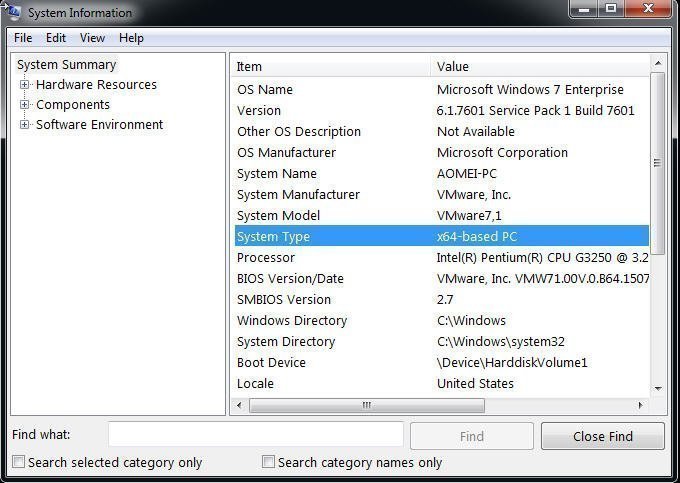
Note: The system stype can also be displayed as follow. You just need to check if your computer supports 64 bit processor. If it is, you can perform Windows 7 32 bit upgrade to 64 bit.
• 64-bit operating system, x64-based processor
• 32-bit operating system, x64-based processor
• 32-bit operating system, x86-based processor
Verify CPU and driver compatibility
To further determine that you can upgrade Windows 7 32 bit to 64 bit without format, you need to verify CPU compatibility and driver compatibility.
To check CPU compatibility, you can download Coreinfo from Microsoft, then see if the processor include Physical Address Extension (PAE), No-eXecute (NX), Streaming SIMD Extensions 2 (SSE2), CMPXCHG16b (CX16). To make it, type coreinfo in the command line window and press Enter, then hit Ctrl + F and type PAE, NX, SSE2, CX16 one by one.
To check driver (eg: graphics and sound cards) compatibility, you can go to device manufacturer support website and see if you can find 64-bit versions of the drivers.
After checking these compatibility, you may already know if your computer is compatible with Windows 7 64-bit system. If it is, please continue to see below and learn how to upgrade Windows 7 32 bit to 64 bit without losing data.
Step 2: Backup files to external hard drive to prevent data loss
Backing up files to an external hard drive is a necessary way to ensure you can perform Windows 7 32 bit upgrade to 64 bit without losing data. Well now you just need the best free backup software - AOMEI Backupper Standard for help.
By using it, you can enable its File Backup feature to backup any files or folders you want to an image file and save it to any storage device, such as, external hard drive, USB flash drive, network drive, cloud drive, NAS, etc. Then, you can restore files from backup after upgrading Windows 7 32 bit to Windows 7 64 bit.
In addition, you can still use it to continuously protect data in Windows 7 64 bit. It supports daily/weekly/monthly schedule backup to help you backup files regularly. But as time goes by, you will have more and more backups, eventually resulting in backup disk full issue. In this case, you can use its incremental backup feature to backup only changed files, which greatly improves this issue.
Then, please download this software to a have a try! Also, an external hard drive with enough disk space is required to store backup images.
1. launch AOMEI Backupper Standard, then you will see its deep-blue interface. Click Backup > File Backup subsequently.
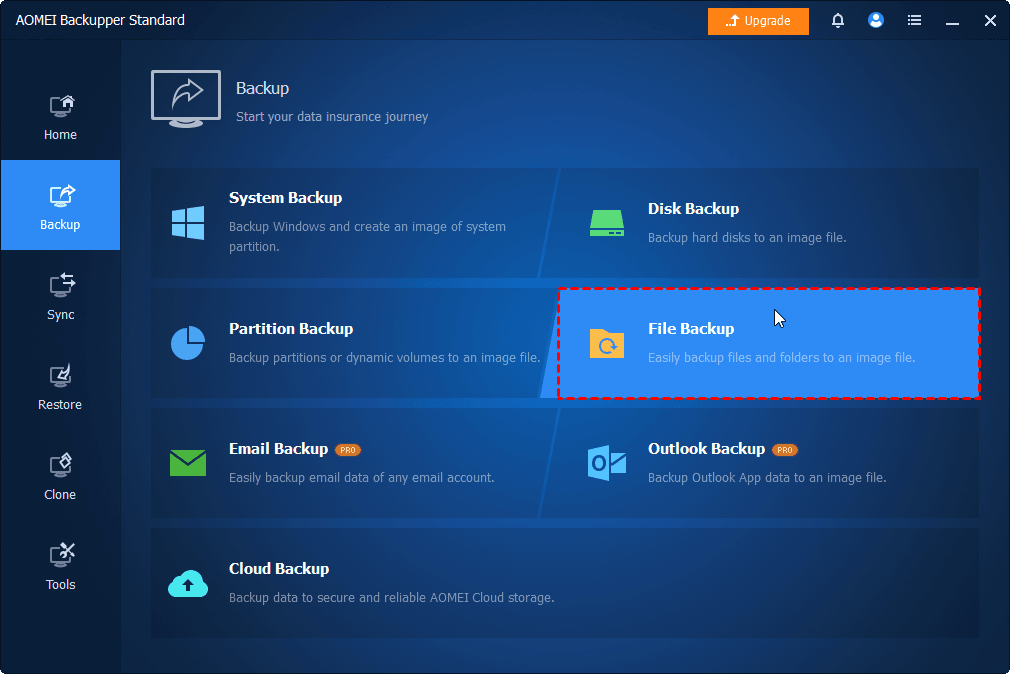
2. Click Add Folder or Add Files to select what you want to backup. Then, click the folder-shaped button to select the external hard drive as backup destination.

3. Confirm this operation and click Start Backup to backup files to external hard drive in Windows 7.
Step 3: Upgrade Windows 7 32 bit to 64 bit free (Clean Install)
To ensure Windows 7 32 bit can be upgraded to 64 bit, you need an installation media for assistance. Therefore, please create an installation media for Windows first, and then clean install 64-bit operating system with given steps.
Create Windows 7 installation media
To create Windows 7 installation media, you need to prepare the following three things first.
① Windows 7 64 bit ISO image files. If you do not have it, you can download it from Microsoft Store.
② A flash drive with 5GB at least. It's used to save your ISO image files. And you can take it everywhere, because it's very portable.
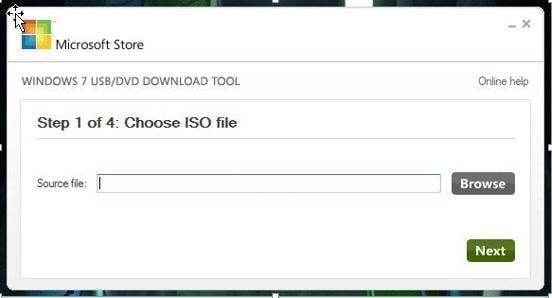
③ Windows 7 USB DVD download tool. This tool is used to burn ISO image file to your USB flash drive.
Then, let's get started to burn ISO image files to USB flash drive with this tool.
1. Open Windows 7 USB DVD download tool, click Browse to find your ISO image files, then click Next.
2. Choose USB as your media type.
3. Insert USB flash drive and select it, then click Begin copying. And this tool will format your USB flash drive first, then create bootable USB device. Thus, you need to backup USB first if there is something important.
Upgrade Windows 7 32 bit to 64 bit step by step
1. Plug in your USB flash drive and set boot priority to this drive in BIOS, then restart your computer and press any key to boot from it.
2. Wait for Windows 7 installation files to load, then you will see the main interface. Set up the language and other preference, and click Install Now in the next window.
3. Accept the license terms and click Next.
4. Select Windows 7 installation type: Custom.
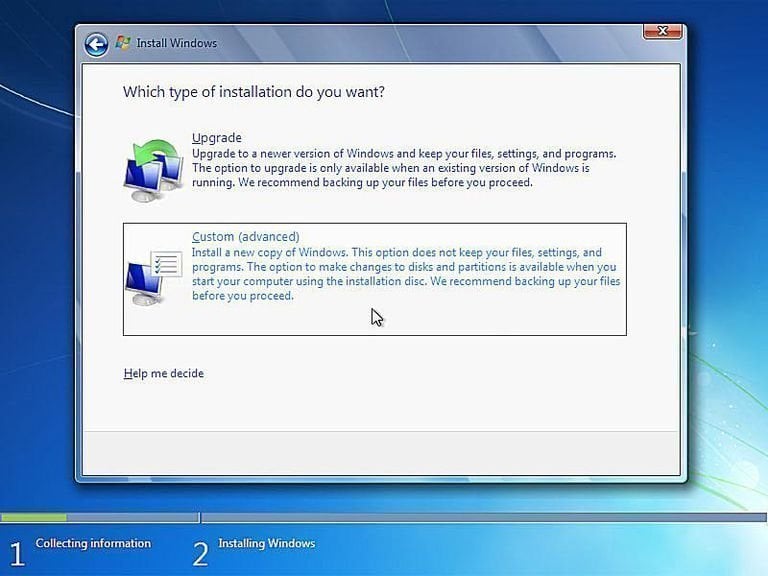
5. Click Drive Options and then Delete to delete system partition & other operating system related partition. After that, select the unallocated space and use it to install 64-bit Windows 7.
- ★Tips:
- If the system partition is big enough to install Windows 7 64 bit, you do not need to delete system partition and other operating system related partition. You can use the existing system partition to clean install your Windows.
- The previous Windows is stored on Windows.old folder on the current system partition, it gives you a chance to restore Windows from it and go back to previous status.
Step 4: Activate Windows 7 64 bit to reuse product key
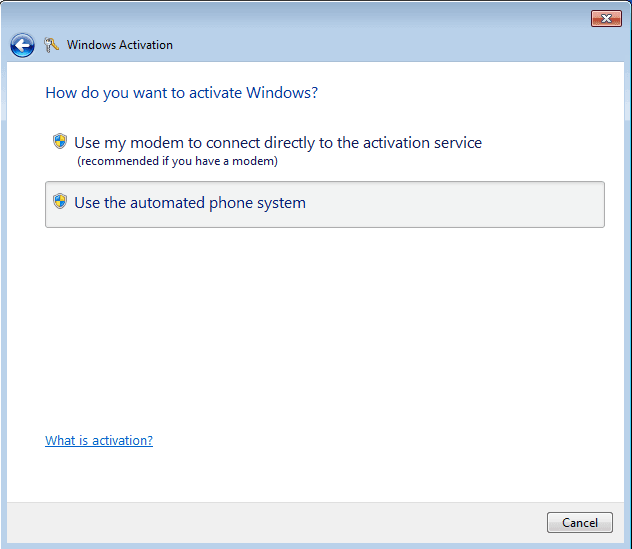
It's said, if the product key was already activated in Windows 7 32-bit, you need to activate the 64 bit versions of Windows 7 by phone. Below are the steps for it.
1. Type slui.exe in the search box and hit Enter.
2. Click Show me other ways to activate now in the Windows activation interface.
3. Click Use the automated phone system.
4. Select the nearest location and click Next.
5. Get the confirmation ID by the given phone number, and then enter the installation ID and confirmation ID. After that, click Next to start the activation process.
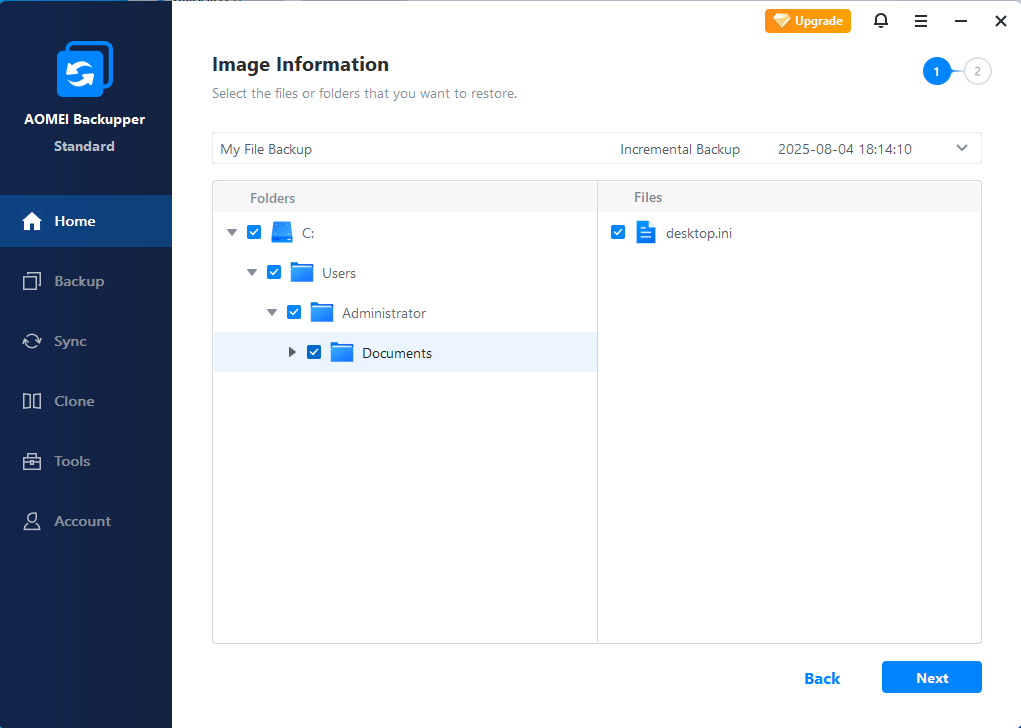
Step 5: Restore files from backup with AOMEI Backupper
Now, you may already upgrade Windows 7 32 bit to 64 bit successfully, then want to get your files or folders back. Launch the free backup software again, click Restore and Select Image Files to locate backup image, then follow the on-screen instructions to finish all the rest of steps.
For detailed steps, you can refers to: 3 Ways to Restore Files from Windows 10/8/7 Backup.
Does this work for upgrading 32 bit to 64 bit in Windows 10?
Except for upgrading Windows 7 32 bit to 64 bit without losing data, some users still want to upgrade Windows 10 32 bit to 64 bit. Then, does this work for Windows 10 upgrade? The answer is YES, no matter what the operating system you are currently using, you can only clean install a 64 bit version of Windows. The approximate steps are:
1. Check the system stype, drivers and RAM size (at least 2GB).
2. Backing up files with AOMEI Backupper Standard. This software applies to all the Windows system, including Windows 11/10/8/7/XP/Vista.
3. Download Media Creation Tool and create Windows 10 installation media with it.
4. Then, boot from the installation media and use Custom option to clean install Windows 10.
5. Activate the license key using phone if necessary. You can refers to official method provided by Microsoft.
6. Restore files you will use with AOMEI Backupper Standard.
You may find that the steps are almost the same, except for the way to create installation media. And you need to check the RAM size in Windows 10 as well (Right-click This PC and select Properties, then you can see RAM and its size.).
To create Windows 10 installation media, you can follow the steps below.
1. Connect a USB drive with at least 8GB of available space.
2. Go to Microsoft's Windows 10 download page and download the Media Creation Tool by clicking the Download tool now button.
3. Double-click the MediaCrationTool.exe file.
4. Read the license terms and click Accept.
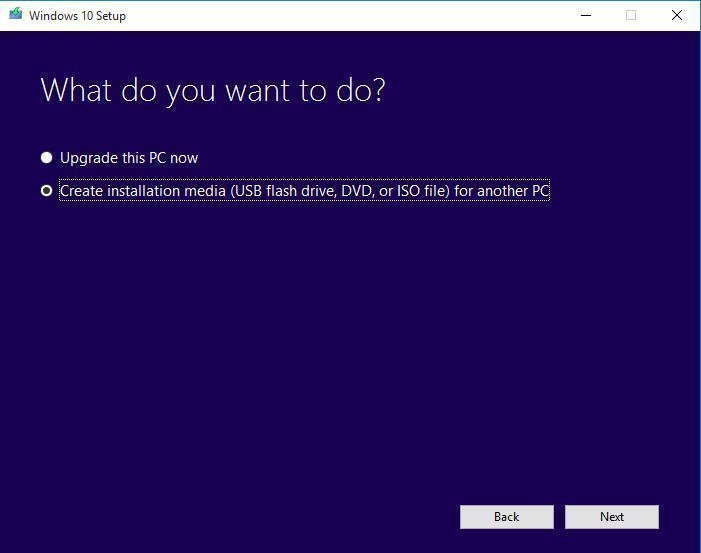
5. Tick Create installation media for another PC, then click Next.
6. Select language and other preference, then click Next.
7. Select the USB flash drive option, then click Next.
8. Select the connected USB drive, then click Next. Wait for the final result.
The way forward
Clean Install is the best way to upgrade Windows 7 32 bit to 64 bit. If you don't want to lose any data during the process, please backup files to an external hard drive with the best free backup software - AOMEI Backupper.
It can help you always keep the latest backup versions as well as provide multiple ways for backup disk space full issue due to accumulated backups. The best way is to delete old backup images with its Backup Scheme. To unlock it, please upgrade to AOMEI Backupper Professional.