How to Recover Data from Hard Drive that Won’t Boot?
Learn to recover data from hard drive that won’t boot with the corresponding ways in this post. Besides, there’re relevant hard disk data recovery tips for you.
By Penny / Updated on October 17, 2024
Can you recover files from a computer that won’t turn on?
One of my Windows 10 activated hard drives that cannot boot anymore. Although I’ve followed the CMD instructions to fix MBR and Scan OS, it still cannot boot. The drive itself is readable when I select the command prompt from the boot Diagnostics. Then I can see all of the directories, and my files still be present. The drive itself appears to be fine. How do I recover files from an unbootable computer? Thanks in advance for your help.
- A user from Microsoft
When it comes to problems about how to recover files from hard drive that won’t boot, there’re corresponding solutions for you.
If you accidentally deleted boot partition in Windows 7, 8, 10, or 11 PCs, you certainly cannot boot your PC. Not to mention accessing your desired files from this unbootable hard drive.
Please refer to the first case to get data from bootable drives without deletion performances.
Assuming there’s data loss, please read further to recover deleted files from hard drives.
Phase 1. Two ways to recover data from hard drive that won’t boot
It seems possible to recover data from hard drive that won’t boot. There’re two feasible fixes for you.
Fix 1. Make a bootable USB media via AOMEI Partition Assistant
If your Windows computer fails to boot, please create bootable media via a professional partition manager tool like AOMEI Partition Assistant Standard to fix this issue. Then you can change the boot order from your bootable USB flash drive to access your data.
- Notes:✎...
- Since the data saved on your USB flash drive will be formatted/erased, you’d better use a new USB drive if the budget allows. Or you can utilize AOMEI Backupper to make a free disk backup to protect your USB files.
- Prepare another working PC.
Step 1. Download and install the free AOMEI Partition Assistant demo version on another working PC. After connecting your USB stick to it, click Make bootable media > Next.
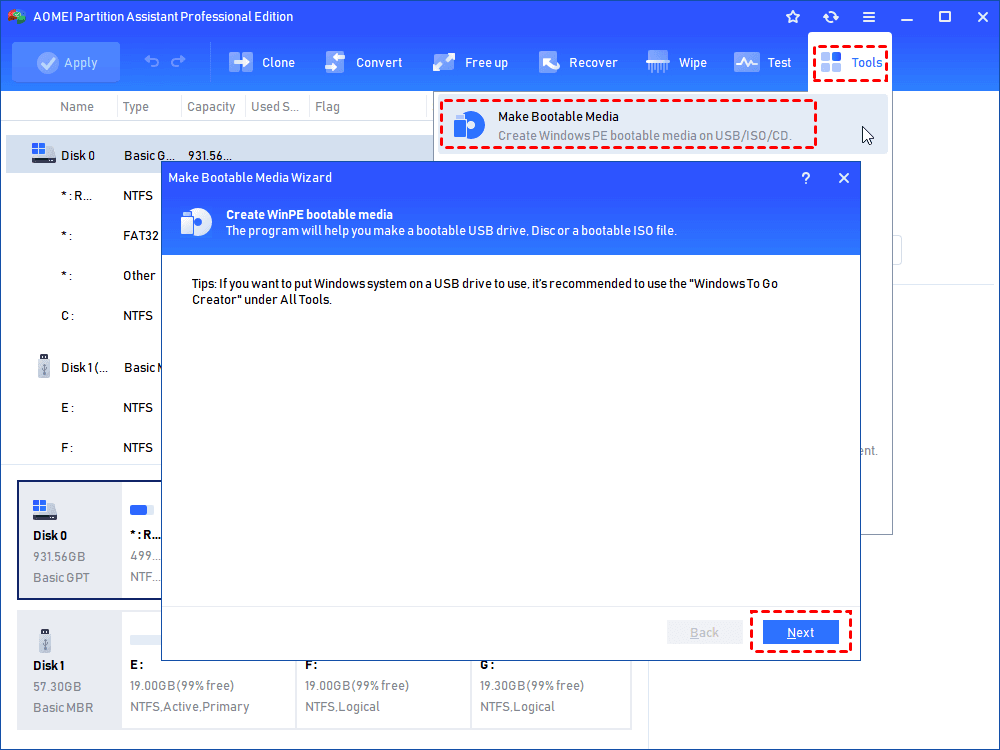
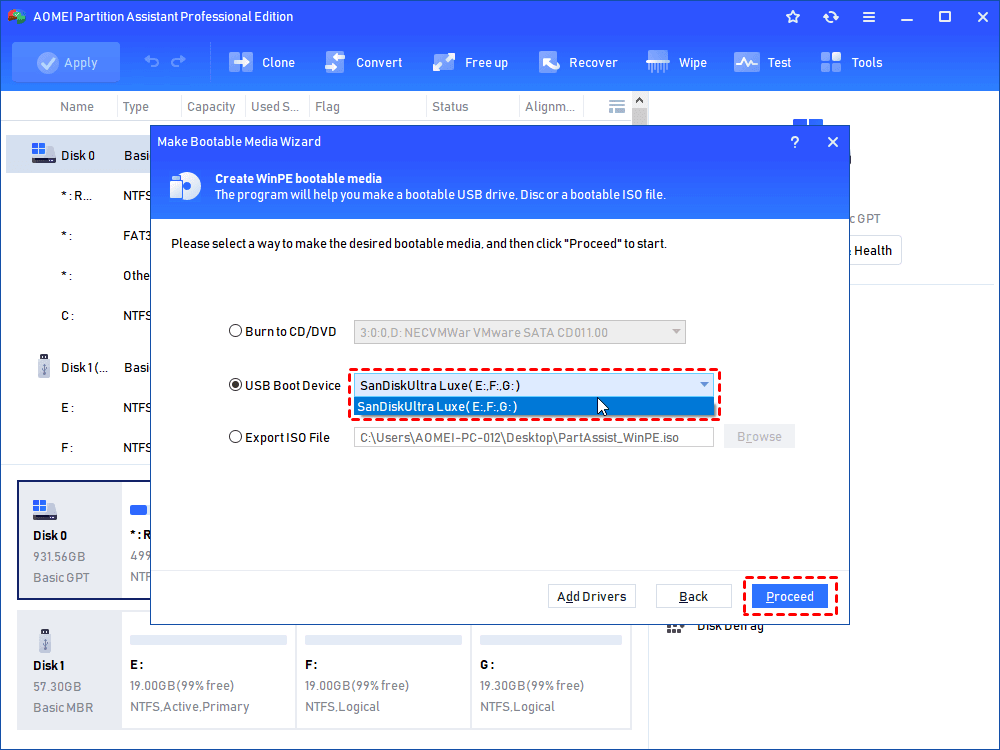
Step 2. Select “USB Boot Device” and click “Proceed” to begin the pending operation.
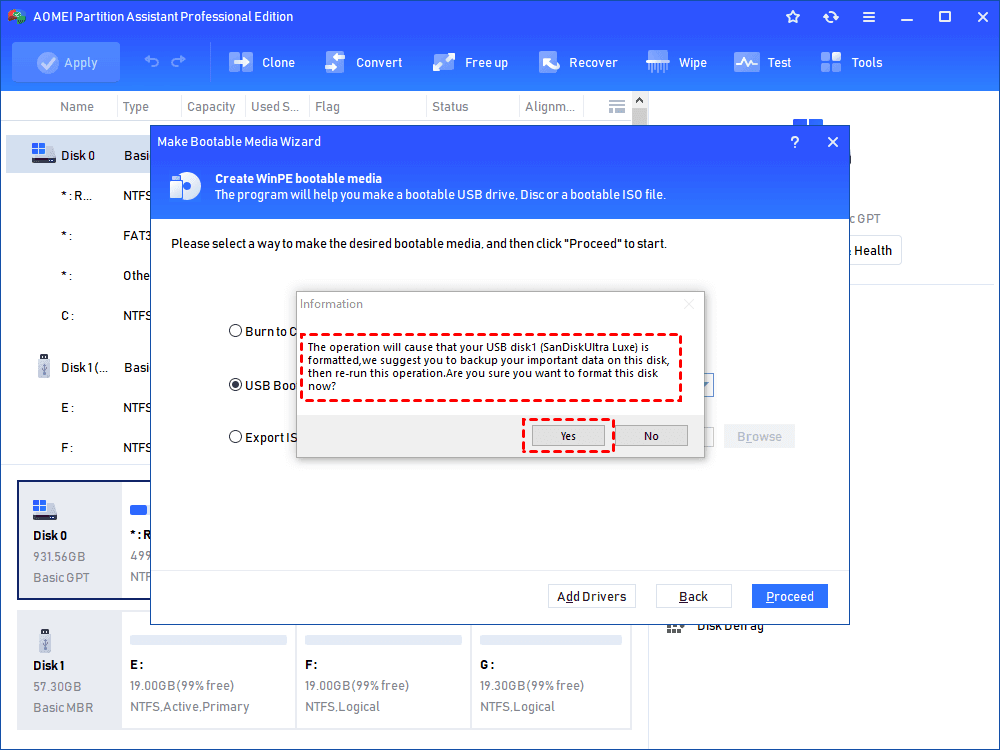
Step 3. Click the “Yes” button to begin the process.
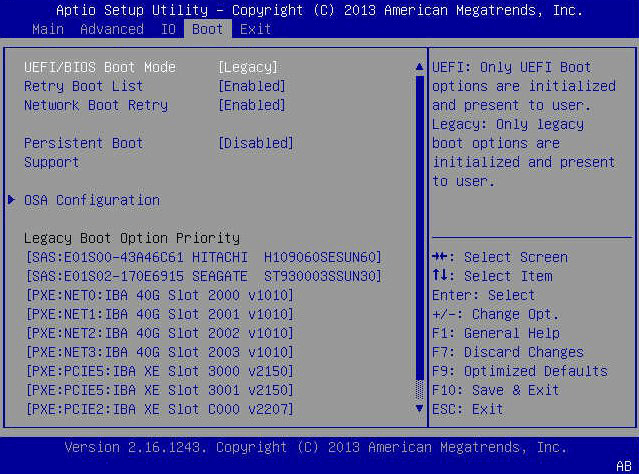
Step 4. After connecting your bootable USB media to your unbootable computer, go to its BIOS.
Step 5. In BIOS, locate the Boot menu and look for the Boot Sequence.
Step 6. Change the bootable order from your connected bootable USB media.
Step 7. Press F10 to confirm that your PC will boot from the bootable USB media.
After fixing it, try to get your needed data from your hard drive.
Fix 2. Manually get files off hard drives that won’t turn on
How to get data from laptop that won’t turn on? Another way is to get your desired data off hard drives manually. Let’s show how it works.
Step 1. Turn off your computer and remove the battery. Then unplug your desktop PC or laptop from the power outlet.
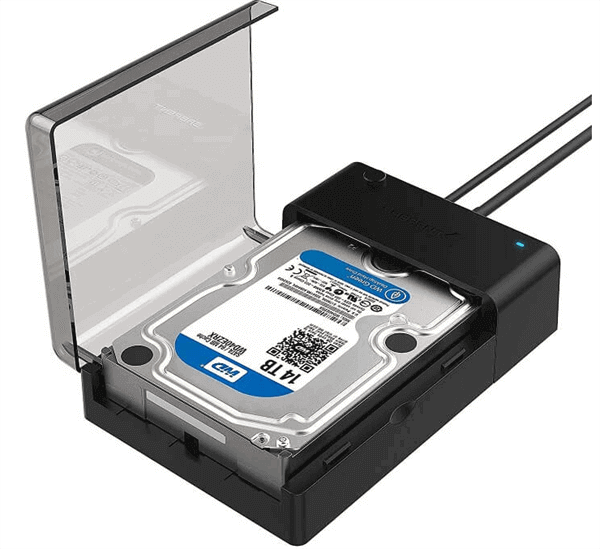
Step 2. After locating the hard drive that fails to boot, disconnect your hard drive cables. Then unscrew it, and pull it out of the case.
Step 3. Connect the hard drive to a working PC using an external hard drive enclosure.
Step 4. Reboot the new PC from its standard operating system on the main drive. After that, you can read and access the hard drive data.
Step 5. Please copy files from the non-booting hard drive to a new storage device.
Phase 2. Two ways to recover deleted files from hard drives
After data loss, you’ll need to recover deleted & missing files from bootable hard drives. And this part lists two directions for your reference.
1. Restore deleted & lost files from backups via File History
As the title implies, regular backups are essential to the restoration process. But without backups, please go to the next solution to seek help from leading data recovery software.
In this scenario, let’s perform how to restore files from backups via File History because this feature allows you to recover deleted, lost, or damaged original files after activating File History.
- Notes:✎...
- Free File History can back up files in Documents, Music, Pictures, Videos, Desktop folders, and offline OneDrive files saved on your PC.
- If you’ve turned on File History, Previous Versions is accessible to you, which can help you recover overwritten Word documents.
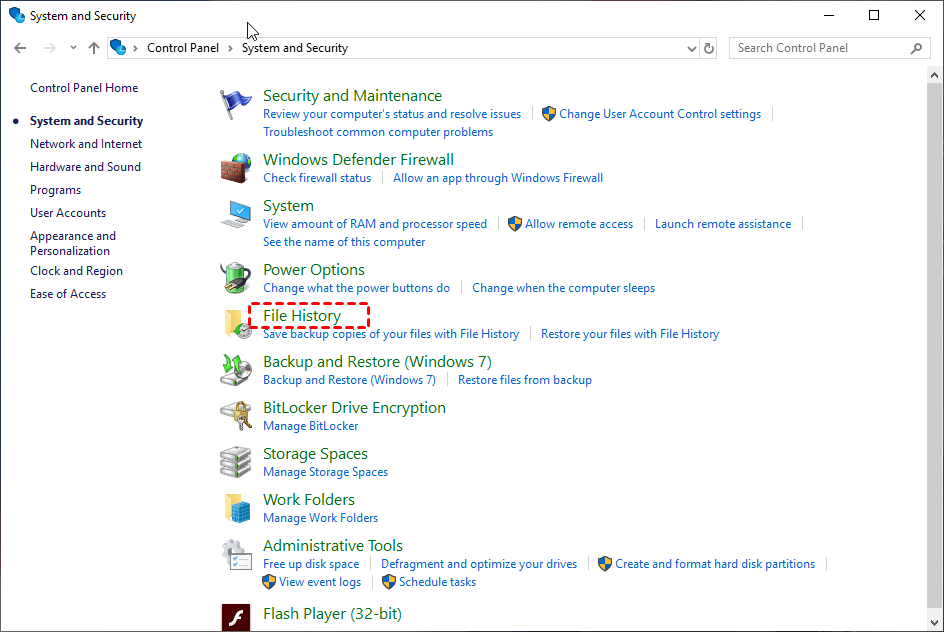
Step 1. Type “Control Panel” in the search bar to open it. Then go to System and Security.

Step 2. Under the File History tab, choose the “Restore your files from File History” option.
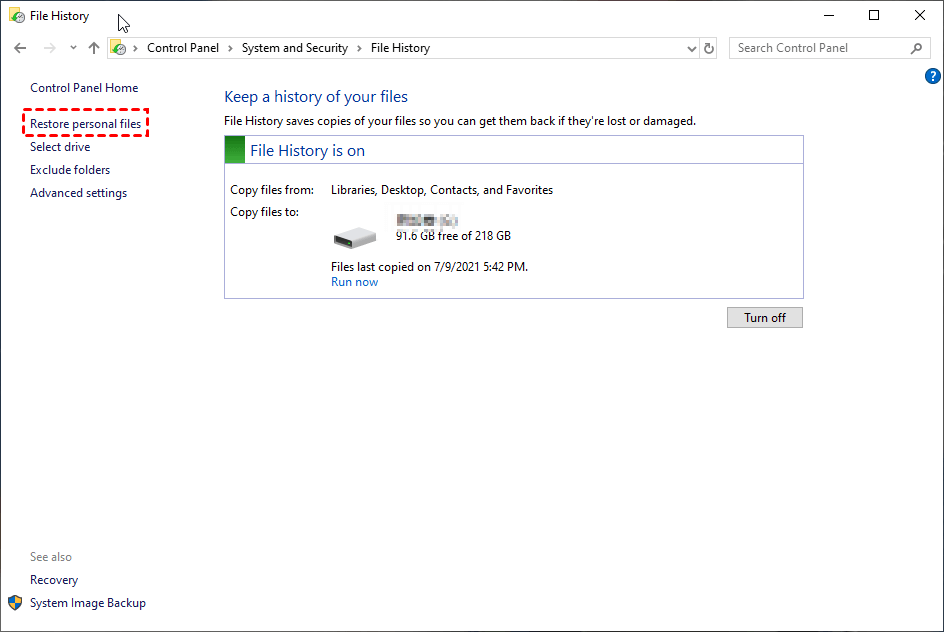
Step 3. Click the “Restore personal files” button.
Step 4. Click “Restore” to get your selected deleted files to their original saved paths.
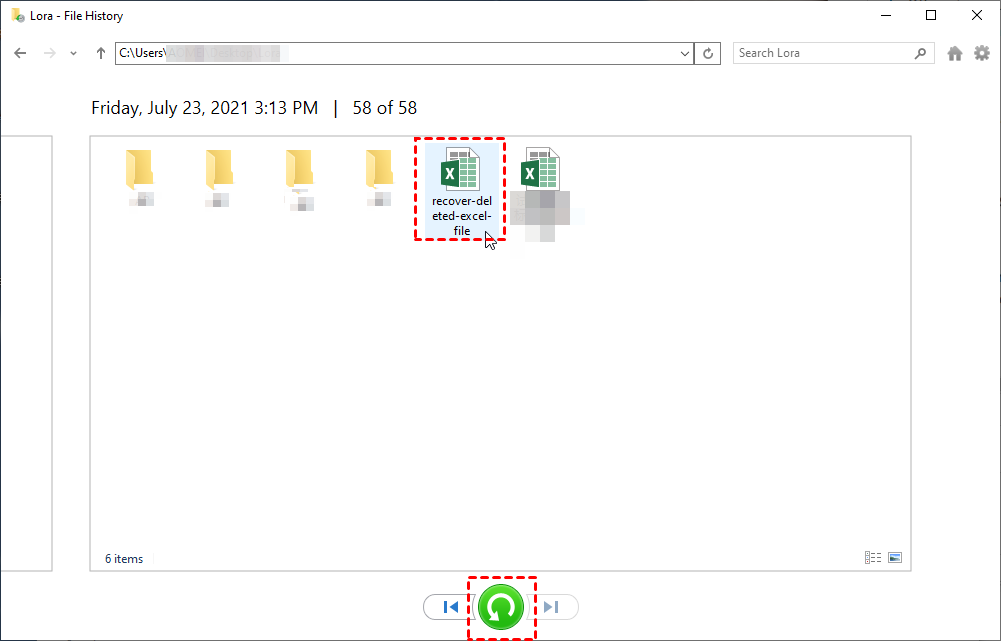
If you want to change a saved path, right-click “Restore” and select “Restore to” to designate a new saved location.
2. Recover deleted & missing files from hard drives via data recovery software
Without valuable backups, you’ll have no recourse but to utilize professional Windows data recovery software like MyRecover to recover deleted & missing files from internal or external hard drives.
- After deletion, please avoid newly written performances on your computer because newly added data can decrease the Windows data recovery rate.
- After recovery, please remember to save these retrieved files in a new saved path.
- To recover a large number of deleted & missing files from your hard drives, please consider upgrading MyRecover to the Professional or Technician edition.
- ★Highlights of MyRecover:
- Powerful features: Recover deleted & lost Word, Excel, PPT, folders, compressed files, photos, songs, videos, audio, websites, and other 200+ file types from HDD, USB, SSD, etc.
- Easy-to-find: Quick Scan and Deep Scan can find your deleted & missing files as many as possible. You can also quickly locate your desired files by Filename, Path, Date, Size, etc.
- Convenient: Get deleted files’ original Paths, Filenames, and Format after recovery.
- Excellent compatibility: Support NTFS, FAT32, exFAT, and ReFS file systems and be compatible with Windows 11, 10, 8, 7, or Windows Server PC.
The sooner you begin Windows data recovery via MyRecover, the better chances you’ll have.
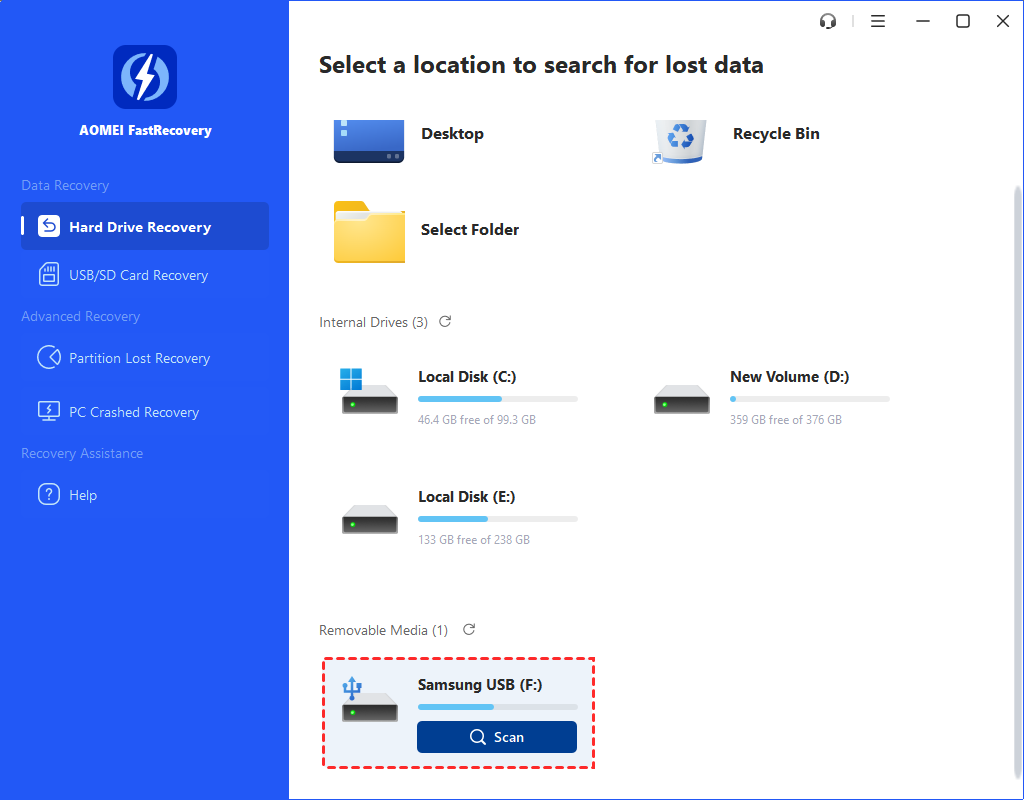
Step 1. After launching MyRecover on your Windows, hover the mouse over the hard drive that stores your desired files before data loss. Then click Scan.
Step 2. Filter your needed data according to Name, Date, Document Type, or Path.
- Name: Type the filenames of your desired files to narrow the search area.
- Date modified: Set the date (today, yesterday, last 7/30 days, and so on) according to your situation.
- Size: Filter the file size (<128KB, 128KB~1MB, 1MB~ 512MB, etc) based on your needs.
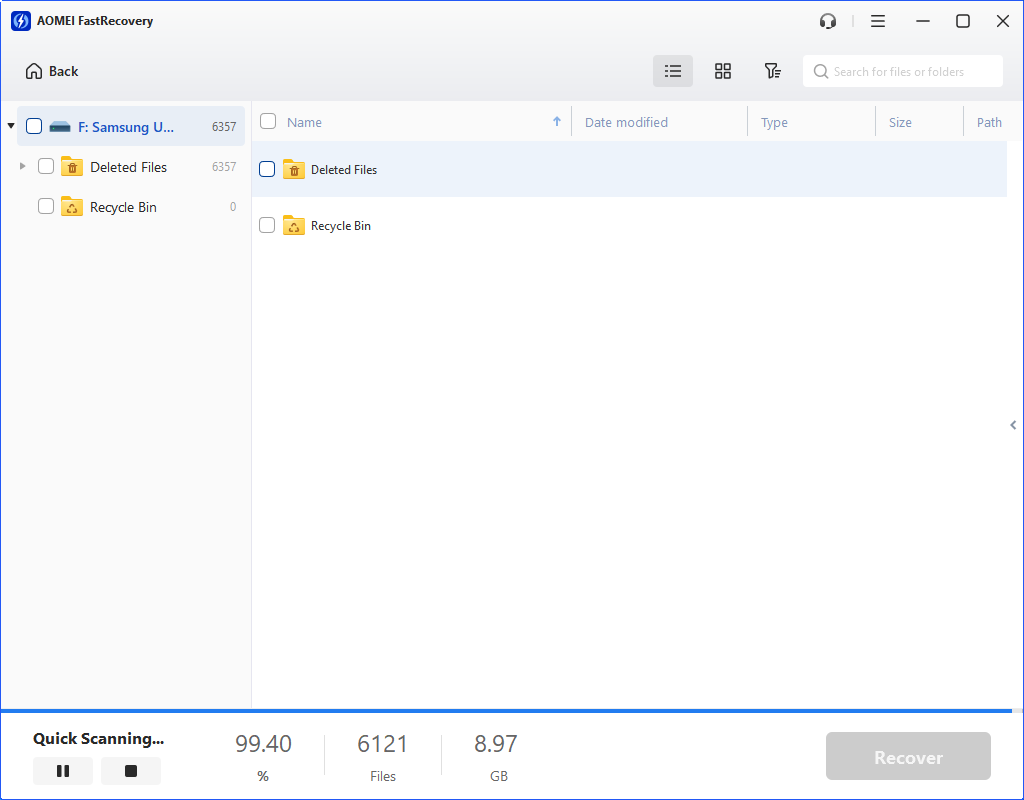
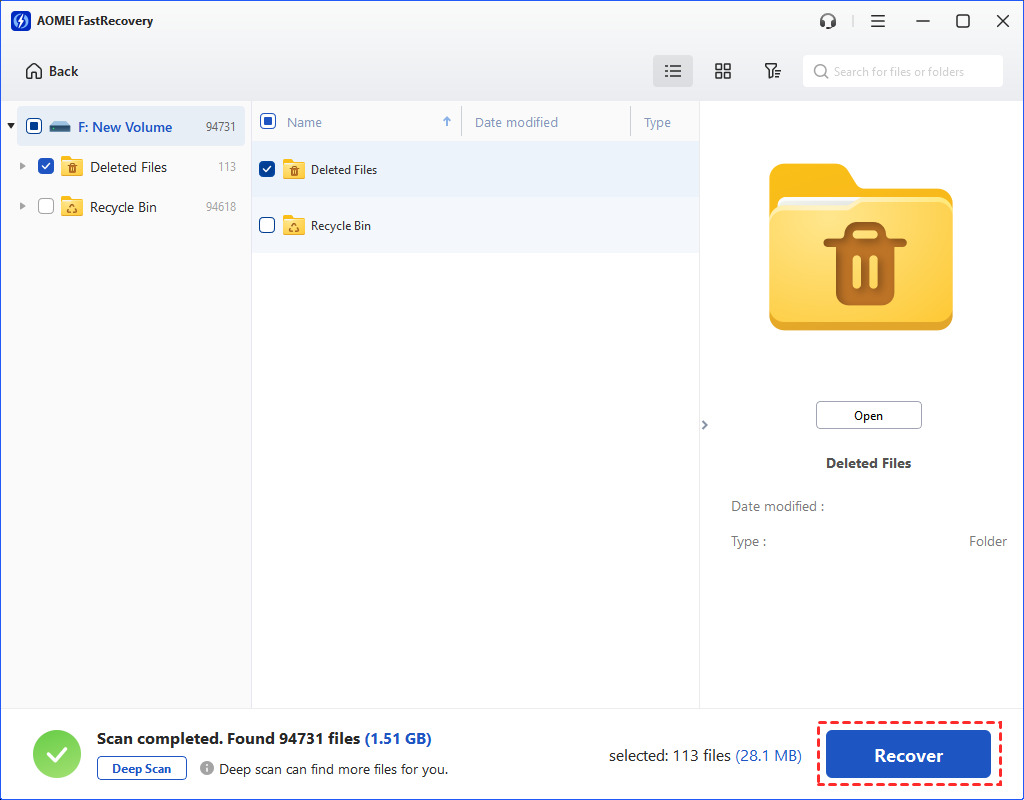
Step 3. Go to the Deleted Files/Recycle Bin/Other Missing Files folder and select the data you want. Then click “Recover x files” to begin the hard disk data recovery process.
Relevant Q&A about hard disk data recovery
How to recover data from hard drive that won’t boot? Please get efficient methods from the above content. In addition, there’re related tips about hard disk data recovery.