How to Easily Create Sony Windows 7 VAIO Recovery Disk and Restore It
You can learn what is Sony VAIO recovery disk and how to create Sony VAIO recovery disk as well as how to restore it. You can also know how to restore data when the recovery disk won’t work.
By Clytze Updated on November 29, 2022
What is Sony VAIO Recovery Disk?
Recovery disks are also known as restore disks, repair disks, boot disks, or rescue disks. Users can use it to repair, recover, rescue or boot the computers when needed. Recovery disks are especially important if your computer is inaccessible.
VAIO computers were originally manufactured by Sony Corporation. When you buy a Sony VAIO computer, you won't see a recovery DVD or CD. However, you will see a recovery partition, which you can use to create a recovery media.
Sony VAIO already provides software that can help you with this task. This software is VAIO Care or VAIO Recovery Wizard, depending on your computer model and Windows version. You can read on to learn how to create Sony VAIO Windows 7 Recovery Disk.
How to Create Sony Windows 7 VAIO Recovery Disk by VAIO Recovery Wizard
You can follow these instructions to learn how to create a recovery disks for a Sony VAIO in Windows 7 using the VAIO Recovery Wizard software.
Step 1. Get a CD-R or DVD-R/DVD+R with which you will use to create the recovery disk. Close all programs and disconnect every peripheral device attached to your PC.
Step 2. Start your computer and log on to Windows 7 OS, then select Start.
Step 3. Launch the Control Panel window and choose Performance and Maintenance if you have enabled the Category View.
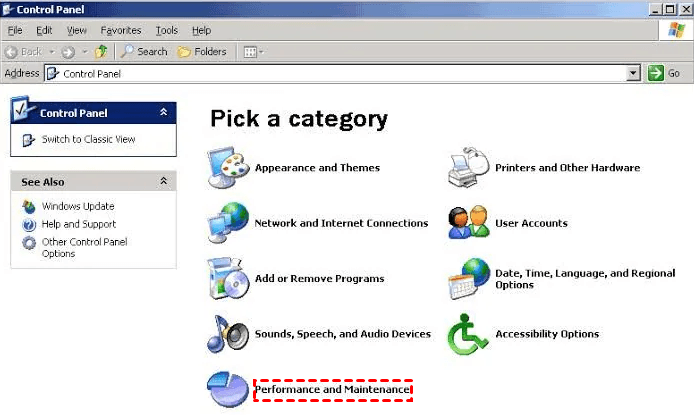
Step 4. Select the option VAIO Recovery Wizard. Once the software opens, choose Next.
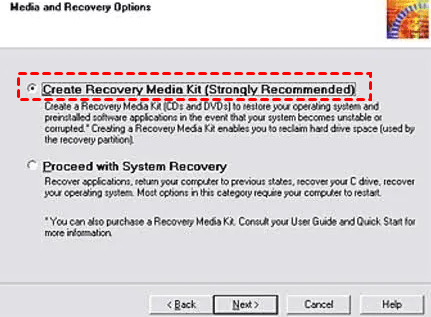
Step 5. Choose the first option in this new window, to proceed with creating the recovery media, then select Next.
Step 6. Choose either CDs or DVDs as your desired media to use. Now click Next.
Step 7. Insert the first blank disk you wish to use into the drive of your computer. Again, choose Next.
Step 8. Do the same for the rest of the DVDs/CDs, depending on how many are needed based on the notification of the VAIO software. Follow the on-line instructions to complete the process.
Step 9. Your PC will restart. Ensure all the disks are labeled and keep them safe!
How to Use Created Recovery Disk to Restore a Sony VAIO Computer
When you have finished creating Sony VAIO recovery disks, you can use them to restore your Windows 7 computer. The following are the specific operation steps.
Step 1. First, plug in the drive or insert the CD/DVD in the computer's drive using the VAIO User Guide to instruct you on what to do. Thus, insert the first recovery disc into the drive for DVD.
Step 2. Put off your computer and put it on again.
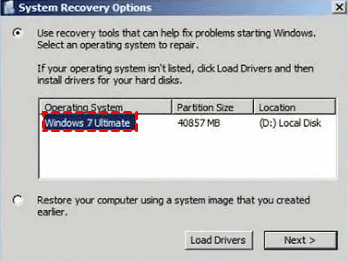
Step 3. Choose the Next option beneath the option to select a keyboard layout. These are found in the window labeled System Recovery Options.
Step 4. Click on Next after selecting an operating system to repair.
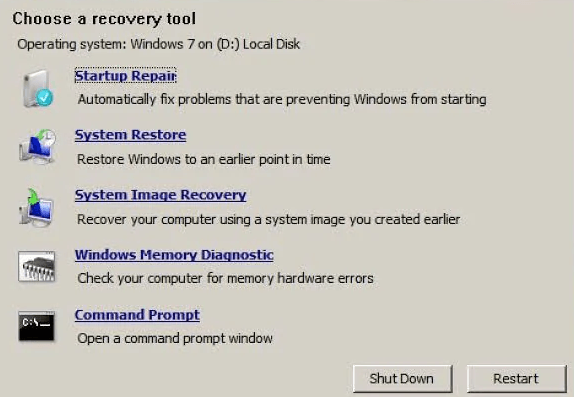
Step 5. Go to Choose a recovery tool, you will find a list of options to pick from. You can select one of them according to your needs.
How to Fix Sony VAIO Recovery Disk won’t Work
When you try to restore your Sony VAIO with this recovery disk, it just doesn't work. What should you do? Don't worry, you can choose a professional third-party software AOMEI Backupper Standard to create a bootable disk for free to solve the problem of not being able to boot your current computer.
You need a USB drive or CD/DVD to create a bootable media on a normal computer with AOMEI Backupper Standard. This bootable media will allow you to boot your system so you can access the files on it, since your current computer won't boot itself. You can start by following the tutorial below.
First and foremost, download AOMEI Backupper Standard and install it. If you are a Windows Server user, you can pick AOMEI Backupper Server.
Step 1. and open it. Click Tools > Create Bootable Media.

Tip:
If you encountered unexpected system failures, you could also click Tools > Recovery Environment. It allows you to boot into WinPE and perform backup/restore with AOMEI Backupper as well.
Step 2. Select Windows PE - Create bootable disc based on Windows PE.

Tip:
You can download a pre-build PE from AOMEI server by selecting Download WinPE creating environment from the internet, then Windows AIK/ ADK is no longer required.
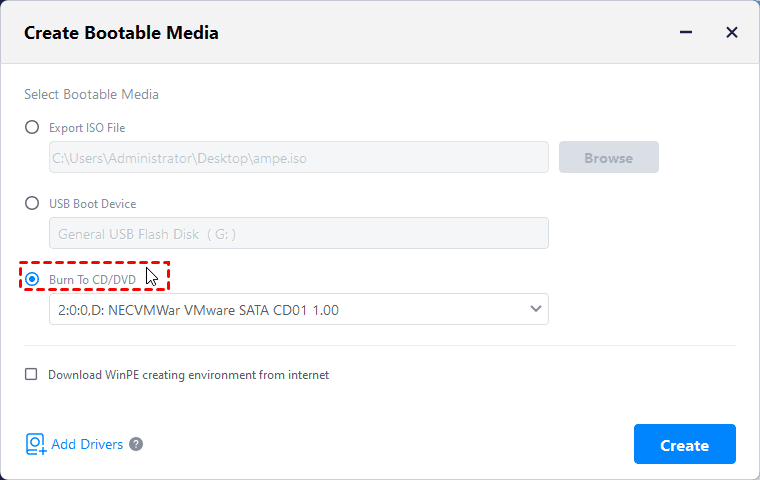
Step 3. Select the storage device or specify the location where you want to export the ISO file, and then click Next to start. Wait for the process to complete and click Finish.
Summary
This article explains what a Sony VAIO Windows 7 recovery disk is, how to make recovery disk for Sony VAIO in Windows 7 and how to fix a computer that won't start if the recovery disk doesn't work. You can fix this by creating a bootable disk with free third-party software. Then set this bootable disk as the first boot sequence in the BIOS to start the computer.
Apart from that, this freeware also provides various useful functions such as disk backup, disk restore and disk clone, etc. You can download this software to explore more.