How to Create ISO of USB Drive: 2 Easy Ways
This article describes two ways to teach creating an ISO of a USB drive, including using the Win32 Disk Imager utility as well as a professional media creator - AOMEI Backupper.
By Miya Updated on December 25, 2024
Can You Create an ISO from USB?
Yes, it is possible to create an ISO from a USB drive. Creating an ISO (Disk Image) from a USB drive involves capturing the contents of the USB drive in a single file format. While ISO files are typically associated with optical discs, the process can be adapted for USB drives.
One common approach is to use Win32 Disk Imager. Alternatively, user-friendly tools like AOMEI Backupper provide a GUI-based method for imaging USB drives. Always exercise caution to avoid data loss during these processes. Let's take a look at how to create ISO of USB drive next.
How to Create ISO of USB Drive with 2 Ways
As mentioned earlier, there are two ways to create ISO of USB drive. This section will tell you the exact steps to take, so please read it carefully!
1. Use Win32 Disk Imager
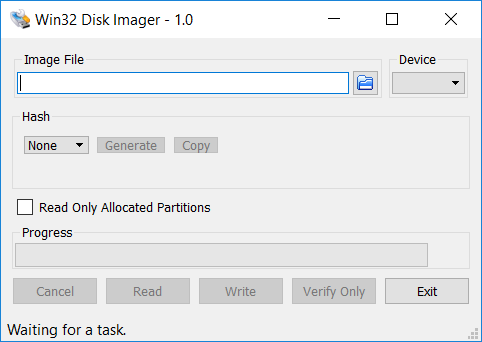
Win32 Disk Imager is a compact application that allows you to write a raw disk image to a removable device (USB drive, SD memory card, etc) or backup a removable device to a raw image file. Follow the steps below to create ISO image of USB drive using Win32 Disk Imager:
1. Plug the USB drive into your computer.
2. Open Win32 Disk Imager, choose the drive letter of your USB drive (here is I:\) under “Device”.
3. Then, click the blue folder icon under “Image File” to choose a location on your PC to save the backup image and name the image file.
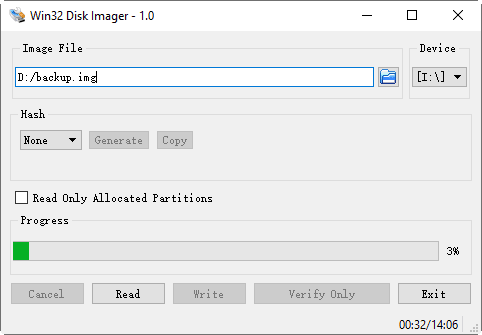
4. Click Read to begin creating ISO image.
2. Use Free Disk Image Creator - AOMEI Backupper (Recommend)
Now that you're familiar with the entire process of creating ISO of USB drive using Win32 Disk Imager, it's worth acknowledging that while Win32 Disk Imager is a reliable tool, its features are limited. For example, it does not support compressing disk images.
Fortunately, there's a comprehensive alternative for creating ISO of bootable USB drive on a Windows PC, and it goes by the name of AOMEI Backupper – a user-friendly and proven-effective software solution.

-
Multiple devices: It enables you to create a disk image of an HDD, SSD, USB flash drive, SD card, and memory card, etc.
-
Schedule backup: You can backup your storage device automatically at a specific time or upon an event.
-
Versatile options: It offers backup compression to greatly reduce the size of the image file and incremental backup to backup only changes.
Download AOMEI Backupper and learn how to image a USB drive with it as follows:
1. Connect your USB flash drive to your computer and make sure it is detected.
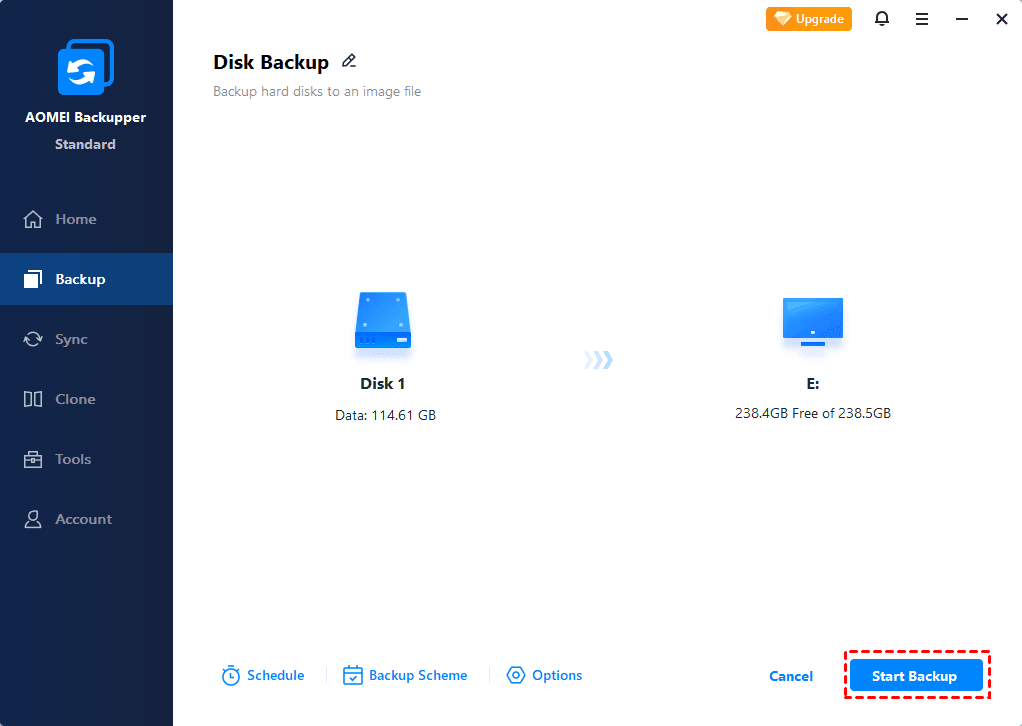
2. Install and run AOMEI Backupper. Click Backup, and select Disk Backup.

3. Select the USB drive as the backup source by clicking Add Disk. Then, select a folder on your computer to save the backup image by clicking the destination box.

4. Click Start Backup to start imaging your USB drive.
Bonus: How to Burn ISO to USB Drive with 2 Ways
For users who want to burn ISO to a USB drive, please refer to the following two methods.
Important: Remember to back up any important data on the USB drive before burning ISO, as the process will erase all data on the drive.
1. Use Rufus
Creating a bootable USB drive from an ISO file involves using specialized software. One common tool for this task is Rufus. Here's a general guide on how to use Rufus:
Step 1. Visit the Rufus official website (https://rufus.ie/) and download the latest version of the Rufus tool. Plug your USB drive into your computer.
Step 2. Select your USB drive from the Device dropdown menu.
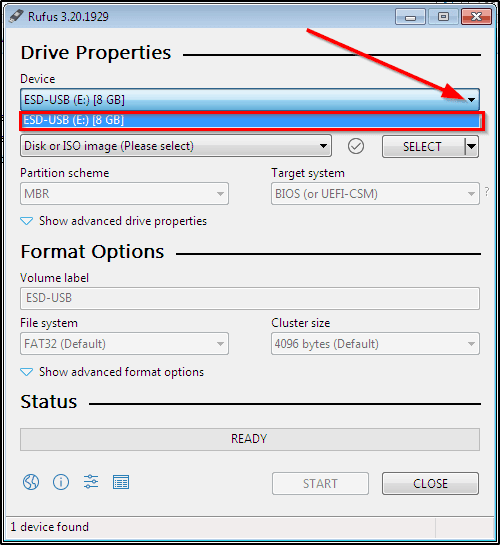
Step 3. Under Boot selection, click on the Select button and choose the ISO file or select Disk or ISO image (Please select) and then choose ISO Image to create an ISO from the USB drive.
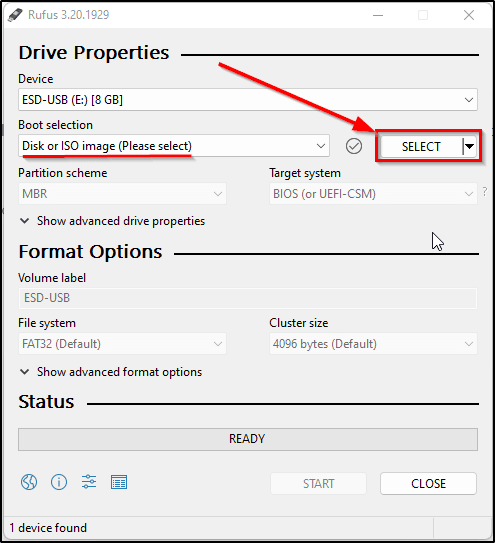
Step 4. Ensure the Partition scheme and File system are set according to your needs.
Step 5. Click on the Start button to begin the process. Rufus will prompt a warning that all data on the USB drive will be destroyed. Confirm and proceed.
Rufus will start creating the ISO. Wait for the process to complete. Once the process is done, Rufus will show "READY" at the bottom. You can now close Rufus.
2. Use AOMEI Backupper
AOMEI Backupper also allows the creation of boot disks for both Windows PE and Linux. Connect a USB drive to your PC and then follow the instructions below:
Step 1. Open AOMEI Backupper and choose the Create Bootable Media option located in the Tools tab.

Step 2. From the window that appears, opt for the Windows PE - Create bootable disc based on Windows PE (recommended) and proceed by clicking Next.

♥Tip: While you have the option to create a bootable disk based on the Linux kernel, please note that it only supports basic functions of AOMEI Backupper.
Step 3. For a bootable USB drive, simply choose USB Boot Device as depicted in the screenshot, and then proceed by clicking Next.

Step 4. Upon completion of the operation, click Finish to exit the interface.
Now that you've successfully created a bootable USB, proceed to reboot your computer. Set the USB drive as the primary boot device in the BIOS settings and verify if your computer can boot from the disc.
Summary
Creating ISO of USB drive using Win32 Disk Imager is not difficult, but the tool offers limited features. If you're looking for a comprehensive alternative, consider using third-party software like AOMEI Backupper.
This versatile tool not only simplifies the process of imaging a (bootable) USB drive but also provides all-around computer protection solutions, such as backing up the C drive in Windows 11 to safeguard your data in case of a system crash.