Easily Perform OneDrive Two Way Sync (2 Ways)
You can learn 2 easy ways to perform OneDrive two way sync, including the OneDrive desktop app and third-party sync software. Please read on.
User Case: Two Way Synchronization with OneDrive?
“Is there a way to do two-way sync with my onedrive and hardrive so they both mirror each other when a change occurs with one of them? it sucks to manually add the files individually when a change occur on onedrive or my hardrive. why is this not a feature of itself with onedrive?"
You can certainly sync your OneDrive and hard drive in both directions, and this article will introduce you 2 useful ways to sync OneDrive including the OneDrive Desktop App and professional third-party sync software. You can read on for more details.
What Is the OneDrive Two Way Sync?
OneDrive is a cloud storage service from Microsoft that supports storing documents, photos, and other files online and synchronizing them across multiple computers and devices. Besides, you can share any files on OneDrive with others.
OneDrive Two Way Sync is a synchronization mode also known as OneDrive bidirectional sync. It syncs between the source and destination locations so that keeps the two folders exactly the same. That is, any changes in the source path are synced to the destination, and any changes in the destination path are also synced to the source.
How to Perform OneDrive Two Way Sync
So how to perform OneDrive two-way sync? This article will show you two useful methods, you can use the OneDrive desktop app or the third-party sync software to help you. You can choose any of them based on your own needs.
Perform OneDrive Two Way Sync via OneDrive Desktop App
The first method is to use the OneDrive desktop app for two-way sync. It helps you sync local folder to OneDrive as well as sync OneDrive to your computer. You can follow the steps below.
Step 1. Download OneDrive desktop app on your computer, install and open it. Then sign in with your Microsoft account.
- Note:✎...
- If you are using Windows 11/10, OneDrive is already installed on your computer.
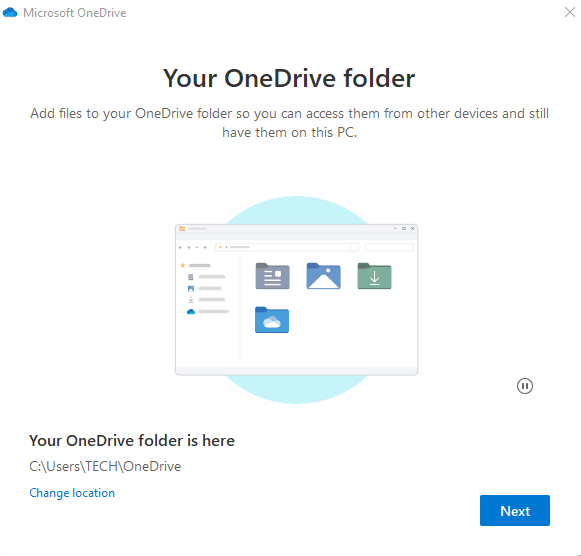
Step 2. In the Your OneDrive folder page, select Next to accept the default folder location for your OneDrive files. If you want to move the OneDrive folder to other places you can click Change location.
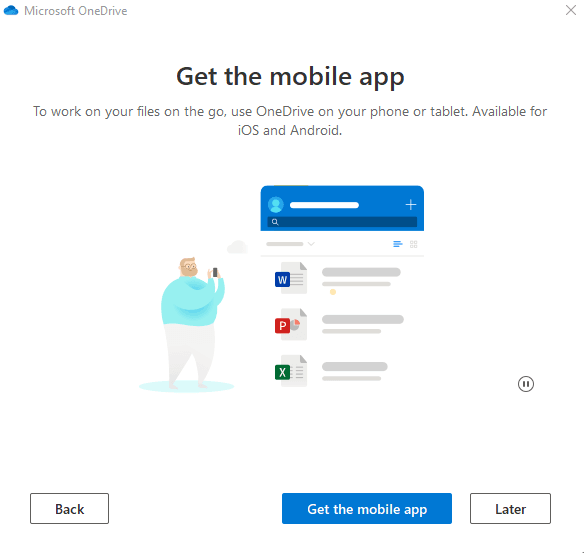
Step 3. Then you will see Get the mobile app page, if you need it, click Get the mobile app button. If you don’t need it, click Later.
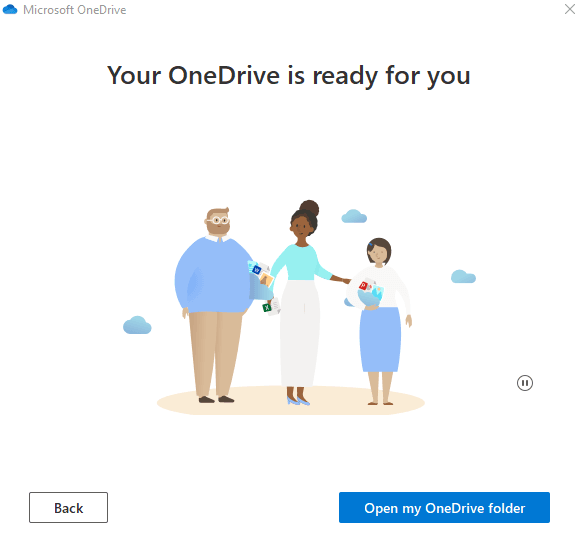
Step 4. On the Your OneDrive is ready for you page, click Open my OneDrive folder.
Step 5. Then right-click the OneDrive folder and choose Always keep on this device in the dropdown menu.
After that, all the changes you make to the files no matter stored in the OneDrive folder on your computer or stored in OneDrive cloud will immediately be synced to the other as soon as your device connects to the Internet.
Although this app can help you perform two-way sync, some users also encountered OneDrive sync issues during the using process. Therefore, you need to be aware of the following points when using the OneDrive desktop app for two-way sync.
- Notes:✎...
- If you accidentally delete or modify files in your OneDrive folder on the computer, these changes will also be synced to the cloud, and vice versa.
- With the OneDrive desktop application, you can only sync your Desktop, Documents and Pictures folders to OneDrive automatically. For other folders, you need to manually drag them to OneDrive folders one by one. This can be very time-consuming if there are a lot of folders that need to be synced.
Perform OneDrive Two Way Sync via Third-party Sync Software (Easiest)
In addition to the OneDrive desktop app, you can also choose professional third-party sync software to help you. AOMEI Backupper Professional is a great choice. Its two-way sync feature not only helps you easily perform OneDrive two way sync, but also allows you to sync any file without moving folders to onedrive manually. It also has the advantages below.
- Multiple paths: It can not only sync OneDrive files to PC or vice versa, but also supports external hard drives, USB drives, other cloud drives or NAS as the source or destination.
- Different systems: It supports different Windows operating systems, such as Windows 11/10/8.1/8/7/VP/Vista, etc.
- Schedule sync: You can enable Schedule Sync feature to automatically sync all files and folders to OneDrive.
Then, you can follow the graphic tutorial below to perform OneDrive two-way sync via AOMEI Backupper Professional.
Step 1. Download AOMEI Backupper Professional, install and open it. Then click Sync > Two-Way Sync.
- Note:✎...
- Except for Two-Way Sync, this software also provides Basic Sync (one-way sync), Real-Time Sync and Mirror Sync to fulfill your different demands on different environments.
Step 2. Click Add Folder to select the local folders you want to sync.
Step 3. Click the inverted triangle at the right edge of the second bar and choose Select a cloud drive.
Step 4. Then select the OneDrive as the destination path and click OK.
- Note:✎...
- If you cannot find OneDrive in the list, please go back to Step 3 and manually navigate to the OneDrive local folder by clicking the folder shaped button in the second bar.
Step 5. Confirm all your operations and click Start Sync to perform OneDrive two-way sync.
- Notes:✎...
- Options: You can write comments or set the email notification for your sync tasks.
- Schedule: It allows you to automatically sync your files with fixed intervals, such as Daily, Weekly, Monthly, Event trigger, USB plug in.
Summary
OneDrive two-way sync helps you keep files in both folders the same, and any changes in both folders will be synced to the other side. You can use the OneDrive desktop app to achieve the goal, but except for the desktop, documents and photos, other files need to be synced manually. If you accidentally make a mistake in the operation, then it may lead to file loss.
Or you can choose the third-party sync software AOMEI Backupper Professional for two-way sync. It is easy to operate and you can set fixed intervals to perform OneDrive two-way sync automatically. To enjoy more cloud storage for free, you still could try the Cloud Backup feature.
In addition, if you are a Windows Server user, AOMEI Backupper Server will be more suitable for you. You can download this software to explore more features.


