2 Ways to Backup Synology NAS to External Hard Drive for Free
It is necessary to backup Synology NAS to external hard drive for data security and this article provides you with 2 safe and free ways.
Do I need to backup Synology NAS to external hard drive?
NAS is a network connected storage device that enables multiple clients to store and share files in a central place with fast data access. Synology, as one of the most popular NAS brands, provides NAS devices for both family and office occasions. Therefore, you could say it's already an efficient backup solution, why bother to backup Synology NAS to external hard drive?
This problem is, the data stored on Synology NAS isn't always safe.
Accident happens at any time. You can’t be 100% sure the Synology NAS won’t suffer from inappropriate working conditions or man-made damage. And as a device with certain service life, it may break down at times and will fail eventually.
Therefore, it’s undoubtedly a wise decision to adopt the 3-2-1 data protection strategy, which means having at least 3 data copies - 1 is stored locally and the rest are stored on 2 different devices. Otherwise it would be a disaster if all your important files stored on Synology NAS get lost without a second copy.
So after you backup PC to Synology NAS, it’s also a good idea to backup data from Synology NAS to other devices. In this case, a portable external hard drive with large capacity is probably the best choice - you can take it by your side easily and use the backup any time you need. Besides, the price of an external hard drive is acceptable for most people.
How to backup Synology NAS to external hard drive?
As previously explained, it’s double protection to back up Synology NAS data to external hard drive. But how can you do it exactly? Here are 2 simple and free methods - namely using backup software in Diskstation Manager or third-party tool.
In DiskStation Manager, you can use Hyper Backup, Snapshot and USB Copy, just select the one that best meets your needs. You have to know the add-ons in Synology DSM have certain limitations and sometimes won’t work properly, Hyper Backup is only supported by DSM 6.0 or above, for example.
Thus, it's recommended to use powerful and reliable backup services - AOMEI Backupper Standard. It has more advanced options and better performance. For example, Hyper Backup supports only default compression level, but this software allows you to choose between Normal or High compression. You can try it if you want rich backup features and make it hassle-free.
Preparations before backup
Before starting Synology NAS backup, there are 3 things you should prepare at first:
-
A Synology NAS with available data port.
-
An external hard drive with sufficient space.
-
A powerful tool that can do the backup & restore efficiently.
Then you can choose an approach to backup Synology NAS.
Method 1. Backup Synology NAS using DiskStation Manager software
Just log into DSM and search them in Package Center, then install the one that best meets your needs and backup your NAS files following the wizard.
How to backup Synology NAS to external hard drive (take Hyper Backup as an example):
1. Usually Hyper Backup is installed by default, if not, you can download the package in Package Center and install it manually.
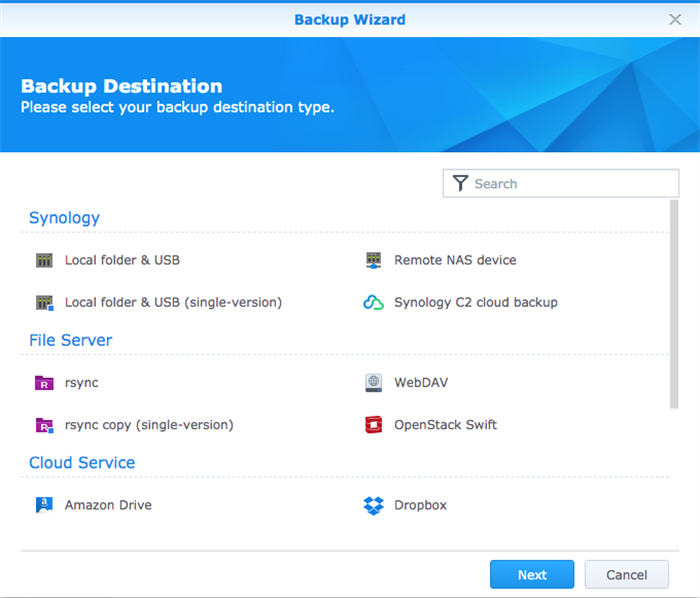
2. Open the tool, click the + button and then choose Data backup task > Local folder & USB (single-version).
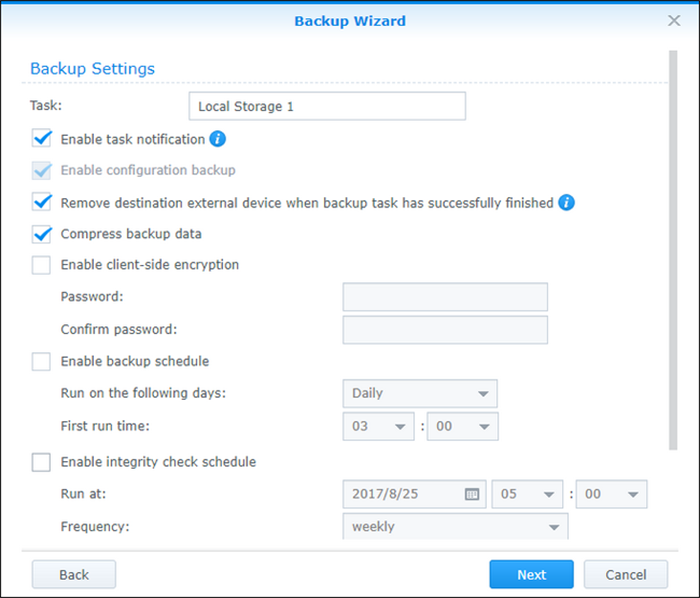
3. Follow the backup wizard to make choice of your backup destination as well as other advanced settings.
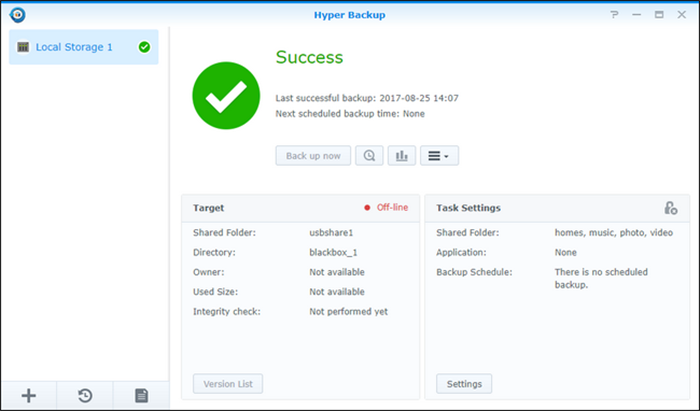
4. Hit Apply to backup data on Synology NAS to destination. Once the process is completed you’ll see the success screen.
Notes:
-
Make sure your Synology NAS is running DSM 6.0 or above. For users of older DSM versions, Hyper Backup is not supported. Instead, you can use Backup and Restore in old NAS.
-
Learn more about backup Synology NAS with DSM software.
Method 2. Backup Synology NAS to external hard drive with AOMEI Backupper
AOMEI Backupper Standard is a reliable backup software with rich backup features, and it can help you backup Synology NAS to external hard drive easily in Windows 11/10/8/7/XP/Vista. Also, you can backup NAS to USB drive, local disk etc, not only Synology NAS, but also QNAP NAS, Seagate NAS, and more.
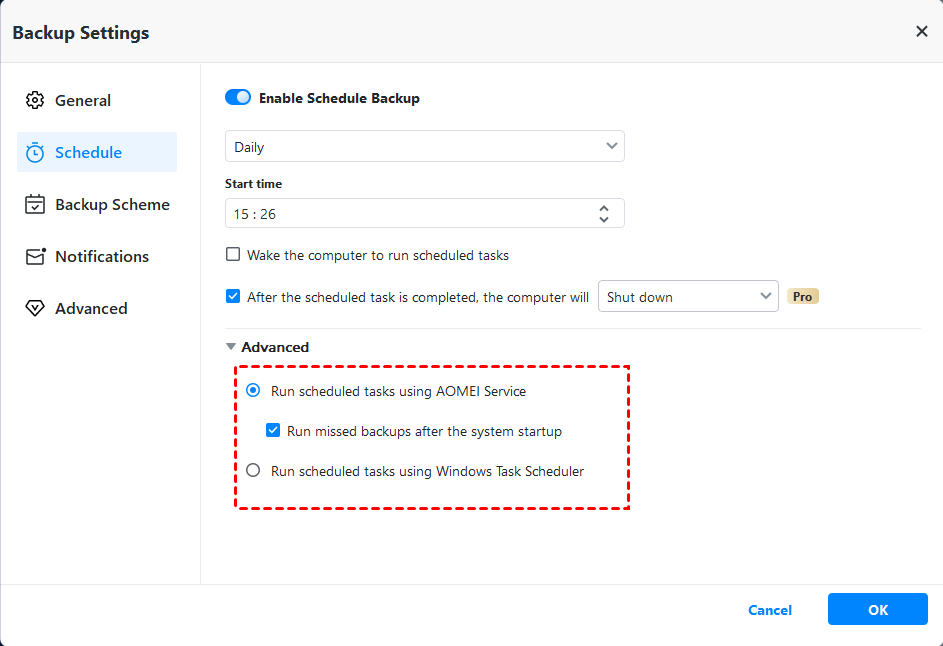
If you want to make Synology NAS backup to external hard drive automatically, you can create schedule backup. And the default incremental mode will back up only changed files at each scheduled time point.
What’s more, all these functions are based on a concise yet intellectual interface, so that you can operate it easily even without much computer knowledge.
Another thing I like about it is the price - FREE. The standard version already meets your need to backup NAS files. So you can simply give it a shot without any concern. For server users , try AOMEI Backupper Server.
How to backup NAS to external drive:
1. Download AOMEI Backupper and install it. Insert your external hard drive into an available USB port of your computer. Also, make sure you can connect to your Synology NAS therefore get access to the source file.
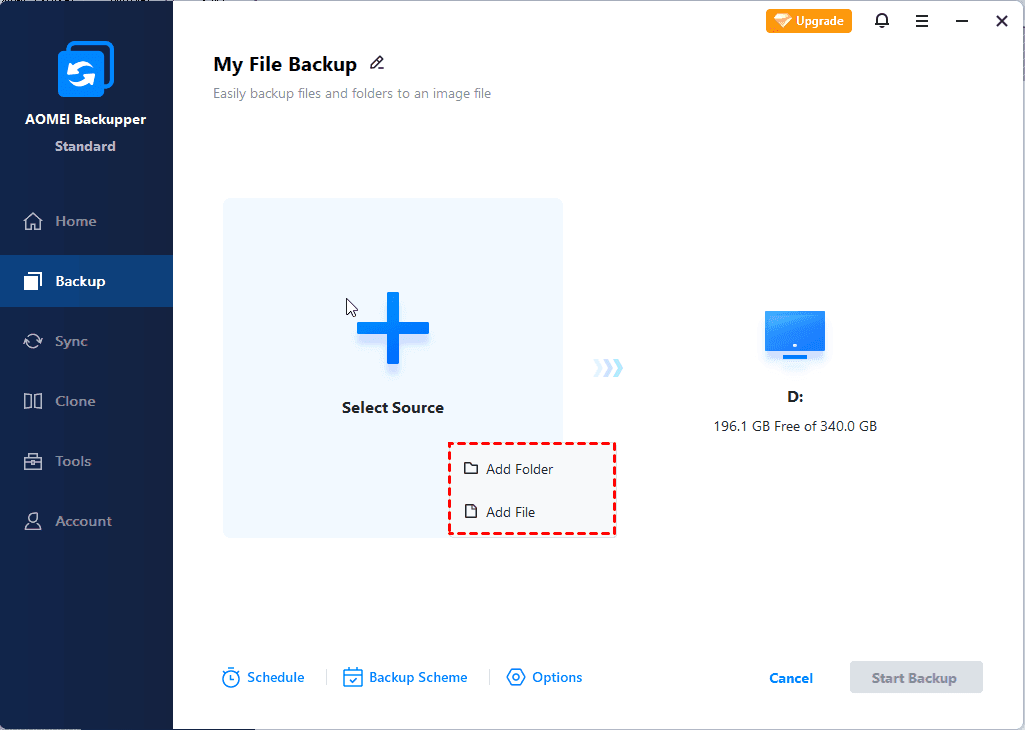
2. Enter the main interface. Select File Backup under the Backup option.
3. Click Add Folder or Add File to specify what you want to backup.
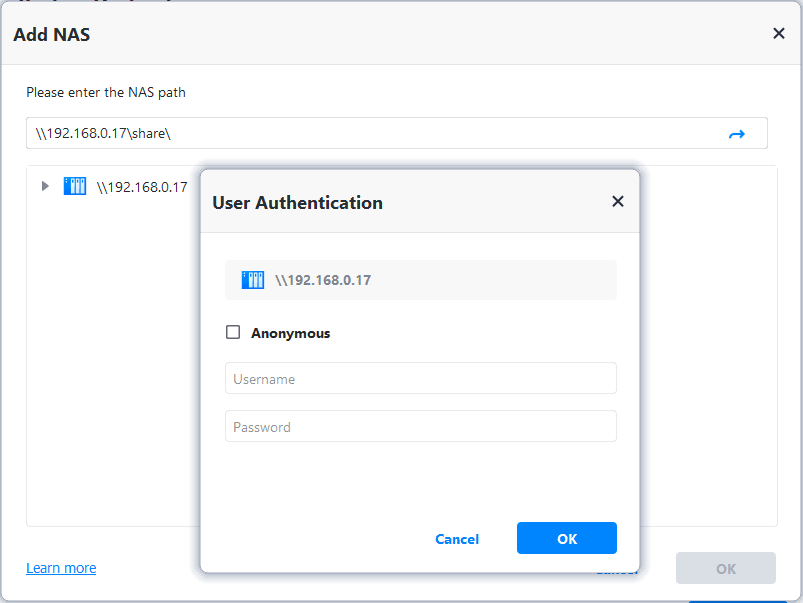
Select Share/NAS in the popping out window. Click Add Share or NAS Devices and input the required information of Synology NAS, then select the data you want to backup.
4. Choose the external hard drive as the destination path, hit Start Backup to execute the backup.
When the process is complete, click Finish to quit the wizard. Your Synology NAS should be backed up successfully, and you can pull out the external hard drive now.
Other helpful features:
★ Scheduled backup
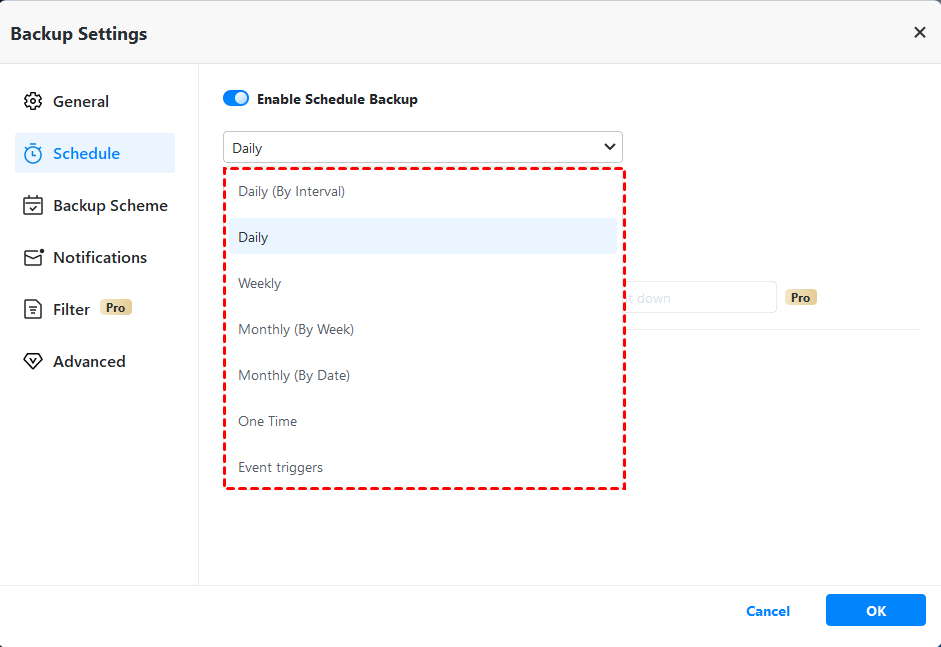
If you want to make Synology NAS backup to external hard drive automatically, click Schedule Backup to make your choice among Daily/Weekly/Monthly. If you upgrade to Professional or higher editions, you can also choose Event triggers (such as startup, login and shutdown) or USB plug in.
*To automatically backup NAS to external hard drive or suchlike removable devices on scheduled time point, you should always keep the device connected to the computer.
★ Incremental and differential backup
Scheduled backup is running in incremental mode by default, which only backs up changed or newly added files to save your time and space. Similarly, its Diferential Backup backs up only changes, but its recovery operation is much easier. You can choose it manually in Backup Scheme if you are currently using the professional. If not, you can upgrade now and enjoy a 5% discount in the previous page.
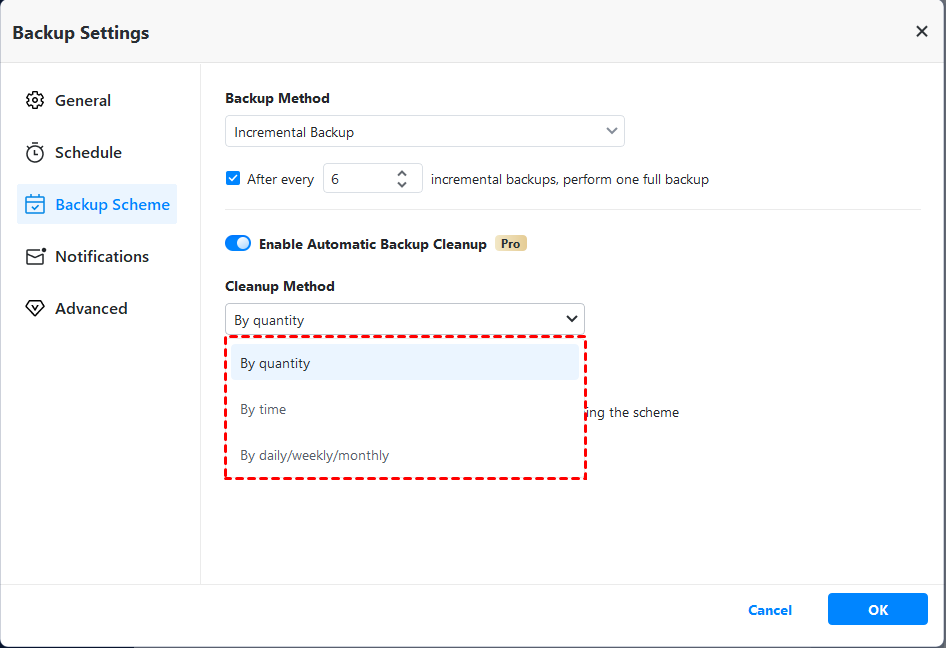
If you are worried that the accumulated backup files will fill up your external hard drive, you could use this feature in advanced edition to auto delete older backups. You could customize the rule according to your needs.
To better protect data security and avoid the risk of data loss caused by external hard drive corruption or loss, this software also provides its own cloud storage device for its users - AOMEI Cloud. You can easily perform cloud backup to better protect data security as well as save disk space. After you sign up for an AOMEI account, it provides you with 1TB of free storage space for 15 days.
Conclusion
It’s always a wise decision to keep more than one copies of your important data in different media according to the 3-2-1 backup principle. Though Synology NAS is already a backup strategy, it won’t hurt to double the insurance.
Among all the software to do that, AOMEI Backupper is a powerful one enables you to backup Synology NAS to external hard drive, USB drive and local disk quickly within several simple clicks, and you don’t need to pay anything for the purpose.
But if you have multiple computers within your company to backup, you can consider AOMEI Backupper Technician for better performance. Although it’s a paid tool, the license code is valid for unlimited PCs.
