Lenovo System Restore Windows 10 from Boot: Full Guide
This guide dives into the Lenovo system restore Windows 10 from boot with multiple methods. Learn how to access the recovery environment, use a bootable USB, and restore your system with tools like AOMEI Backupper.
By Rosie Updated on January 20, 2025
When your Lenovo computer fails to function correctly or cannot boot into Windows 10, restoring the system from boot can help resolve the issue. Lenovo system restore Windows 10 from boot is a powerful solution that allows you to repair or reset your operating system to its original state. Whether dealing with system crashes, boot failures, or corrupted files, restoring from boot can provide a quick resolution without professional assistance. This article provides a step-by-step guide to restoring your Lenovo device, read on and get the powerful solutions.
Methods for Lenovo System Restore Windows 10 from Boot
Before proceeding, always ensure your data is backed up. Tools like AOMEI Backupper make creating full system backups simple, giving you peace of mind during the restore process.
Best free Windows backup and restore software for Lenovo users.
Method 1: Lenovo Factory Reset on Windows 10 from Boot
Step 1. Access the Recovery Environment
- Restart your Lenovo PC.
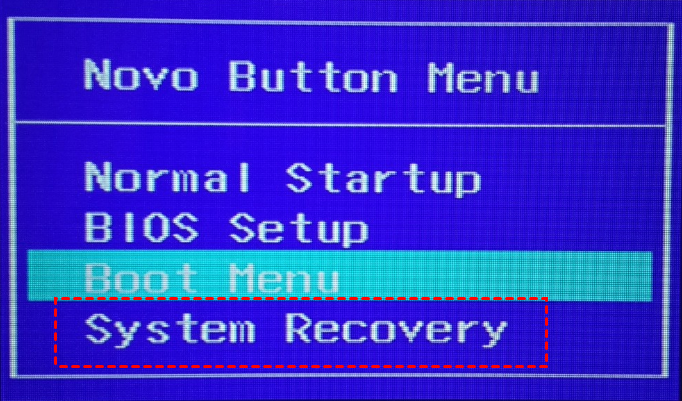
- Turn it back on and immediately press the Novo Button (small recovery button next to the power button) or F12 (depending on your Lenovo model) to access the Boot Menu.
- If you’re using F12, select "System Recovery" from the menu. If you're using the Novo Button, choose "Troubleshoot" from the Novo Menu.
Step 2. Select "Restore from Initial Backup"
-
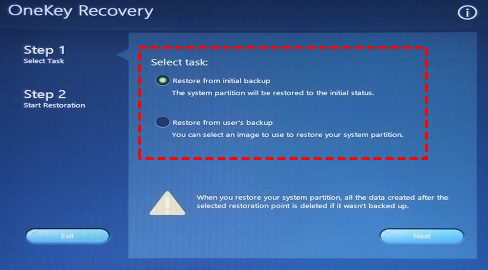
Once you’re in the Lenovo OneKey Recovery or Windows Recovery Environment, select "Troubleshoot".
-
Choose "Restore from Initial Backup" (this will restore your system to factory settings).
Step 3. Confirm Factory Reset
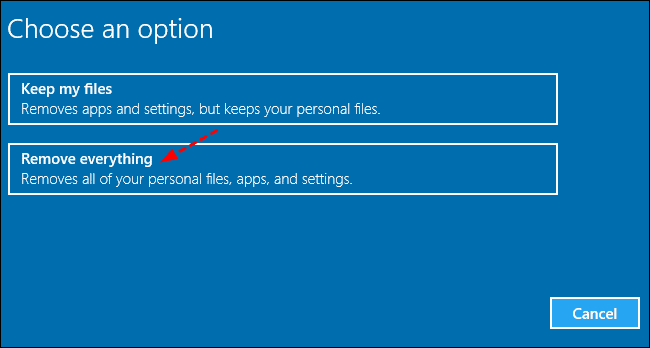
- You’ll be presented with options like "Reset this PC" or "Remove Everything". Select "Remove Everything" if you want to wipe all files, apps, and settings.
Step 4: Start the Factory Reset
- After confirmation, the system will begin the factory reset process. This may take a while, depending on your system.
Method 2: Using AOMEI Backupper- The Best Way
AOMEI Backupper Standard simplifies Lenovo system backup and recovery, even if the recovery partition is missing or inaccessible. This free tool enables full backups and restoration, even from bootable media, protecting your system and data during crashes, malware attacks, or failures, ensuring reliable recovery with minimal effort.

-
Effortless and Quick Restore: Easily restore your Lenovo system from a backup image, saving time and reducing effort during recovery.
-
Seamless Restoration: Automatically restarts your Lenovo system during recovery, ensuring a smooth and uninterrupted restoration process without manual input.
-
Restore Even When the System Fails to Boot: Provides bootable media support to restore your Lenovo system when Windows 10 fails to start.
-
Flexible Recovery: Enables network booting for system recovery, offering flexibility when physical boot media is unavailable.
How to Restore Your Lenovo System Using AOMEI Backupper
Note: Before you restore your system, please be sure you have created a system image with AOMEI Backupper.
- Select the System Backup feature and choose a storage location for the backup file.
Step 1: Select the System Backup Task
Open the AOMEI Backupper and click the “Restore” button. Then, choose “Select Task” to locate the system backup task you previously created.

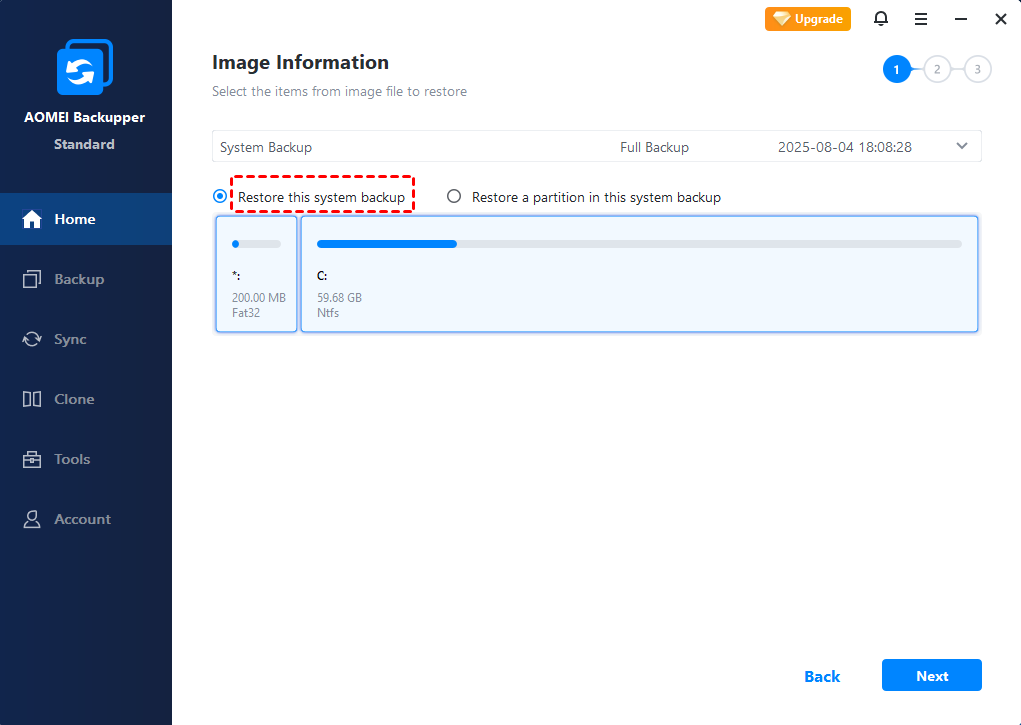
Step 2: Choose the Restore Option
Select “Restore this system backup” from the options provided and click “Next” to proceed with the recovery process.
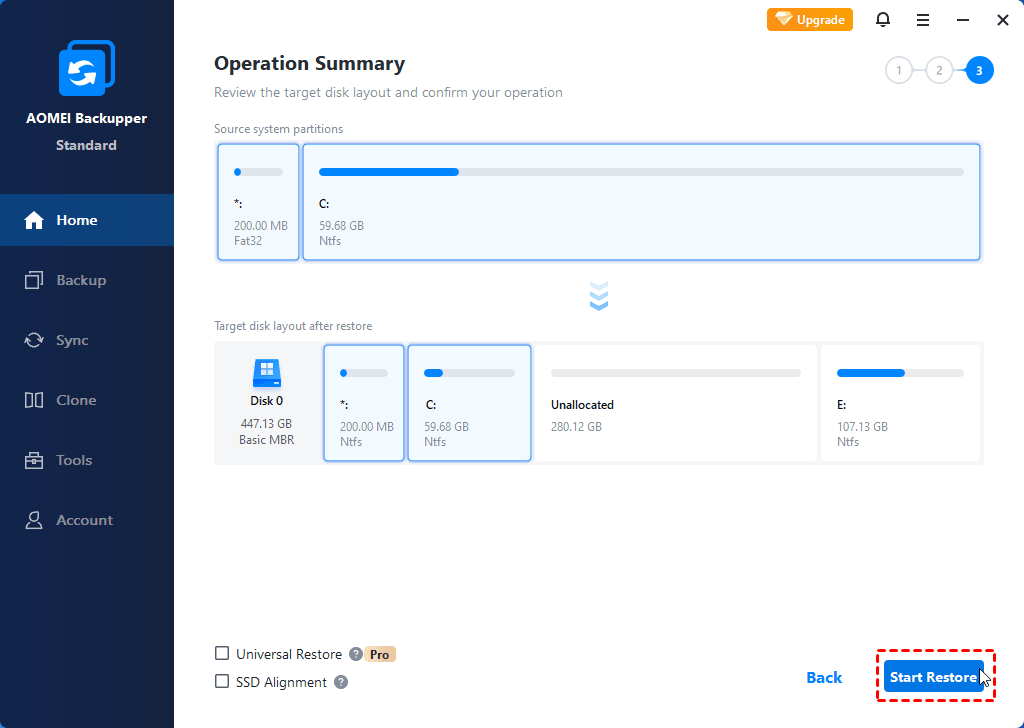
Step 3: Confirm and Start the Restoration
Carefully review the listed operations on the summary screen. If everything looks correct, click “Start Restore” to initiate the Lenovo system recovery.
With AOMEI Backupper, restoring your Lenovo system from a backup is straightforward and reliable, ensuring your device is back to normal in no time.
Method 3: Using Windows Safe Mode with Command Prompt
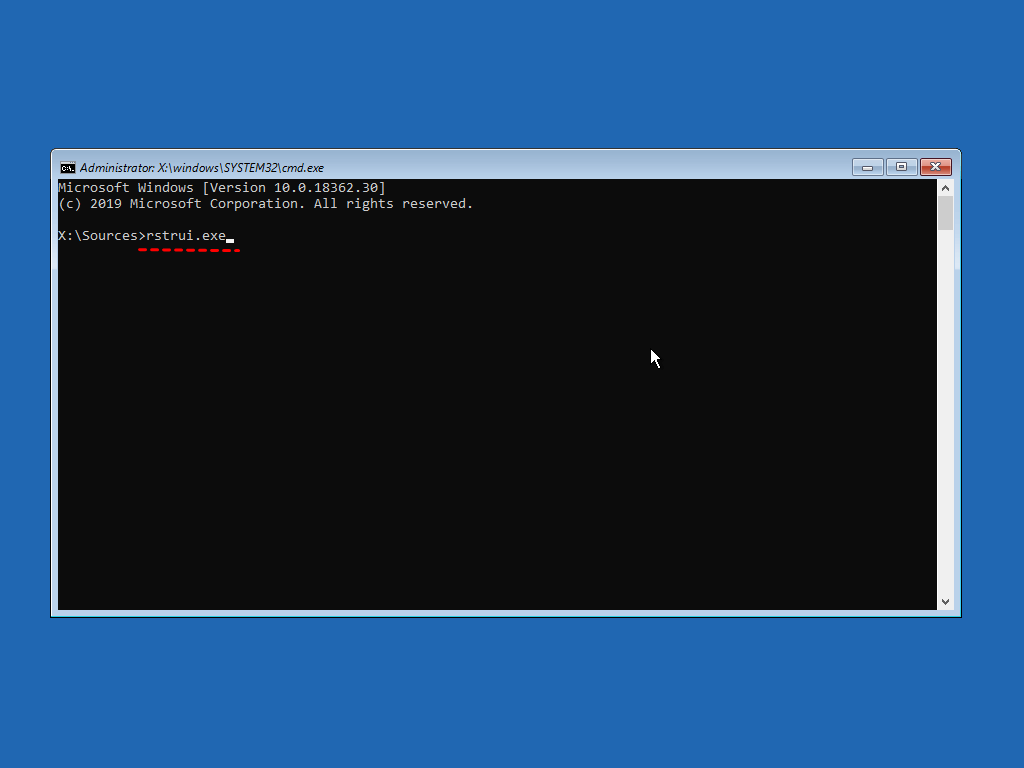
1. Boot into Safe Mode with Command Prompt by pressing F8 during startup.

2. Enter the command rstrui.exe to launch the System Restore utility.
3. Follow the wizard to select a restore point or perform a factory reset.
4. Review the details of the restore point and click Finish to begin the restoration.
FAQs
1. How long does the system restore process take?
2. Will I lose my data during the restore process?
3. Can AOMEI Backupper restore systems without a recovery partition?
Final Thoughts
Lenovo system restore Windows 10 from boot provides an efficient way to resolve critical errors and get your PC back to working condition. Whatever method you use, always prioritize creating backups to safeguard your data.
Regularly backing up your system and understanding these restore methods can save you from unexpected data loss and ensure smooth recovery in any situation. If you encounter issues, Lenovo’s support team and community forums are always there to help.