Can I Upgrade ASUS VivoBook SSD? The Answer Is Here!
Discover how to perform an ASUS VivoBook SSD upgrade effortlessly. Learn about compatible SSD types and step-by-step installation guides.
By Miya Updated on October 29, 2024
Can I Upgrade My ASUS VivoBook SSD?
Yes, you can perform ASUS VivoBook SSD upgrade. The upgrade process involves checking if your VivoBook supports SATA or NVMe (M.2) SSDs, backing up important data, and using the appropriate tools to open the laptop and replace the existing SSD. After installing the new SSD, you'll need to reassemble the laptop and restore your data. To make the transition smoother, consider using cloning software to duplicate your old SSD onto the new one, ensuring all your files and settings remain intact.
Dependable Disk Cloning Software for Data and System Migration
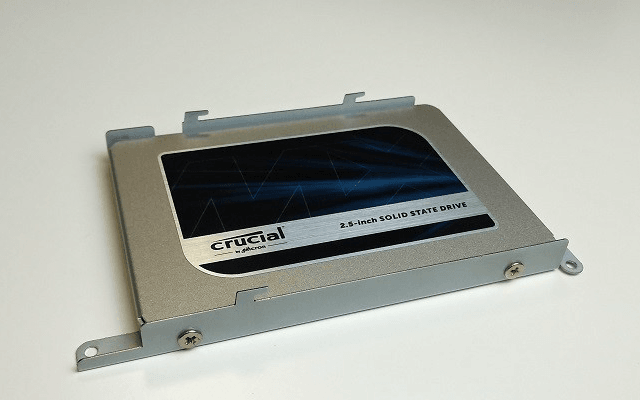
There are generally two scenarios when users consider upgrading the SSD in an ASUS VivoBook. The first is to replace the original HDD with a 2.5-inch SSD. The second is to keep the original HDD and add a SATA M.2 SSD.
In the ASUS VivoBook, the operating system is pre-installed on the original hard drive. If you want to replace the original HDD, you will need to migrate your data and system to the new SSD. To facilitate this process, reliable disk cloning software is essential.
AOMEI Backupper is a straightforward disk cloning software that can help you migrate your data and system without boot issues. Its user-friendly design and clear interface enable all users to navigate it smoothly in a short time. It supports all Windows PCs, including Windows 7/8/8.1/10/11/XP/Vista, and offers powerful features such as:
✩ Support for multiple disk types: HDDs, SATA SSDs, NVMe SSDs, M.2 SSDs, etc.
✩ Compatibility with all SSD brands: clone HDD to WD Blue SSD, Kingston SSD, Samsung SSD, etc.
✩ Two cloning methods: Intelligent Clone (default) and Sector by Sector Clone, with the default method cloning only the used sectors on the disk.
Using this software, you can easily transfer the data and system from the original ASUS HDD to the new SSD. Next, I will provide a detailed guide on how to upgrade ASUS E203N SSD.
How to perform ASUS VivoBook SSD
If you want to replace the original hard drive with a new SSD, you need to use AOMEI Backupper to migrate your data and system, then install the new SSD on your computer and boot from it. Before migrating your data and system, you need to make some preparations to upgrade ASUS VivoBook 14 RAM.
Preparations:
✽ Connect the SATA 2.5" SSD to your Asus X505ZA using a SATA-to-USB cable.
✽ The cloning process will delete all data on the target disk. If there are any files on the SSD, back them up as needed.
Step-by-Step Guide to Migrate Everything from the Original HDD to the New SSD:
Step 1. Download AOMEI Backupper and install it on your computer.
Easiest Windows backup software for personal use.
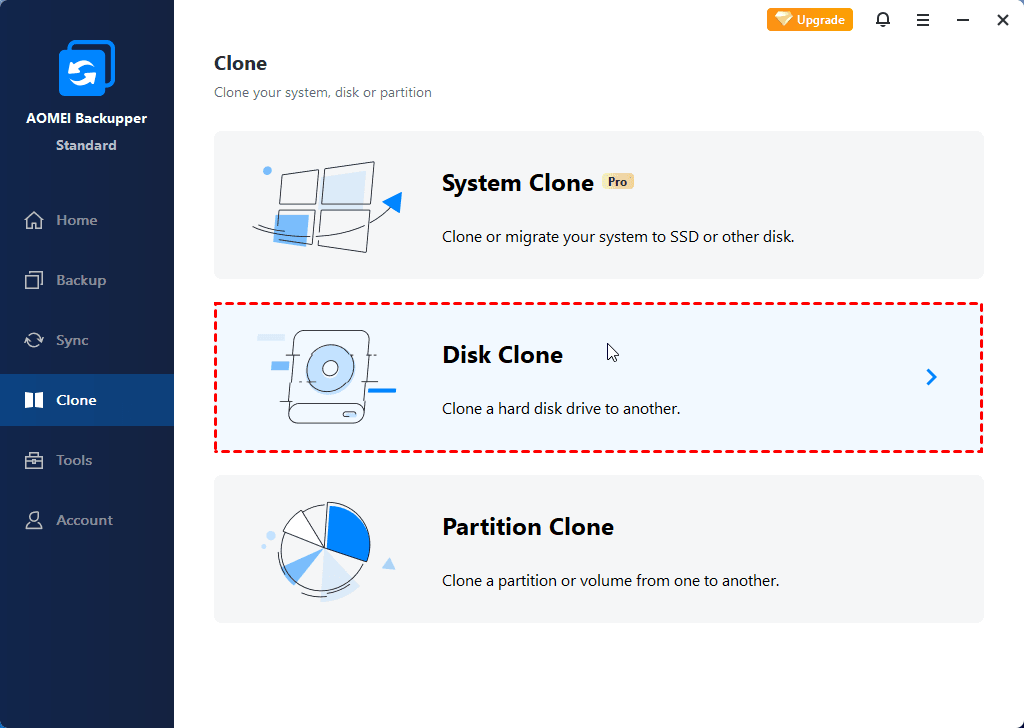
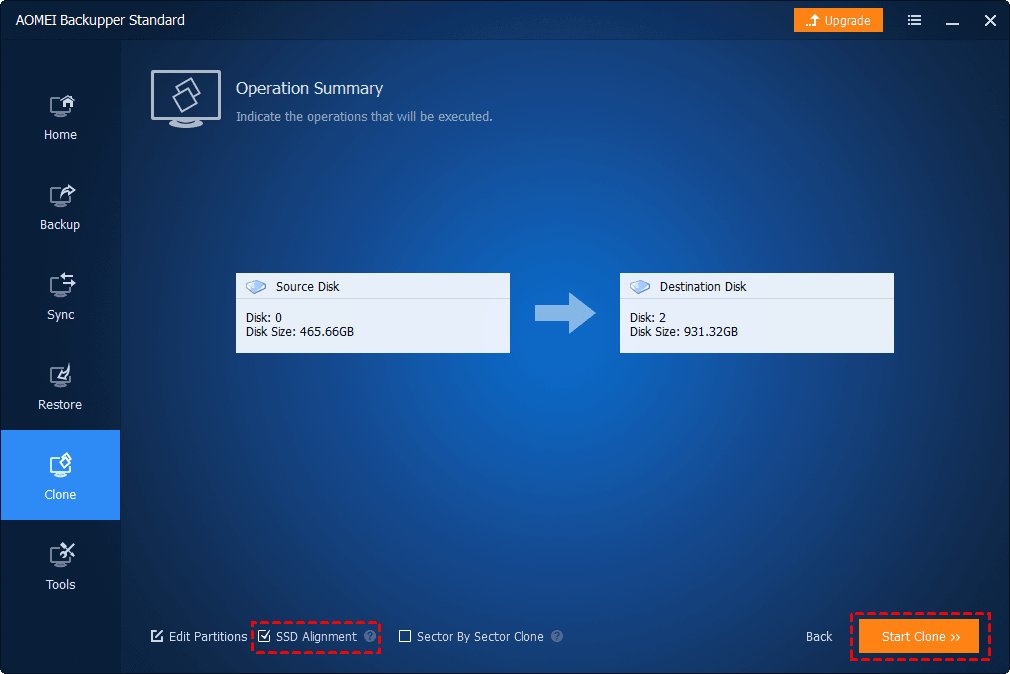
Step 2. Launch the software. In the left menu, click "Clone" and then select "Disk Clone" from the options.
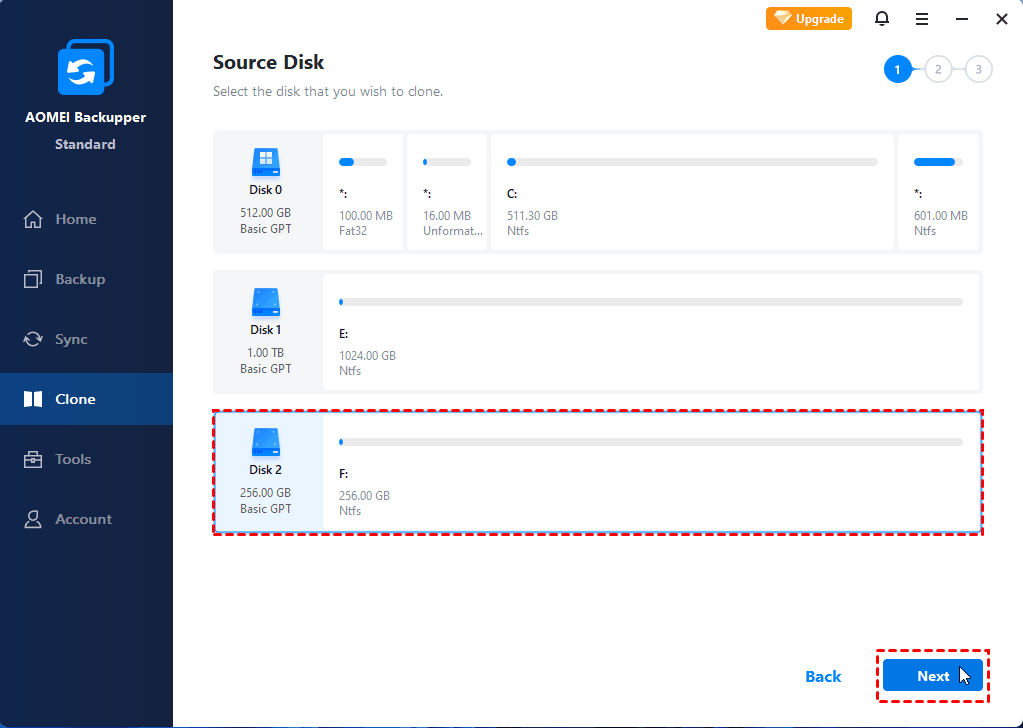
Step 3. Choose the original hard drive as the source disk from which you want to migrate data, then click "Next."
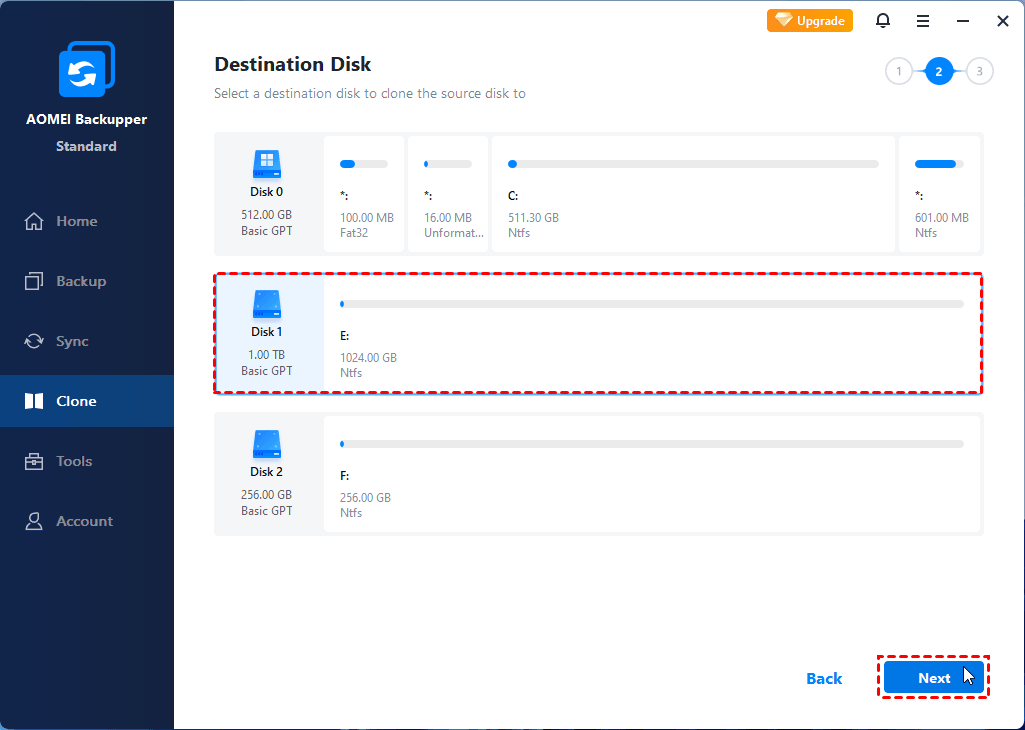
Step 4. Choose the new SATA 2.5" SSD as the destination drive.
Step 5. Check the box for SSD Alignment to optimize the SSD's performance, then click "Start Clone."
Tips:
- The free version of AOMEI Backupper supports cloning system disks from MBR to MBR only. For cloning between MBR to GPT or GPT to GPT, upgrading to AOMEI Backupper Professional is required.
- To adjust partition sizes on the destination disk using "Edit Partitions," upgrading to a higher version is necessary.
Install New SSD to Your ASUS VivoBook After Clone
Once you've migrated your data and system to the new SSD, you can proceed with the ASUS VivoBook SSD upgrade.
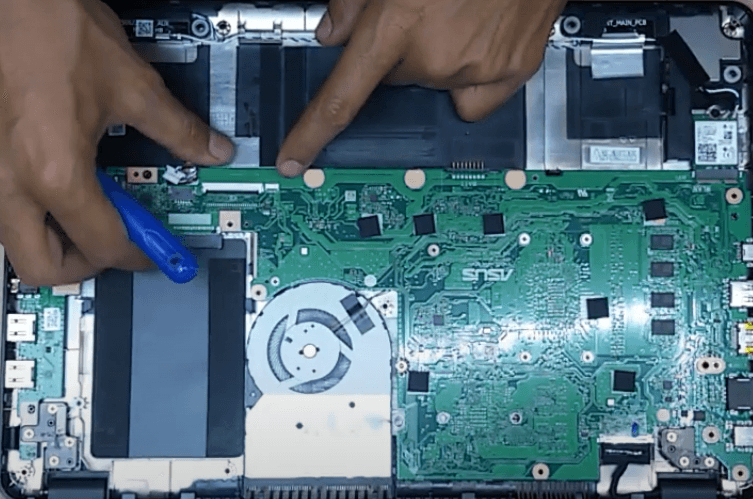
Step 1: Loosen the screws on the back cover and use a screwdriver to open it. Disconnect the power cord and the connection cable between the touchpad & keyboard and the motherboard.
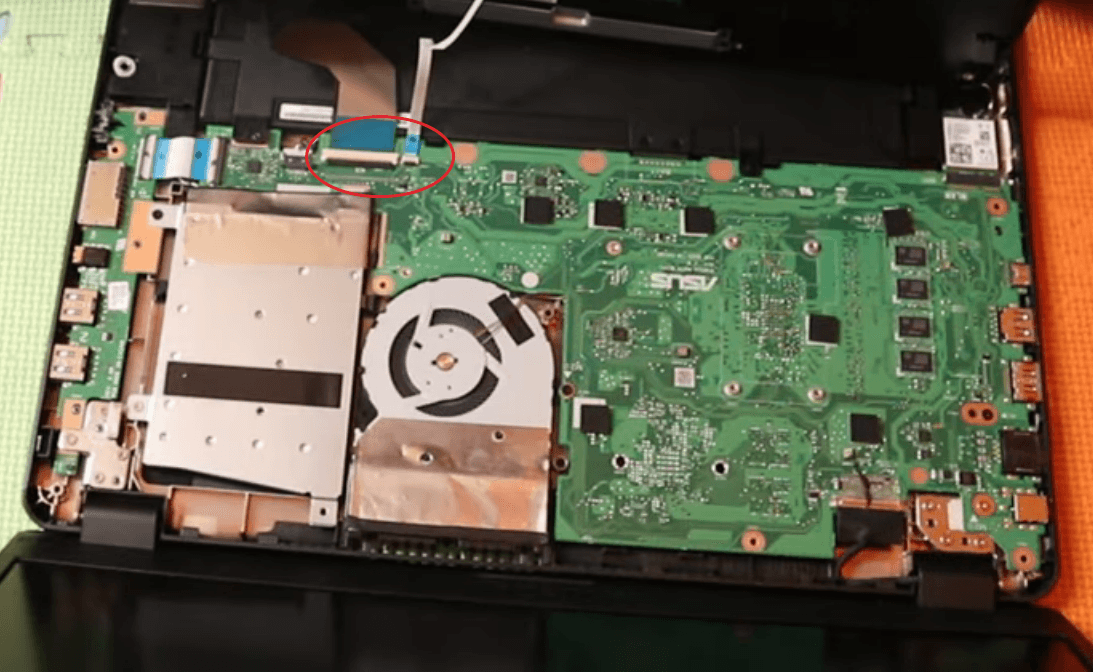
Step 2: Locate the hard drive at the top right. Remove the 4 screws holding it in place.
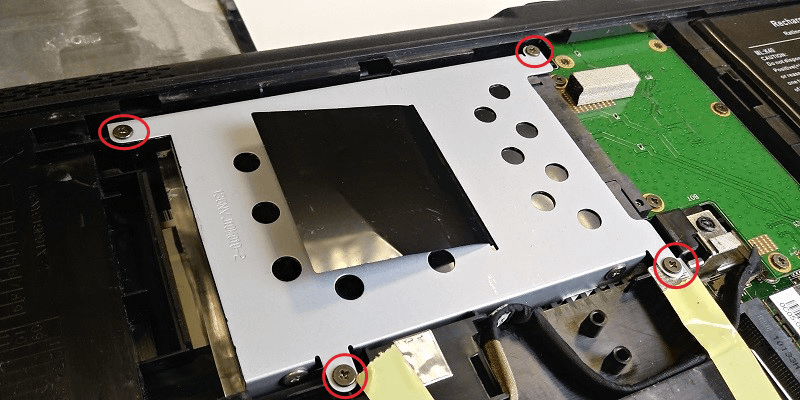
Step 3: Once the screws are removed, gently pull the hard drive to disconnect it from the SATA connector. The hard disk is secured in the rack by 4 screws; remove these to release the hard disk from the rack.
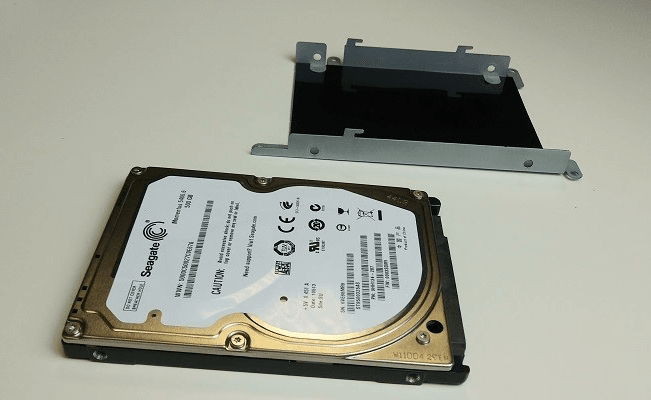
Step 4: Mount the SSD onto the rack and secure it with screws. Reassemble everything in reverse order.
Step 5: After reassembly, restart your computer. You should now be able to successfully boot from the cloned SSDto complete ASUS VivoBook Flip 14 TM420 RAM Upgrade.
FAQs on ASUS VivoBook SSD Upgrade
Summary
This article tells you how to perform Asus VivoBook SSD upgrade. Whether you want to keep the old hard drive or not, it is recommended to use reliable disk cloning software to help you migrate your data and system to the new SSD.
The disk cloning software provided in this article can not only help you with data migration, but also help you back up, restore or synchronize files. For instance, you can use it to sync external hard drive. More functions are waiting for you to explore.