How to Use DISM to Clone Disk vs Easier Way
DISM is a command-line tool that is used to service Windows images. If you want to use DISM to clone disk, you can read this post to get a full guide and an easier option for disk cloning.
By Jonna Updated on June 30, 2025
Can I Use DISM for Disk Cloning?
“I have got a new SSD with a larger capacity for my Windows 10 machine, and I would like to transfer all the content of my current Windows 10 system disk onto the new SSD and eventually replace the system disk with this new SSD. My question is: Is it possible to use DISM for disk cloning? Does anybody have any experience?”
– Microsoft Community
Essentially, yes, you can use DISM to clone disk. However, it should be mentioned that this tool is not typically used for cloning disks. Instead, cloning disks is often accomplished using other professional disk cloning tools like AOMEI Backupper.
Easiest hard drive clone software for Windows PC.
If you're looking to clone a disk using DISM specifically, move to the general guide in the next chapter.
How to Use DISM to Clone Disk
Regarding how to use DISM for disk copy, this process consists of two main parts: capturing an image of the source disk and applying the image to the destination disk. You can follow the detailed guide below to learn how do I clone a disk for free using DISM:
Step 1. Prepare to capture partitions
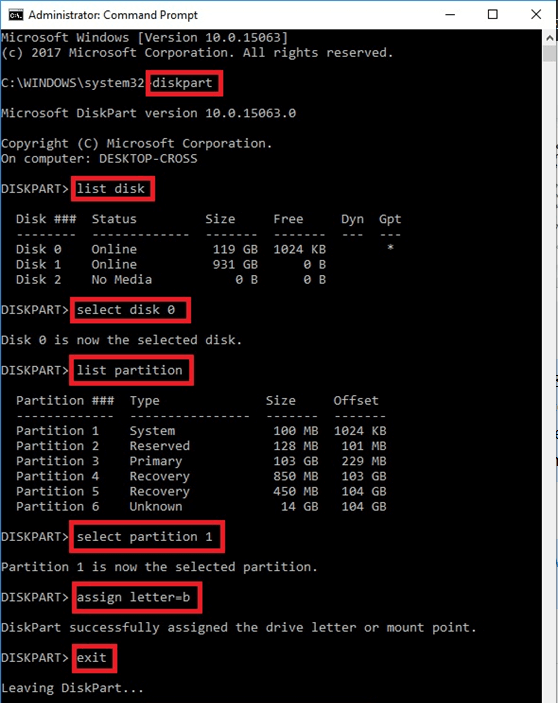
To make sure the partitions that you want to capture have drive letters assigned, you can run Command Prompt and input the command lines:
- diskpart
- list disk
- select disk x (x represents the specific number of the primary hard disk)
- list partition
- select partition=n (n represents the partition that needs a drive letter)
- assign letter=b (Assign the partition with a drive letter b)
- exit
Step 2. Capture an image for target drive
1. Press Win + X and choose PowerShell (Admin). And Click Yes on the pop-up UAC windows.
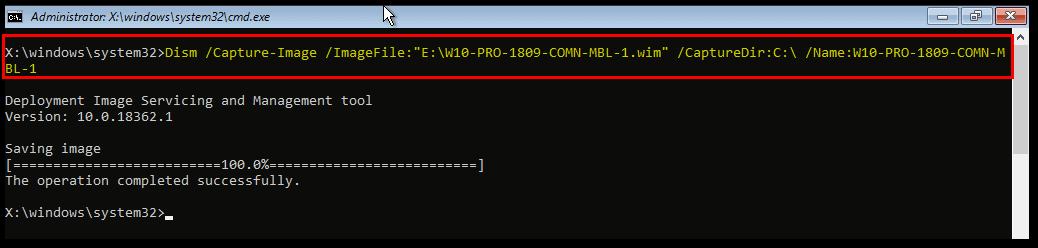
2. For using DISM to capture entire disk, type the following command:
- Dism /Capture-Image /ImageFile:C:\my-windows-partition.wim /CaptureDir:C:\ /Name:"My Windows partition"
♦ Replace C:\my-windows-partition.wim with the desired path and filename for your disk image.
♦ Replace C:\ with the drive letter of the source disk.
♦ Replace "My Windows partition" with a specific name for your disk image.
Step 3. Save the images to the network or another safe location
1. Connect an external drive, or use a network location where you can safely save your image, like: net use W: \\PC_Name\ShareName.
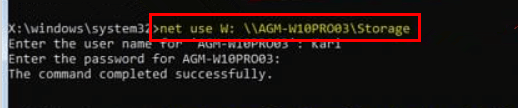
2. Provide your network credentials, if prompted.
3. Copy the partitions to your network share with the following command:
- md N:\Images\
- copy C:\my-windows-partition.wim N:\Images\
- copy C:\my-system-partition.wim N:\Images\
Step 4. Apply the image to new drive
Now, you can apply the captured image to the destination disk using the command below:
- Dism /Apply-Image /ImageFile:N:\Images\my-windows-partition.wim /Index:1 /ApplyDir:W:\
♦ Replace N:\Images\my-windows-partition.wim with the path to your disk image.
♦ Replace 1 with the index of the image in the WIM file (usually 1).
♦ Replace w:\ with the drive letter of the destination disk.
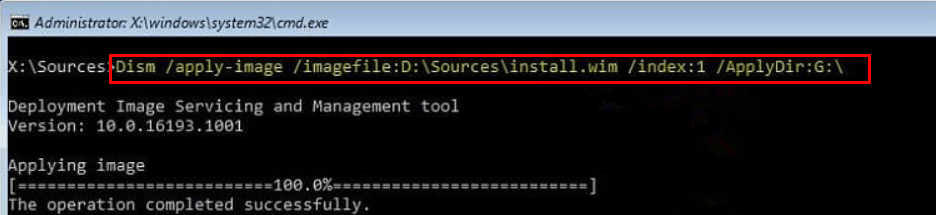
Then, DISM will apply the Windows image to the selected partition (G: in this example).
Easier Way to Clone Disk to Another Disk
As you can see, using DISM for cloning disk is quite complicated. For an easier solution for disk cloning, you can turn to AOMEI Backupper, a professional and reliable cloning software for Windows 11/10/8.1/8/7/XP/Vista.
👉 It comes with a user-friendly interface, that enables you to clone a hard drive to another with just a few clicks.
👉 It supports you to clone drives of different sizes, like cloning larger HDD to smaller SSD as well as cloning SSD to larger SSD, or vice versa.
👉 It provides 3 cloning options: Disk Clone for copying entire disk, System Clone for cloning Windows OS only, and Partition Clone for cloning specified partitions.
👉 It supports a wide range of SSD disks, including SATA, NVMe, PCIe, AHCI, etc. And it offers SSD Alignment to optimize performance and extend the lifespan of SSDs.
Check the following steps to see how to clone hard drive to another disk, such as an SSD, using this disk to disk clone software:
- Properly connect the target SSD to your computer, ensuring it is detected and recognized.
- As the target SSD will be overwritten during the cloning process, so backup important files in advance.
Step 1. Begin by downloading the software and running it on your computer.
Step 2. Once on the main interface, click Clone and then select Disk Clone.

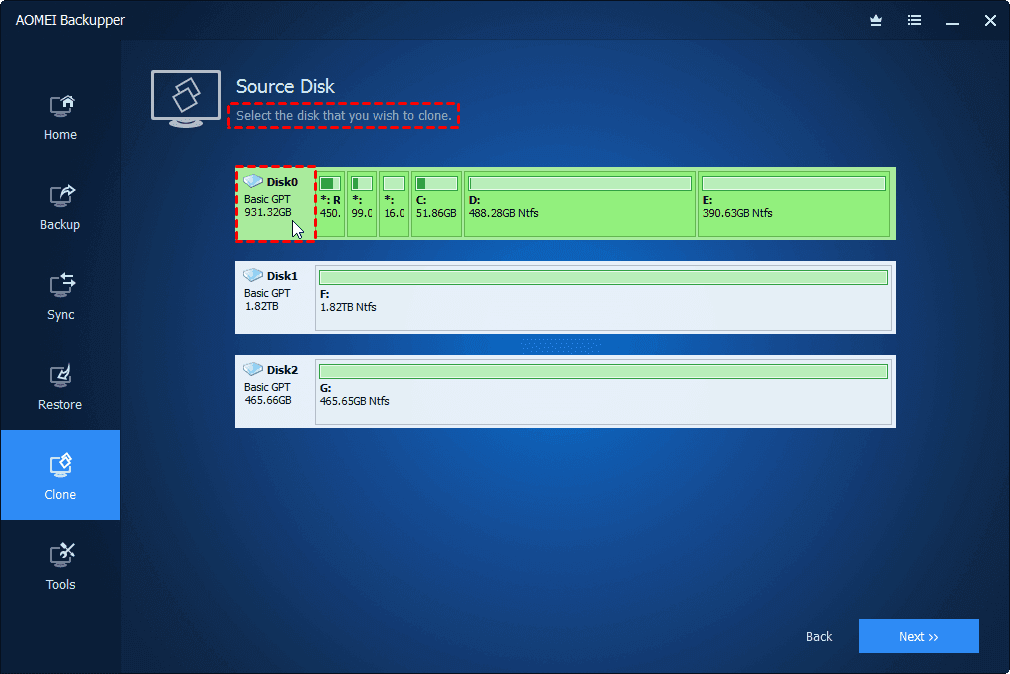
Step 3. Select the disk that contains your Windows system as your source drive, and click Next to continue.
Step 4. Choose the connected SSD to set it as the destination disk, and click Next.

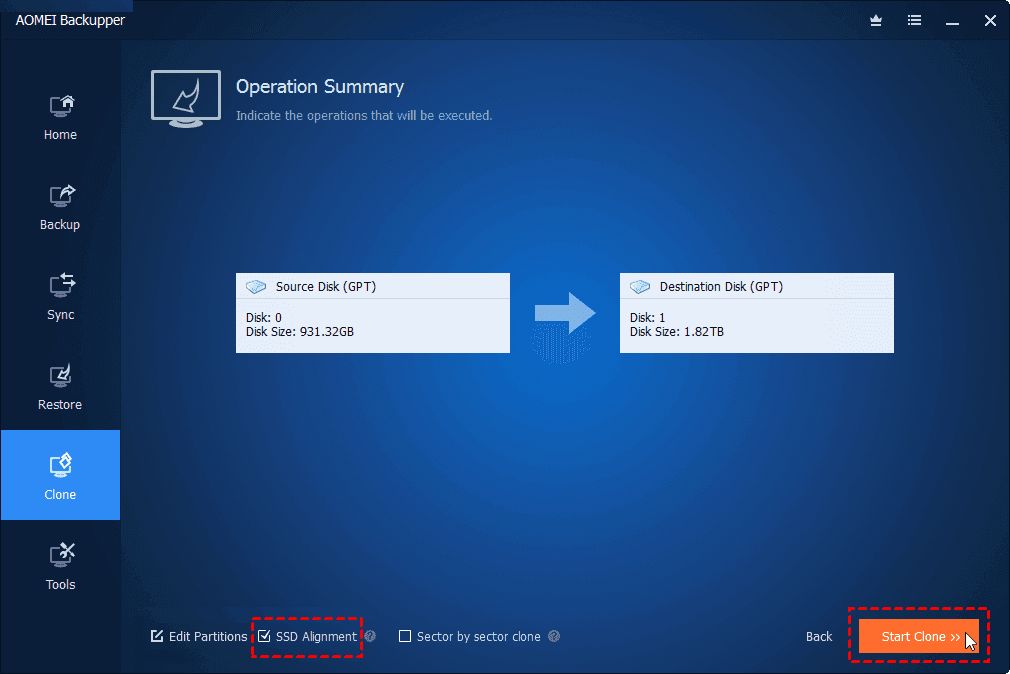
Step 5. Tick SSD Alignment for optimal performance, then click Start Clone to initiate the SSD cloning process.
How to Boot up from the Cloned Disk
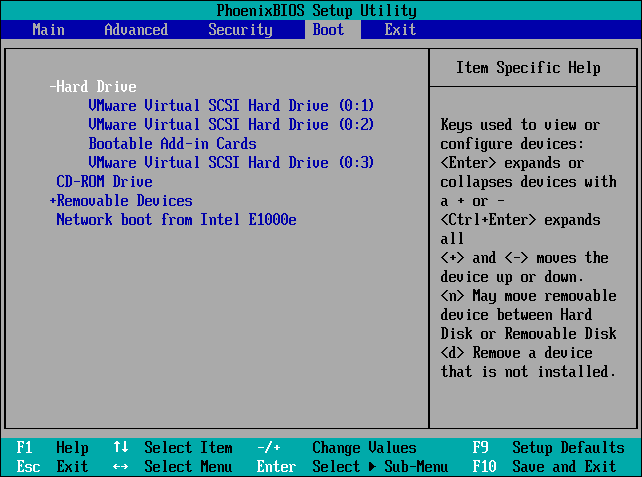
To boot your computer from the cloned disk, you can unplug the old hard drive, install the new drive there, and then start your computer. Press the specific key (usually F2, F8, F12, and Del) to enter BIOS, and change the boot priority to the cloned SSD.
DISM Cloning FAQs in Windows
1. What is DISM, and how is it used for cloning?
2. Can DISM clone a system with all installed programs and settings?
3. What is the difference between DISM and other 3rd-party cloning tools?
4. How do I check the integrity of a DISM image?
Use the following command to verify the image: dism /Get-ImageInfo /ImageFile:"C:\backup\image.wim"
5. Can DISM clone a system to a different hardware configuration?
6. What file formats does DISM support for images?
DISM primarily uses the .wim (Windows Imaging Format) file format. It also supports .ffu (Full Flash Update) for certain scenarios.
7. How do I automate DISM cloning tasks?
You can create batch scripts or PowerShell scripts to automate DISM commands. For example:
@echo off dism /Capture-Image /ImageFile:"C:\backup\image.wim" /CaptureDir:"C:" /Name:"Windows_Backup" dism /Apply-Image /ImageFile:"C:\backup\image.wim" /Index:1 /ApplyDir:"D:"
Save the script as a .bat file and run it as needed.
Conclusion
On this page, you have learned how to utilize DISM to clone disk. If this method is too complicated for you or it fails for cloning, you can also directly use the professional cloning tool - AOMEI Backupper, which simplifies the disk cloning process with a few clicks. Not only can it clone hard drive to SSD or SSD to SSD, but you can also clone USB drive to SSD easily.
Apart from that, AOMEI Backupper offers other useful features, like Windows bootable drive creation, for system, disk, partition, file backup and recovery, and so on. It even offers a Universal Restore function that can help you restore system or disk backup images to a computer with dissimilar hardware.