Dell XPS 9350 SSD Upgrade: Unlock Potential Speed
This comprehensive guide covers everything you need to know, from understanding the benefits of a Dell XPS 9350 SSD upgrade to selecting the right SSD, and detailed installation steps. Additionally, we provide solutions to common upgrade challenges, and a detailed FAQ section.
By Sebastian Updated on September 30, 2024
Introduction to Dell XPS 9350 SSD Upgrade
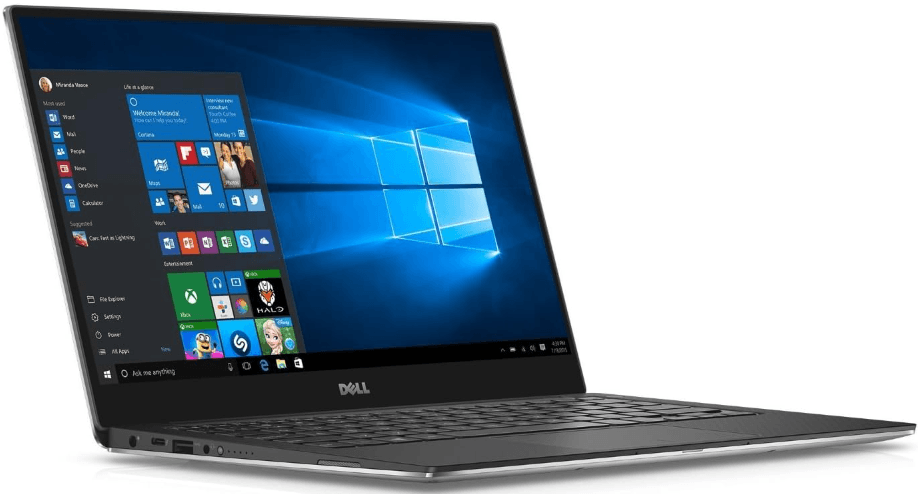
Upgrading the SSD in your Dell XPS 9350 is one of the most effective ways to enhance its performance and extend its lifespan. The XPS 9350, a model cherished for its sleek design and robust capabilities, can achieve unprecedented speeds with a suitable SSD upgrade. This article will guide you through the intricacies of choosing and installing the perfect SSD for your needs.
Dell XPS 9350 SSD upgrade: benefits and considerations
Benefits of upgrading the SSD
-
Enhanced Performance: One of the most immediate benefits of upgrading your XPS 9350 SSD is the significant boost in performance. Modern SSDs like the Samsung 980 PRO and Western Digital Blue SN550 offer read and write speeds that can be several times faster than older SSDs or traditional hard drives.
-
Increased Storage Capacity: Upgrading your SSD also allows you to expand your storage capacity, accommodating more files, applications, and media.
-
Improved Reliability and Longevity: Modern SSDs are built with advanced technology that enhances their reliability and longevity. With higher TBW (Terabytes Written) ratings, they can endure more write cycles before failing.
-
Better Energy Efficiency: Newer SSDs are more energy-efficient than their predecessors and traditional hard drives.
Considerations for Upgrading Your XPS 9350 SSD
📌Compatibility: When selecting an SSD for your XPS 9350, ensure compatibility with your laptop's specifications. Key considerations include:
-
Form Factor: The XPS 9350 typically supports M.2 2230 form factor SSDs.
-
Interface: PCIe NVMe interface is preferred for optimal performance.
📌Capacity: Determine the appropriate storage capacity based on your needs. SSDs are available in various capacities:
-
128GB to 256GB: Suitable for basic use with essential applications and a limited amount of media.
-
512GB to 1TB: Ideal for moderate use with multiple applications, games, and a sizeable media collection.
-
1TB and above: Best for intensive use, including professional work with large files, extensive game libraries, and significant media collections.
📌Budget: Budget is a critical factor in your decision-making process. Consider:
-
High-End SSDs: Options like the Samsung 980 PRO offer top-tier performance but come at a higher price.
-
Mid-Range SSDs: The Western Digital Blue SN550 provides a good balance between performance and cost.
-
Budget-Friendly SSDs: The Crucial P2 is affordable while still delivering solid performance for everyday use.
Recommended SSDs for Dell XPS 9350
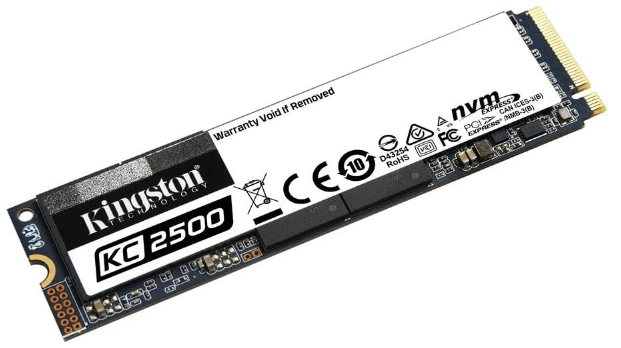
Kingston KC2500: The Kingston KC2500 is known for its impressive performance and reliability. It offers high read and write speeds, making it an excellent choice for enhancing your Dell XPS 9350's performance.
Sabrent Rocket NVMe 4.0: The Sabrent Rocket NVMe 4.0 is a high-performance SSD that offers exceptional speed and efficiency. It's ideal for users who demand the best in storage technology.
Intel 660p Series: The Intel 660p Series SSD provides a great balance of performance and affordability. It's perfect for users looking to upgrade their storage without overspending.
Step-by-Step Guide to Upgrading Dell XPS 9350 SSD
When you get the preparations ready, you can start upgrading the SSD on your Dell XPS 9350.
Clone OS and Data to the New SSD
To upgrade your Dell XPS 9350 SSD without losing any data, cloning is the best option. AOMEI Backupper Professional makes this process easy and quick. It's user-friendly and works with many different computers, not just Dell. Using this tool, you can clone your Dell SSD efficiently, keeping all your files safe and intact.
1. ✍ Effortless Cloning: AOMEI Backupper's "Disk Clone" feature makes it easy to clone your SSD to a larger one, ensuring it remains bootable. If you only need to clone the operating system, use the "System Clone" option for a seamless experience.
2. ✍ Disk Space Optimization: This software helps you make the most of your SSD space and can convert disk types from MBR to GPT, allowing for efficient storage management.
3. ✍ Performance Enhancement: AOMEI Backupper uses advanced 4k technology to boost SSD performance, leading to faster system operation and a better overall user experience.
4. ✍ Universal Compatibility: No matter the brand of your disk—whether it's Samsung, Toshiba, WD, or another—AOMEI Backupper is compatible, ensuring smooth integration with various hardware setups.
Download AOMEI Backupper Professional now and follow our simple step-by-step instructions to start cloning your SSD without any hassle. This user-friendly software makes the process easy and quick. By following our guide, you'll have your new SSD up and running in no time. Enjoy a faster and more efficient system today.
1. Start by connecting the new SSD to your Dell XPS 9350 with an external enclosure. This is the first step to begin the upgrade.
2. Open the AOMEI Backupper software and go to the "Clone" section. You will find all the tools you need to manage your disks there. Click on "Disk Clone" to start the cloning process.

Note: The Professional version of AOMEI Backupper allows you to clone both system disks (MBR/GPT) and data disks across different Windows versions, including 11, 10, 8, 7, XP, and Vista. For server users, there is also the AOMEI Backupper Server edition available.
3. In the cloning interface, select your current SSD as the source disk and the new SSD as the destination disk. This ensures that all your data is copied correctly.
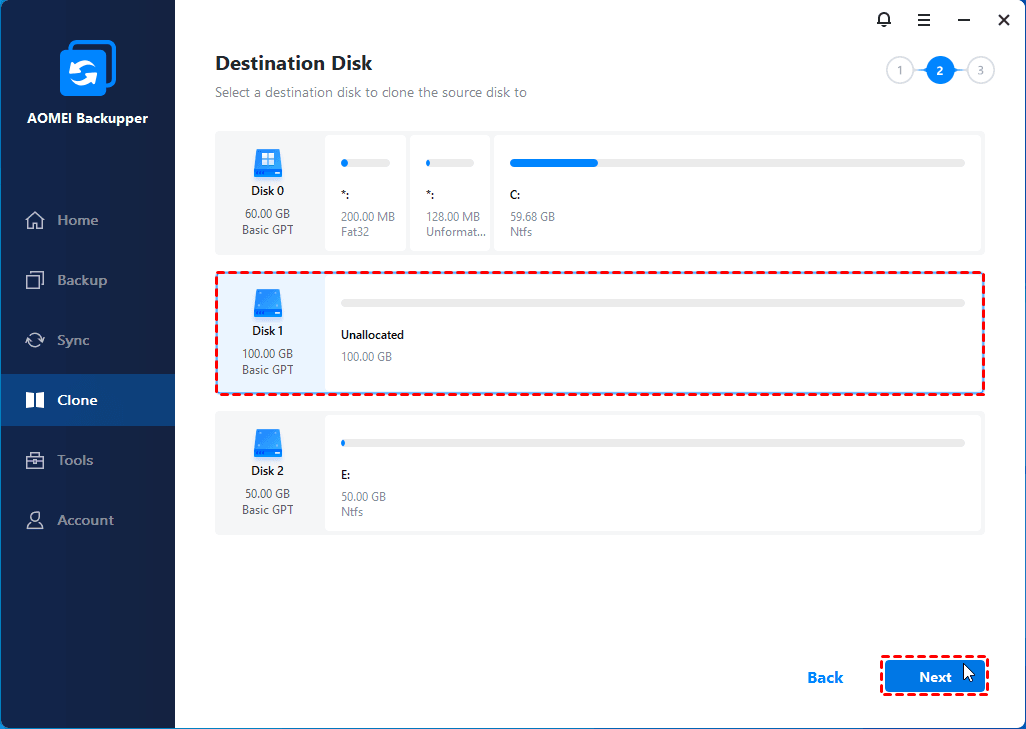
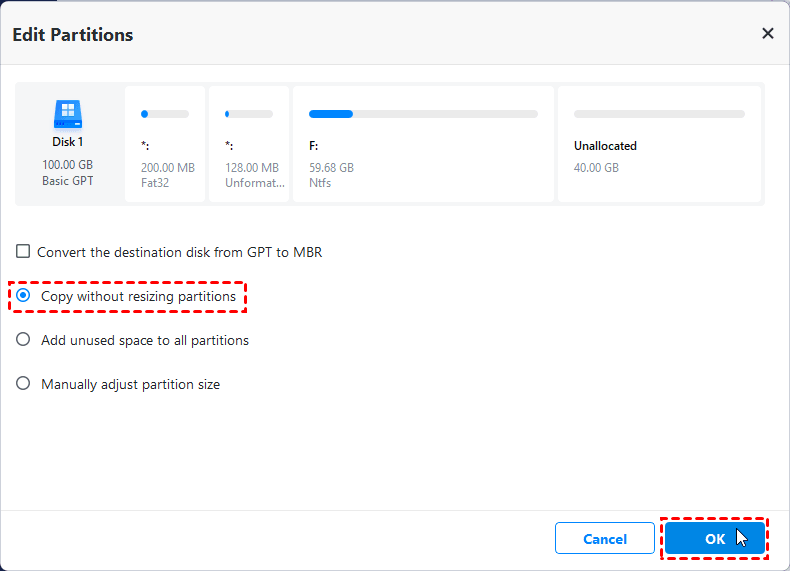
4. To get the best performance from your new SSD, enable the SSD Alignment option. Also, to avoid any leftover unallocated space after cloning, use the "Edit Partitions" feature. Here, you can add unused partitions or manually adjust partition.
5. Once you have configured all the settings, start the cloning process. Let the software transfer the data from your current SSD to the new one. Depending on the size of the data, this process may take some time, so wait patiently until it is completed.
Install the New SSD on the Dell XPS 9350
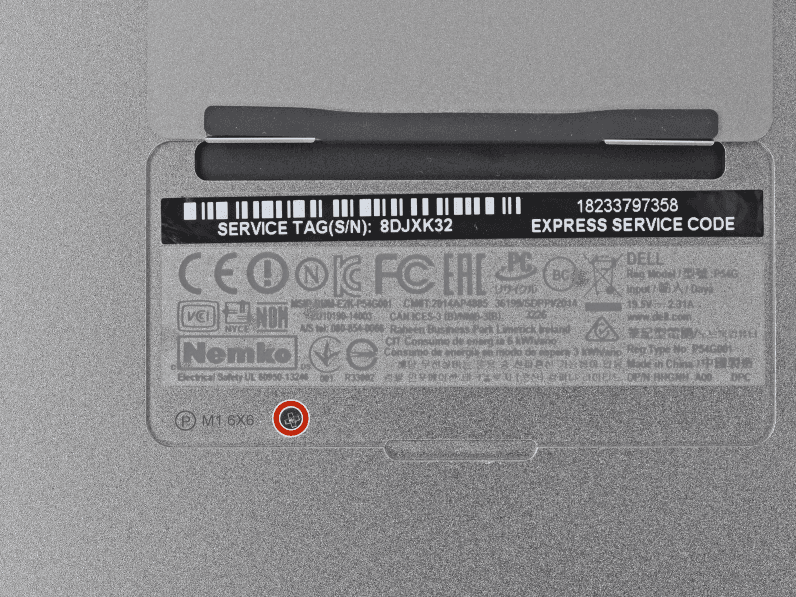
1. Remove the eight 4 mm T5 Torx screws from the bottom cover and the hidden Phillips screw under the flap.
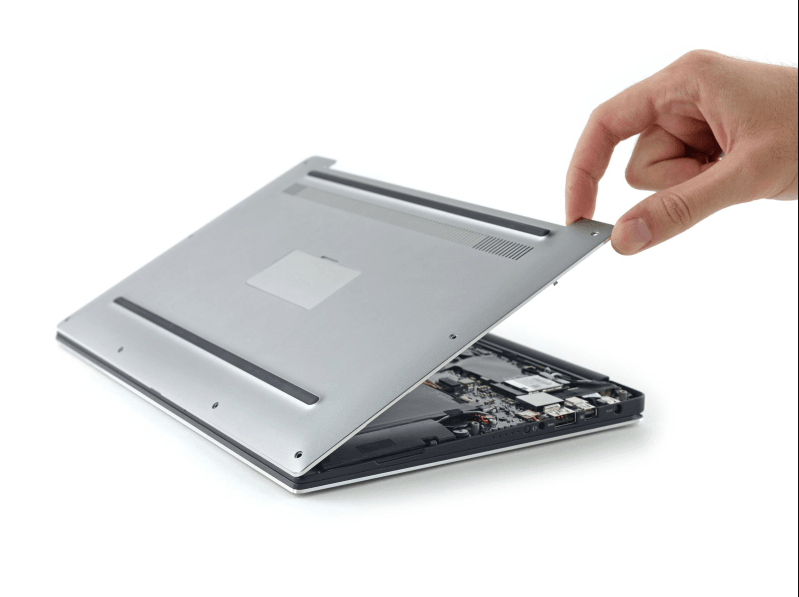
2. Use a plastic opening tool to lift the 'XPS' flap in the center.
3. With opening picks or a plastic pry tool, carefully detach the case clips starting from the back edge.
4. Disconnect the battery by pulling the battery cable connector towards the battery. Then, remove the black 4 mm Phillips screw holding the SSD in place.
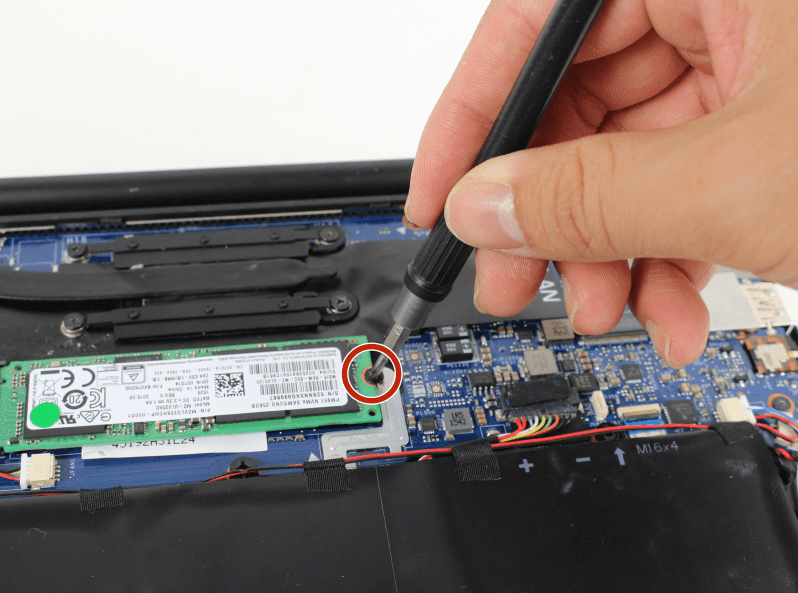
5. Gently slide the SSD out of its socket.
Boost Your Dell XPS 9350 from the New SSD
After installing the new SSD, you need to boot your system from it. To do this, go into your BIOS settings and change the boot order, making your new SSD the primary boot device.
Frequently Asked Questions (FAQs)
Q1: Why should I upgrade my Dell XPS 9350 SSD?
A: Upgrading your SSD can significantly enhance your laptop's performance, reduce boot times, increase storage capacity, and improve overall system reliability.
Q2: How do I know if an SSD is compatible with my Dell XPS 9350?
A: Ensure the SSD matches the M.2 2230 form factor and supports the PCIe NVMe interface for optimal compatibility with the XPS 9350.
Q3: What should I do if my laptop doesn't recognize the new SSD?
A: Check the BIOS settings to ensure the SSD is detected. If not, recheck the physical installation, ensuring the SSD is properly seated and secured.
Tips for a Successful SSD Upgrade
- Backup Data Regularly: Regular backups ensure that your data is safe during the upgrade process.
- Use Quality Tools: High-quality tools prevent damage to your laptop during disassembly and reassembly.
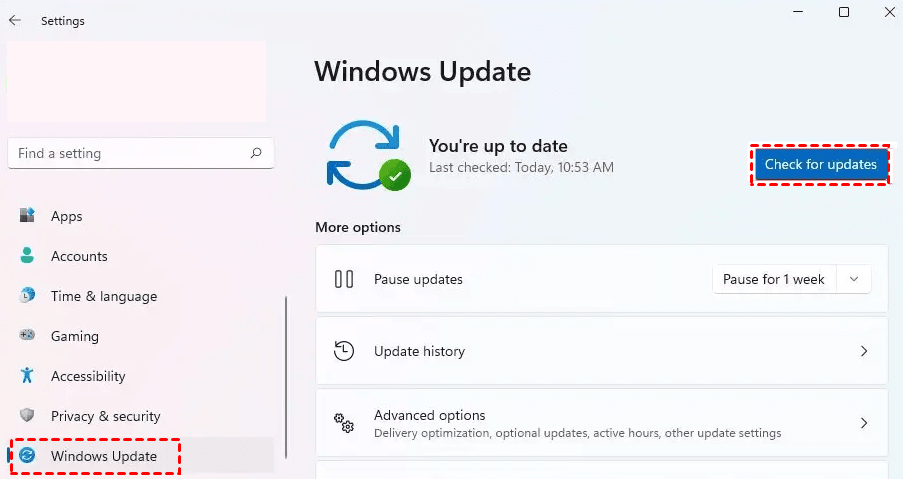
- Keep Your System Updated: Ensure your operating system and drivers are up to date to fully utilize the new SSD's capabilities.
Conclusion
Upgrading the SSD in your Dell XPS 9350 is a straightforward process that can yield substantial benefits in performance and storage capacity. By selecting the right SSD and following the proper installation steps, you can transform your laptop into a faster, more efficient machine. Whether you choose a high-end option like the Samsung 980 PRO or a budget-friendly SSD like the Crucial P2, the right upgrade will enhance your computing experience.