
GetDataBack Review: Pros, Cons, and Verdict [2025]
You may need a GetDataBack review to learn key features, pros, cons, pricing, and comments about the GetDataBack software.
By Zoey / Updated on December 30, 2024
Runtime Software, a USA-based software company, brings us GetDataBack Pro, a data recovery application that often flies under the radar in comparison to more widely recognized data recovery tools.
Our aim in this GetDataBack review is to dive into a practical evaluation of GetDataBack. We want to discern how it stacks up against other data recovery software we've put to the test.
Key Features of GetDataBack
GetDataBack Pro arrives on the scene with a robust feature set, aimed at enabling users to reclaim their lost data independently. Let's explore its offerings:
File System Compatibility
The software extends its helping hand to a variety of file systems, encompassing Windows, macOS, and Linux-centric platforms. Here's the exhaustive roster of supported file systems:
Windows: NTFS, FAT12, FAT16, FAT32, and exFAT
Linux: EXT, EXT2, EXT3, and EXT4
Macintosh: HFS+ and APFS
Note: While GetDataBack covers this extensive range of file systems, it exclusively operates on Windows systems equipped with a minimum of 4 GB of RAM. Users can recover a wide array of file types, including image recovery, documents, videos, audio, and executables. The comprehensive support for common file systems is a notable advantage, especially the inclusion of Apple-specific file systems.
Data Recovery Capabilities
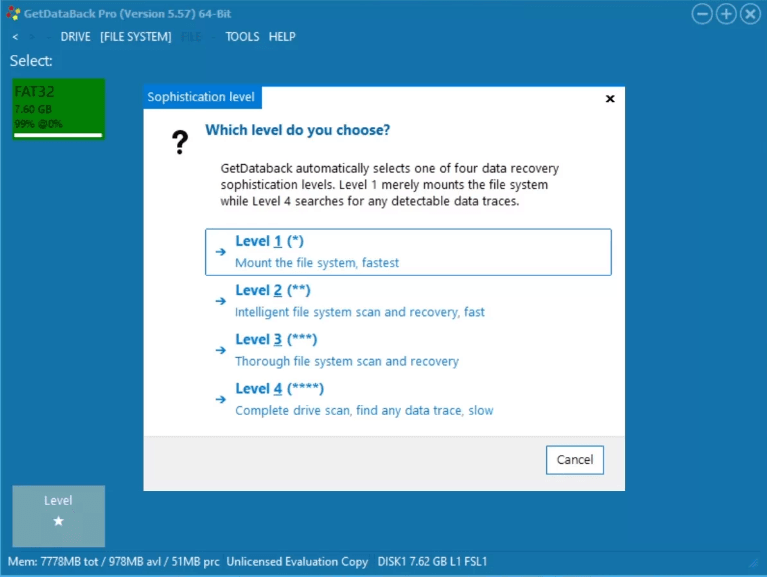
Get ready for 4 levels of data recovery scans, denoted by stars. By default, the program initiates a level 1 scan, the fastest but least thorough. Remarkably, a level 1 scan on a Microsoft Surface Laptop 3, examining both an SSD and a USB drive, wrapped up in just a few seconds.
We even tested it on a recently quick-formatted hard drive with the same level 1 scan. To our surprise, all the missing data became visible, and we could preview each file in the recovery task.
-
We hadn't written new data to the hard drive after formatting it.
-
Despite the ability to preview individual files, GetDataBack struggled with accurately displaying folder names, which could pose a challenge when attempting to recover a number of files.
User-Friendly Interface
The interface of GetDataBack has its pros and cons. It adopts a tile-like design reminiscent of Windows 8 and 8.1.
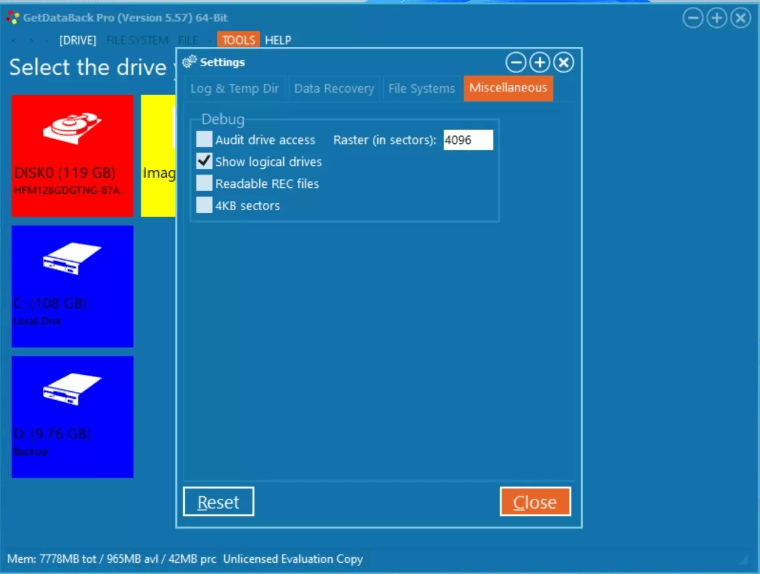
Scanning starts as soon as you select the relevant storage drive from GetDataBack's home screen, although it did miss having a dedicated scan button. Users can also scan individual partitions. You can enable this feature by navigating to Tools > Settings > Miscellaneous > Show Logical Drives.
Easy Tutorial to Use GetDataBack
Overall, the data recovery process within GetDataBack is straightforward, though the interface might require some adjustment. Let's begin by understanding how to perform GetDataBack download and install:
1. Download the GetDataBack setup file.
2. Run the downloaded file.
3. Follow the on-screen instructions to complete the installation.
Upon completing the download, initiate the application via the Start menu as there won't be a desktop shortcut available.
In a test scenario, we embarked on a data recovery mission, targeting an internal hard drive and the disk image of a USB drive. It's worth noting that this data recovery procedure mirrors the process for recovering files from external HDDs and SD cards.
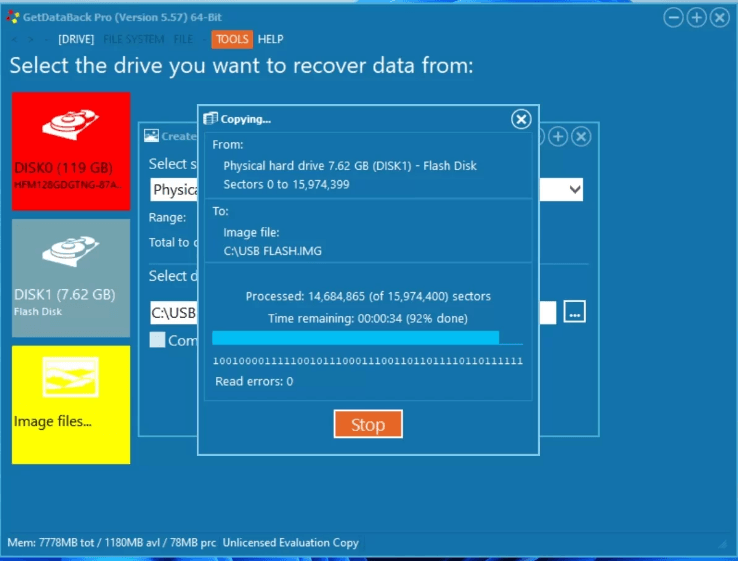
1. To craft the USB disk image, we hopped into GetDataBack's toolbox, navigating through Tools > Create Image. The software invested approximately 5 minutes in generating the disk image, tailored for an 8 GB USB drive.
2. Mounting these image files is a straightforward endeavor. Head to the GetDataBack home screen, locate the Image files option, and with a simple click, unveil the path to your disk image. A quick click on 'Open' completes the process.
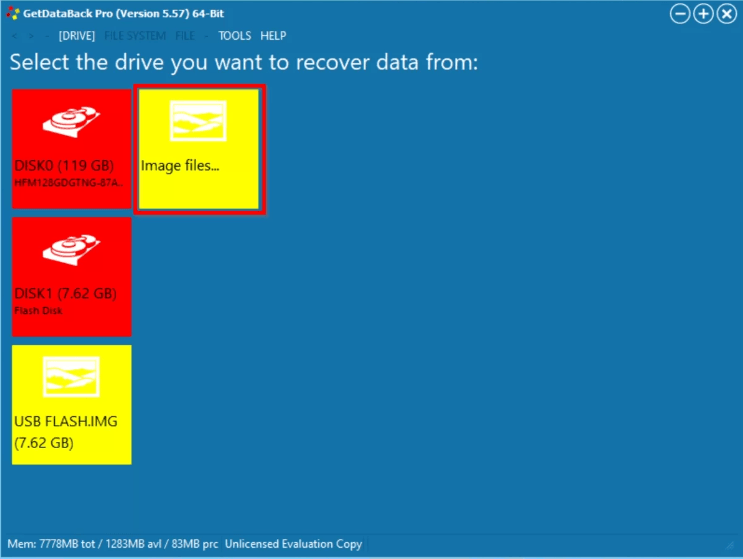
3. Initiating a scan on this disk image was as effortless as clicking on the newly mounted disk image, symbolized by a conspicuous yellow tile.
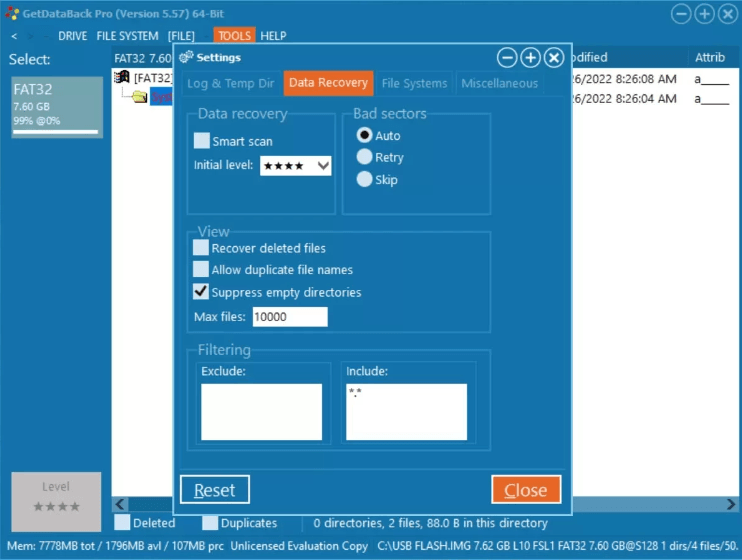
The software promptly initiated a Level 1 scan, disregarding any changes we had made to the default setting, which was set at Level 4. It wasn't until later that we discovered the necessity of unchecking the Smart Scan option within Tools > Data Recovery to ensure the scan Level setting took effect.
4. When subjected to a Level 4 scan, the USB disk image underwent meticulous scrutiny by GetDataBack, consuming a couple of minutes in the process. Regrettably, no recoverable files surfaced within the confines of the disk image. Moreover, a scan of the physical USB drive yielded similar results, with the sole discovery being the hidden System Volume Information folder that was originally resident on the USB drive.

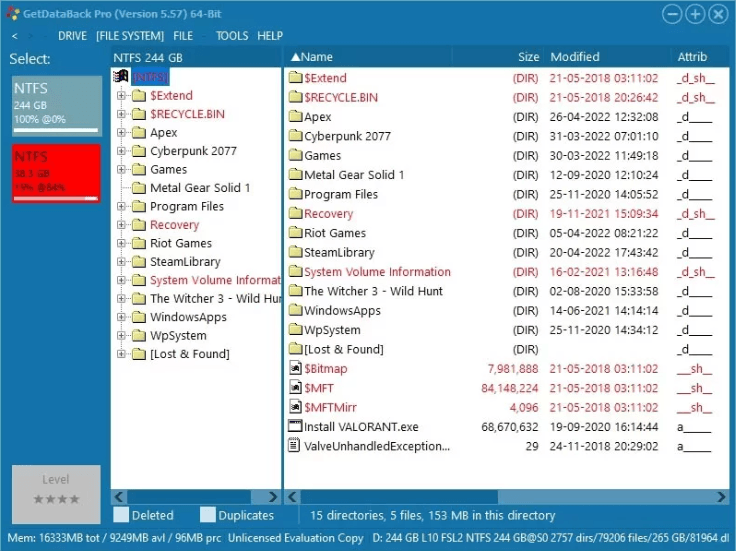
5. Further testing led us to engage in a Level 4 scan of an HDD partition boasting a substantial 243 GB of data. This comprehensive examination spanned approximately 40 minutes. However, GetDataBack did redeem itself by revealing a substantial trove of recoverable data, all of which was readily available for preview.
6. To recover the data, a straightforward right-click on the desired file followed by the selection of 'Copy' sufficed.
Pricing of GetDataBack
At $79 for a lifetime license, GetDataBack offers competitive pricing. As of the time of writing this GetDataBack review, Runtime Software exclusively provides a one-time purchase model for GetDataBack Pro, without any subscription-based or tiered alternatives. It's worth noting that while you can download GetDataBack Simple to preview recoverable files, actual data recovery requires an upgrade to GetDataBack Pro.
User Feedback for GetDataBack
While GetDataBack's usability earns some praise, novice users might find it overwhelming due to the sheer volume of technical terms the software exposes. This can potentially confuse those who aren't well-versed in data recovery.
However, not all user experiences are positive. It's worth noting that this feedback may not reflect the most current state of the software, as some comments date back a while. Perhaps Runtime Software has made strides in improving its customer support since then.
Find a GetDataBack Alternative
If you're on the hunt for a powerful GetDataBack alternative, AOMEI FastRecovery stands out as a highly recommended choice. It excels at recovering deleted and lost files from various storage media, including HDDs, SSDs, USB drives, and SD cards. Here's a glimpse of its merits and drawbacks:
👍 Pros:
- Recovers 200+ file formats, encompassing 42 image file types.
- Preserves original file formats, filenames, directories, and sizes for recovered files.
- Offers the flexibility to pause, filter, or preview specific files during scanning.
👎 Cons:
- Not support Mac and Linux operating systems.
Now, let's delve deeper into what AOMEI FastRecovery brings to users:

- AOMEI FastRecovery efficiently tackles data loss stemming from deletion, disk formatting, virus attacks, or system crashes.
- It boasts an extensive file format recovery repertoire, encompassing images (JPG, PNG, DNG, TIFF, etc.), videos (MP4, MOV, AVI, etc.), MS Office files and WPS files, folders, compressed files, websites, and more.
- AOMEI FastRecovery streamlines the recovery process by automatically running both Quick Scan and Deep Scan, leaving no stone unturned in the search for retrievable files.
- Plus, during the scanning process, you have the option to filter and preview files based on various criteria like filename, file format, saved path, storage size, and deletion date.
Here's a guide on how to recover deleted files from hard drives, USB drives, or SD cards using AOMEI FastRecovery:
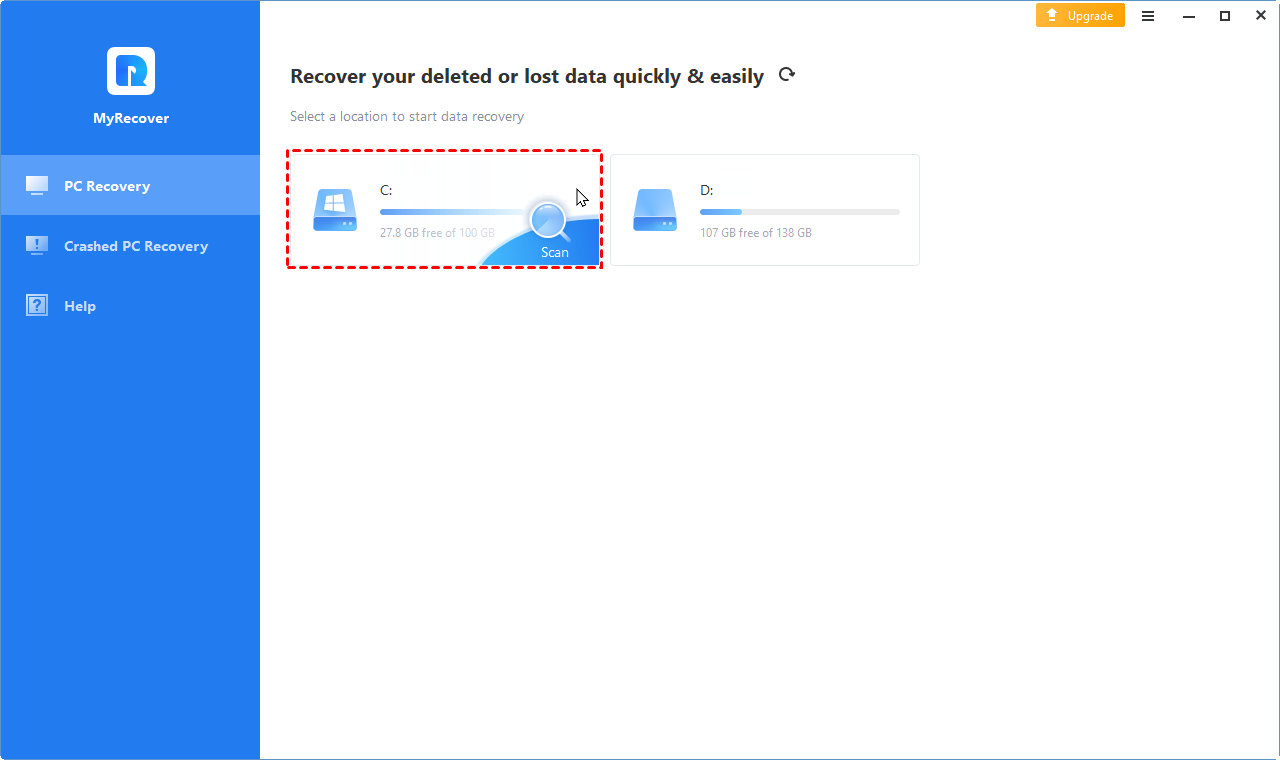
Step 1: Install and run AOMEI FastRecovery on your Windows system. Once open, hover the mouse over the drive saved deleted files before, and click Scan.
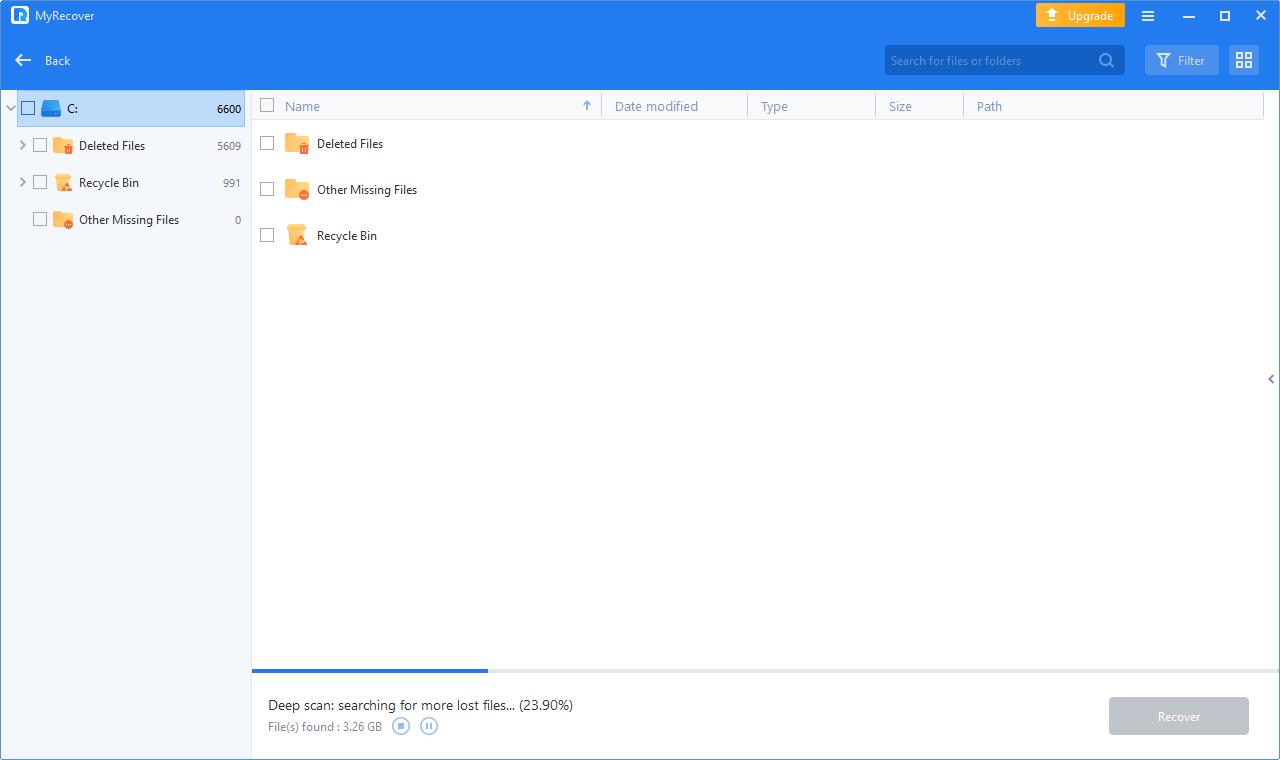
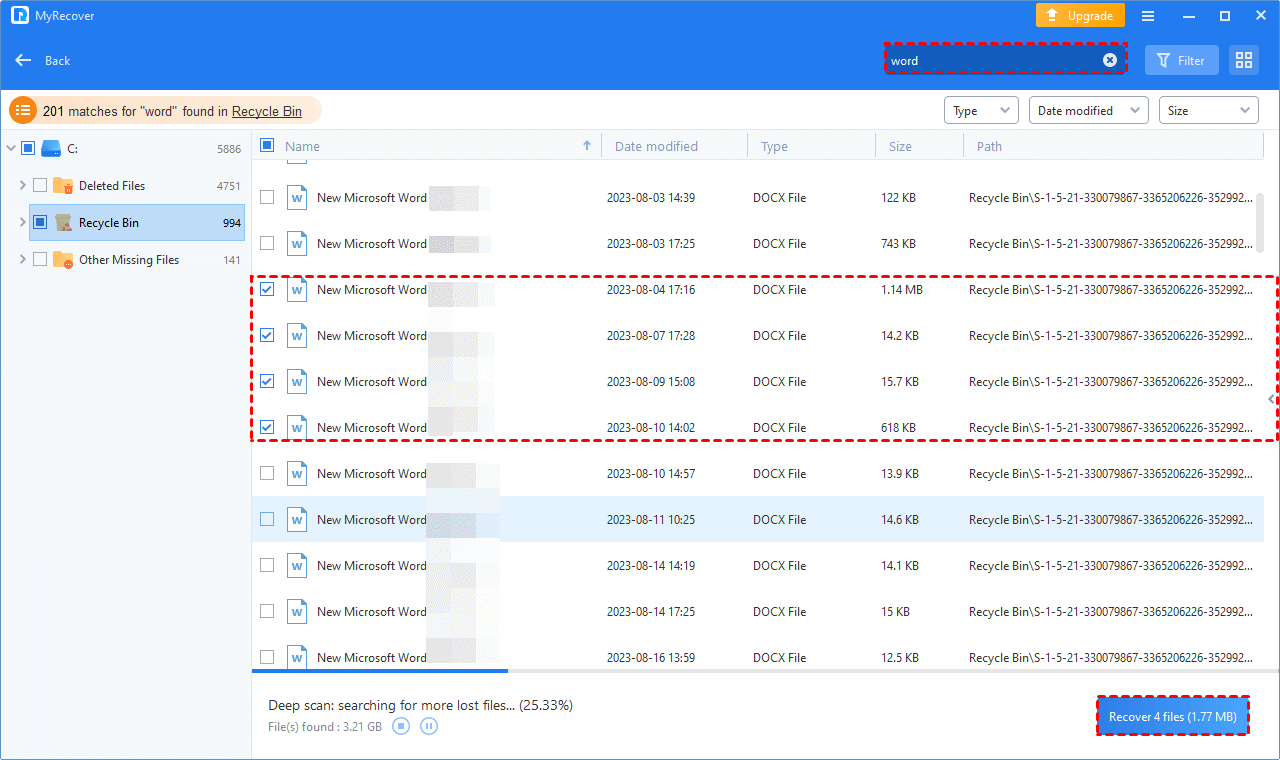
Step 2: As you click "Start Scan," AOMEI FastRecovery will automatically initiate both Quick Scan and Deep Scan procedures to identify all recoverable files on your selected drive. While the scanning process is underway, you have the flexibility to swiftly filter and preview your preferred files based on criteria like Filename, Document Type, Path, Size, Date, and more.
Step 3: After the scan is complete, navigate to the "Deleted Files/Recycle Bin/Other Missing Files" section. Here, you can browse and select the specific files you wish to recover. Once you've made your selections, simply click "Recover x files" to initiate the recovery process.
FAQs
Is GetDataBack Safe?
What Is GetDataBack Used For?
Do Data Recovery Apps Deliver on Their Promises?

