[Free] How to Recover Data without Backup on Windows 11/10
This guide provides you with 4 effective tips on how to recover data without backup, including Windows and iOS. If you’ve been bothered by this issue, find the way that suits you the most here.
By Dervish / Updated on September 13, 2024
Page Navigation:
✦ Option 1. Recover deleted data without backup through data recovery tool [Hot]
✦ Option 2. Get data back without backup from the Recycle Bin
✦ Option 3. Retrieve deleted files without backup using Windows File Recovery
✦ Option 4. Try Ctrl + Z to recover data without backup
Help! Can I recover deleted files without backup?
I have mistakenly deleted some files on my computer. I know I can restore data from a backup. But as far as I know, I haven’t made any backups on my computer as I don’t know how to back up files. So can I recover data without backup?”
As in the example of the scenario, you may also face the situation of recovering deleted files without backup. After deleting unnecessary files, you may regret it. If you have a backup at this time, then you can quickly restore them. However, if there is no backup, how to recover data without backup may become challenging.
How to recover data without backup - 4 Options
Don't worry, here are some useful tips that can recover deleted files by mistake, even if there is no backup. Refer to the following parts and find the way that suits you the most.
▶ Option 1. Recover deleted data without backup through data recovery tool [Hot]
AOMEI FastRecovery is one of the most popular data recovery software on the market, it is easy to use and has a high recovery rate.
It allows you to recover over 200 types of data, including photos, videos, PDFs, Word, PPTs, and Excel from Windows 11/10/8/7. In addition, it can also recover data from a formatted drive. All in all, It is the top choice for recovering deleted files when there is no backup.
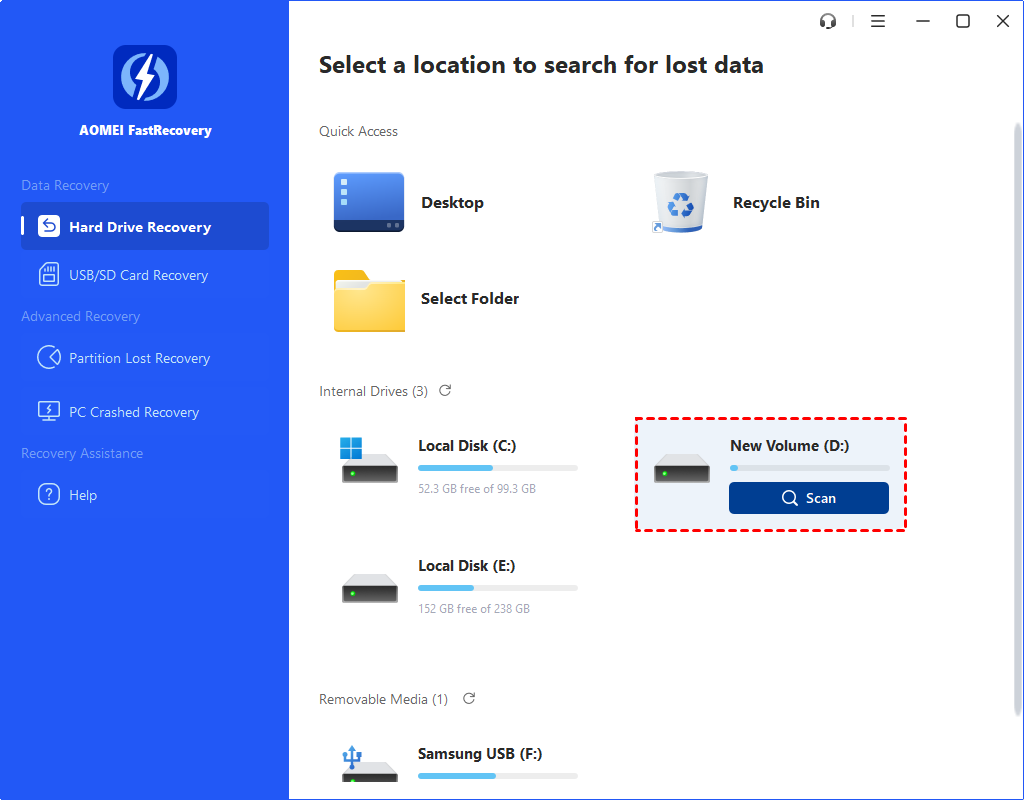
Step 1. Install and launch AOMEI FastRecovery on your computer.
Step 2. Find the formatted drive from which you want to recover your data and click Scan.
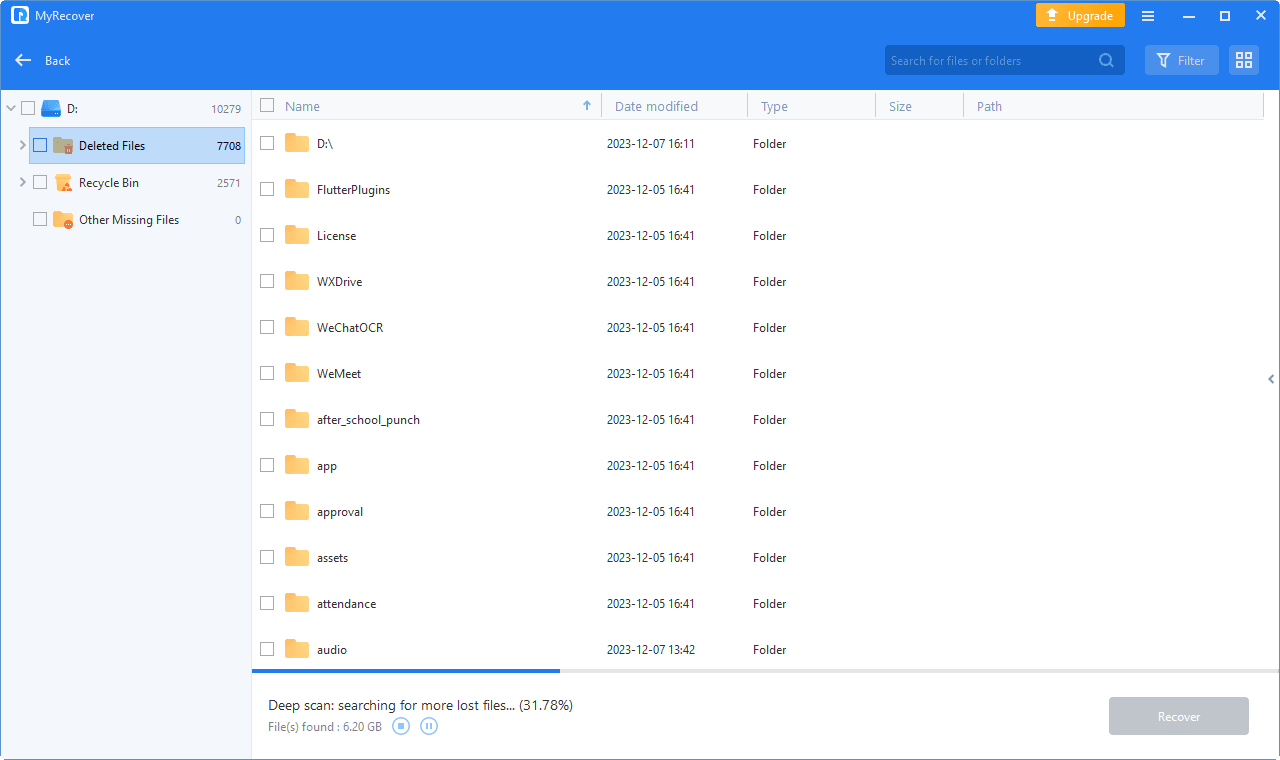
Step 3. Then the scanning process will start automatically. You don’t need to wait for the process to complete if you find the data you want to recover.
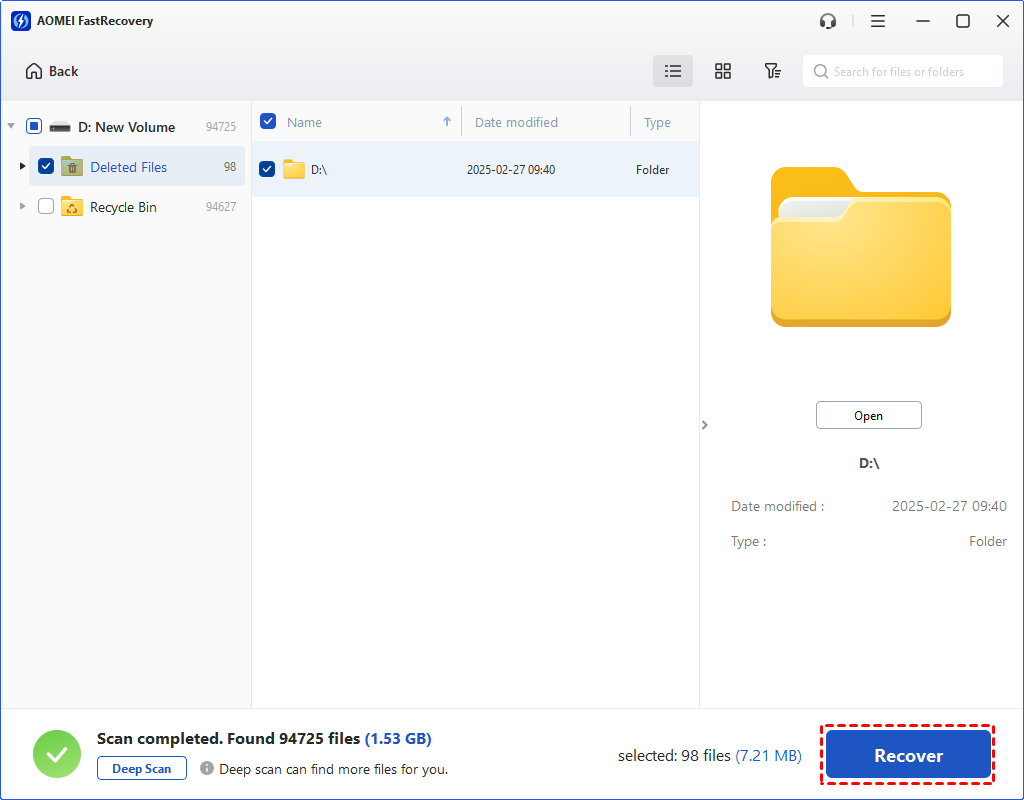
Step 4. Select the files you want to restore. Click Recover xx files.
▶ Option 2. Get data back without backup from the Recycle Bin
If you dragged deleted files to the Recycle Bin or pressed the "Delete" key to delete them and did not empty the Recycle Bin yet, it is easy to recover deleted files from Recycle Bin in Windows 10/11.
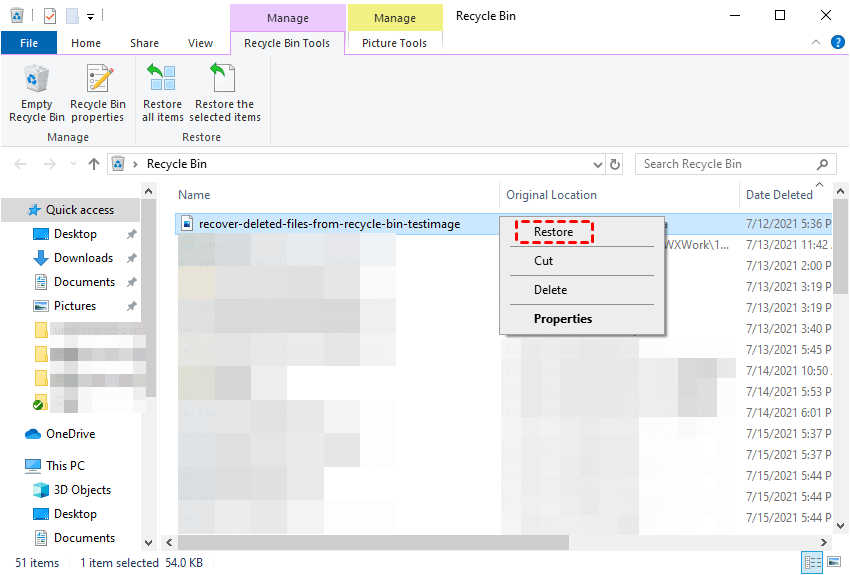
Step 1. Open Recycle Bin on your desktop.
Step 2. Locate the files that you deleted.
Step 3. Then, right-click it and select Restore to recover it to the origin path.
▶ Option 3. Retrieve deleted files without backup using Windows File Recovery
You can also try Windows File Recovery, a command-line utility of Microsoft, which allows you to recover data using the Command Prompt without backup.
Preparation work before using Windows File Recovery:
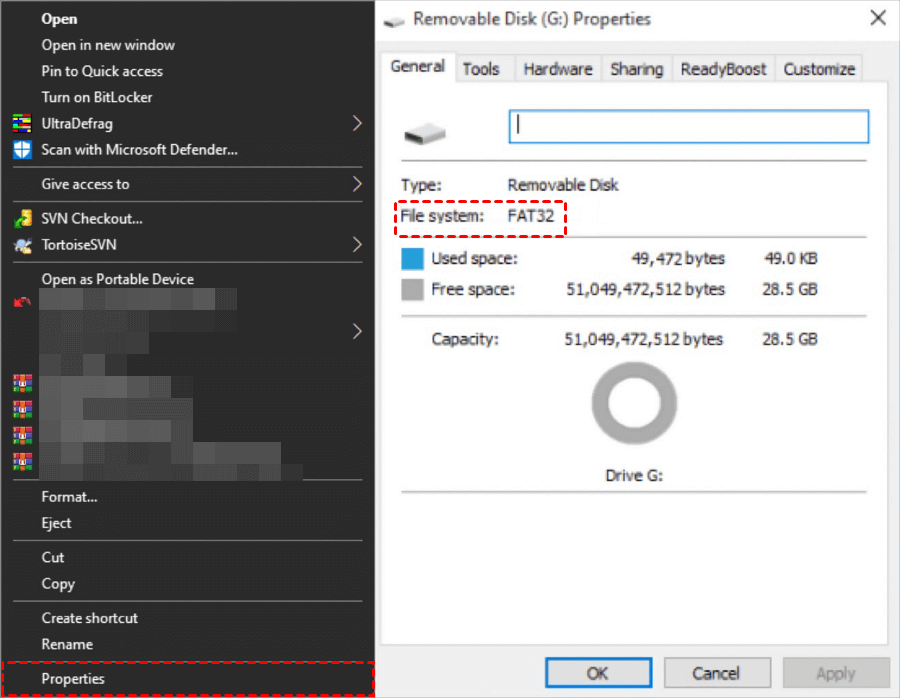
To use this tool, check out your File System first. Go to This PC > right-click on the drive that contains the data you want to restore before > click Properties.
In addition, you need to use recovery mode and switches to get back your files. To decide which mode to use, refer to this table.
| File system | Scenarios | Mode |
| NTFS | Deleted recently | Regular |
| NTFS | Deleted for a while | Extensive |
| NTFS | Formatted disk | Extensive |
| NTFS | Corrupted disk | Extensive |
| FAT and exFAT | Any | Extensive |
Switches are used to filter the scanning range, thus can save the scanning time.
| Switches | Meaning | Supported mode(s) |
| /n | Filter the scan range: scans for a specific file with its file name/path/type, etc. | All |
| /y: | Recover specific extension groups. | Signature |
| /k | Recovers system files. | NTFSSegment |
| /u | Recovers undeleted files, for example, from the Recycle Bin. | NTFSSegment |
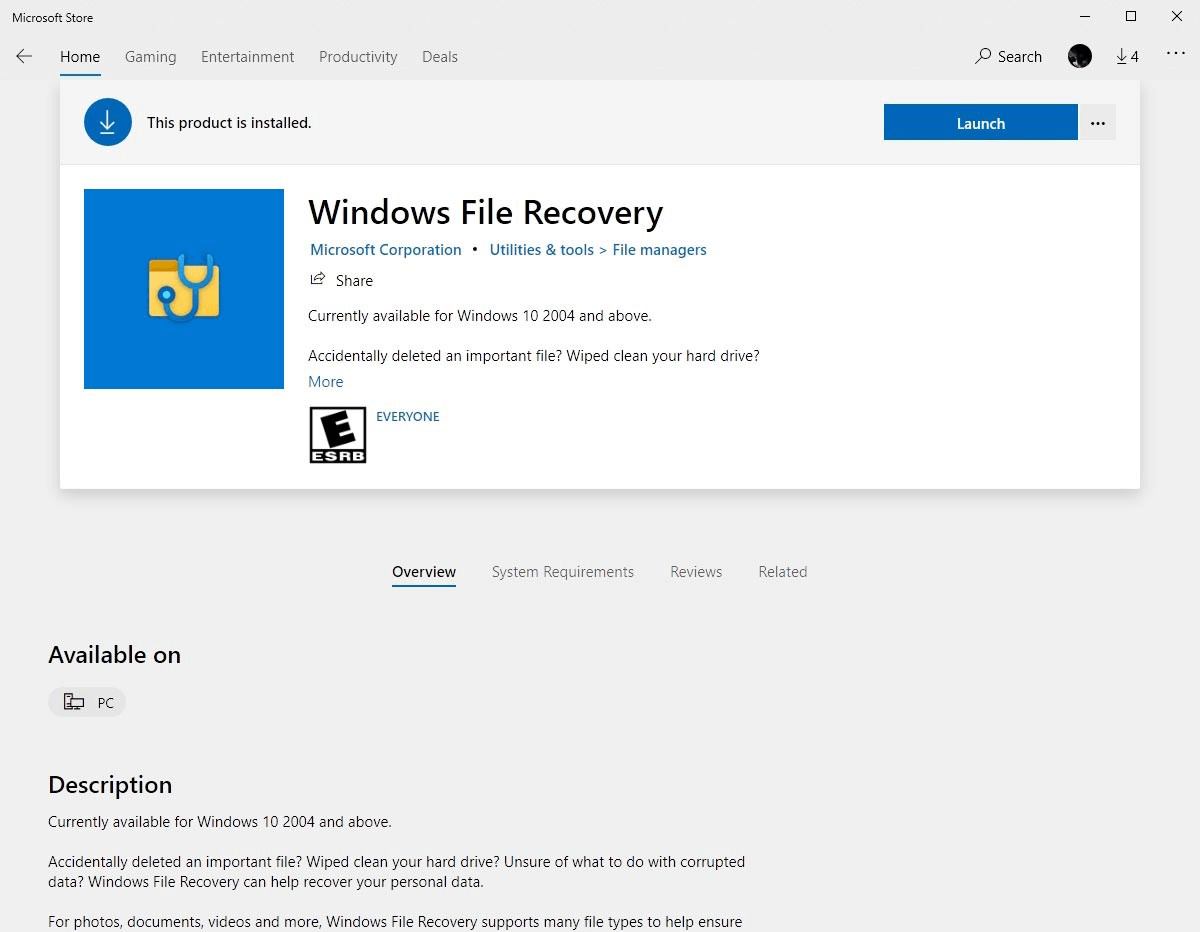
Step 1. Download and install Window File Recovery on your computer from Microsoft Store and then open it.
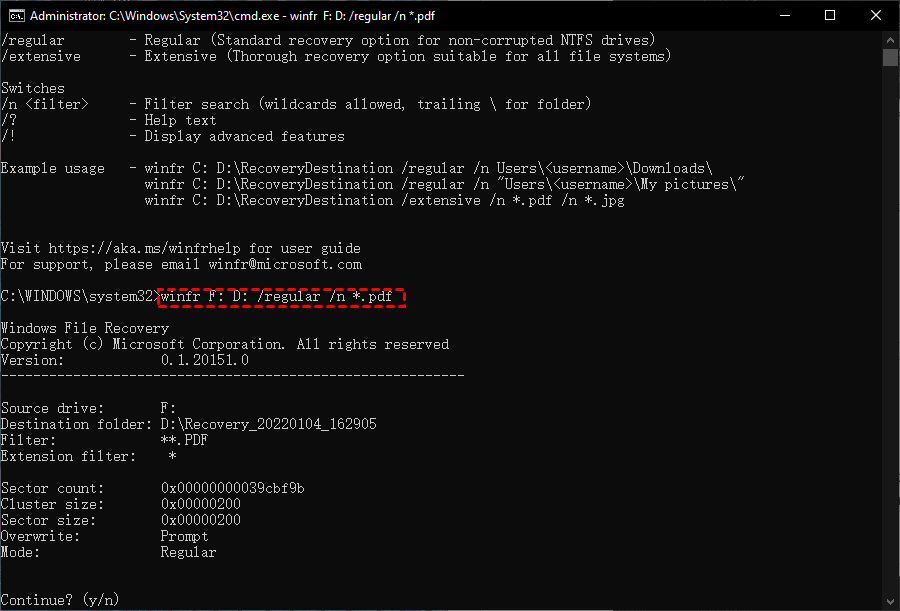
Step 2. Open Powershell or Command Prompt (run as administrator). In the Command Prompt, enter commands in the following command format:
winfr source-drive: destination-drive: [/mode] [/switches]
For example, if you need to recover deleted pdf files from F: drive (the external hard drive) to D: drive, then the command will be like:
winfr F: D: /regular /n *.pdf
- Notes:✎...
- The tool is only compatible with Windows 10 versions 2004 and up.
- The results of Windows File Recovery are unpredictable. Some of your information might not be recoverable.
Using Windows File Recovery appears to be quite difficult for those without command-line experience. As a result, WinfrGUI was created to assist users in resolving the problem. With a graphical user interface, users can experience all the functions of Windows File Recovery easily.
▶ Option 4. Try Ctrl + Z to recover data without backup
You can use the Windows shortcut Ctrl+Z to recover deleted files. Pressing Ctrl+Z simultaneously can undo the last action and recover other data files you were working on.
Here are the steps to recover deleted files using Ctrl+Z:
Step 1. Right-click on the folder containing the lost file.
Step 2. Click "Undo Delete" to restore the file to its original location.
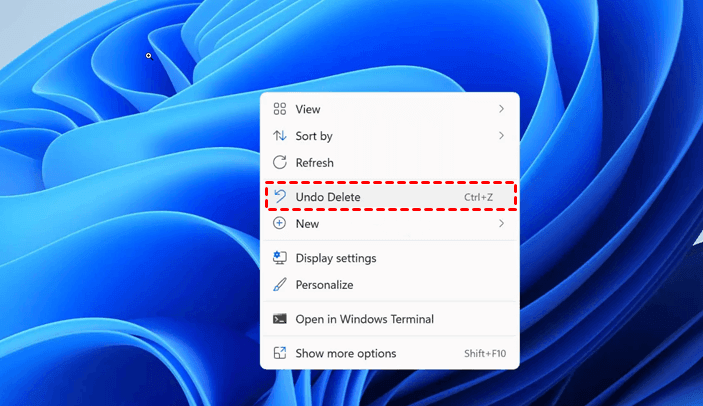
Step 3. You can also press "Ctrl+Z" to recover deleted data.
How to recover iPhone data without backup
Is it possible to recover deleted data from an iPhone without a backup? Yes, it is! Let’s look at how to recover data without backup on an iPhone using the professional iPhone data recovery tool MyRecover for iOS.
Step 1. Download and install MyRecover for iOS on your computer. It’s advised to use an original lightning cable to connect your iPhone to the computer.
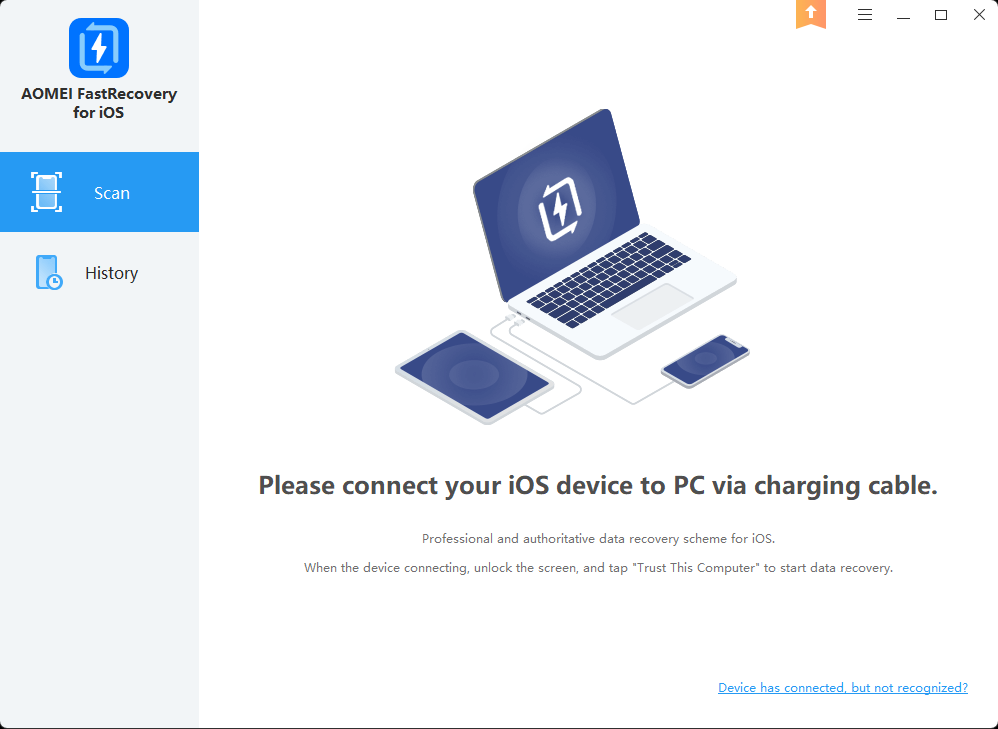
Step 2. Tap “Trust this computer” on your iPhone to authorize the computer. MyRecover for iOS will detect your iPhone automatically. Click “Scan Now” on the software to start the scanning process. It usually costs several minutes to complete.

Step 3. All of your iPhone data found will be listed on the left panel. Click “Photos” and select the deleted photos and videos you want to restore, and then click “Recover” to save them to your computer.

Conclusion
From what has been discussed above, this post mainly gives you 4 options on how to recover data without backup respectively. Besides, a professional iPhone data recovery tool is also introduced in case you need to recover lost data from your iPhone/iPad/iPod.
In a word, no matter whether you admit it or not, backup has played a great role in ensuring data safety. Therefore, back up your important data in case any unexpected occasion happens.