[2023] How to Use TestDisk to Recover Data on Windows 11/.10/8/7 PC
When encountering data loss on your Windows PC, you may want to rely on TestDisk to recover files. Here in this guide, you can get detailed steps about how to use TestDisk to recover data on Windows 10/8/7 PC, as well as a simpler way to recover data.
By Demi / Updated on December 11, 2024
You may encounter data loss on a Windows computer in your daily work for kinds of reasons, such as accidental deletion, virus/malware attack, system crash, and so on. Fortunately, most of the time, you can rely on a right data recovery tool to retrieve deleted or lost data.
When it comes to file recovery software for Windows, TestDisk is one of the popular names among advanced Windows users. Thus, in this guide, you will be given detailed instructions about TeskDisk and the steps on how to use TeskDisk to recover data on Windows 10/8/7 PC.
How to use TestDisk to recover data on Windows PC
TestDisk is a free and sophisticated data recovery application that may help users recover deleted data, and lost partitions, and make non-booting drives bootable again, among other things.
However, The process about how to use TeskDisk to recover files seems like a lengthy and complicated process. Optionally, a TestDisk alternative is available for you in the next part, enabling you to recover data on Windows PC in a simpler way.
You may need to follow every step below with patience and carefulness to know how to use TestDisk to recover files in Windows 10/8/7 PC.
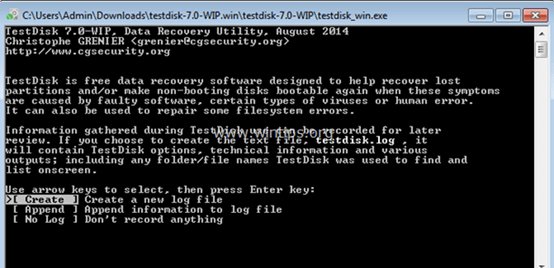
Step 1. Download, install, and launch TestDisk on your computer > Once it is launched, press Enter.
Step 2. Select Create option and press the Enter button to let TestDisk scan for connected hard drives.
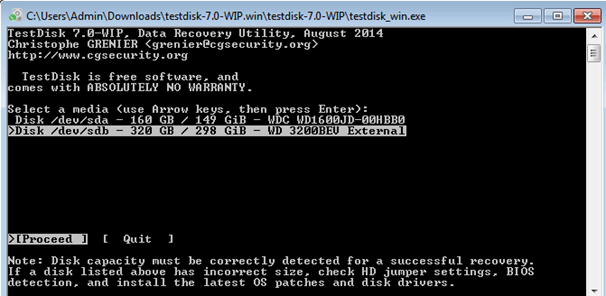
Step 3. When the list of hard drives shows in the window, use the arrow keys to select the disk that you want to scan > Press Enter to continue.
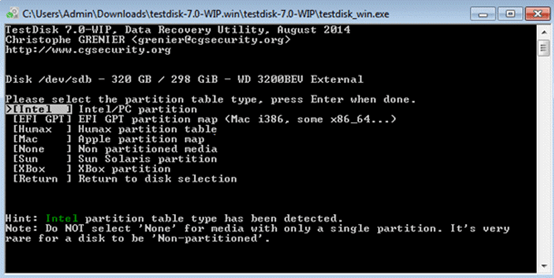
Step 4. On the next screen, choose the partition table type (Intel) > Continue by pressing the Enter button.
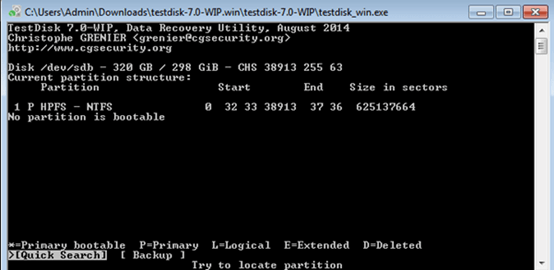
Step 5. Select Analyze and press Enter, then, TestDisk will start analyzing your selected hard drive.
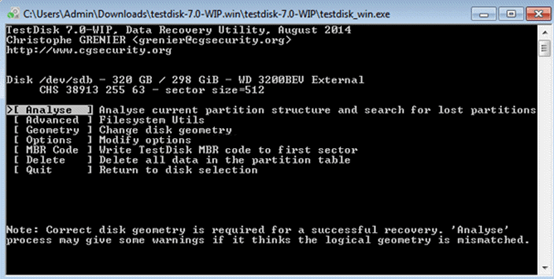
Step 6. Once the analysis is complete, use the Quick Search option to scan the drive.
Step 7. Now, you will see the list of lost/deleted files. From that list, navigate to the files or folders that you want to recover and press the C button to copy them.
Step 8. Choose a destination to copy your files > Press Y to start the copying process.
TestDisk will copy the selected files to the folder where it is running from. Once all the selected files are copied, you will see a Copy Done! Message on the screen.
Three-step: Recover data via AOMEI FastRecovery
Different from the complicated process in TestDisk, AOMEI FastRecovery provides you a way to recover deleted or lost data from HDD/SSD within 3 as easy as ABC steps. Without any experience requirement, this data recovery tool can be of great assistance to all Windows users.
Other features and advantages of AOMEI FastRecovery
✔ Apply to different data loss conditions. AOMEI FastRecovery can assist you regardless of how you lost data from hard drivers, such as accidental deletion, disk formatting, system crash, virus attack, and so on.
✔ Support to recover 200+ types of files. The software supports recovering files including but not limited to texts, pictures, videos, audio, compressed files, etc. Furthermore, the files will be retrieved to their original quality.
✔ Scan drives deeply and quickly. Embed an advanced scanning algorithm, AOMEI FastRecovery deeply scans and filters all deleted and lost files in a short time. You can be free to select files to be recovered.
Click the icon below to free download AOMEI FastRecovery on your Windows 11/10/8/7/Server computer and recover wanted data by following the simple three steps below.
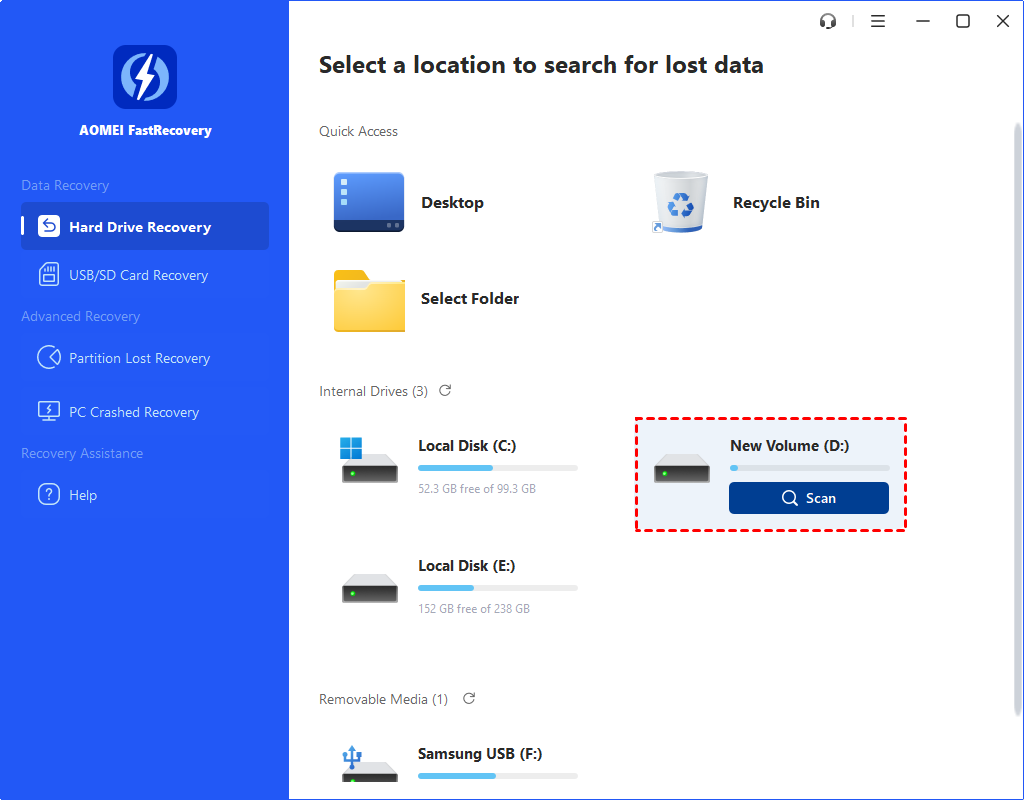
Step 1. Run AOMEI FastRecovery on your computer > Hover the mouse over the partition or disk where your data is lost > Click Scan.
If you need to recover data from flash drive, just plug it into your computer in advance.
Step 2. Wait for the scan process to finish. During the process, you can click the folders in the Scanned files list to browse and choose the wanted files you’d like to recover.
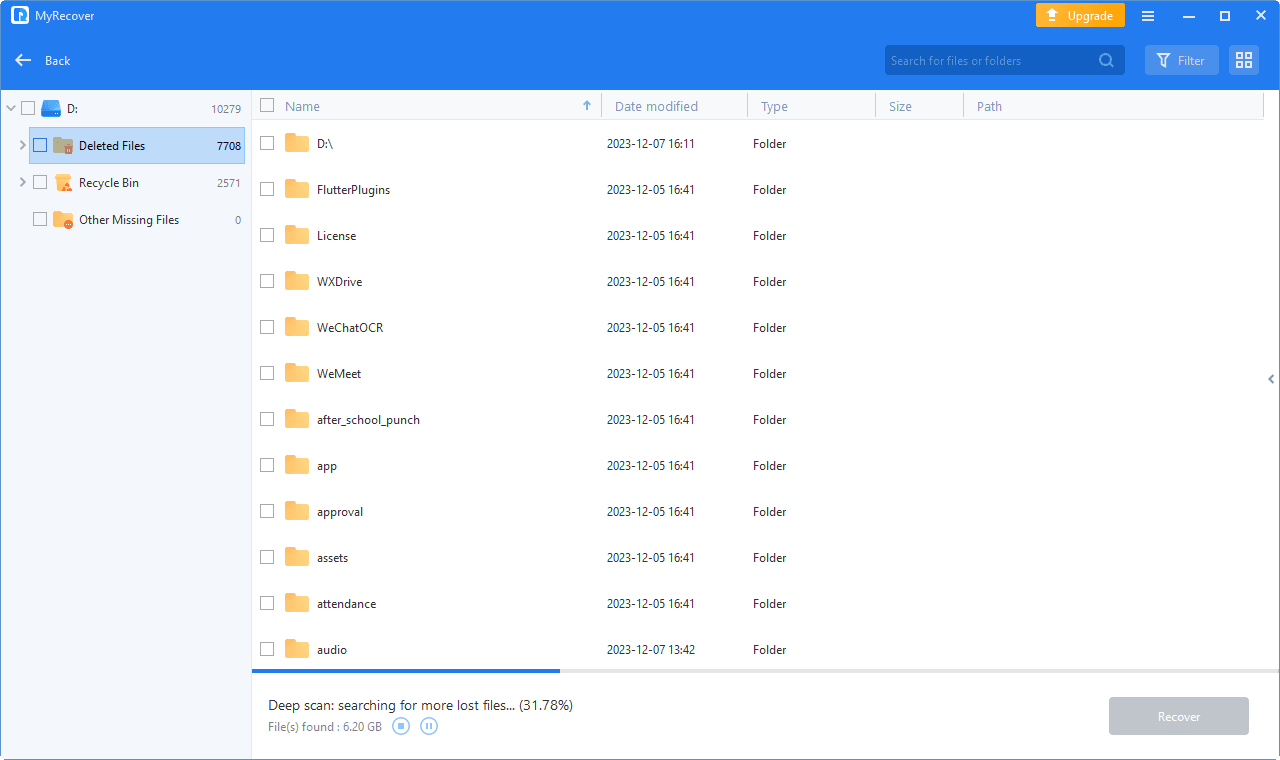
You can also quickly find the data you want to recover by using the search bar and filter function from the upper-right corner.
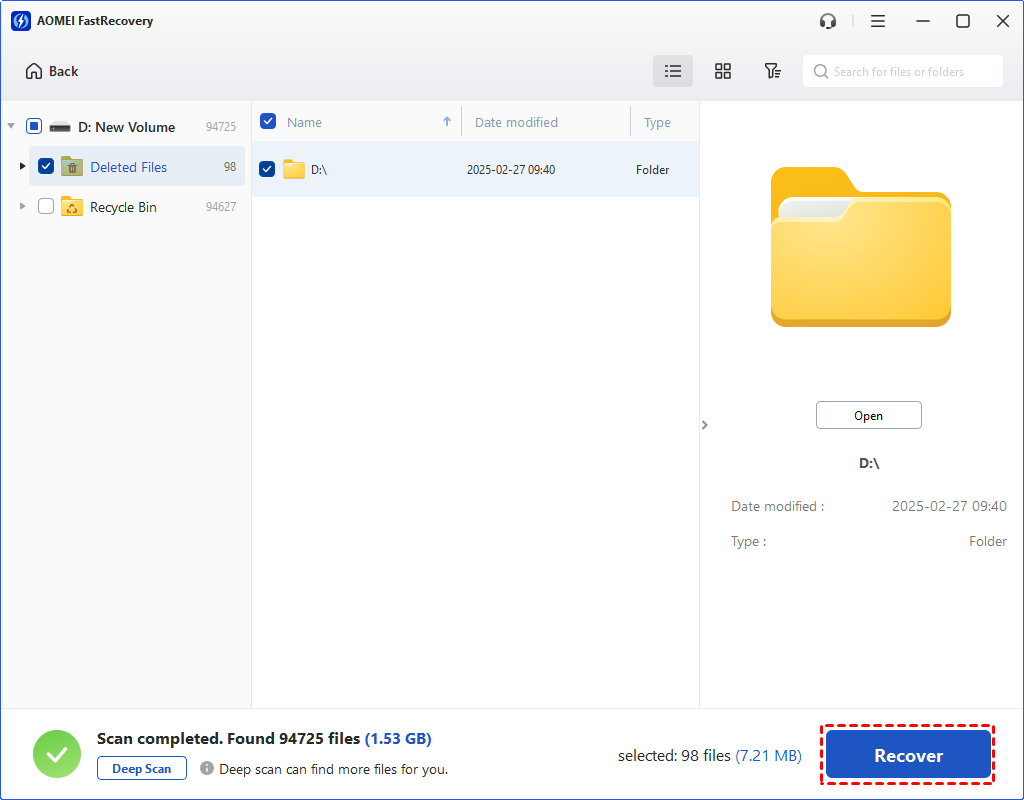
Step 3. Make sure you have selected all needed data to recover > Click Recover x files to get the lost files back > Finally, choose a destination to save the selected files.
Warm tips: How to avoid data loss on Windows computer
It is suggested to do some precautions to avoid data loss in advance instead of looking for solution for data recovery after it has happened. Here are three tips for you to avoid data loss on Windows PC to some degree.
Tip 1. Keep using Antivirus software. Making antivirus software enabled on your computer helps prevent viruses and malware from attacking your computer and deleting your files.
Tip 2. Schedule regular Windows backup. It is suggested to backup files in Windows PC regularly to avoid any unexpected data loss. You can try the AOMEI Backupper software to backup Windows in different ways.
Tip 3. Partition drives for different use. You can also partition hard drives to save files for different purposes. Here you can try AOMEI Partition Assistant, an easy-to-use partition manager, which also enables you to recover deleted/lost partitions.
Conclusion
That’s all for how to use TestDisk to recover data on Windows 10/8/7 computer. Hope you can get all lost/deleted data back with the methods in this guide. If you prefer a simple and time-saving way for data recovery, you can try AOMEI FastRecovery as well. If this guide helps you, please share it with others.