[4 Options] How to Recover Files Deleted by CHKDSK Safely
This post is mainly about how to recover files deleted by CHKDSK. Specifically, you can use data recovery software, File History, Backup and Restore, and Windows File Recovery, along with step-by-step guides.
By Ivy / Updated on March 5, 2025
What is CHKDSK?
CHKDSK, which stands for “check disk”, is a Windows utility that checks the file system integrity of a volume, or drive and repairs logical errors. Also, it marks bad sectors, telling Windows where it can't store or read data. In addition, it goes through all data listings to make sure that everything on the disk is correct.
The issue: CHKDSK deleted my files
“I ran CHKDSK to repair the file system corruptions on my hard drive. However, in the process of fixing the errors, CHKDSK deleted my files. The removed files are important to me. How can I recover files deleted by CHKDSK?”
Don't worry, this article will provide you with 4 simple & effective methods to recover files deleted by CHKDSK. However, before getting to know how you’d better get to know more about CHKDSK. Here we'll list some common questions in the following:
Why do chkdsk delete files?
Yeah, sometimes, users may find CHKDSK deleted my files, usually in the one of following situations:
❌CHKDSK finds bad sectors: The CHKDSK will mark bad sectors on the hard disk if it finds them, thus Windows won't read or store data from there, causing data stored in the bad sector to be lost permanently.
💾 The disk is corrupted or damaged: The corrupted or damaged disk itself is inaccessible. Continue using CHKDSK to accelerate the processing of losing data.
⛔ The CHKDSK is interrupted: Unexpected shutdown or restart may cause CHKDSK to delete files. So please avoid these operations while running the CHKDSK command.
Can CHKDSK recover files?
It is not a data recovery tool and will not recover lost or damaged files. CHKDSK will simply ensure the information currently on the disk is in a consistent and safe state. If files are damaged, the CHKDSK utility attempts to separate the damaged files and save the remnants as Filenn.chk.
How does CHKDSK Utility Work?
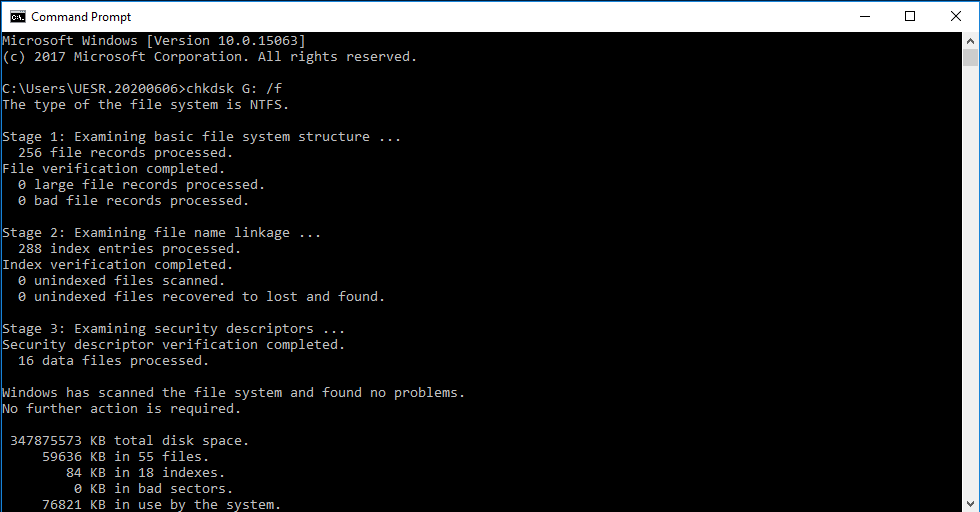
When you run CHKDSK, it does whatever is necessary to repair the logical file system, though it may result in data loss. The CHKDSK process has five stages, three of which are mandatory and two of which are optional. All of which are visible when you run CHKDSK in CMD.
Stage 1. File checks and verification
Stage 2. Examines volume indexes
Stage 3. Verifies the security descriptors for each Volume
Stage 4. Data verification (optional)
Stage 5. Checks for free space (optional)
4 methods to recover files lost after CHKDSK on Windows
Next, it's time to learn how to recover files that have been lost due to the CHKDSK utility. 4 tried-and-true methods for recovering files deleted by CHKDSK are mentioned below.
Option 1. Recover files deleted by CHKDSK via data recovery software 🔥
The first option to retrieve deleted files is to use professional data recovery software, such as AOMEI FastRecovery, released by AOMEI Tech, with 10 years of experience in the data protection industry. It's read-only, which means it does not make any changes while scanning the disk, thus not causing data overwriting. More importantly, it has a free edition that can recover data up to 500MB.
- Easy-to-operate. It allows you to recover lost/deleted files from Windows within 3 easy steps.
- Top-notch algorithms: It combines Quick Scan & Deep Scan to thoroughly scan the disk to find as many files as possible, even if they are permanently deleted, ensuring high recovery rates.
- Versatile: It can recover lost/deleted texts, pictures, videos, audios, emails, compressed files, etc., in over 1000+ formats without losing their quality.
- Flexible. It provides users with some useful methods, such as search, filter, preview, selective restore, etc., making data recovery smooth.
- Widely-compatible. It supports NTFS, FAT32, exFAT, and ReFS in Windows 11/10/8/7 & Windows Server.
- All-inclusive. It applies to various file loss scenarios in Windows, including recovering files from formatted drives, corrupted partitions, after system crashes, virus attacks, etc.
Download, install and launch AOMEI FastRecovery on your computer.
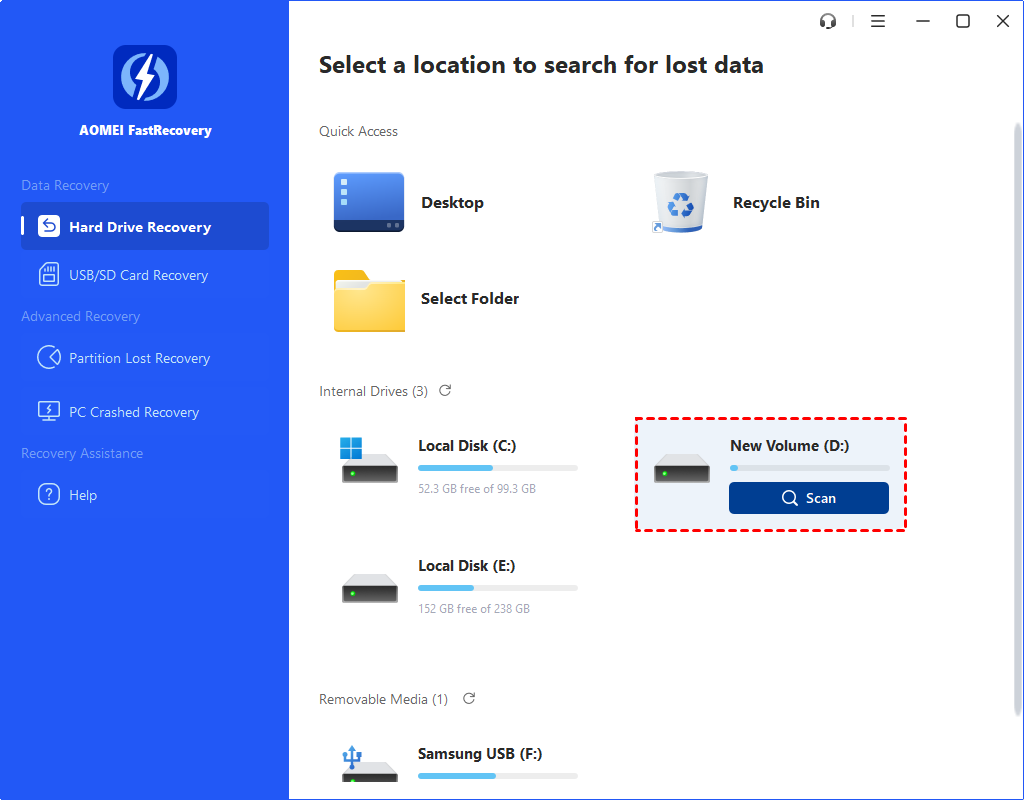
Step 1. Scan the drive containing deleted files.
Hover the mouse over the partition used to store the deleted files. Click Scan.
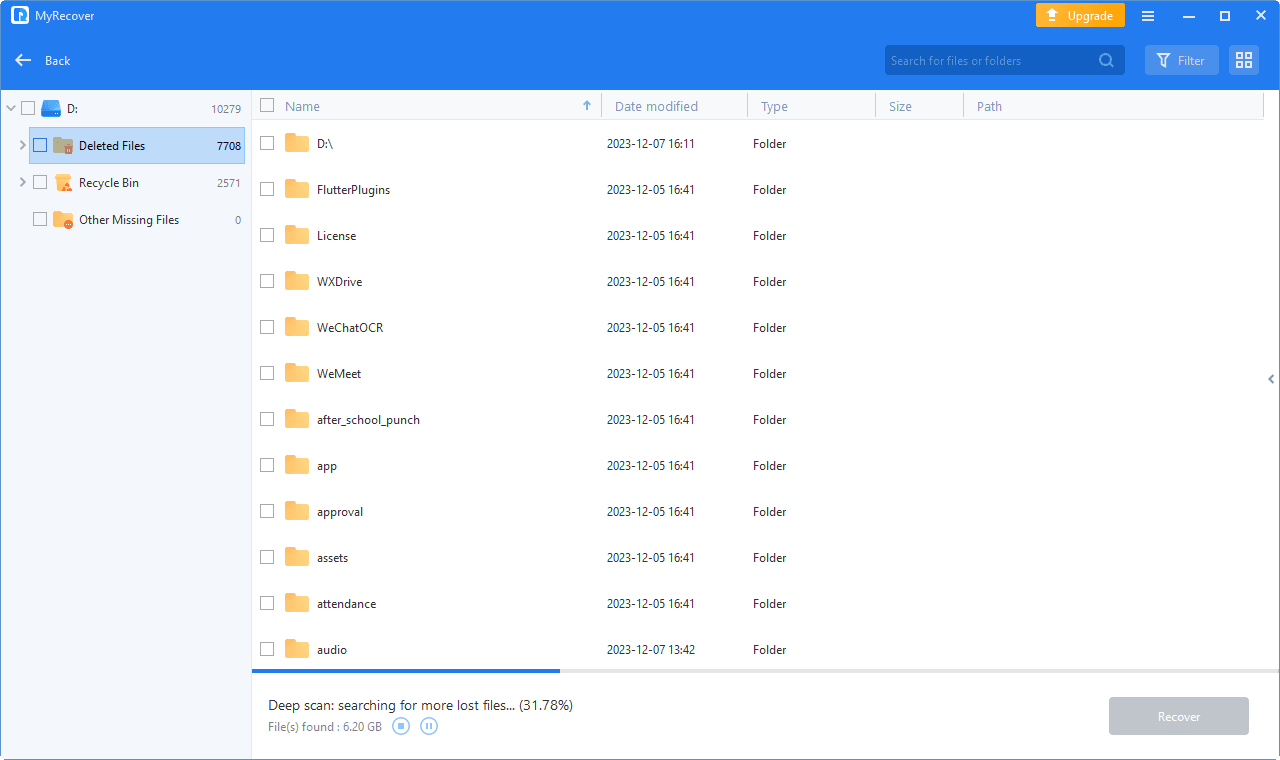
Step 2. Find files deleted by CHKDSK.
Then the scanning process will start automatically. You don’t need to wait for the process to complete if you find the files you want to recover.
By default, the retrieved files will be categorized by file path, thus you can expand Deleted Files/Recycle Bin to find files in the original location.
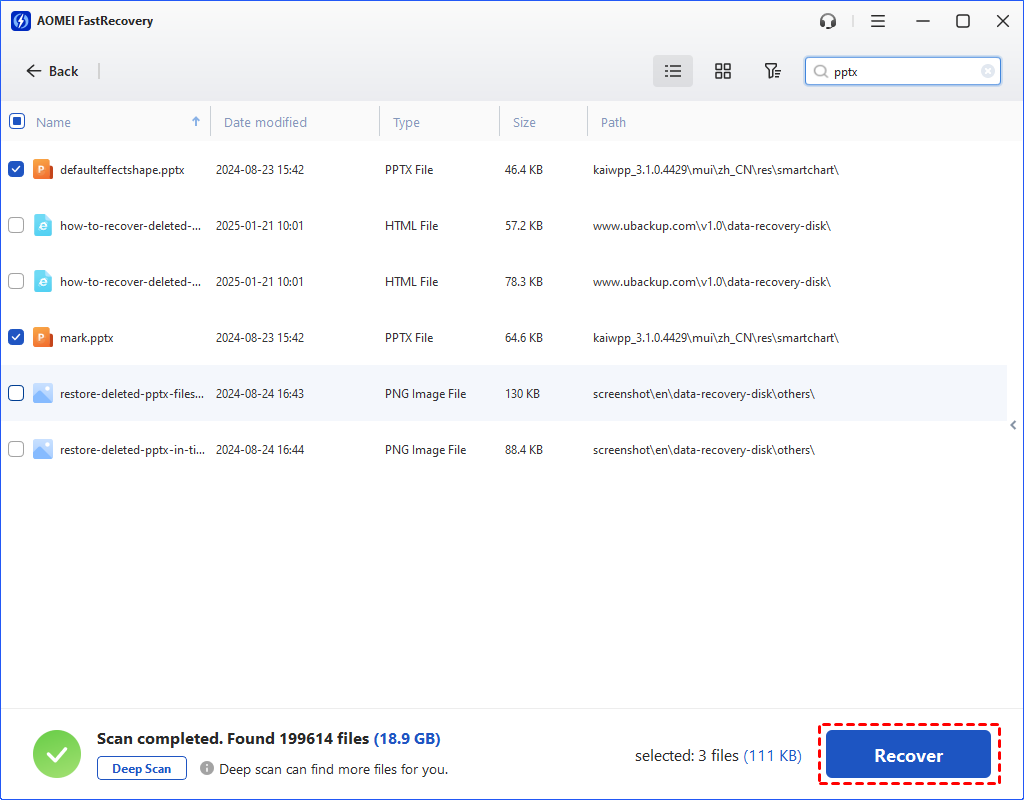
Also, you can search or filter files quickly using the following items. Once found, double-click the files to preview (if you are not sure).
- Filter: Specify the Type (i.e. Images)/Size to target your search.
- Search: Type the file name or extension in the search box to locate files precisely.
- Preview: Preview files in a clear thumbnail, such as wav,ico, jpg, png, bmp, jpeg, tif, svg, gif, ico, mp4, mp3, txt, xlsx, pdf, ini, docx, etc.
Step 3. Choose the files that you want to recover. Click Recover and choose a new path to save the restored files.
-
Restoring files to original location may cause data overwriting.
-
The Recover button will display the number and size of selected files.
-
The free edition only supports data recovery of 500MB. Once it exceeds, you will be asked to upgrade to AOMEI FastRecovery Pro or Tech edition.
Option 2. Restore files using Backup and Restore utility
The second option to recover data with backup is to use Backup and Restore utility provided by Microsoft. But you need to make sure that you have enabled this service in advance.
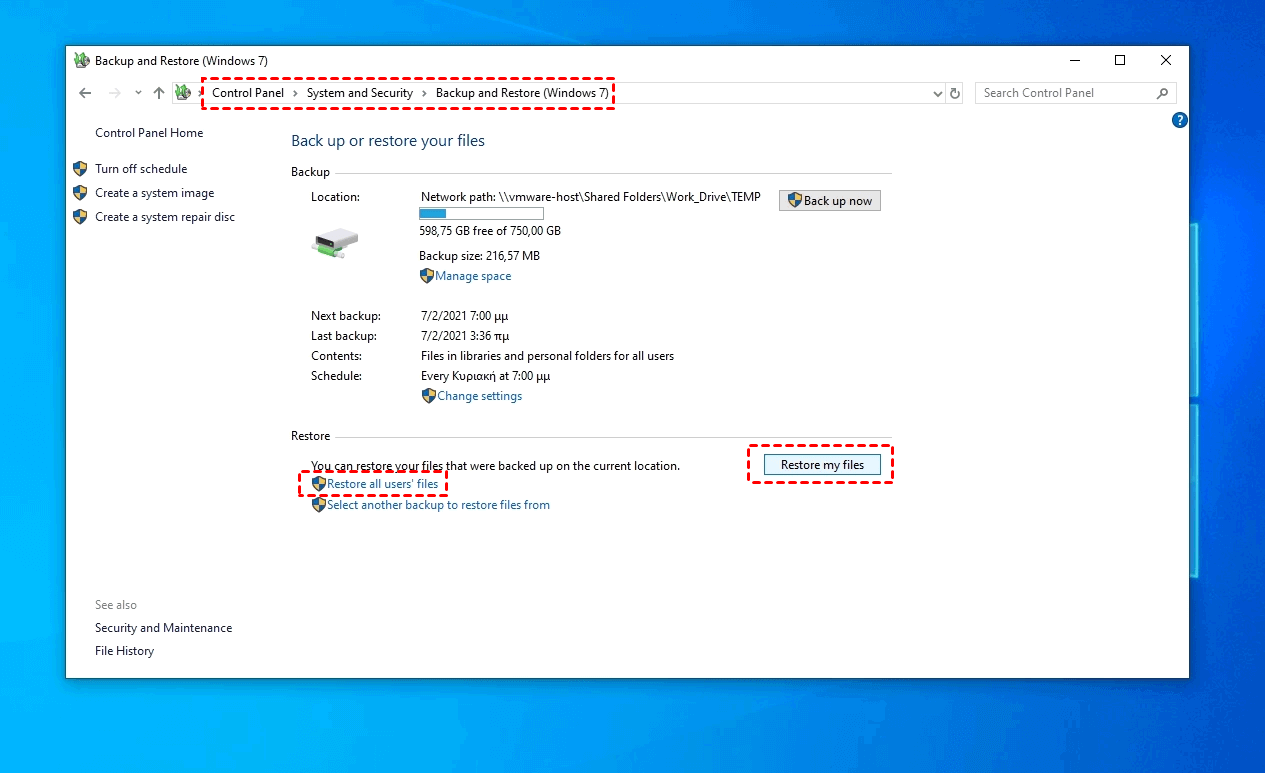
Step 1. Navigate here: Control Panel > System and Security > Backup and Restore (Windows 7). Click on Restore my files to selectively recover permanently deleted files. You can also choose Restore all users’ files to get all deleted files back.
Step 2. Search for your PowerPoint files by using the Browse for files or Browse for folders option.
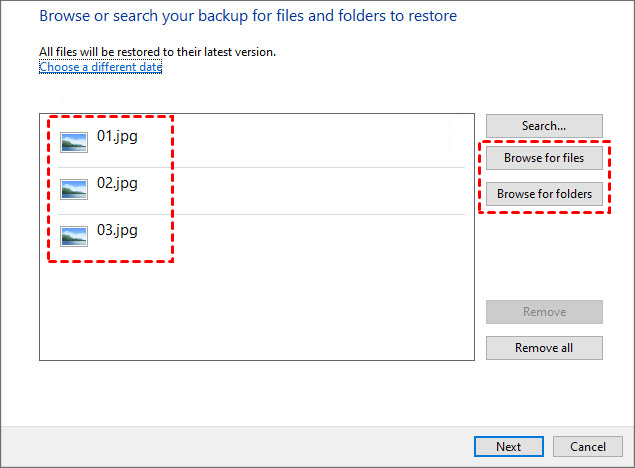
Step 3. Choose a location to save the backup, select your files and click Restore to recover them.
Option 3. Restore files using the File History
If you have turned on File History to save copies of your files, then you can get them back if they are deleted.
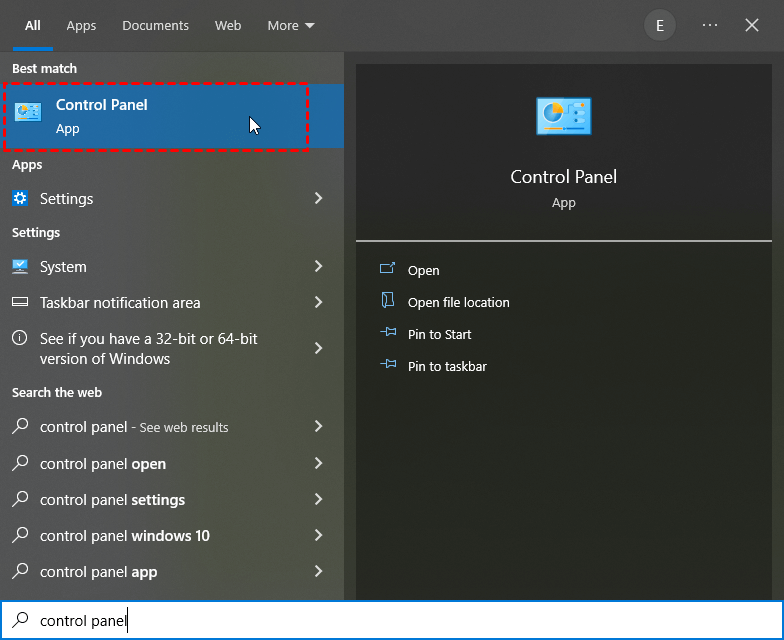
Step 1. Input Control Panel in the Windows search bar, and start it.
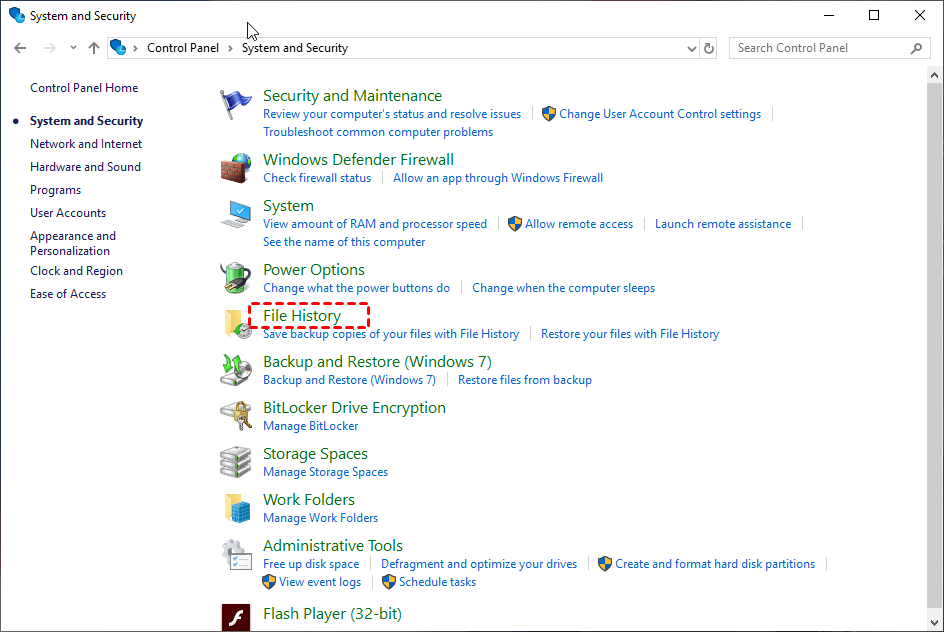
Step 2. Click System and Security.

Step 3. Click File History.
Step 4. Click Restore personal files.
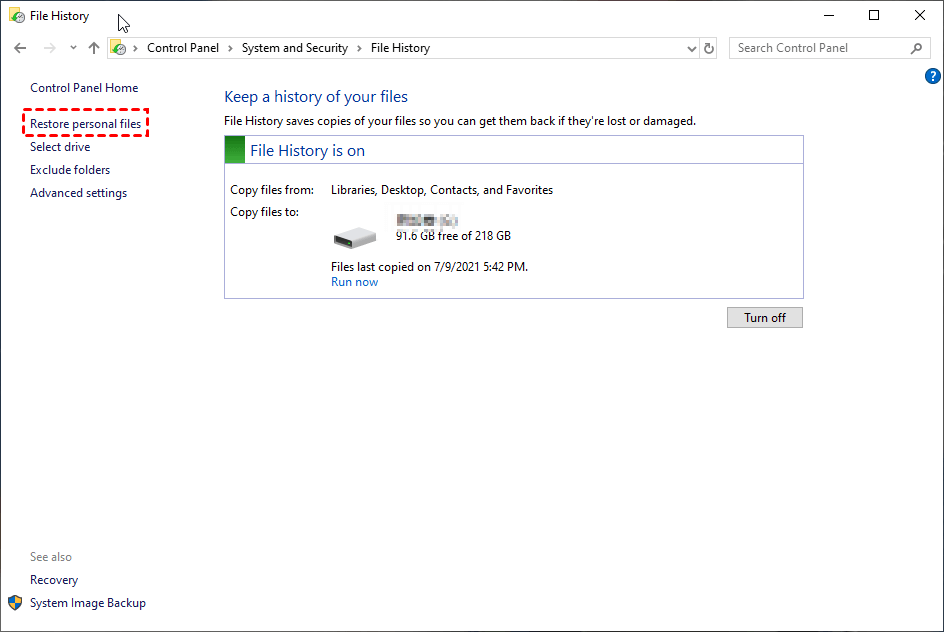
Step 5. Select the files you need to recover and then click the Restore button.

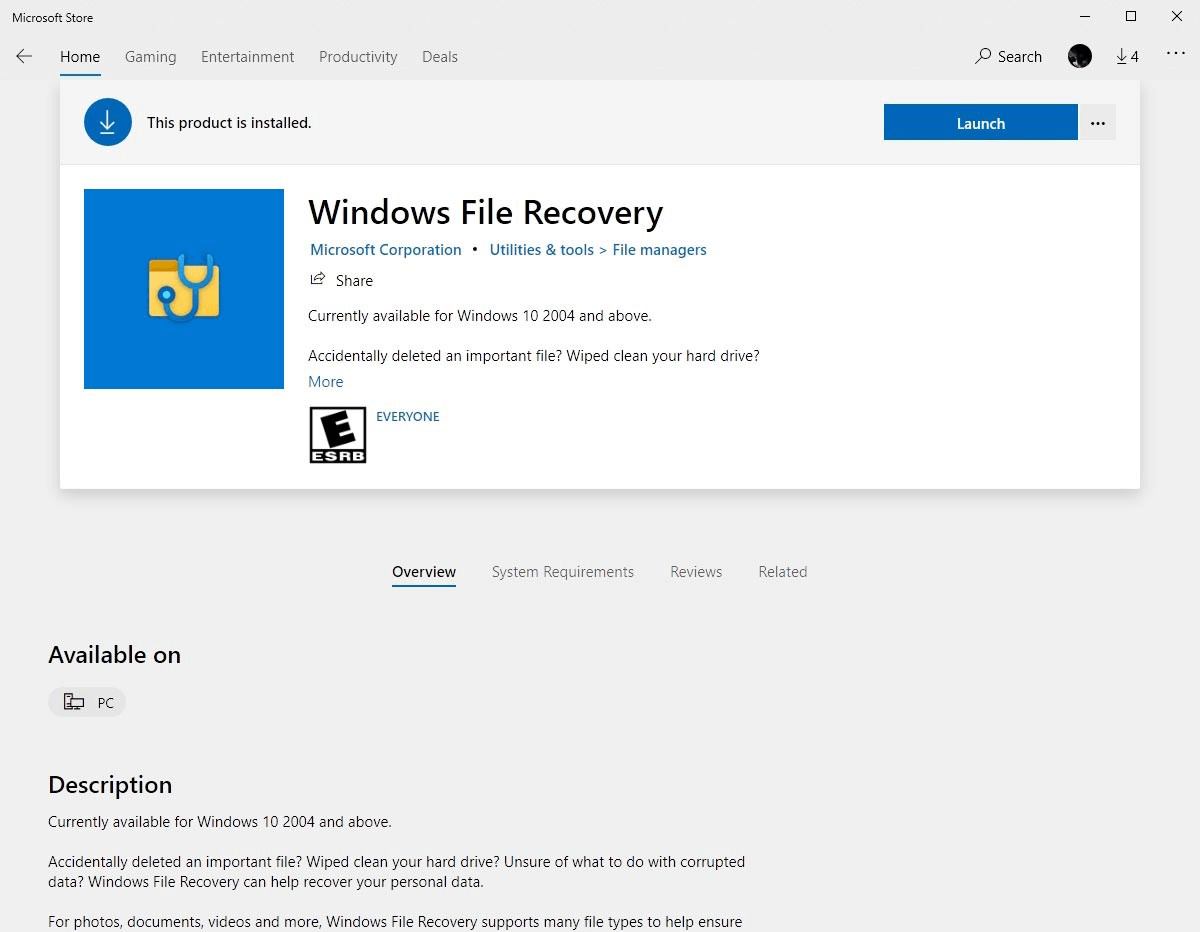
Option 4. Recover files lost after CHKDSK with Windows File Recovery
The final option is to recover permanently deleted files using CMD via the tool Windows File Recovery. Note the outcomes of this tool are unpredictable and it is only compatible with Windows 10 versions 2004 and up.
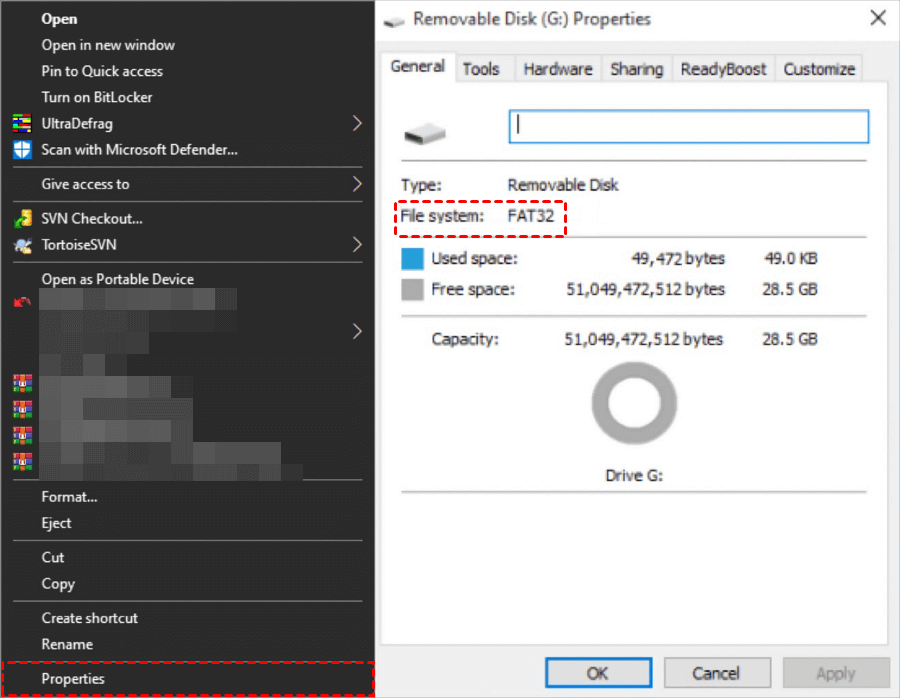
✅Preparation work before using Windows File Recovery:
To use this tool, check out your File System first. Go to This PC > right-click on the external drive that contains the deleted files > click Properties.
In addition, you need to use recovery mode and switches to get back your files. To decide which mode to use, refer to this table.
| File system | Scenarios | Mode |
| NTFS | Deleted recently | Regular |
| NTFS | Deleted for a while | Extensive |
| NTFS | Formatted disk | Extensive |
| NTFS | Corrupted disk | Extensive |
| FAT and exFAT | Any | Extensive |
Switches are used to filter the scanning range, thus saving the scanning time.
| Switches | Meaning | Supported mode(s) |
| /n | Filter the scan range: scans for a specific file with its file name/path/type, etc. | All |
| /y: | Recover specific extension groups. | Signature |
| /k | Recover system files. | NTFSSegment |
| /u | Recovers undeleted files, for example, from the Recycle Bin. | NTFSSegment |
Step 1. Download and install Window File Recovery on your computer from Microsoft Store and then open it.
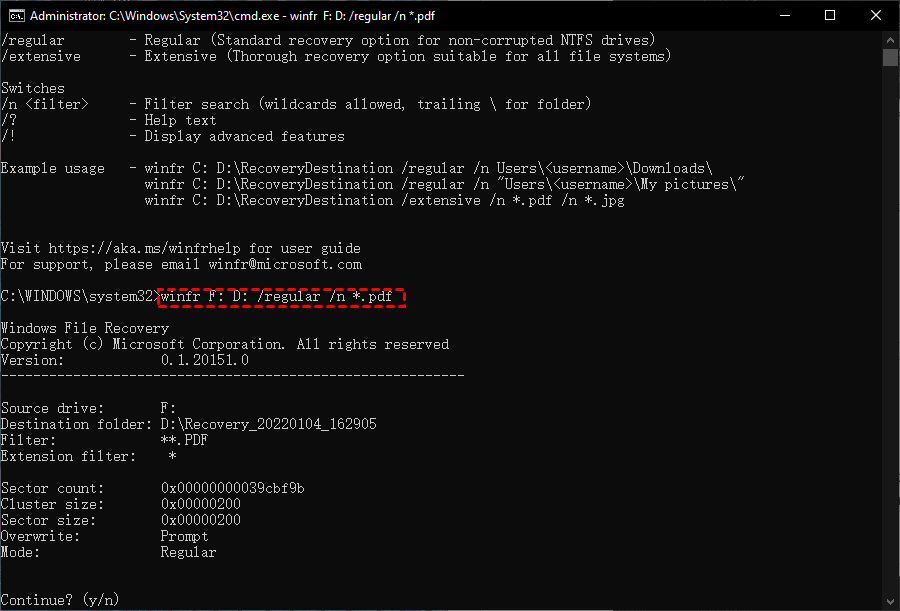
Step 2. Open Powershell or Command Prompt (run as administrator). In the Command Prompt, enter commands in the following command format:
winfr source-drive: destination-drive: [/mode] [/switches]
For example, if you need to recover deleted pdf files from F: drive (the external hard drive) to D: drive, then the command will be like:
winfr F: D: /regular /n *.pdf
The Bottom Line
The comments on CHKDSK are extremely polarizing, even some users complaint chkdsk deleted my files, wondering "how to recover files deleted by CHKDSK". Here, this article introduces you to 4 simple and effective methods, among which, the easiest way is to use data recovery software like AOMEI FastRecovery to retrieve data from hard disk even without backup.
To avoid any kind of data loss, the best practice is to use backup software for Windows AOMEI Backupper Standard, which allows you to back up your system, disks, partitions, or files by creating a copy of them. Thus, you can use it in the event of data loss.