USB Not Recognized? Fixed!
USB not recognized? Get seven feasible methods to address your USB device not recognized Windows 10/11 PC on this page. And you can use the recommended suggestions to prevent data loss.
By Penny / Updated on October 30, 2024
How do I get my computer to recognize my USB device?
Whenever I start up my PC. It keeps saying the USB device not recognized and keeps popping up. How do I get my USB to work again? Any suggestions will be appreciated.
When it comes to problems of USB not recognized Windows 10/11 computers, there’re several feasible methods. You’re advised to get an overview of the above possible reasons before referring to one of them.
- Unsuitable USB interface
- Unlettered USB drive
- External hard drive access denied
- Outdated device graphics
- Outdated Windows update files
Solution 1. Check and change your USB port
Does the USB port on your computer work properly? Please examine the available ports one by one to determine whether the problem is with your PC or with the device itself.
If changing ports solves the problem, then it may be something wrong with the previous port. You can abandon the broken port or send your PC to be repaired.
Solution 2. Assign a drive letter to make the drive recognized by Windows OS
The Windows OS can automatically discourage users from accessing unlettered drives because drive letters are identifiers of volumes. At this point, you can make good use of the Windows system utility, Disk Management to assign a drive letter. Besides, this tool also can help you recover hidden partitions in Windows 7, 8, 10, or 11 computers.
Please refer to the following steps to address this problem.
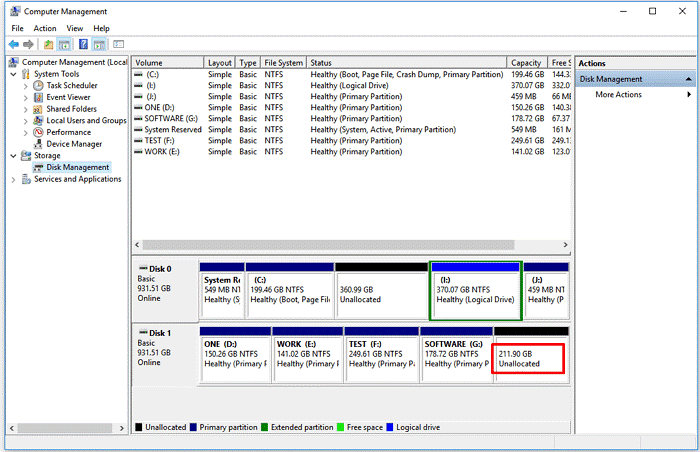
Step 1. After connecting your USB to your computer, press “Win + R” and type “diskmgmt.msc” in the Run box. You can press “OK” or hit “Enter” to open the Disk Management utility.
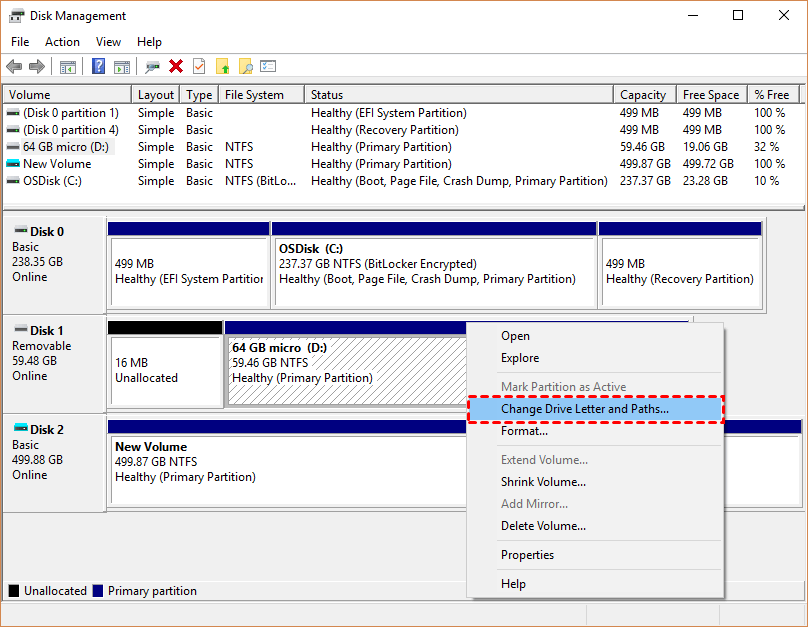
Step 2. Right-click on your connected USB and select the “Change Drive Letter and Paths” option.
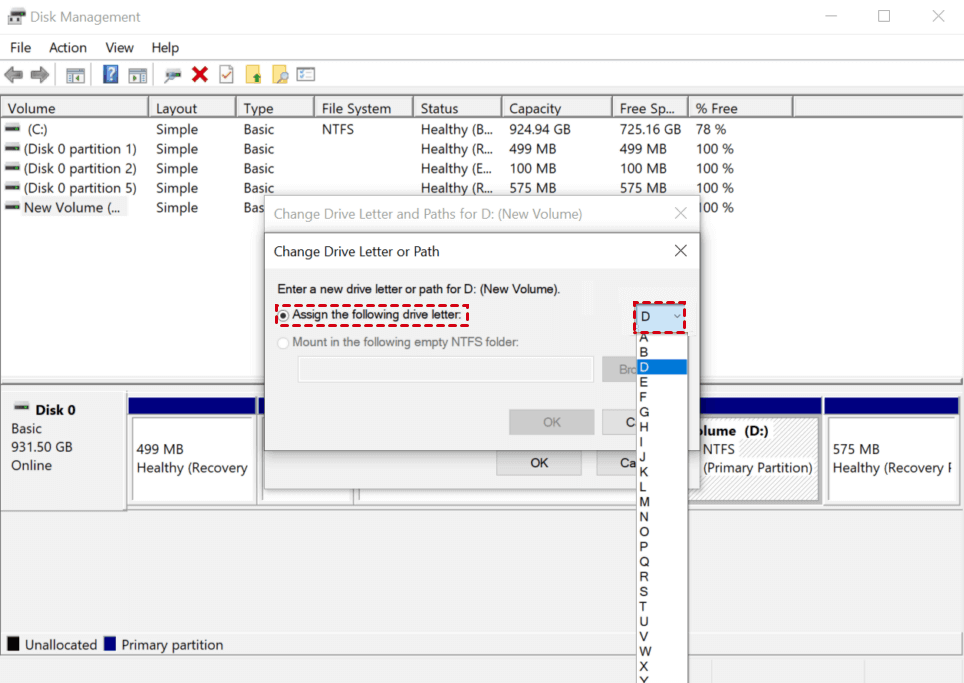
Step 3. Select “Add” to assign a new drive letter to this unlettered USB drive.
Step 4. Select the “Assign the following drive letter” option. Please ensure your chosen new drive letter is different from all the current drive letters.
Solution 3. Enable the USB Root Hub
If you never activated your USB Root Hub, your Windows computer naturally will not recognize your connected USB drive. So how to enable the USB Root Hub, please refer to the following steps.
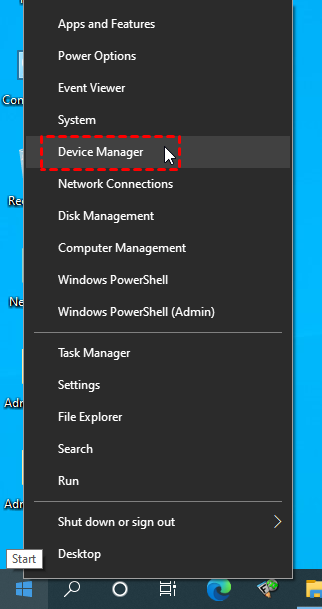
Step 1. Connect the external hard drive to your computer. Then open Device Manager by entering it in the search bar.
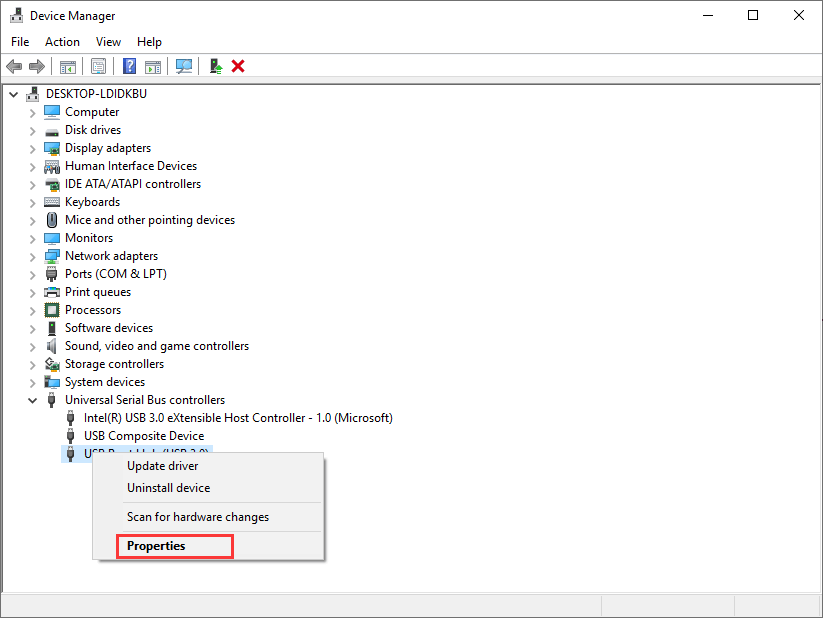
Step 2. Expand Universal Serial Bus Controllers and right-click on your chosen USB Root Hub. Then click the “Properties” button.
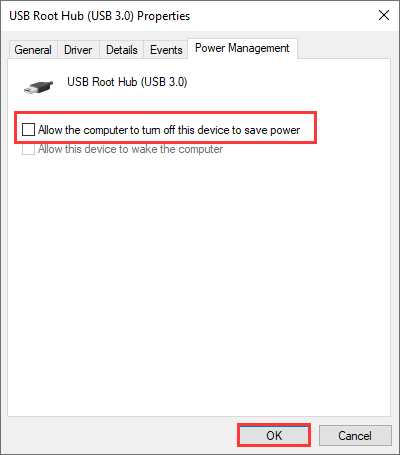
Step 3. Under the Power Management tab, uncheck “Allow the computer to turn off this device to power” and click “OK” to save your modifications.
Solution 4. Update device driver via Device Manager
There’s no denying that an outdated device driver is responsible for the USB device not recognized. To solve this issue, you need to update device driver via the following steps.
Step 1. Connect the USB to your computer. Then open Device Manager by entering it in the search bar.
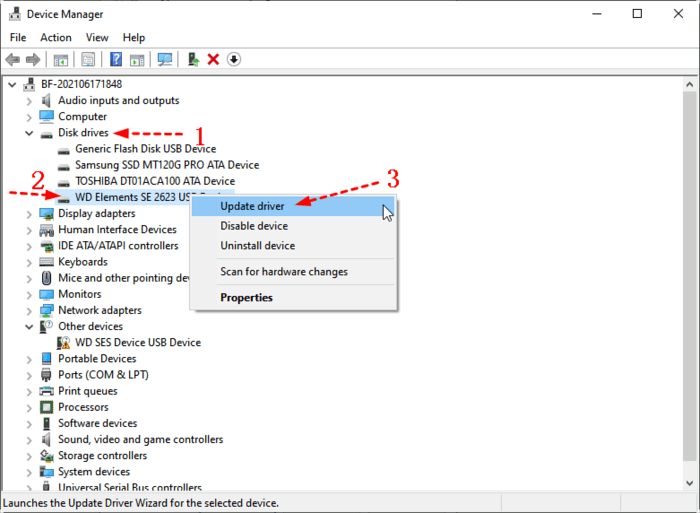
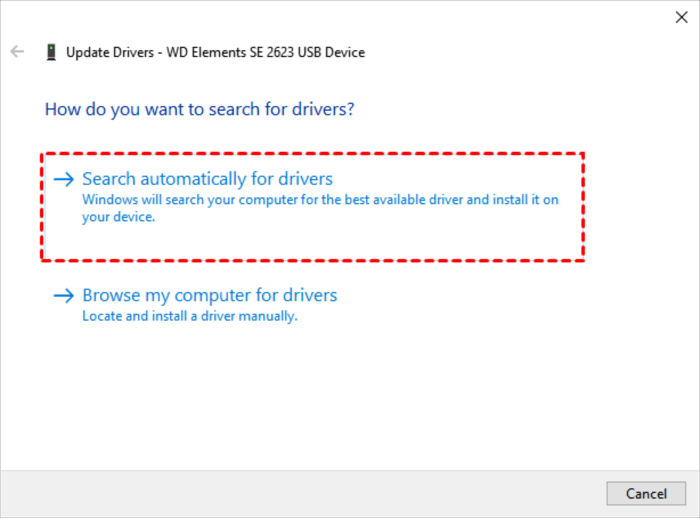
Step 2. Go to Disk drives and right-click on your connected USB stick. Then select the “Update driver” option.
Step 3. Select the “Search automatically for drives” option.
Solution 5. Disable USB selective suspend setting
If the above solutions are useless, please check whether if your system’s power settings are preventing your USB drive from showing up in Windows or not. Because if you’ve disabled certain settings in Power Settings, your USB cannot be recognized. Let’s show how it works.
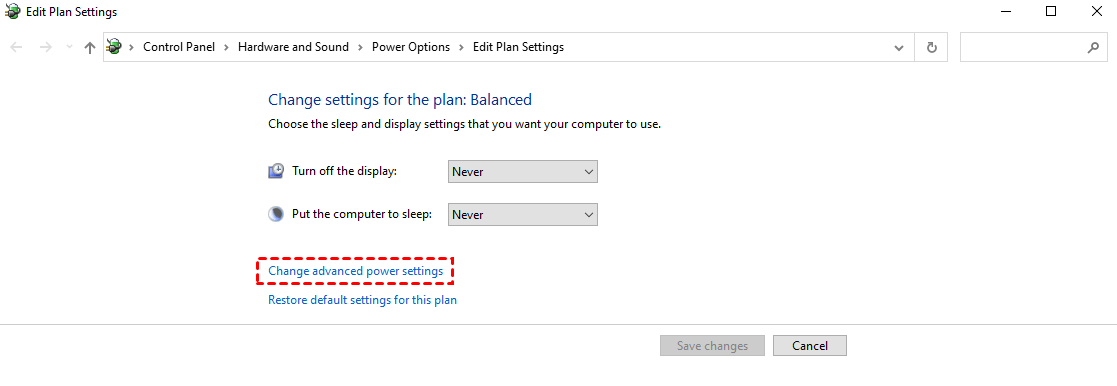
Step 1. Type “edit power plan” in the search bar on your computer. Then open it.
Step 2. In the Edit Plan Settings window, click the “Change advanced power settings” button.
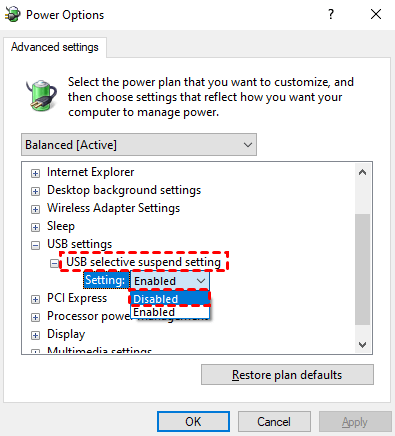
Step 3. In the Power Options window, expand USB settings > USB selective suspend setting option > Disabled.
Solution 6. Update your Windows
Sometimes, if you haven’t updated Windows for a long time, your USB device might cannot be recognized. In this case, you’re supposed to install the latest Windows version because Windows updates can automatically correct the bugs and errors in hardware.
If you need, please get more details to delete Windows update files in Windows 10/11 computer.
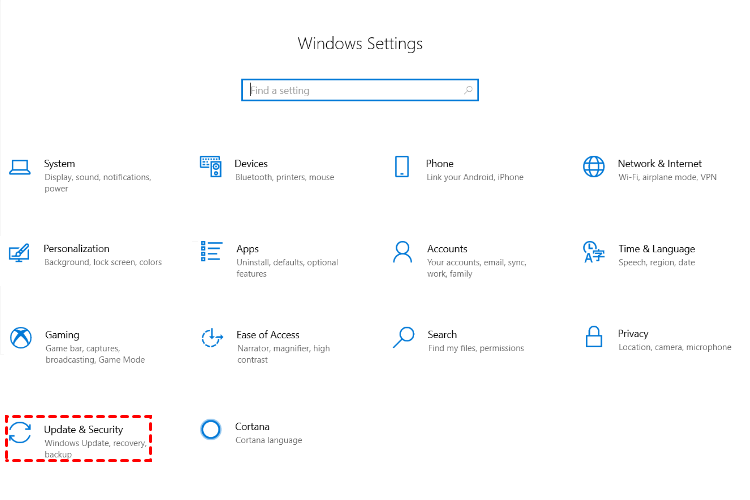
Step 1. Press “Win + I” to open Windows Settings. Then click the “Update & Security” button.
Step 2. In the Update & Security interface, click the “Check for updates” button.
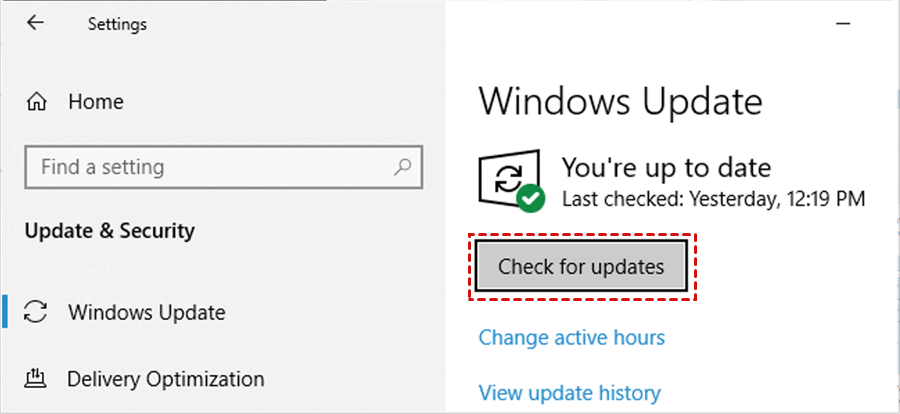
If it’s not the latest version, please wait patiently.
Solution 7. Recover deleted/lost files from USB drives via data recovery software
Once recognized, some users want to recover deleted files from USB drives. However, since few users have the sense of using backup software to back up the contents of their flash drives, we’d better use professional data recovery software to retrieve the data you need.
Deeply engaged in the data recovery field, perhaps professional AOMEI FastRecovery is right for you.
- ★Powerful features & friendly design of AOMEI FastRecovery:
- Recover the deleted/lost Word, Excel, PPT, PDF, photos, videos, audio, folders, and other 200+ types of data from HDD, USB, SD cards, and other portable devices.
- Judge the recovered files based on their original paths, filenames, and format.
- During Quick Scan and Deep Scan, enter filenames in the search bar to locate your desired files or wait to find all the deleted and other lost files on your computers.
- Support NTFS, exFAT, FAT32, and ReFS file systems.
Please download AOMEI FastRecovery on your Windows 11, 10, 8, 7, or Windows Server computers!
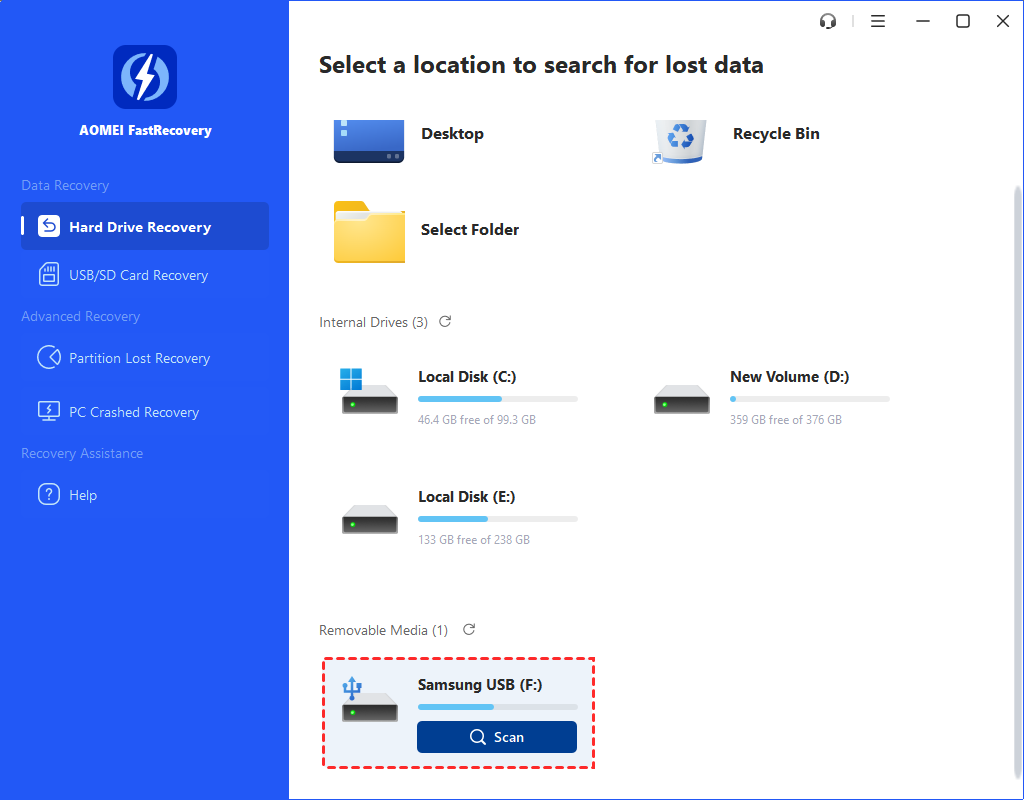
Step 1. Connect your USB drive to the computer, after running this tool, hover the mouse over your connected drive and click Scan.
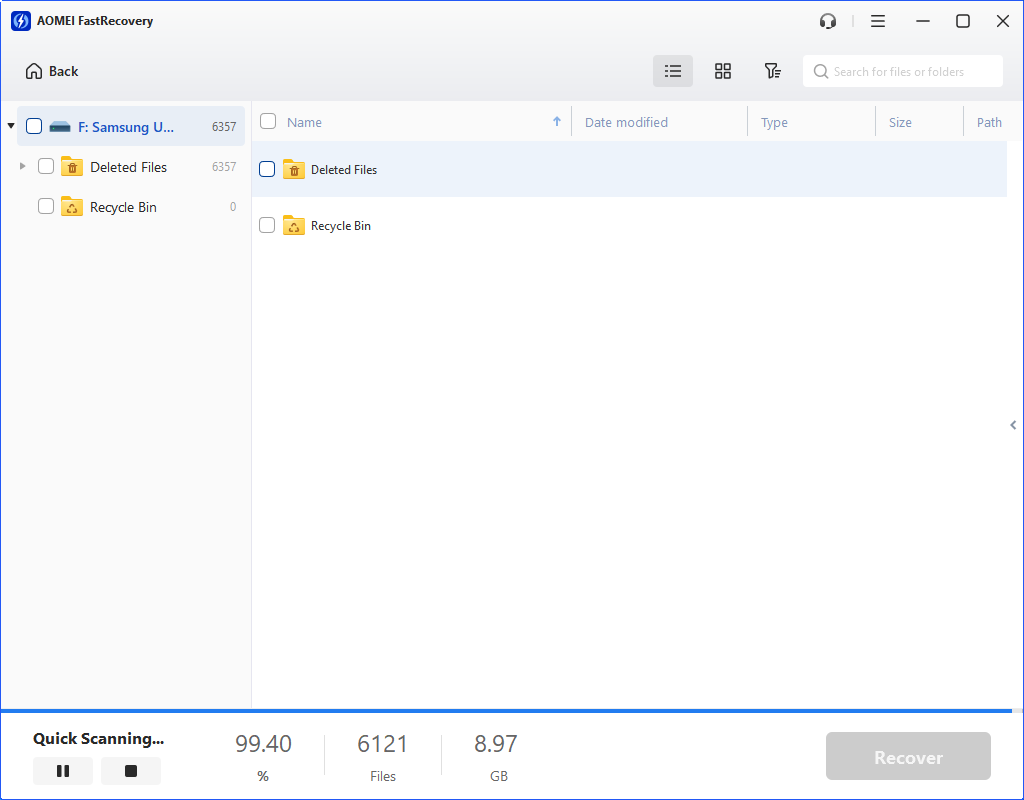
Step 2. Search or wait to see all the deleted files and other missing files as you need.
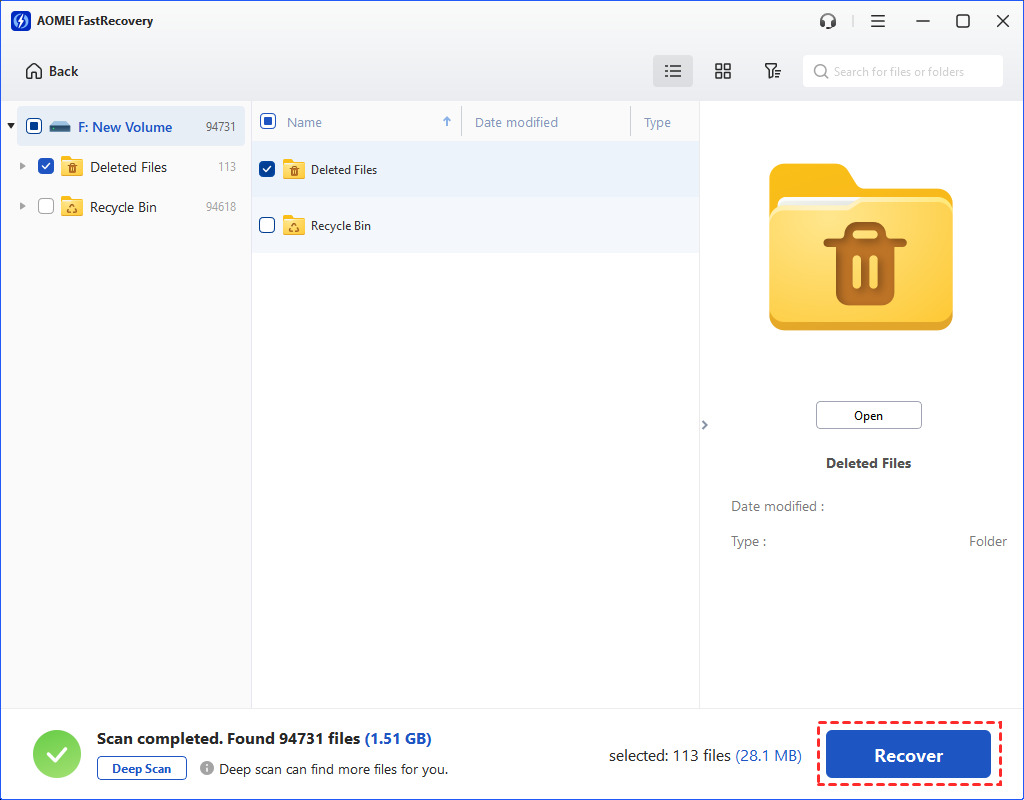
Step 3. Go to the Deleted Files/Recycle Bin/Other Missing Files folder, and select the files you want. Then click “Recover x files” and save these restored files in another location.
Wrapping up
USB not recognized? After reading this article, you can get the relevant possible causes and the corresponding fixes. When it comes to USB data recovery, there’ll be no better way than utilizing leading data recovery software like AOMEI FastRecovery.
Naturally, if you’ve created disk backups using this free backup software for Windows, you can get your needed files directly.