Troubleshoot | Word Recent Documents Not Showing
MS Word Recent Documents not showing? This article aims to help you solve this issue. You can also recover lost Word documents and get relevant recent documents tips.
By Penny / Updated on October 31, 2024
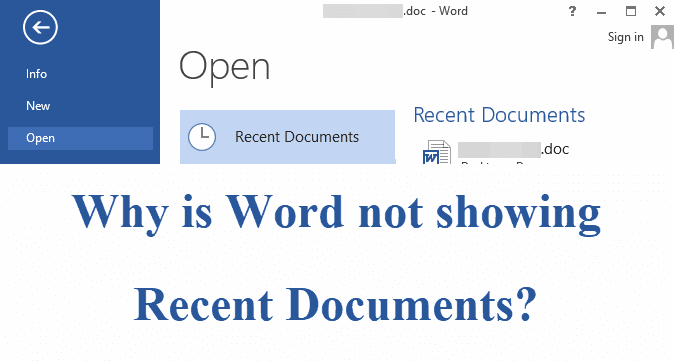
Why is Word not showing Recent Documents?
Microsoft Office programs can default show the last few documents you opened in that software so that users can quickly access their recent files by clicking the corresponding link.
However, several users complained about their Microsoft Word Recent Documents not showing.
In the last few weeks, my Word has stopped showing the recently opened files when I right-click on the icon in the taskbar. It only showed three files I had not opened in a long time. I right-clicked on each of those three files and selected Removed from this list. But the list never populated again with more recent Word documents. Why did my Microsoft Word stop showing? Moreover, how do I fix this issue? Thanks.
- A user from Microsoft Community
Deletion is one of the possible reasons. If you’ve manually removed your needed recent document from the Recent Documents list like the above user, it definitely cannot show up. Logging out of the Microsoft accounts and disabling the Recent Documents feature also can prevent your Word Recent Documents from displaying.
If you’re eager to jump out of this dilemma and want to find Recent Documents in Word program, you’ve come to the right place.
In addition, you can get more details on how to find AutoSaved documents in Excel programs.
Part 1. How to fix Word Recent Documents not showing up?
Are your Microsoft Word Recent Documents not showing up? Check two feasible fixes below.
Fix 1. Sign in with MS accounts to show up your Word Recent Documents
Microsoft account connects all your Microsoft apps and devices. When you sign in with the same account, your Microsoft Word program will automatically record and sync all the changes and modifications.
On the contrary, your modifications will not be recorded if you’ve edited partial Word documents after signing out of the MS account. Then you might lose some recent Word document recordings.
If it happens to be your case, please refer to the following steps to re-appear your Word Recent Documents.
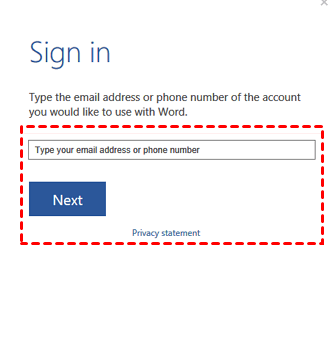
Step 1. Open a blank Word document and click “Sign in” at the top right corner. Then click the “OK” button.

Step 2. Enter your Microsoft account (Email address or phone number) and click “Next” to go on.
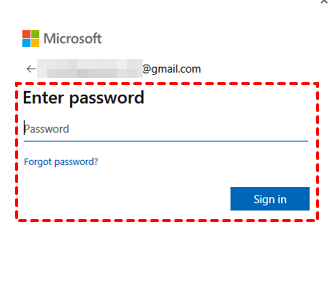
Step 3. Enter your Microsoft account password.
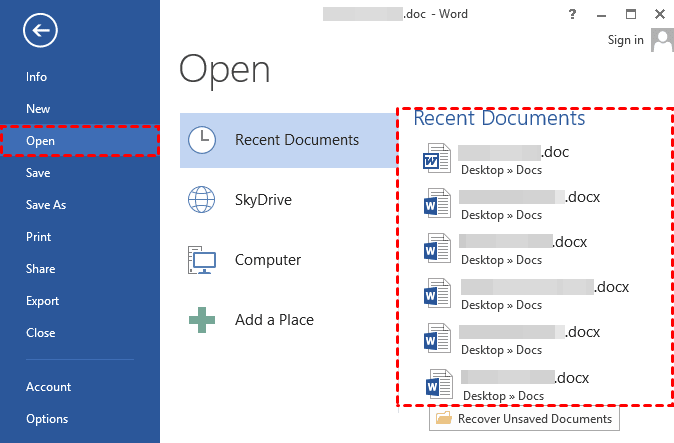
Step 4. After opening a Word file, click File > Open > the Recent Documents panel list to check all your accessible recent Word documents.
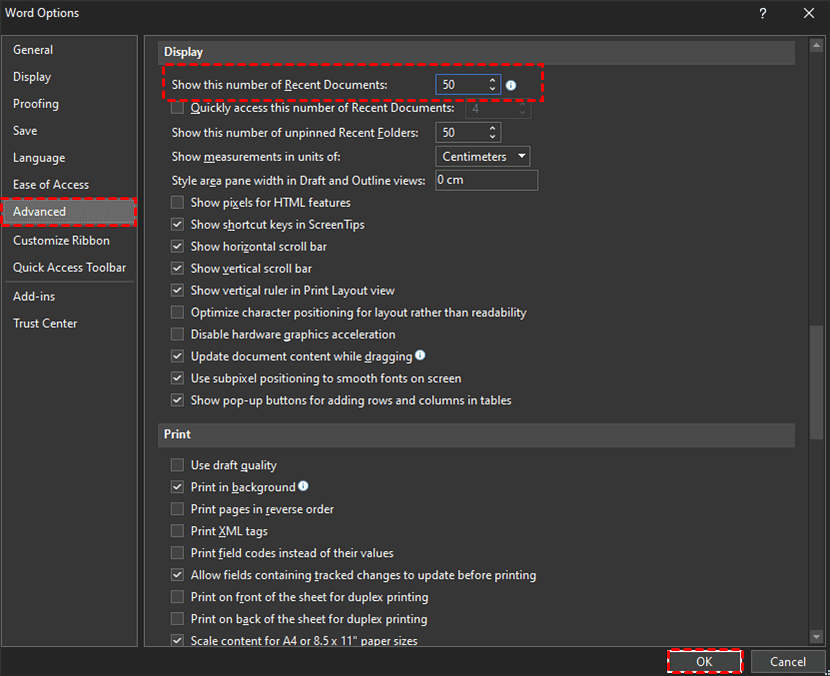
Fix 2. Show this number of Recent Documents in MS Word
In general, the Recent Documents feature is turned on by default. But some users prefer to improve their Microsoft Word program performance by turning off this feature or reducing the number of shown recent documents.
If your Word Recent Documents not showing up in Taskbar because of these two factors, you can show or increase this number of Recent Documents via the following steps.
Step 1. Open a new Word document, then click File > Options to enter the interface of Word Options.
Step 2. Under the Advanced tab, set a number in the box beside Show this number of Recent Documents. Please remember to click “OK” to save these changes.
Further reading: How to recover lost Word documents without backups?
If the above fixes cannot work as expected, which implies your recent Word documents might have been deleted or removed from your hard drive.
Before overwritten, there exists a possibility to recover deleted & lost Word documents from hard drives. So you’re supposed to avoid adding new documents to your computer.
Are you unwilling to be restricted by necessary backups? Or even there’s no backup for you? If you’re bothered by similar matters, the most efficient and effort-saving way is to seek assistance from professional data recovery software like AOMEI FastRecovery.
- ★Key features of AOMEI FastRecovery:
- All-inclusive: Apply to a variety of data loss scenarios such as deletion, disk formatting, system crashes, or virus attacks.
- High-efficiency: Recover 200+ types of files such as Microsoft Word, Excel, PPT, and WPS files, folders, compressed files, photos, audio, songs, videos, and websites from HDDs, USB sticks, SD cards, etc.
- Advanced scanning method: AOMEI FastRecovery runs Quick Scan & Deep Scan automatically to search all the recoverable files. Specify the filename, saved path, date, or size to filter your needed files.
- Convenience: Retain the original filename, path, and format for the deleted files.
- Excellent compatibility: Support NTFS, FAT32, exFAT, and ReFS file systems.
How to recover lost Word documents without backups? Download AOMEI FastRecovery on your Windows 11, 10, 8, 7, or Server PC to retrieve them!
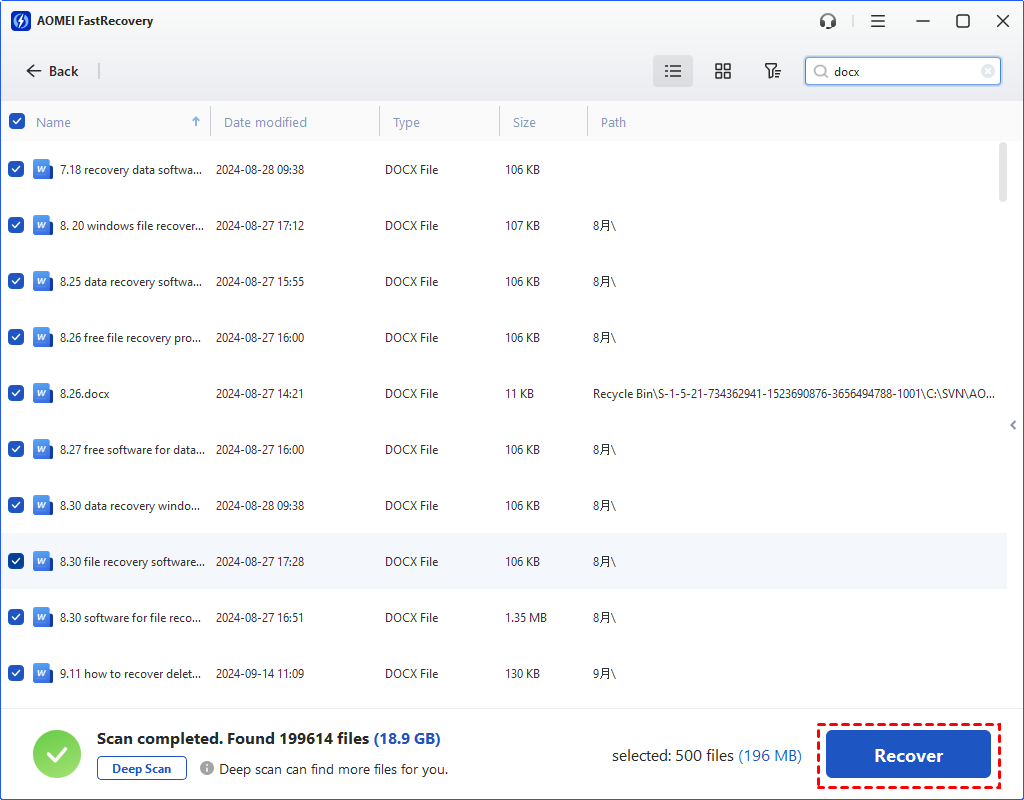
Step 1. Launch AOMEI FastRecovery and hover the mouse over the hard drive that includes your wanted Word documents. Then click Scan.

Step 2. Filter your needed Word documents according to Document Type, Name, Date, or Path.
- Name: Type the filenames of your desired files to narrow the search area.
- Date modified: Set the date (today, yesterday, last 7/30 days, and so on) according to your situation.
- Size: Filter the file size (<128KB, 128KB~1MB, 1MB~ 512MB, etc) based on your needs.

Step 3. Go to the Deleted Files/Recycle Bin/Other Missing Files folder and select the Word files you want. Then click “Recover x files” to start the Word document recovery process.
- After Word document recovery, please save these retrieved Word documents in another partition instead of the original hard drive.
- Upgrading AOMEI FastRecovery to the Professional or Technician edition is a more cost-effective solution if you want to recover a large number of deleted & lost files from local drives.
Relevant Q&A about recent documents
If your Microsoft Word documents not showing, please refer to the above content to fix this issue. Meanwhile, there’re some related tips about Windows recent files.
How do I find a recently saved document?
The following three easy ways can help you find recently saved documents on Windows 10 or 11 computer.
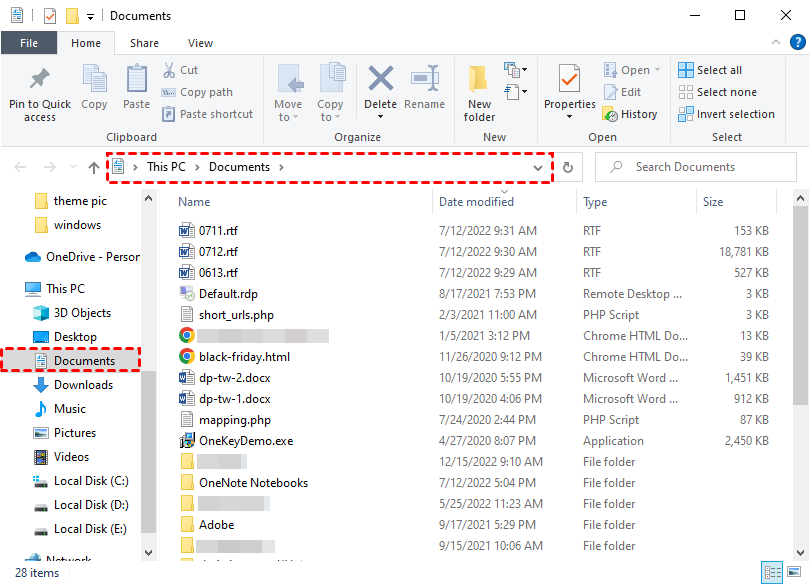
- Target your saved Microsoft Office documents in the corresponding software. Let’s take MS Word as an example. Open a Word file click File > Open > the Recent Documents panel list.
- After saving documents on your Windows PC, press Win + E to open File Explorer > click Documents to check.
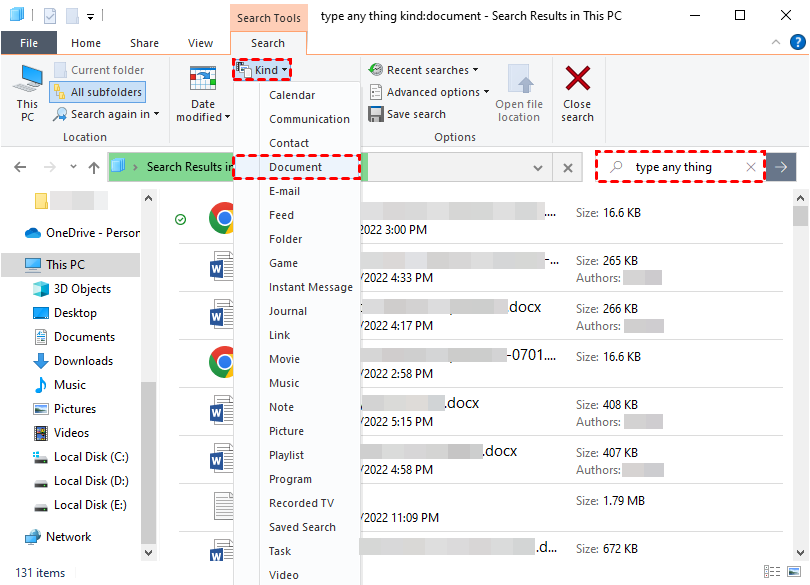
- Type the related filename or file extension in the search bar > click Kind > Documents to find recently saved documents.
How do I fix Quick Access not showing recent files?
In this scenario, there’re four feasible solutions for your reference. If your Windows 10 doesn’t show recent files, these fixes also are useful.
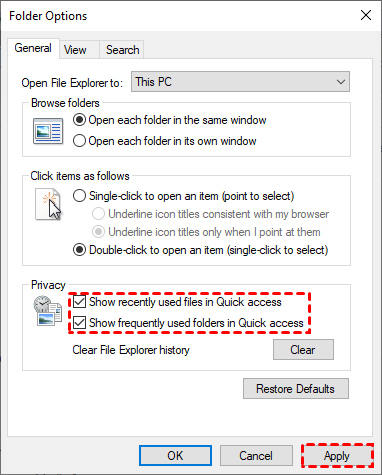
- Open File Explorer or This PC > right-click on Quick Access > click Options to see if you’ve ticked Show recently used files in Quick Access or not.
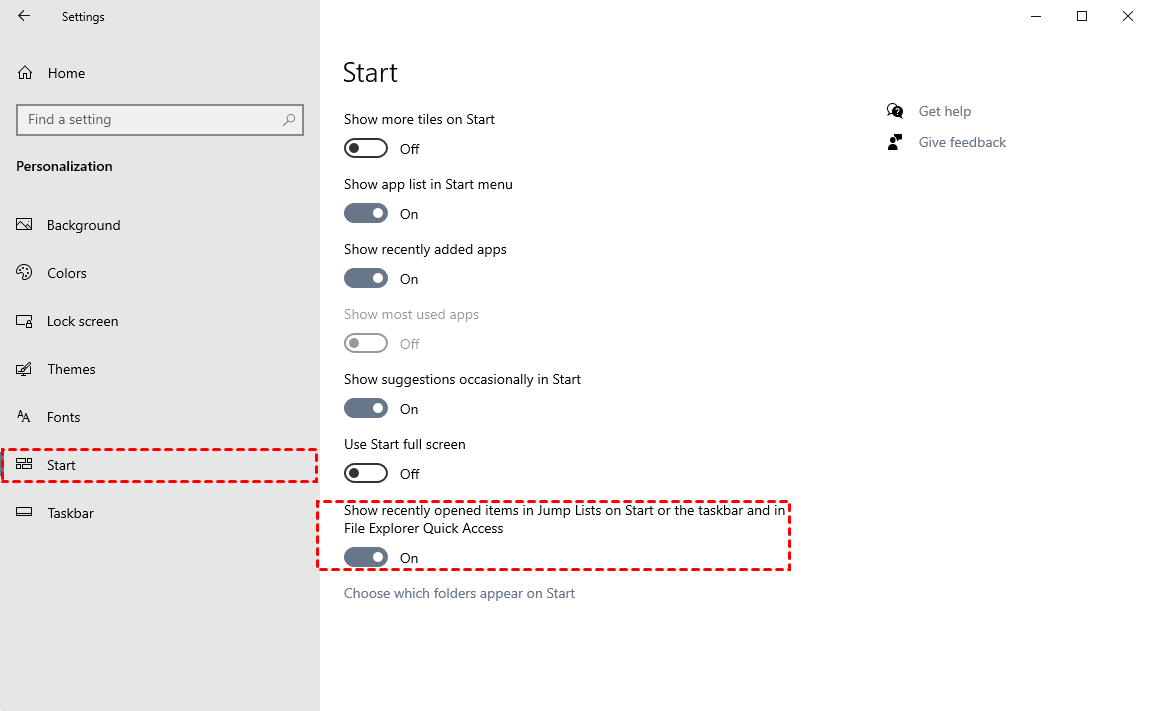
- Press Win + I to open Windows Settings > Personalization > Start > to turn On Show recently opened items in Jump Lists on Start or the taskbar and in File Explorer Quick Access.
- Or enter shell:::{22877a6d-37a1-461a-91b0-dbda5aaebc99} in the File Explorer directory box to enable your Recent folders.
- The last resort is to right-click on Quick Access > Folder Options > View > to Restore defaults because all the settings will be wiped out after restoration.
Wrapping up
Check the corresponding solutions to find Recent Documents in Word and recover lost Word documents from this passage. Besides, you can get relevant recent document tips.
To prevent data loss at the source, it’s time for you to create regular backups using this free backup software for Windows, AOMEI Backupper.