How to Copy Files from VM to Local Machine [4 Methods]
What is the fastest way to transfer large files from a VM to a local machine? Your answer lies in the following scenarios
By Crystal / Updated on September 4, 2024
Why Copy Files from VM to Local Machine?
Virtual machines offer isolated environments for running applications, testing software, and more, but there often arises a need to transfer data between the VM and the host machine. Copying files from a virtual machine (VM) to a local machine is a fundamental task for many IT professionals and users working with virtual environments.
There are several common situations where you need to copy files from a virtual machine to a local computer:
- Backup and Restore: Ensure that data is backed up locally.
- Development: Transferring code or application files for local development.
- Testing: Transfer test results or logs to the host computer for analysis.
- Data Sharing: Facilitate data sharing among team members.
Next, we'll cover the specific steps to copy files from the virtual machine to the local machine.
How to Copy Files from VM to Local Machine [4 Methods]
This section describes 4 options for transferring files from a virtual machine to your computer's data.
- Drag and Drop
- USB Drive
- Shared Folders
- PowerCLI
✍Before copying files from a VM to a local machine, you need to ensure the following prerequisites are met:
✦ The VM and local machine must be networked.
✦ Appropriate permissions to access files and folders.
✦ Ensure secure transfer protocols to protect data integrity.
Method 1. Using Drag & Drop to Copy files from VM to Local Machine
Using drag and drop to copy files from a virtual machine (VM) to a local machine is one of the most user-friendly methods available. This method is typically supported by virtualization software like VMware Workstation.
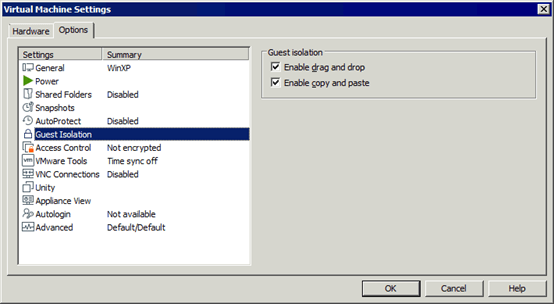
1. Go to VM settings.
2. Navigate to the Options tab, and select Guest Isolation.
Here are two checkboxes:
- Enable drag and drop
- Enable copy and paste
Check the Enable drag and drop option.
3. On your VM, navigate to the files or folders you want to copy.
4. Click and hold the selected files, drag them from the VM window, and drop them onto the desired location on your local machine.
This is a straightforward process, but it works best with smaller files as it shares data across the guest and host operating systems.
✨Note: Besides VMware Workstation, you can also copy and paste between VM and your local computer in VMware ESXi and Hyper-V.
Method 2. Using USB Drive to Transfer Files from VM to Host
Using a USB drive is a practical method for transferring files between a VM and a local machine, particularly when network connectivity is limited or not an option. Here’s how to transfer files using a USB drive:
1. Insert the USB drive into the physical host machine.
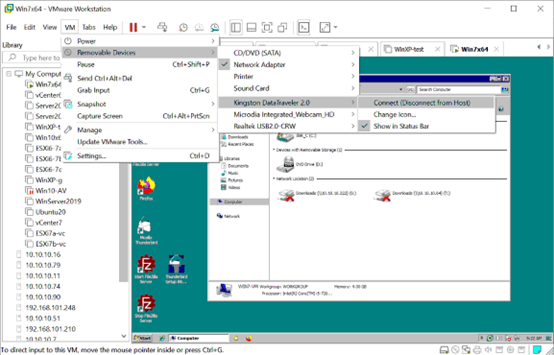
2. In VMware Workstation, click on the VM menu, select Removable Devices, and then the connected USB drive. Choose Connect (Disconnect from host).
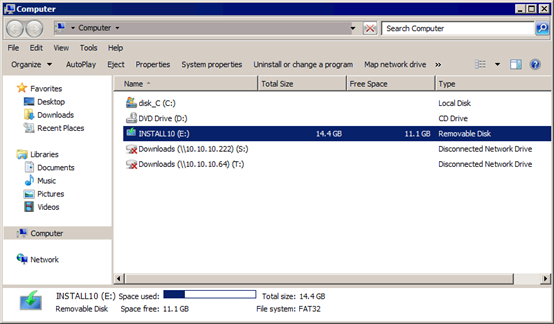
3. View the USB flash drive connected to the virtual machine in My Computer (Windows Explorer). It is now possible to copy files from the USB storage device to the virtual computer. Copy the files from VM to the USB storage device.
For VMware ESXi users, you can use also easy copy ESXi files to USB drive.
4. Disconnect the USB flash drive from the virtual machine and attach this USB device to the host computer after you have copied all necessary files from the virtual machine to it.
This method doesn’t depend on network settings or permissions. However, the transfer speed is limited by the USB drive’s performance and the size of the files.
Method 3. Using Shared Folders to Between a VM and a local machine.
For Hyper-V users, it’s possible to share files to Hyper-V VM from host using Shared Folder.
Here, we will introduce how to share files between a VM and physical host.
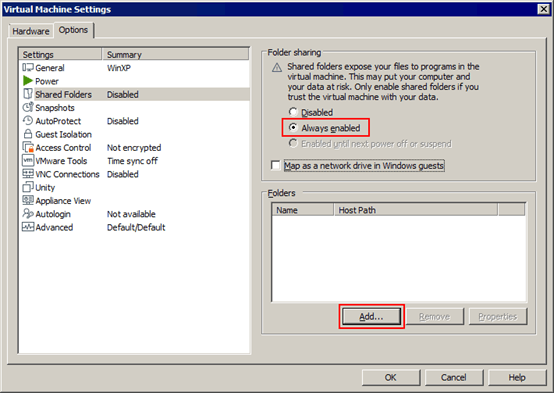
1. Open VM settings and select Options > Shared Folders.
2. In the Folder sharing section, select Always enabled. Add the folder you wish to share. You can then type the local machine path to the directory you want to share and name your folder.
3. In the VM, shared folders typically appear as network drives or mounted folders. On Windows, check under "This PC" or "Network Locations." On Linux, check the "/mnt" or "/media" directories.
Method 4. Copying File from VM to Local Machine via Command Line
VMware PowerCLI command is a powerful tool that can automate various tasks in a VMware environment, including file transfers. Here’s how to copy files from a VM to a local machine using use PowerCLI commands (cmdlets):
1. Connect to vCenter or ESXi Host:

2. Copy specified files from the VM to the local path:
PowerCLI is highly efficient for automating and scripting file transfers, especially in environments with multiple VMs. However, it requires familiarity with command-line interfaces and VMware environments, otherwise it is not recommended for beginners.
Important: Copy Files for Virtual and Local Machine
When it comes to ensuring the safety of your valuable data, backing up files for virtual machine (VM)and physical PC is a critical task. AOMEI Cyber Backup stands out as an efficient and user-friendly backup software solution designed to offers a comprehensive way to backup data.
- It offers a user-friendly interface that makes the backup process simple, even for users with limited technical expertise.
- The software ensures that your data is transferred securely, protecting it from potential threats.
- It’s easy to restore your files to virtual or local machine quickly and efficiently.
1. Bind Devices: Access to AOMEI Cyber Backup web client, navigate to Source Device > VMware > + Add VMware Device to Add vCenter or Standalone ESXi host. And then click … > Bind Device.

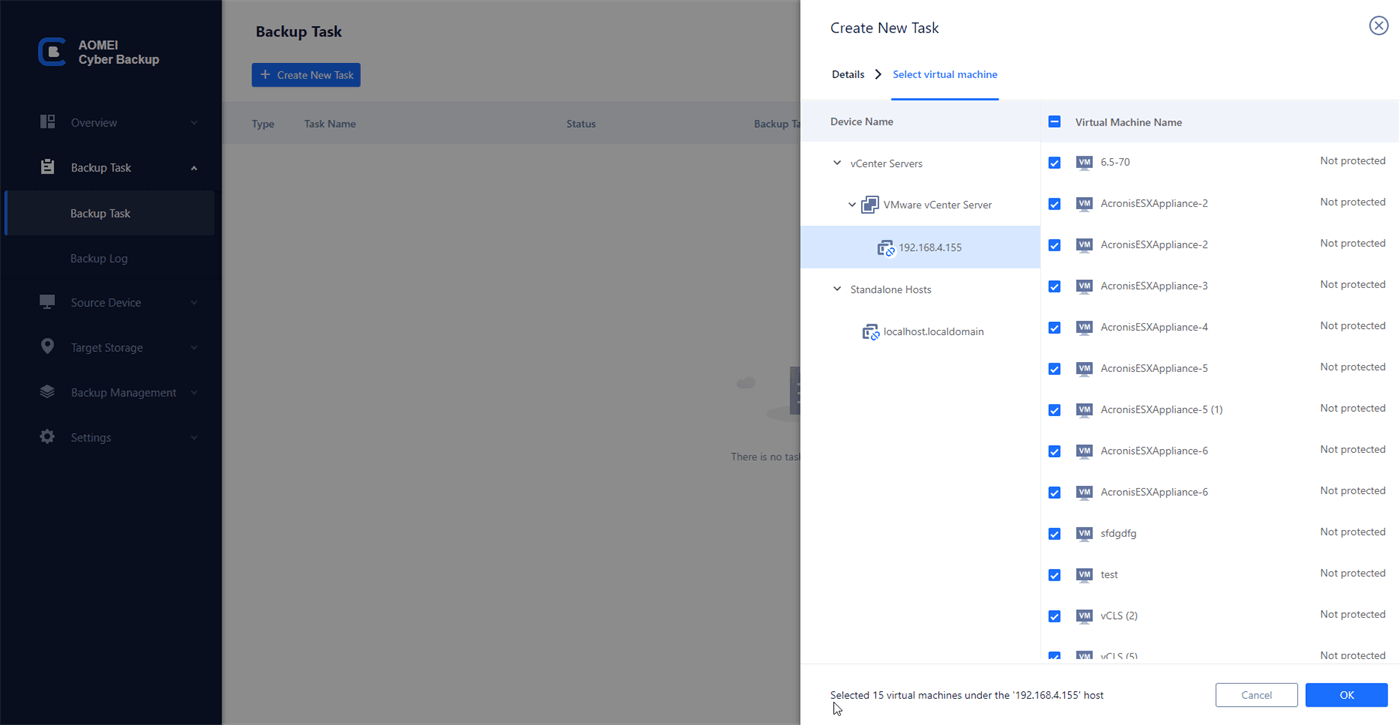
2. Create Backup Task: Navigate to Backup Task > + Create New Task, and select VMware ESXi Backup as the Backup Type.
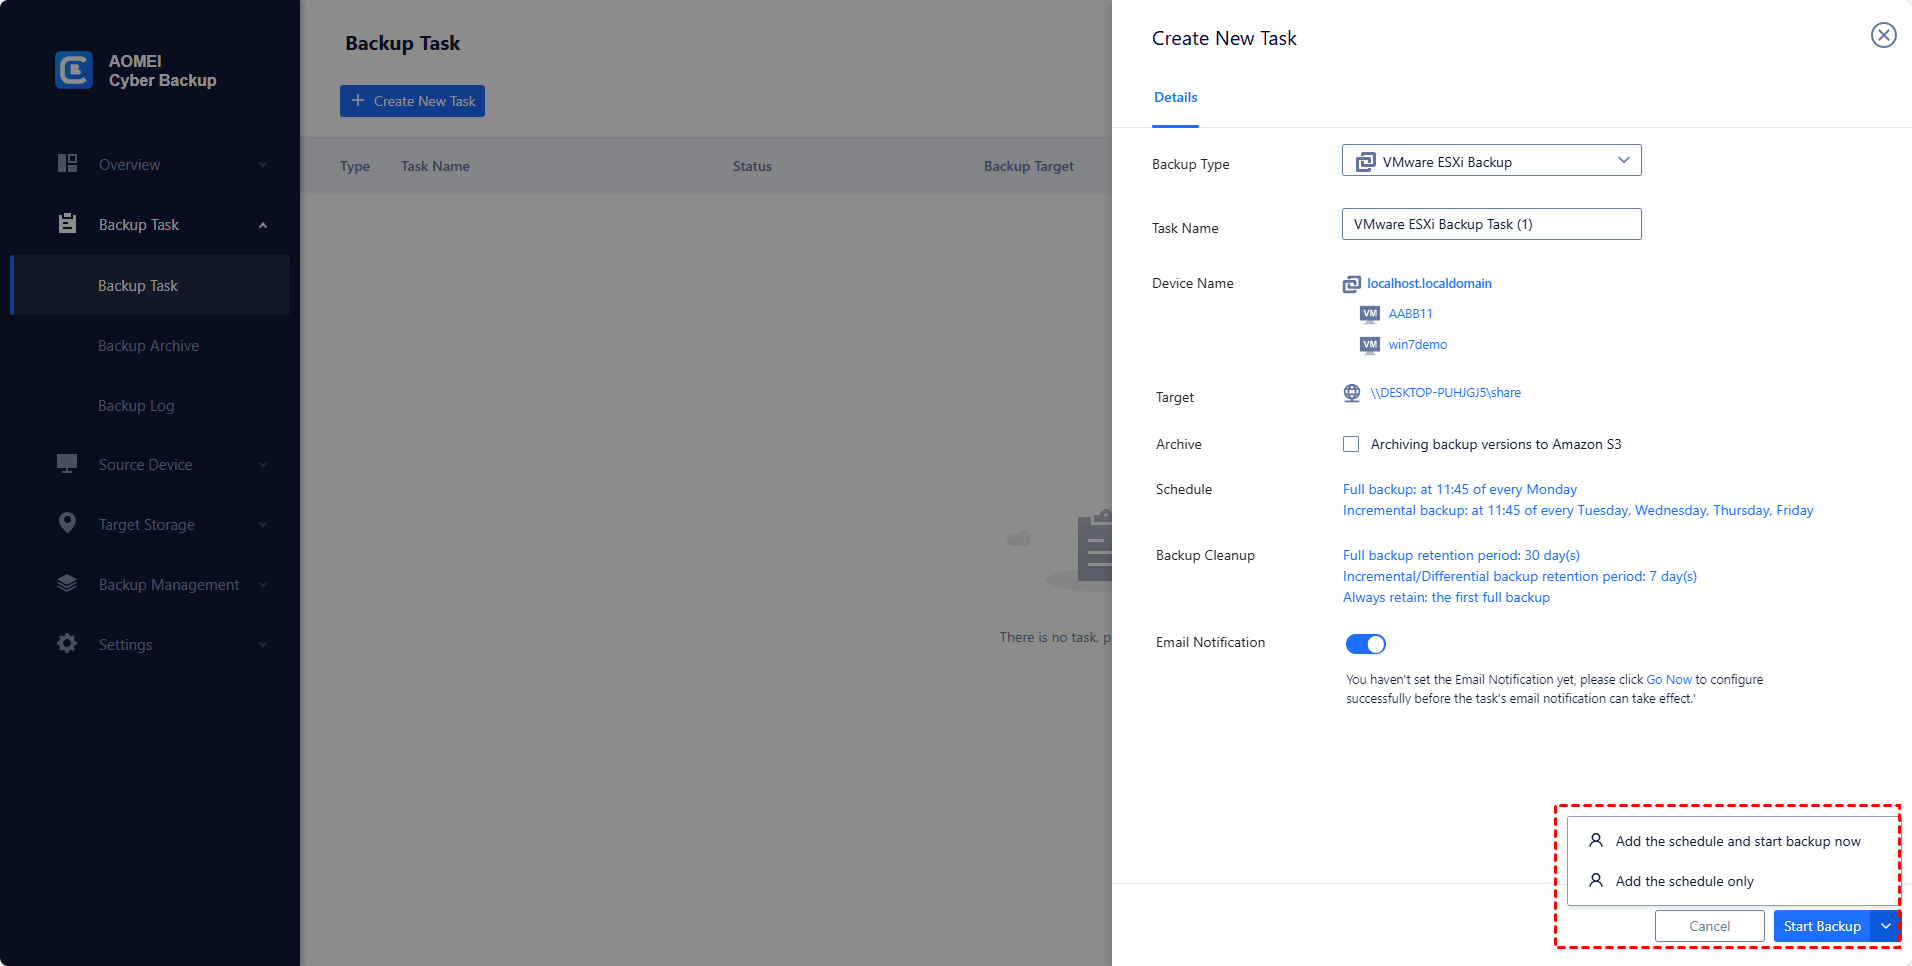
3. Set the Task Name, Device, Target, Schedule and Cleanup as needed.
- Task Name: you can change the task name or use the default name with an ordinal.
- Device: batch backup multiple VMs on vCenter or standalone host within one backup task.
- Target: select to back up to a local path, or to a network path like NAS.
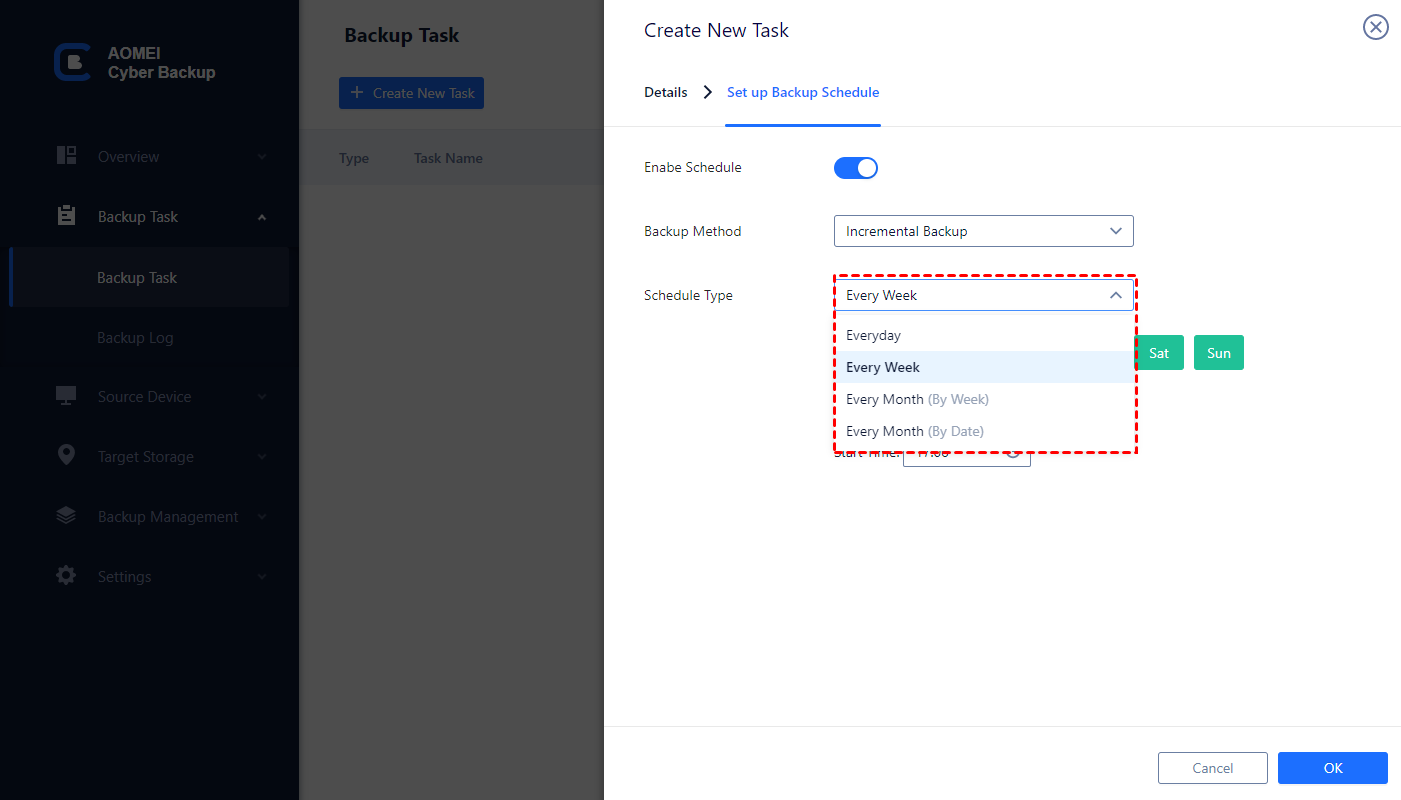
- Schedule (optional): perform full, differential, or incremental backup, and automate execution according to the frequency you specified.
4. Run Backup: Now you can click Start Backup and select Add the schedule and start backup now, or Add the schedule only.
By following these steps and utilizing AOMEI Cyber Backup, you can easily copy files for your VM and your local machine, ensuring your data is backed up and secure. Whether you are an individual user or managing a business, having a reliable backup solution like AOMEI Cyber Backup is essential for data protection and peace of mind.
Conclusion
Each of these methods for copying files from VM to local machine has its own advantages and can be chosen based on the specific requirements and constraints of your working environment.
Data security is essential for both local and virtual machines. AOMEI Cyber Backup will automatically backup your data via a central hub, ensuring that you never have to worry about data loss when transferring files.