Enable Image File Compression to Save Disk Space
Image file compression can help to save disk space. Free backup software - AOMEI Backupper possesses this function.
By Lily Updated on June 20, 2023
Why compress an image file?
The more files that need to be backed up, the larger the image file storage space will be. If you need to do regular data backup to ensure data safety, you may also need the function of compression to reduce the storage space of image file. For example, the data on C drive is 20GB, but the image file of C drive just occupies 5GB. That is the magic effect of compression.
Best free image file compression software for Windows
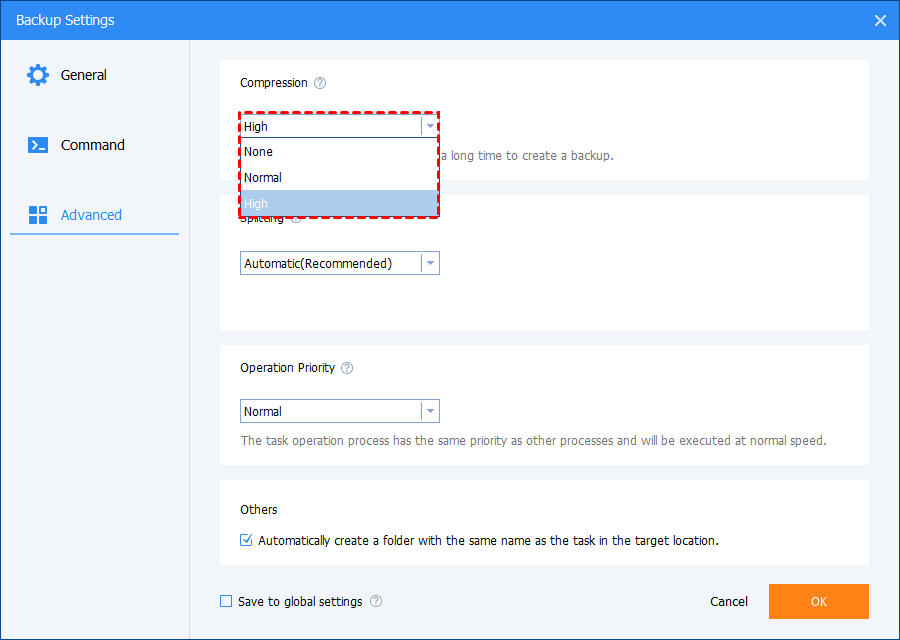
AOMEI Backupper provides the function of compressing image files, which includes three levels: None, Normal and High. The option of "Normal" is set as default. You can set the compression level according to your own needs during backup.
- None: The software will not compress the image file during backup. Its advantage is that the speed of backup and restore is fast, while its disadvantage is that the image file needs more storage space.
- Normal: It is the recommended compression level. It will compress the data to a normal extent. As for the speed of backup and restore and the storage space of the image file, this level is the best choice. It will not occupy much space or cost much time.
- High: It will compress the image file to the largest extent. It will cost more time in compression during backup and decompression during restore.
AOMEI Backup offers you four backup types: System Backup, Disk Backup, Partition Backup, and File Backup. No matter what you want to backup on your computer, you can find the corresponding backup type. Download and install it on your PC now!
How to compress a disk image file efficiently
Here come the operating steps.
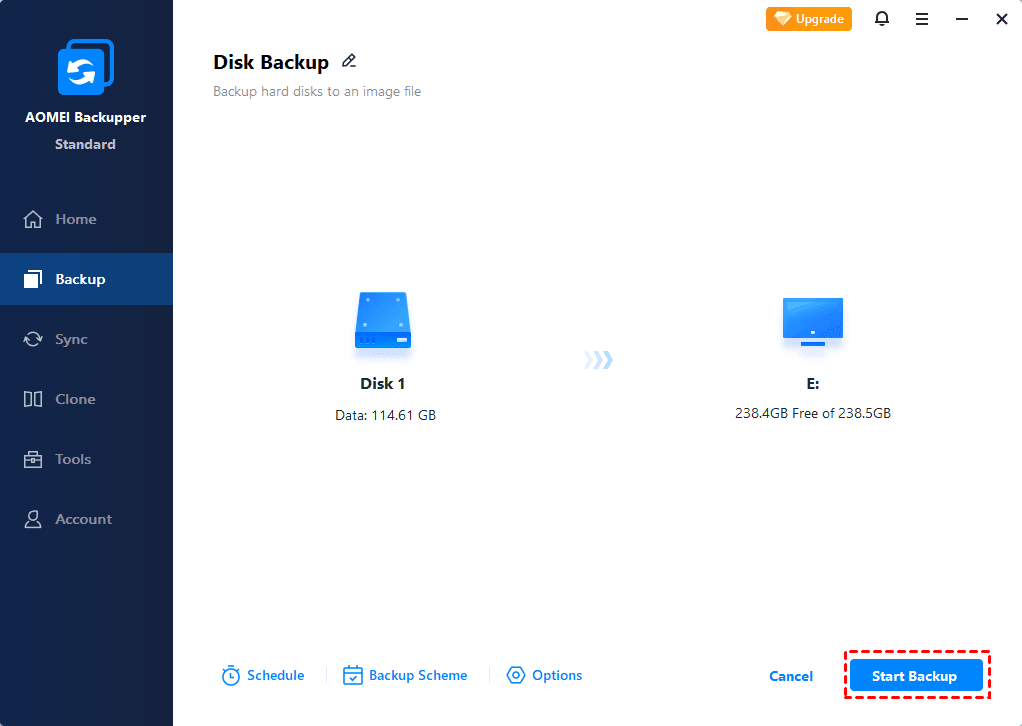
1. Select a backup type to enter the setting page. Here I choose "Disk Backup" to create a disk image of my computer hard drive.

2. Select the source disk(s) and destination path. Various backup storage devices are supported, such as a local disk, external hard drive, USB thumb drive, network location, etc.

3. You can compress the disk image by clicking "Options". In the pop-up interface, click the "Advanced" option, and there will be three compression levels available: None, Normal and High. Select one level and click "OK" to save the settings.
4. Click "Start Backup" when you are ready.
The ideal compression rate has a close relationship with the file type of the files that need to be backed up. For example, if the type of the files that you backup is all jpg, .mp3, .avi, it is hard for you to reduce the storage space of the image file even if the selected compression level is "High". But if the type of files that you backup is .txt, .doc, .xls, the compression rate will be much higher.