How to Copy Photos from Mac to External Hard Drive: 2 Ways
Want to copy Mac photos to external hard drive but don’t know how? Scroll down to get 2 efficient ways and bonus solutions to the external hard drive not recognized issue.
By Lily Updated on September 30, 2024
Why copy photos from Mac to external hard drive?
You may store a lot of photos on your Mac. Those photos are invaluable to you, and you may want to copy photos on Mac to external hard drive for the following reasons:
✅ Backup and Data Security: Storing photos on an external hard drive provides a backup in case of Mac failure, accidental deletion, or corruption of files. This ensures your photos are not lost and can be restored easily.
✅ Portability and Sharing: External hard drives are portable, making it easy to transport your photo library. This is useful for sharing large photo collections with friends, family, or colleagues without needing to rely on internet transfers.
✅ Organization and Management: Keeping photos on an external drive can help organize your digital library. You can create dedicated folders and categorize photos by event, date, or subject without cluttering your Mac’s internal storage.
✅ Free Up Storage Space: Photos can take up a significant amount of storage on your Mac. Moving them to an external hard drive frees up space, improving your Mac's performance and allowing you to store other important files.
👉 Preparing your external hard drive for photo transfer
👉 Copy Mac photos to external hard drive via Finder
👉 Copy photos on Mac to external hard drive with a free copy tool🔥
Preparing your external hard drive for photo transfer
Before you transfer photos from Mac to external hard drive, please make your external hard drive prepared:
1. Test the Connection
Connect your external hard drive to your Mac to ensure it's recognized and functioning properly. Check that you can read and write files to the drive without issues.
2. Check Available Space
Verify that your external hard drive has sufficient storage space to accommodate your photo library. Consider the size of your existing photos and any future additions.
3. Format the Drive
If the drive is new or previously used with a different operating system, you might need to format it. Use the Disk Utility app on your Mac to format the drive:
- Go to Applications > Utilities > Disk Utility.
- Select your external hard drive from the list on the left.
- Click the Erase button at the top.
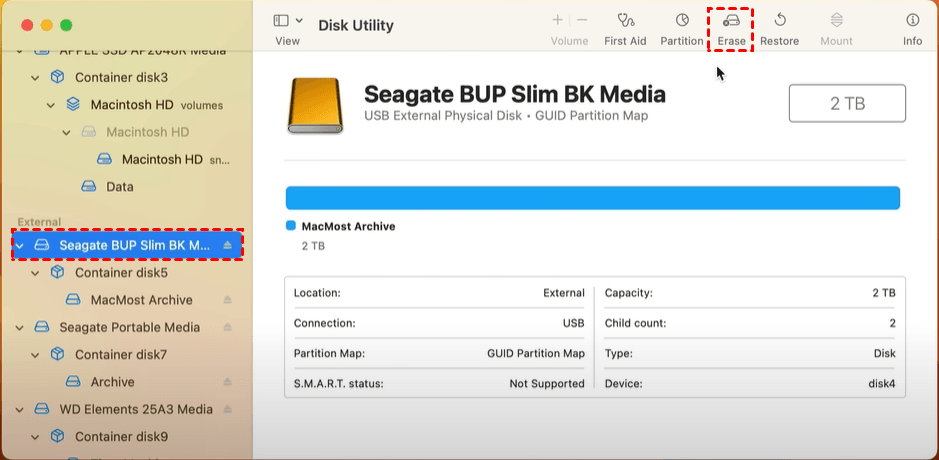
- Choose a format (APFS and Mac OS Extended (Journaled) are recommended for macOS).
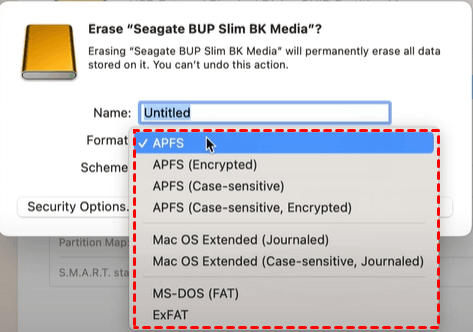
- Name the drive and click Erase to format it.
How to transfer selected photos from Mac to external hard drive
Now, your external hard drive is ready. Choose one of the following ways to copy photos from Mac to external hard drive.
Copy Mac photos to external hard drive via Finder
Learn how to copy Mac photos to external hard drive via Finder as follows. It is a straightforward process.
1. Click on the Finder icon in your Dock to open a new Finder window.
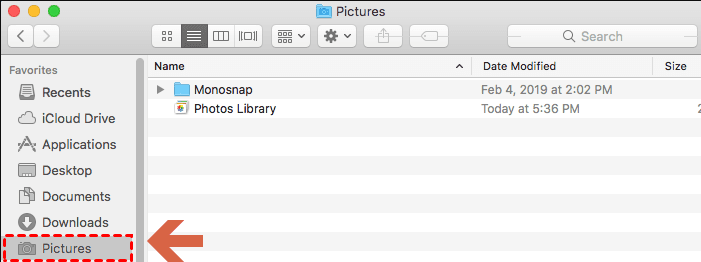
2. Navigate to the folder that contains the photos you want to transfer. Common locations include the Pictures folder or any other custom folders you may have created.
3. To copy multiple photos, click and drag your mouse to create a selection box around the desired files.
Note: Alternatively, you can hold down the Command key and click on individual photos to select multiple files.
4. Right-click the selected photos and choose Copy from the context menu.
Note: Alternatively, you can use the keyboard shortcut Command + C to copy the selected files.
5. Click on the external hard drive from the Finder sidebar to open it.
6. Open an existing folder on your external hard drive or create a new folder to store the transferred photos.
7. Right-click within the folder and select Paste from the context menu.
Note: Alternatively, you can use the keyboard shortcut Command + V to paste the copied files.
Copy photos on Mac to external hard drive with a free copy tool
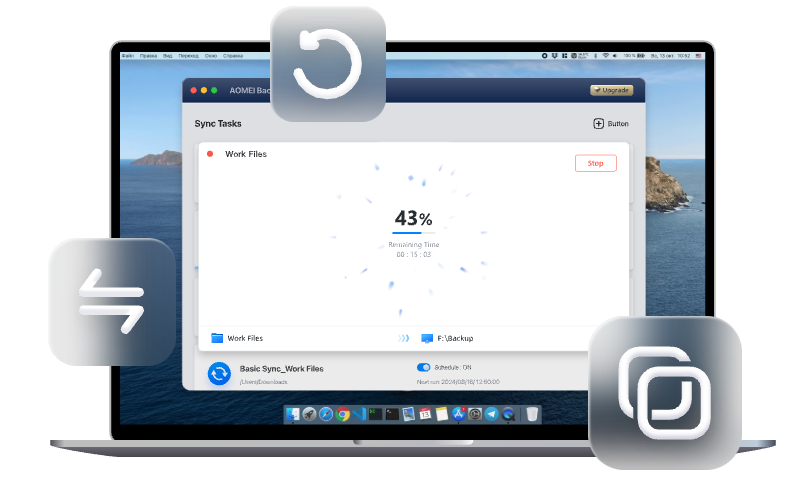
The best file copy software for Mac – AOMEI Backupper Mac can also help you with photo transfer. It offers all-around sync features to cater to your different needs.
💛Multiple sync types: You can sync files from source to destination with Basic Sync or Mirror Sync. You can also sync files both sides with Two-Way Sync.
💛Various sync source and destination: You can select folders on the local disk, external hard drive, network location or NAS device as the sync source or destination.
💛Schedule Sync: Set a sync task to run Once, Hourly, Daily, Weekly or Monthly based on your need.
💛File Filtering: Include or exclude specific file/folder types from the sync task.
Download AOMEI Backupper now and learn how to copy photos on Mac to external hard drive using AOMEI Backupper below.
Free Mac sync software to sync files and folders automatically
💡 Prerequisites: AOMEI Backupper only supports an external hard drive formatted as exFAT. If your external drive is in other formats, format it as exFAT in advance.
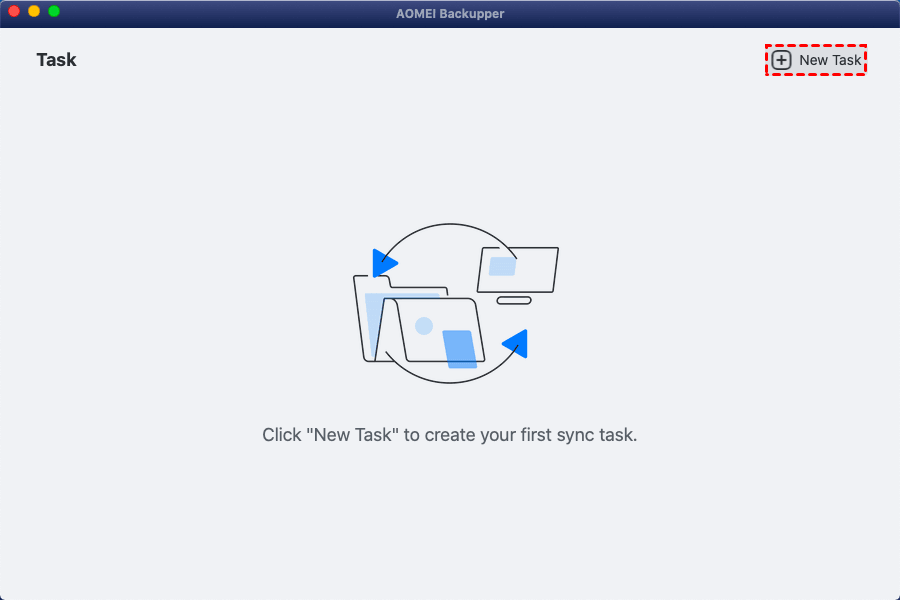
1. Install and launch AOMEI Backupper Mac. In the main interface, click New Task in the top-right corner.
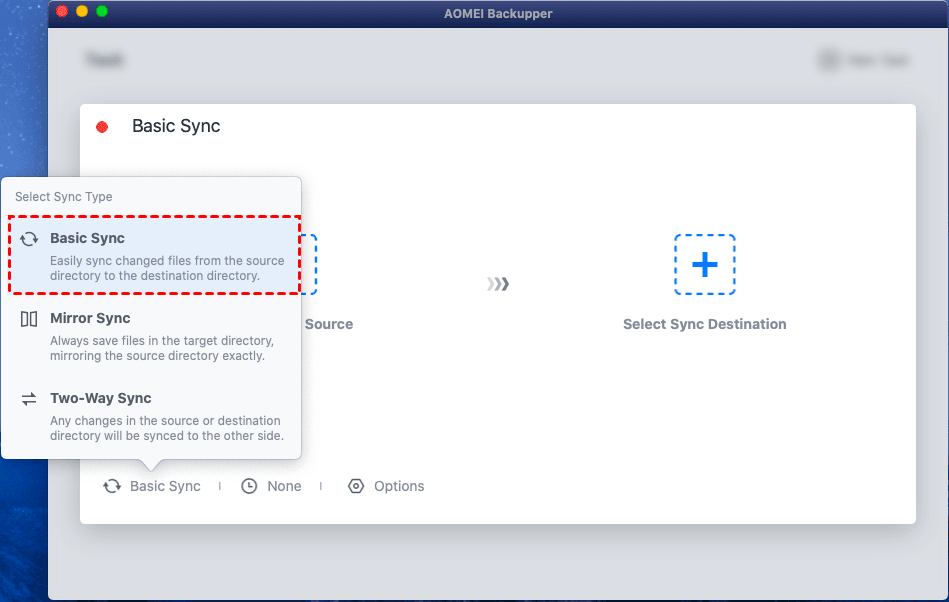
2. Select your desired sync type. Here I take Basic Sync as an example.
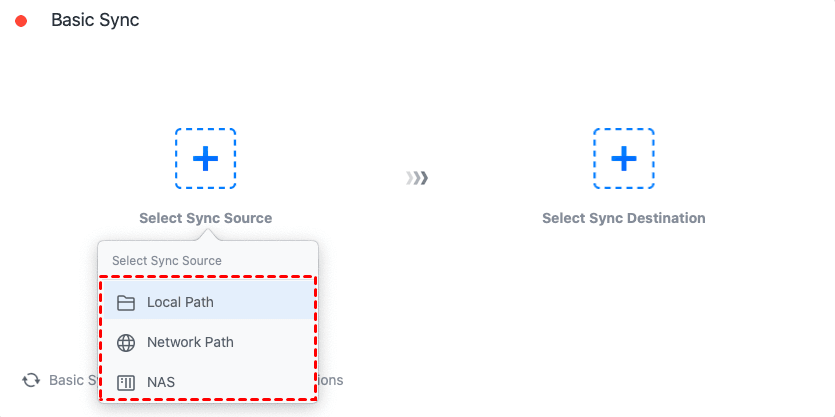
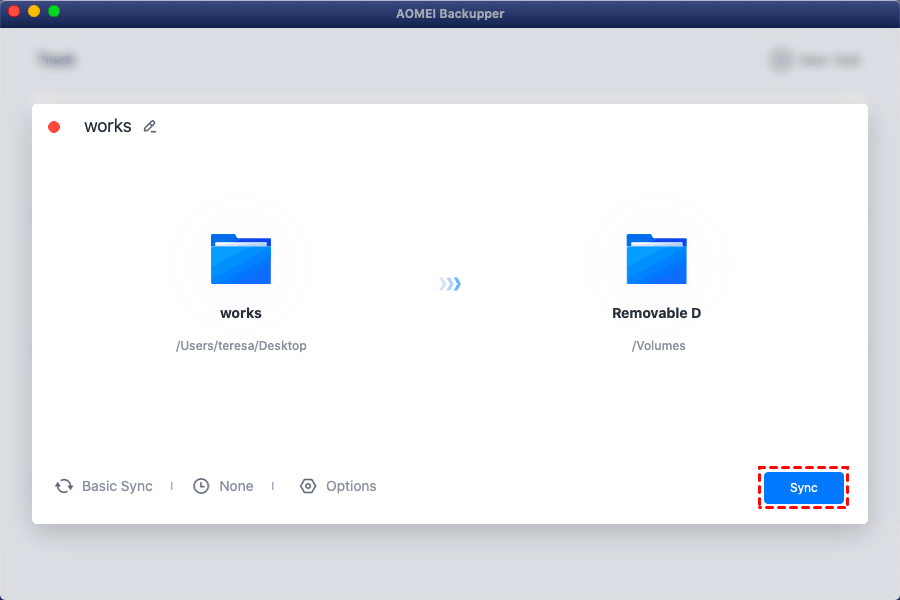
3. Click Select Sync Source > Local Path to choose the folder that contains the photos you want to transfer.
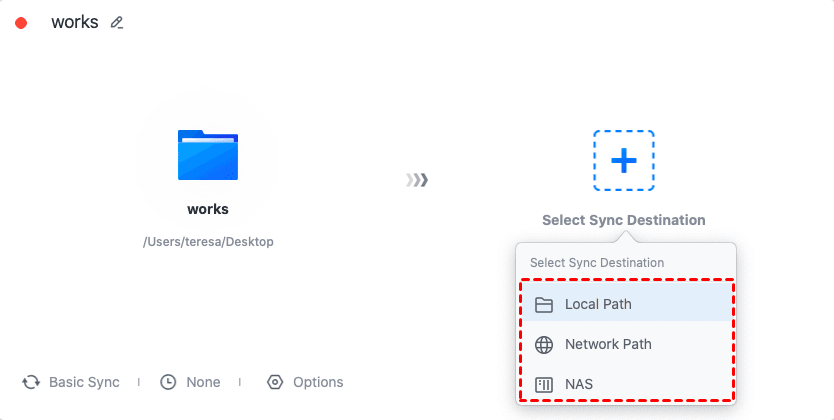
4. Click Select Sync Destination > Local Path to choose the external drive to receive the copied files.
5. Click the clock icon to enable Schedule as necessary. Finally, click on the Sync button to begin photo transfer.
What to do if external hard drive not recognized on Mac?
If your external hard drive is not recognized on your Mac, there are several troubleshooting steps you can follow to identify and resolve the issue:
1. Check the Basics
- Cable and Port: Ensure the cable is properly connected and try using a different cable or port.
- Power Supply: If the drive requires external power, make sure it's plugged in and turned on.
- Drive Activity: Look for any activity on the drive, such as lights or sounds indicating it's powered on and working.
2. Verify in Finder and Disk Utility
- Finder: Check if the drive appears in Finder under "Devices."
- Disk Utility: Open Disk Utility to see if the drive appears there. If it does, but not in Finder, it may need to be mounted. Select the external drive and click the "Mount" button.
3. Check System Information
Go to Apple Menu > About This Mac > System Report > USB (or Thunderbolt). Check if the external drive is listed under the connected devices.
4. Try on Another Device
Connect the external hard drive to another Mac or a Windows PC to determine if the issue is with the drive or your Mac.
5. Reset NVRAM/PRAM
Sometimes resetting the NVRAM/PRAM can help. Restart your Mac and hold down Option + Command + P + R keys until you hear the startup sound twice.
6. Check for Driver Updates
Ensure your Mac has the latest updates. Go to System Preferences > Software Update.
7. Run First Aid in Disk Utility
In Disk Utility, select the external drive and click the "First Aid" button to check and repair the drive.
Wrapping things up
That’s all for how to copy photos from Mac to external hard drive. You can copy photos with Finder or the best free copy software for Mac – AOMEI Backupper. If you get stuck on the external hard drive not recognized issue, follow the troubleshooting steps offered in this article to fix it.
AOMEI Backupper is an excellent choice for reliable file transfer on Mac. It enables you to transfer files between various locations, and the changed files can be copied automatically if you enable the Schedule feature. Just give it a try!