File Management: Mastering Dropbox Selective Sync on Mac
This guide delves into how to set up and use Dropbox Selective Sync on Mac, providing detailed instructions, solutions to common issues, and answers to frequently asked questions. By the end of this article, you'll have a thorough understanding of how to optimize your Dropbox experience on a Mac.
By Sebastian Updated on July 17, 2024
I Cannot Find My Selective Sync Settings
“I have looked everywhere on my Dropbox.com account and cannot find sync anywhere. I have found preferences and there is nothing about sync there. I have a colleague whose screen shows sync under this menu. I have been on Dropbox since 2008. I upgraded the desktop app but I don't know if or how I can update the desktop application. Any suggestions? Could she possibly have a paid version if she has selective sync -- even with the free version I should have sync shouldn't I so I can remove files I don't want to sync.”
– DropBox Forum
What Is Selective Sync?
Selective Sync is a feature offered by cloud storage services like Dropbox and Google Drive. It allows users to choose which folders or files they want to sync to their local device while keeping the rest stored only in the cloud. This feature helps manage local storage space by downloading only the most necessary files, while the rest remain accessible online. Here is the Selective Sync Mac tutorial:

How Does Selective Sync Work?
Selective sync allows you to decide which folders from your Dropbox account are stored on your computer's hard drive. This means you can keep essential files on your device for offline access while managing your hard drive's space efficiently. The folders you don't select remain accessible online through dropbox.com, freeing up local storage space.
- When you select a folder, its contents are downloaded and saved to your hard drive.
- When you deselect a folder, it and its contents are removed from your hard drive and remain only on dropbox.com.
Why Use Selective Sync?
Selective sync offers several key benefits for managing your Dropbox storage:
⚡Efficient Use of Hard Drive Space: By choosing which folders to sync, you can free up significant space on your computer's hard drive. This is especially useful for devices with limited storage capacity.
⚡Offline Access to Important Files: Selective sync ensures that critical files and folders are available offline on your computer. This is particularly beneficial for users who need access to specific documents while traveling or in areas with limited internet connectivity.
⚡Enhanced Performance: Keeping fewer files synced to your local hard drive can improve your computer's performance. Large amounts of data can slow down your system, so selective sync helps maintain optimal speed and efficiency.
⚡Simplified File Management: Selective sync makes it easier to organize and manage your files. You can keep frequently used files at your fingertips while archiving less-used data in the cloud, simplifying your file structure and making it easier to find what you need.
How to Use DropBox Selective Sync on Mac
The "Selective Sync" option is not a specific button in the Mac DropBox. But you can find another option named Choose folders to sync, which allows users to choose specific files or folders to sync. Here's the DropBox Selective Sync setup:
- First, download the Dropbox "desktop sync" app from the Dropbox website and log in to connect your account to your Mac.
- After logging in, click the Dropbox icon on the Menu bar, then click the gear icon to access settings.
- Go to “Preferences > Sync > Choose folders to sync.”
- Select the folders or subfolders you want to sync and deselect the ones you don’t need immediately on your Mac.

Dropbox File Syncing Software Alternative on Mac
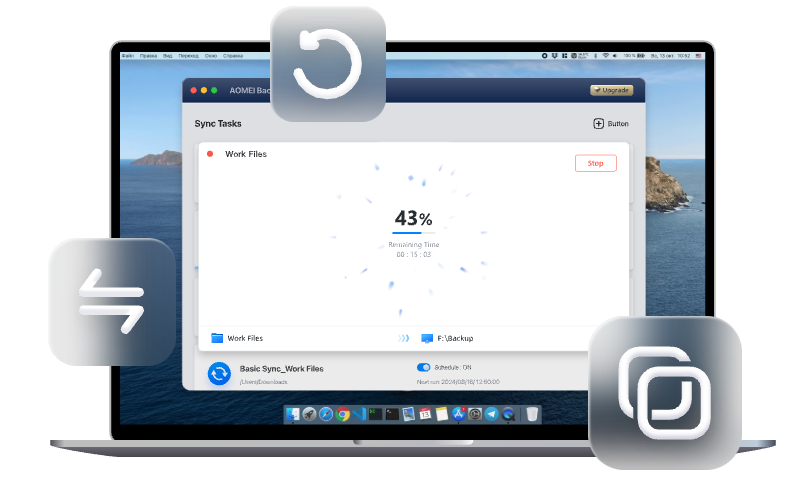
Except for Dropbox providing the selective syncing feature, you can try other Mac syncing tools to find specific files to sync to a designated location. Alternatively, you can switch to a different file sync tool that ensures smooth and reliable syncing. AOMEI Backupper Mac is an excellent choice for syncing important files on your Mac. Its intuitive interface and powerful features make data protection straightforward, ensuring your files are always secure and efficiently managed.
Free Mac sync software to sync files and folders automatically
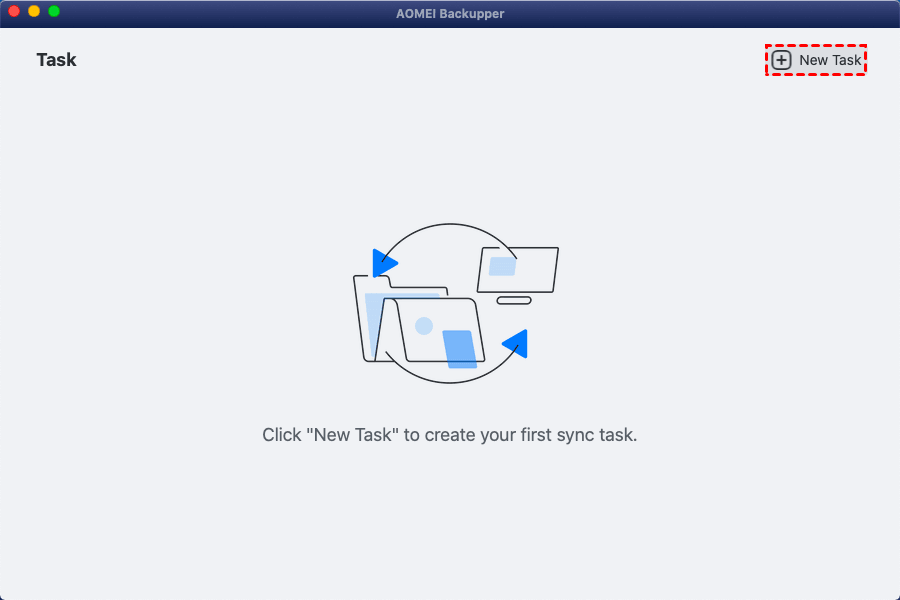
Step 1: Begin by downloading and installing AOMEI Backupper Mac on your device. Open the application and select "New Task" to start the syncing process.
Step 2: Decide on the type of sync that best suits your needs. Options include Basic Sync, Mirror Sync, and Two-Way Sync, each designed for different syncing requirements.
📌 Basic Sync: This method copies files from one location to another while keeping the originals intact. It’s useful for creating backups without altering the source files.
📌 Mirror Sync: This method makes an exact copy of the source files at the destination. It also removes any files at the destination that no longer exist at the source, ensuring both locations are identical.
📌 Two-Way Sync: This keeps files updated in both the source and destination locations. Changes in one location are automatically reflected in the other, maintaining consistency across both.

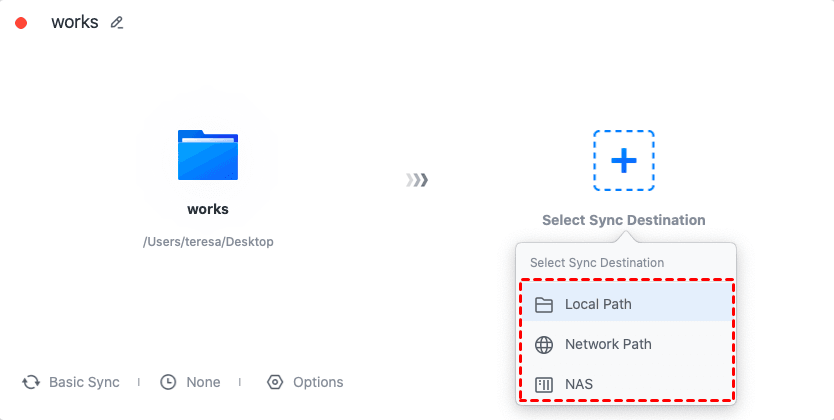
Step 3: Define the source and destination locations for your files. This ensures that the files are synced between the correct folders or drives.
Step 4: Customize your sync schedule and other settings as needed. You can set up how often the sync should occur and tweak additional options to fit your workflow.
You can set the frequency of the sync to suit your needs, whether it's once, hourly, daily, weekly, or monthly. Additionally, you have the option to specify the start time and choose if the system should hibernate or shut down after completing the sync process.
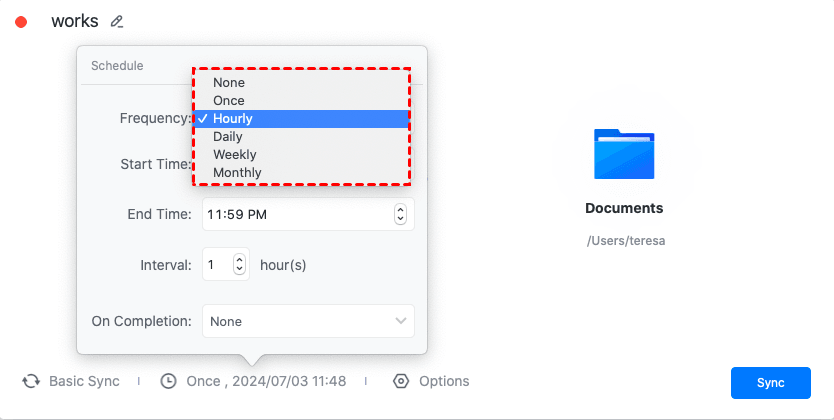
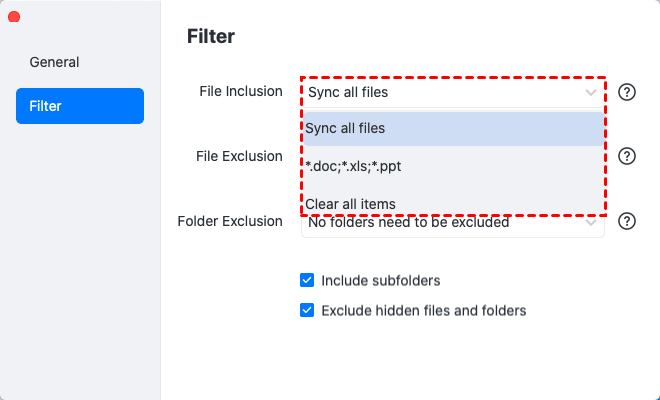
In the "Options" menu, you can further customize the sync by including or excluding specific files and folders, tailoring the process to your requirements.
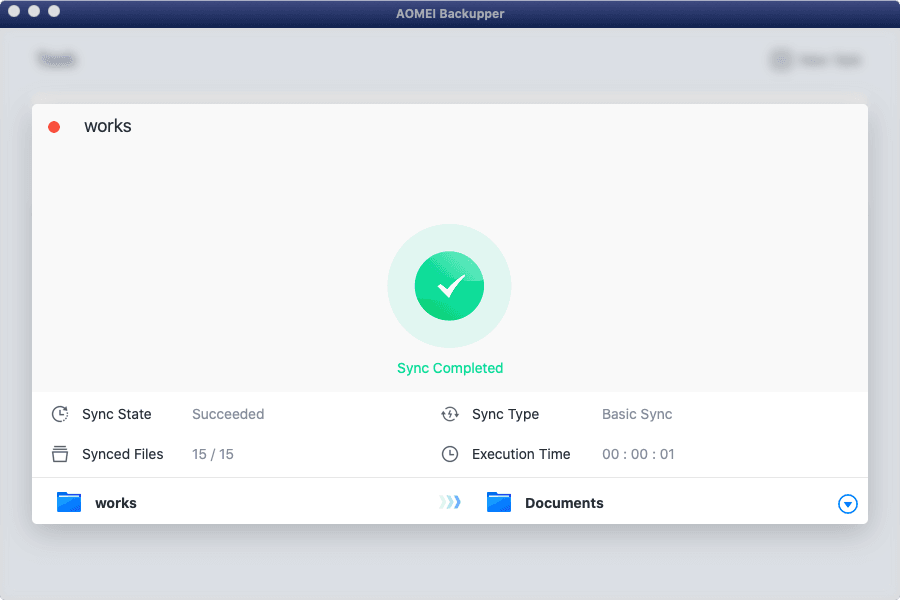
Step 5: Once everything is configured, click "Sync" to begin the process. The software will handle the rest, ensuring your files are synced accurately and efficiently.
FAQs about Dropbox Selective Sync on Mac
Q 1: Why are my files not syncing with Dropbox Selective Sync?
A 2: Ensure your internet connection is stable, restart Dropbox, update the application, and verify your Selective Sync settings. If issues persist, contact Dropbox support.
Q 1: Can I change my Selective Sync settings after the initial setup?
A 2: Yes, you can modify your Selective Sync settings at any time through Dropbox preferences.
Q 3: How does Selective Sync affect my storage space?
A 3: Selective Sync optimizes storage space by allowing you to keep only essential files locally, reducing the amount of disk space used on your Mac.
Practical Tips for Using Dropbox Selective Sync on Mac
- Regular Updates: Keep Dropbox updated to benefit from the latest features and improvements.
- Monitor Sync Status: Regularly check the sync status to ensure all important files are updated.
- Organize Files: Maintain a clear folder structure to make selective syncing easier and more efficient.
Conclusion
Mastering Dropbox Selective Sync on your Mac can significantly enhance your file management capabilities. By optimizing storage space, improving system performance, and ensuring essential files are always accessible, Dropbox Selective Sync is an invaluable tool for any Mac user. Follow the steps and solutions outlined in this guide to make the most of this feature, and utilize the provided tips and technical explanations to deepen your understanding. Embrace the efficiency and convenience of Dropbox Selective Sync, and transform the way you manage your digital files on your Mac.
FAQs about Dropbox Smart Sync on Mac
Q 1: Why are my files not syncing with Dropbox Smart Sync?
A 1: Ensure you have a stable internet connection, restart Dropbox, update the application, and verify your Smart Sync settings. If issues persist, contact Dropbox support.
Q 2: Can I change my Smart Sync settings after the initial setup?
A 2: Yes, you can modify your Smart Sync settings at any time through Dropbox preferences by navigating to the 'Sync' tab and adjusting your folder settings.
Q 3: What happens to unsynced files in Dropbox?
A 3: Unsynced files remain in your Dropbox cloud storage and can be accessed online or synced locally at a later time.
Practical Tips for Using Dropbox Smart Sync on Mac
Regular Updates: Keep Dropbox updated to benefit from the latest features and improvements.
Monitor Sync Status: Regularly check the sync status to ensure all important files are updated.
Organize Files: Maintain a clear folder structure to make selective syncing easier and more efficient.
Conclusion
Mastering Dropbox Smart Sync on your Mac can significantly enhance your file management capabilities. By optimizing storage space, improving system performance, and ensuring essential files are always accessible, Dropbox Smart Sync is an invaluable tool for any Mac user. Follow the steps and solutions outlined in this guide to make the most of this feature, and utilize the provided tips and technical explanations to deepen your understanding. Embrace the efficiency and convenience of Dropbox Smart Sync, and transform the way you manage your digital files on your Mac.