How to Access SD Card on Mac: Complete Guide
Learn how to access an SD card on your Mac below, from insertion to file management and troubleshooting. Perfect for anyone needing a quick, easy-to-follow solution.
By Lily Updated on August 13, 2024
Need to access SD card on Mac
An SD card (Secure Digital card) is a compact, portable memory card used for storing digital data. Due to its small size and large storage capacity, it’s widely used in various electronic devices, such as cameras, smartphones, tablets, and gaming consoles.
Users might need to access SD cards on their Mac for the following reasons:
- Transferring Photos and Videos: Photographers often use SD cards in their cameras. Accessing the SD card on a Mac allows them to transfer high-resolution images and videos for editing, backup, or sharing.
- Data Backup and Storage: SD cards are commonly used for portable storage. Users may need to transfer important files, documents, or media from their Mac to an SD card for backup or to free up space on their device.
- Software Installation: Some software, especially for devices like Raspberry Pi or drones, requires installation files to be written to an SD card. Mac users might need to access the SD card to format it or copy installation files.
- Media Playback: Users may store music, movies, or other media on an SD card for offline playback. Accessing the SD card on a Mac allows them to view, listen, or transfer these files.
Then, how to access an SD card on your Mac? Please read on.
👉 How do I access an SD card on a Mac?
👉 Troubleshoot: SD card not showing up on Mac
👉 Bonus: Backup SD card files in case🔥
How do I access an SD card on a Mac?
In this part, I’ll show you how to access SD card on MacBook Air/Pro in detail.
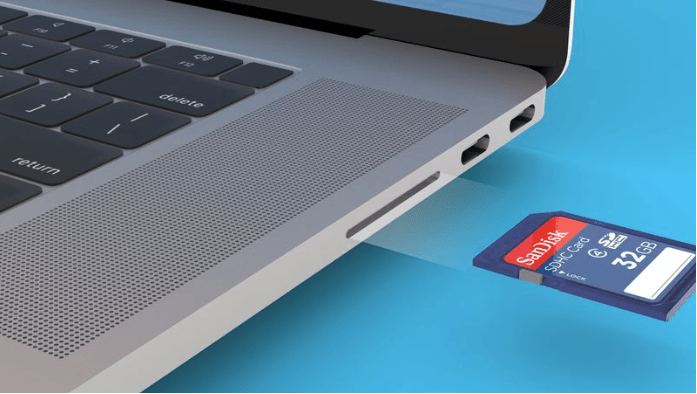
Step 1. Insert the SD Card
Insert the SD card into the SD card slot on your Mac. If your Mac doesn't have a built-in SD card slot, use an external card reader connected via USB or USB-C.
✍ Notes:
★ If you’re using a Mac laptop with Apple silicon with macOS 13.3 or later, you have to approve new SD cards that you connect to your Mac.
★ To connect smaller cards such as MiniSD and MicroSD, please use an adapter.
Step 2. Locate the SD Card
- Open Finder. The SD card should appear in the sidebar under the "Locations" section. It might be named something like "Untitled" or the name you've given it.
- Alternatively, you can access it through Desktop where it might show up as an icon.
Step 3. Access the Files
Click on the SD card icon in Finder or on your Desktop to open it. You can now browse, copy, edit, or delete files just as you would with any other drive.
Step 4. Eject the SD Card
- Before physically removing the SD card, make sure to eject it properly to avoid data corruption. Right-click the SD card icon in Finder or on your Desktop, then select "Eject."
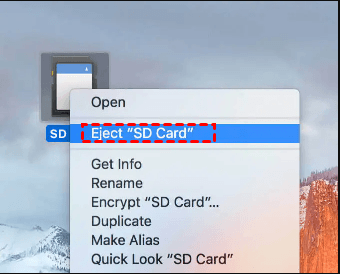
- Once the card disappears from Finder or Desktop, it's safe to remove.
Troubleshoot: SD card not showing up on Mac
If your SD card isn't showing up on your Mac, here are some troubleshooting steps you can follow to resolve the issue:
1. Check the Basics:
- Reinsert the SD Card: Remove the SD card and insert it again to ensure it’s properly seated in the slot or card reader.
- Try a Different Slot or Reader: If your Mac has multiple slots or you're using an external card reader, try using a different one to see if the card is detected.
- Test with Another Device: Insert the SD card into another device (like a camera or another computer) to check if it’s recognized elsewhere.
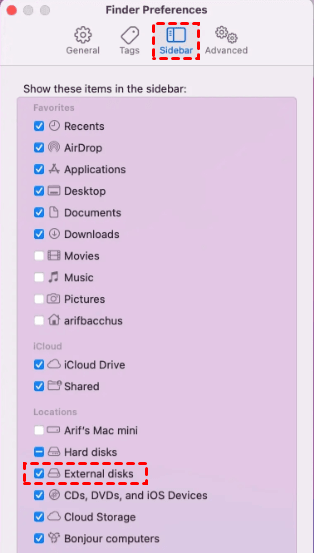
2. Check Finder Preferences:
- Show External Disks: In Finder, go to Finder > Preferences > Sidebar, and make sure "External disks" is checked. This will ensure that external drives like SD cards appear in the Finder sidebar.
- Desktop Display: In Finder settings, go to the General tab and ensure "External disks" is checked under "Show these items on the desktop."
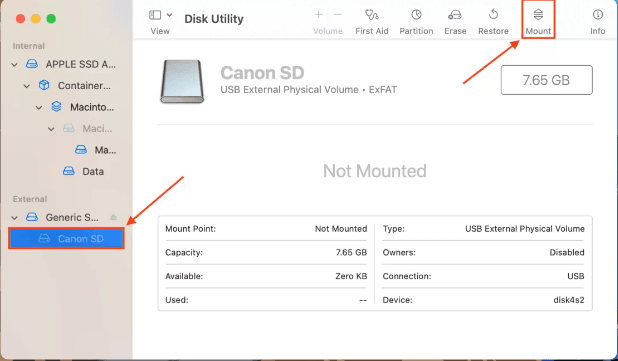
3. Check Disk Utility:
- Open Disk Utility (Applications > Utilities > Disk Utility) and look for your SD card in the list of drives on the left.
- If the SD card appears but isn’t mounted, select it and click Mount. If it still doesn’t show up, it may be unrecognized or corrupted.
4. Check for File System Compatibility:
- If the SD card is formatted with a file system that macOS doesn’t support (e.g., NTFS), it might not appear. You can check the file system in Disk Utility.
- Consider reformatting the SD card to a Mac-compatible format like exFAT or FAT32 if you don't need the data on it. (Be cautious, as reformatting will erase all data on the card.)
5. Reset the SMC and PRAM/NVRAM:
- SMC Reset: This can help resolve issues with hardware recognition. The steps vary depending on your Mac model, so you might need to look up specific instructions for your device.
- PRAM/NVRAM Reset: Restart your Mac and hold down Option + Command + P + R keys until the second startup sound or Apple logo appears. This can reset settings that might affect hardware connections.
Bonus: Backup SD card files in case
Now you know how to access memory card on Mac along with some troubleshooting steps. As a matter of fact, SD cards can be prone to corruption, accidental deletion, or physical damage. Thus, it’s important to backup files on SD card to ensure data security.
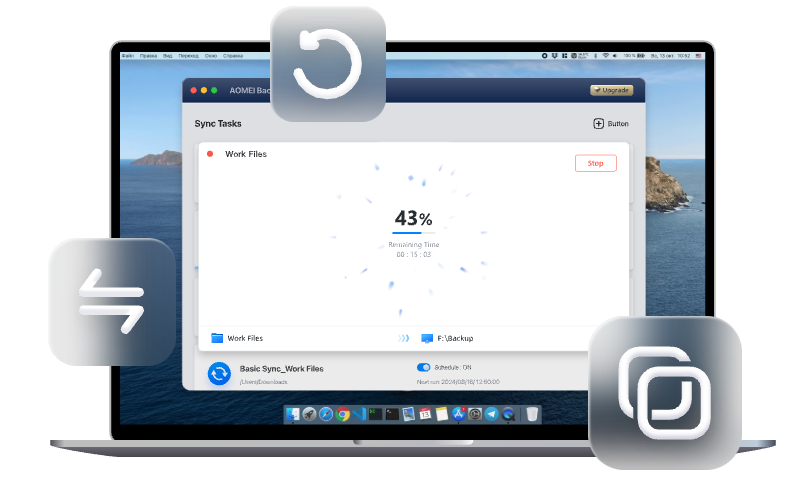
AOMEI Backupper Mac, the best free Mac sync software, is here to help. It enables you to sync files and folders between various locations, offering a reliable backup solution.
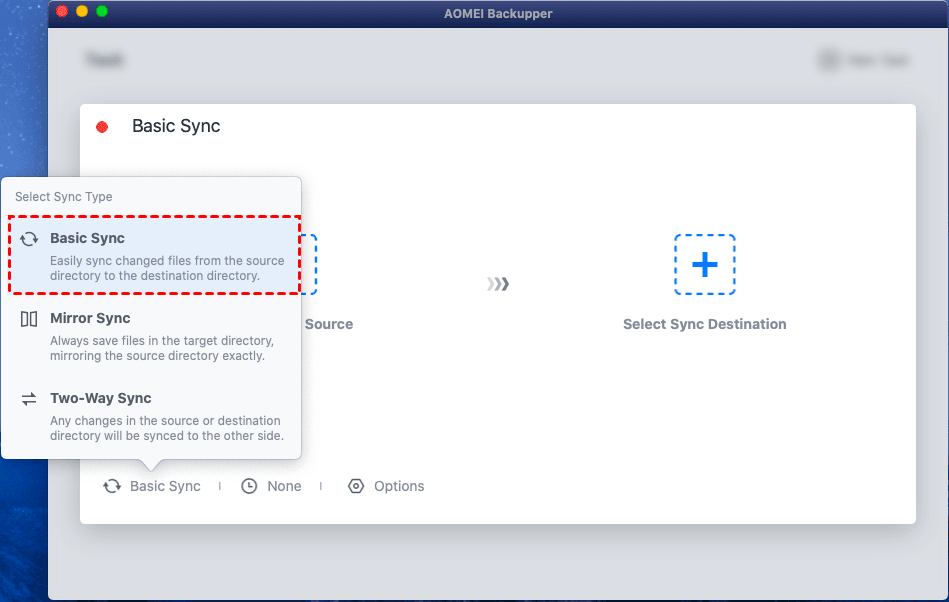
💜Multiple sync types: You can sync files from source to destination with Basic Sync or Mirror Sync. You can also sync files both sides with Two-Way Sync.
💜Various sync source and destination: You can select folders on the local disk, external hard drive, SD card or NAS device as the sync source or destination.
💜Automatic sync: The program offers 5 schedule modes to help you sync folders automatically, including Once, Hourly, Daily, Weekly and Monthly.
💜System compatibility: It runs smoothly on macOS 14/13/12/11/10.15.
Don't wait - download AOMEI Backupper Mac and give it a try today!
Free Mac sync software to sync files and folders automatically
To copy SD card files to another location, follow these steps:
1️⃣Run AOMEI Backupper and click New Task in the main interface. Then, choose a sync type.
2️⃣Select files on the SD card as sync source.
3️⃣Select a different location as sync destination.
4️⃣Finally, click Sync to run the task.
To sum up
This page shows you how to access SD card on Mac with detailed instructions. If the SD card doesn't appear, follow the troubleshooting steps above to fix it. Always safely eject the SD card through Finder or Disk Utility before removing it to avoid data corruption.
What’s more, it is recommended to backup files on SD card with the best file copy software for Mac - AOMEI Backupper. It enables you to transfer files between various locations. Why not give it a shot?