Best Mac File Transfer Apps: Seamless Sharing Guide
This comprehensive guide explores the best Mac file transfer apps, detailing their features, benefits, and usage. It covers multiple solutions, providing detailed steps for each method. It addresses common questions about file transfers and offers useful tips to enhance the experience.
By Sebastian Updated on July 17, 2024
Introduction
Transferring files on a Mac can be a breeze if you have the right tools at your disposal. With numerous Mac file transfer apps available, choosing the right one can be daunting. This guide will walk you through the best options, ensuring smooth, secure, and efficient file transfers every time. Whether you need to move large files, synchronize folders, or share documents with others, having the right application makes all the difference. Read on to discover the top Mac file transfer apps that will simplify your file management tasks.
The Benefits of Using a Mac File Transfer App
Using Mac file transfer software offers several advantages, including:
⚡Streamlined File Transfer: These apps make it easy to move files between devices quickly and hassle-free.
⚡Support for Large Files: Many apps can handle large file transfers, allowing you to move substantial amounts of data without issues.
⚡Robust Security Features: They often include strong security measures to ensure your files remain protected during transfers.
⚡File Synchronization and Cloud Integration: These features help keep your files updated across multiple devices.
⚡User-Friendly Interface: Mac file transfer apps are typically designed to be easy to use, making complex file transfers accessible to anyone.
File Transfer Software for Mac OS
Solution 1: AirDrop for Free File Sharing
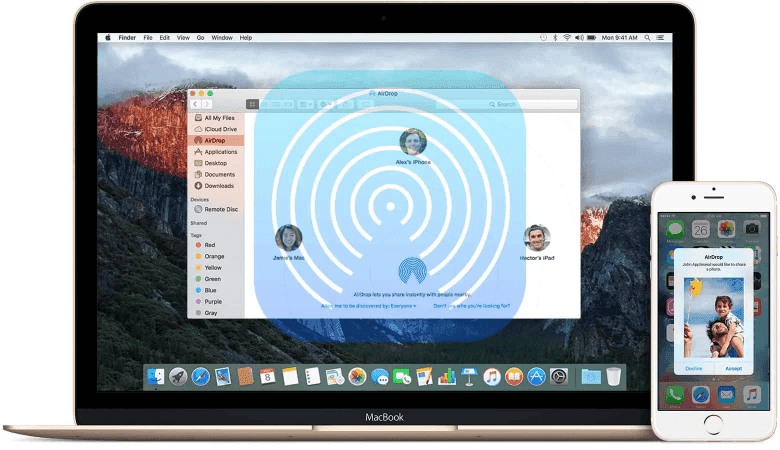
AirDrop is a built-in feature on Apple devices that allows for quick and convenient file sharing between Macs, iPhones, iPads, and iPods. It offers seamless transfers without cables, provides fast speeds, and ensures security through encryption. However, AirDrop only works with Apple devices and requires devices to be within a certain range, and if you transfer large files, the stability may not be good.
Here's how to use it:
Step 1: Open Finder and select AirDrop from the sidebar. Ensure both Wi-Fi and Bluetooth are turned on.
Step 2: Choose your visibility settings: Contacts Only or Everyone.
Step 3: Locate the files you want to transfer and drag them to the AirDrop window.
Step 4: Select the receiving device from the AirDrop window.
Step 5: The recipient will receive a notification to accept the transfer. Once accepted, the files will be transferred.
Solution 2: Using Third-Party Applications
Several third-party apps provide advanced features for file transfers. Here are two popular options:
App 1: AOMEI Backupper Mac
When transferring files, ensuring data integrity is paramount. AOMEI Backupper Mac offers an impeccable solution for backing up and syncing your data. With a user-friendly interface and robust features, AOMEI Backupper simplifies the process of safeguarding your data. AOMEI Backupper Mac provides a reliable and efficient way to sync, ensuring your data is always protected.
- Sync All of Your Mac: Sync any files in your Mac to build full protection.
- Diverse Sync Options: Basic Sync, Mirror Sync, and Two-Way Sync to diversify your Mac synchronization.
- Multiple Destination Options: Sync to local, cloud drive, NAS device, external hard drives, USB flash drives, SD cards, and more.
- Fast & Secure: Syncs your Mac files at the fastest speed using high-end technology while encrypting the process.
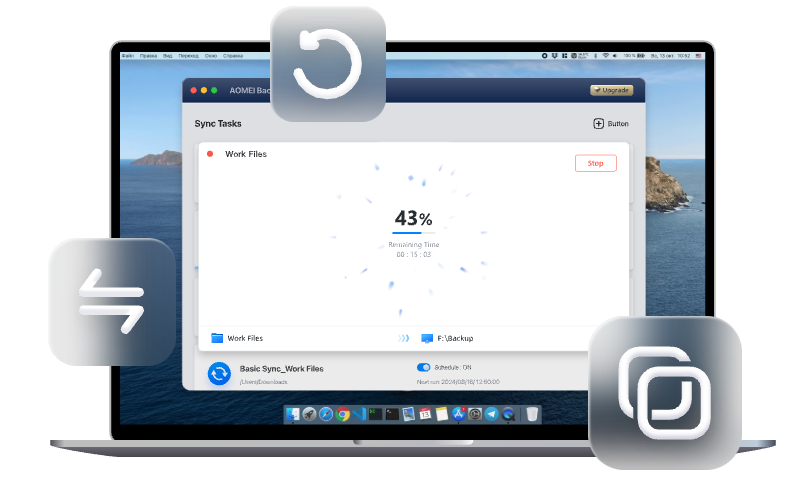
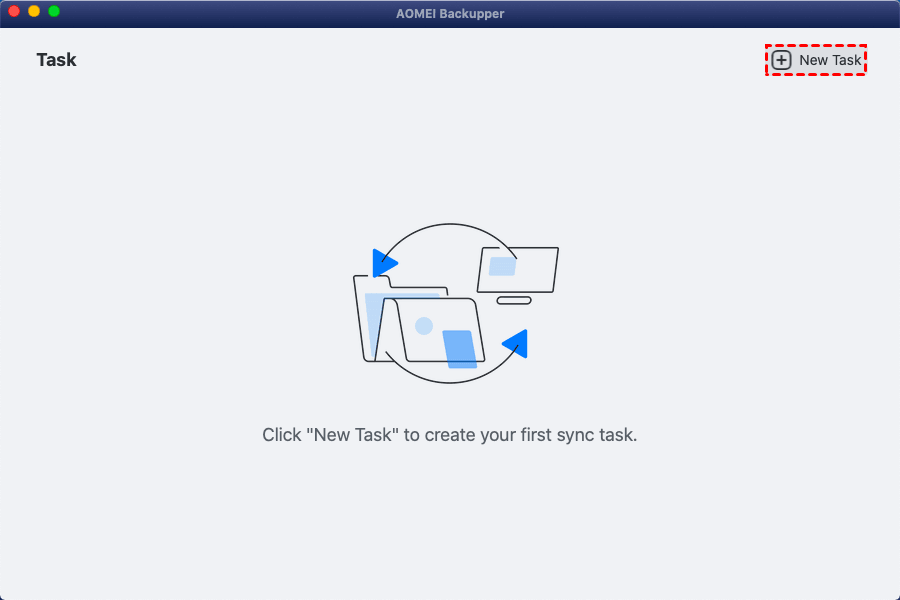
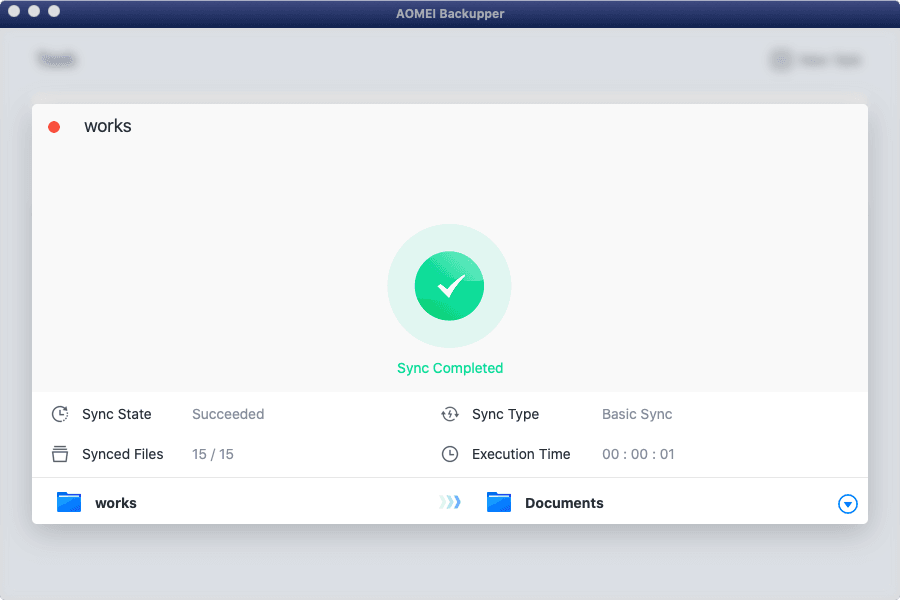
Step 1: Download the AOMEI Backupper Mac software and install it on your Mac. Click New Task to start it.
Step 2: Choose a synchronized type. In general, Basic Sync is enough for you to transfer your files.
Basic Sync: Basic Sync ensures that files in one location are copied to another. But it won't delete the original files in the designated location.
Mirror Sync: Mirror Sync replicates files from a source to a destination, making the destination an exact mirror of the source. It will delete the original files from the transferred location.
Two-Way Sync: Two-Way Sync updates files in both the source and destination locations. Any changes made in either location are synced to the other, maintaining identical files in both places and ensuring that updates are reflected on both sides.

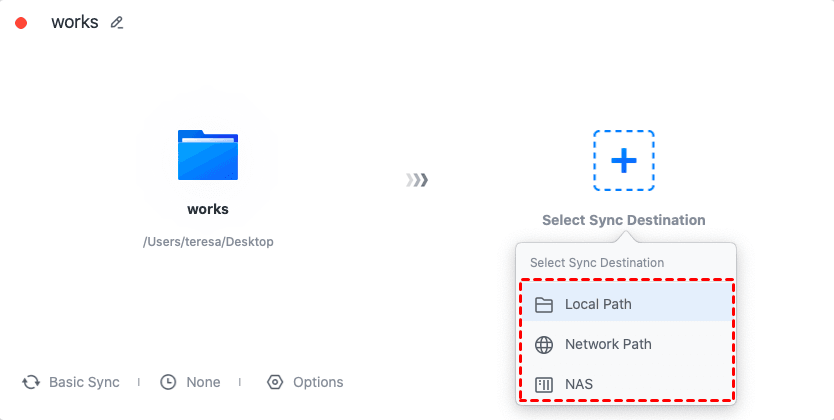
Step 3: Select the sync source and destination.
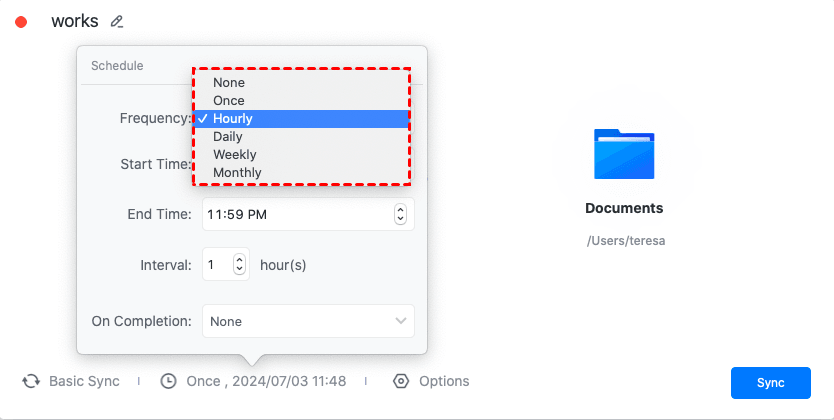
Step 4: There are schedules and options you can adjust.
Here you can select the frequency of synchronization as once, hourly, daily, weekly, or monthly. It also sets the start time and whether to hibernate or shut down after synchronization.
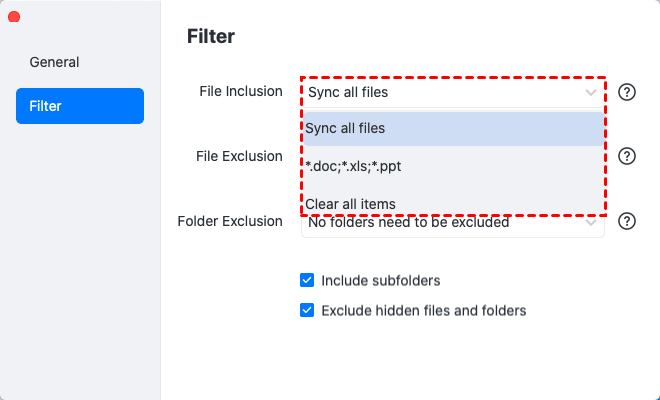
In Option, users can customize settings such as File Inclusion, File Exclusion, and Folder Exclusion.
Step 5: When everything is ready, click Sync and wait for it to complete.
App 2: Send Anywhere
Send Anywhere is a straightforward file-sharing service that allows you to transfer files across devices easily and quickly, offering secure, unlimited file size transfers without the need for registration, but it may experience slower speeds for larger files and share files up to 10GB in size, with the link active for 48 hours. And there is a risk of data loss when using online services.

To transfer files on a Mac using Send Anywhere, follow these updated steps:
- Download and install Send Anywhere from the official website or Mac App Store. Open the app on your Mac.
- Click the '+' button to add the files you want to send.
- Select 'Direct' and click 'Send' to generate a unique 6-digit key.
- On the receiving device, open Send Anywhere and enter the 6-digit key to start the file transfer.
Send Anywhere supports direct transfers using a 6-digit key, creating shareable links, and sending files via email, making it versatile for various file-sharing needs. It doesn't require an account for basic transfers, ensuring a straightforward user experience.
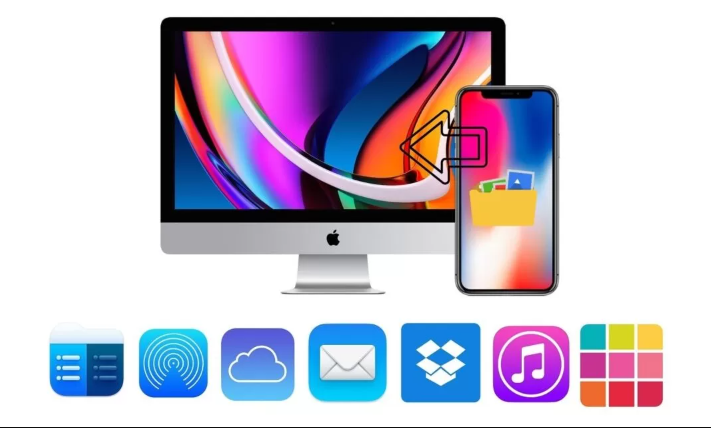
Solution 3: Cloud-Based Services
Cloud-based services provide a versatile and convenient way to transfer files. This method supports large file sizes, offers secure storage, and enables easy sharing and collaboration. Popular services include Google Drive, Dropbox, and OneDrive. Apple service also provides a cloud-based service called iCloud Drive.
iCloud Drive is Apple's cloud storage service that allows users to store files and access them across all Apple devices. Advantages include seamless integration with the Apple ecosystem, automatic backups, and easy file sharing. However, disadvantages include limited free storage (only 5GB) and the necessity of having Apple devices for optimal use.
To share files and folders using iCloud Drive on a Mac, follow these steps:
Step 1: Open Finder and navigate to iCloud Drive in the sidebar.
Step 2: Select the file or folder you want to share, then click the Share button.
Step 3: Choose "Collaborate" from the menu.
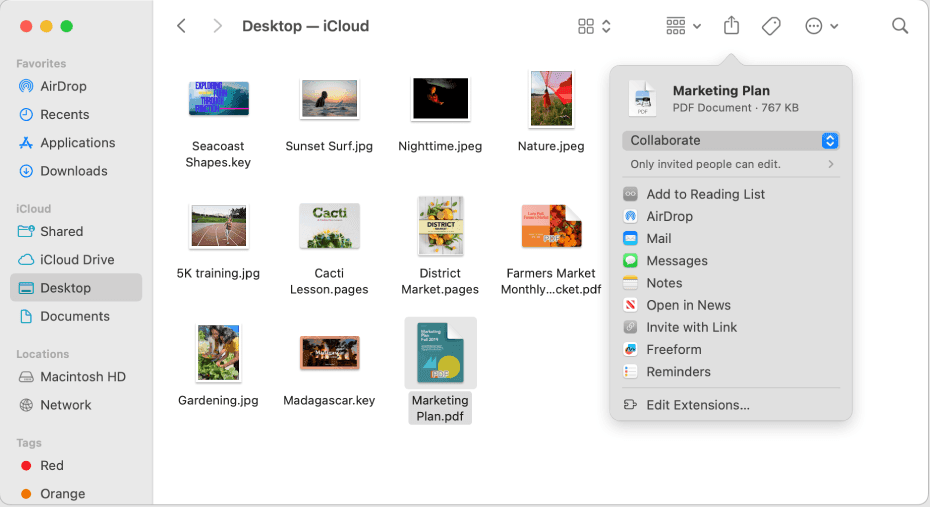
Step 4: Set the permissions by selecting who can access and edit the file or folder.
Step 5: Share the invitation through Mail, Messages, or by copying a link.
FAQs About Mac File-Sharing Software
Q: Can I transfer files between a Mac and a PC?
A: Yes, you can use AOMEI Backupper Mac to make the file transfer. Cloud Services like Google Drive or file transfer apps also support multiple operating systems.
Q: Can I transfer large files using these apps?
A: Yes, most file transfer apps support large files, but check for any limitations or restrictions on file size.
Q: How do I troubleshoot failed transfers?
A: Ensure your internet connection is stable, check your server settings, and verify that your app is up to date.
Tips for Effective File Transfers
🔥Verify Connections: Ensure your network connections are stable before starting large transfers.
🔥Use Encryption: Opt for encrypted transfer protocols to safeguard sensitive data.
🔥Organize Files: Keep files organized and named correctly to avoid confusion during transfers.
Conclusion
Choosing the right Mac file transfer app can significantly enhance your productivity and security. Whether you prefer the simplicity of AirDrop, the robustness of third-party apps like AOMEI Backupper Mac and Send Everything, or the convenience of cloud services like iCloud Drive, this guide has covered all the essential tools and steps. By understanding the features and benefits of each solution, you can make an informed decision and ensure smooth, efficient file transfers on your Mac.