How to Transfer Documents from Mac to Mac: 5 Fastest Ways
Need to transfer documents from Mac to Mac? This guide will show you 5 solutions that can help you copy files between two Macs easily and quickly.
By Jonna Updated on July 16, 2024
Transferring documents from one Mac to another is a common task, whether you're upgrading to a new machine, sharing files with a colleague, or simply ensuring that your data is available across multiple devices. In this comprehensive guide, we'll explore the 5 fastest ways to transfer documents from Mac to Mac, ensuring you can choose the best method for your needs.
Necessity of Transferring Files from Mac to Mac
Transferring files from Mac to Mac is often necessary for several reasons:
- Upgrading to a new Mac: When you purchase a new Mac, you'll want to move your existing files, applications, and settings to your new machine.
- Backup and recovery: Regularly transferring files to another Mac can serve as a backup solution, protecting your data from potential loss.
- File collaboration: Sharing documents with colleagues or team members across different Macs enhances productivity and facilitates smooth collaboration.
- Multi-device usage: Keeping your files synced across multiple Macs ensures you have access to your data regardless of the device you're using.
Way 1. Fastest Way to Transfer Files Between Two Macs - Free File Sync Software
Using free file sync software is one of the fastest and most efficient ways to transfer documents from Mac to Mac. AOMEI Backupper Mac stands out as an excellent choice due to its ease of use and robust features:
- One-click sync: Easily sync files and folders from Mac to Mac, or transfer files from Mac to external hard drive, USB drive, network drive, NAS devices, etc.
- Scheduled sync: Automate the data sync process to run at specified intervals, such as hourly, daily, weekly, and monthly.
- Flexible sync: Support Basic Sync, Mirror Sync, and Two-Way Sync options, allowing for various synchronization needs.
- User-friendly interface: Easy to navigate and set up, making it accessible even for non-tech-savvy users.
Here is how to use AOMEI Backupper Mac for data migration from Mac to Mac:
Preparations:
>>Ensure your two Macs are on the same network, either wireless or wired.
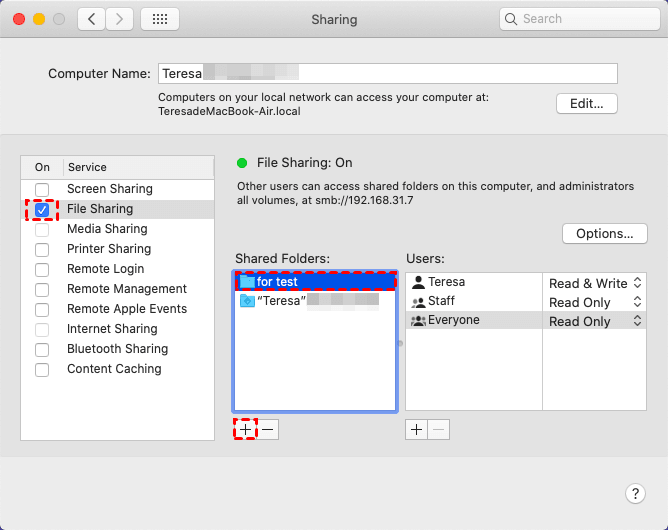
>>Create a shared folder on your source Mac with the following steps:
- Create a new folder, click the Apple icon in the top-left corner, and select System Preferences.
- Click Sharing, and check the File Sharing box.
- Add the newly created folder by clicking the + symbol below the list of Shared Folders. You are able to configure the share access on the right side column, please select Everyone and Read & Write.
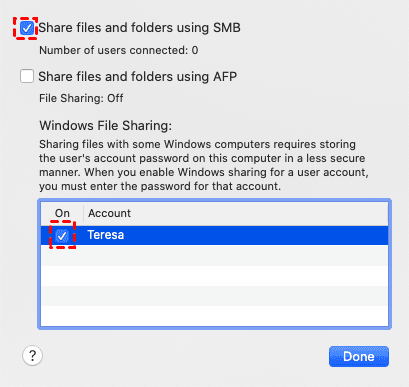
- After that, tap Options, check Share Files and Folders using SMB box, and make sure the user account is checked. Then, click Done.
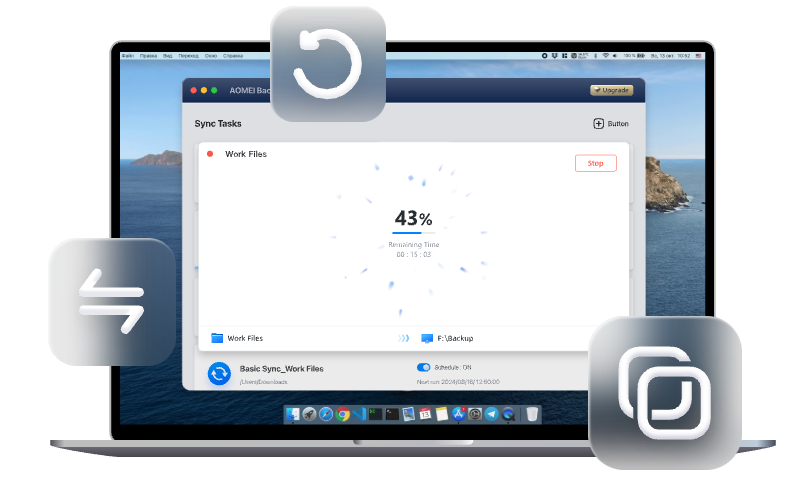
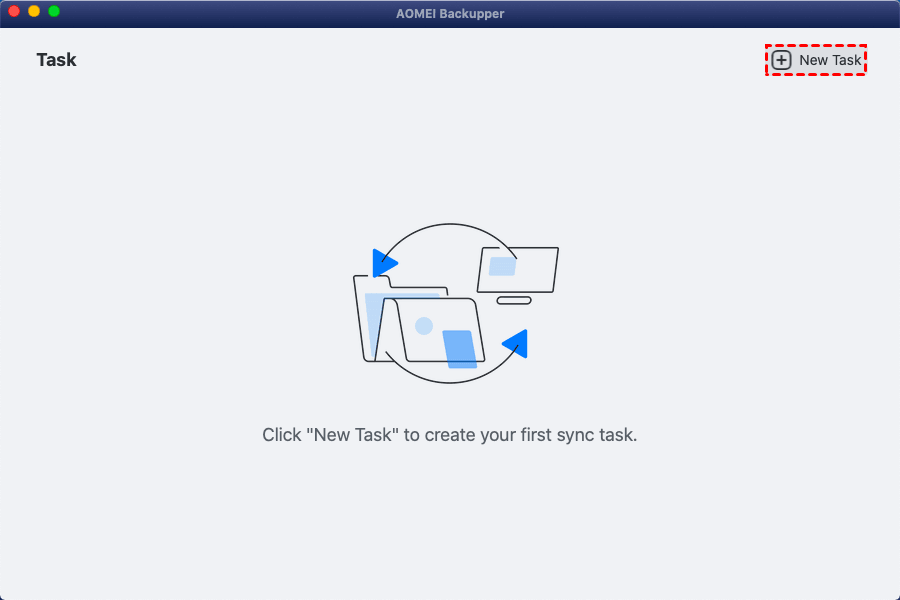
Step 1. Launch AOMEI Backupper Mac on your source Mac, and click on New Task in the top-right corner.
Step 2. Choose your target sync option in the lower left corner, here we take Basic Sync as an example.

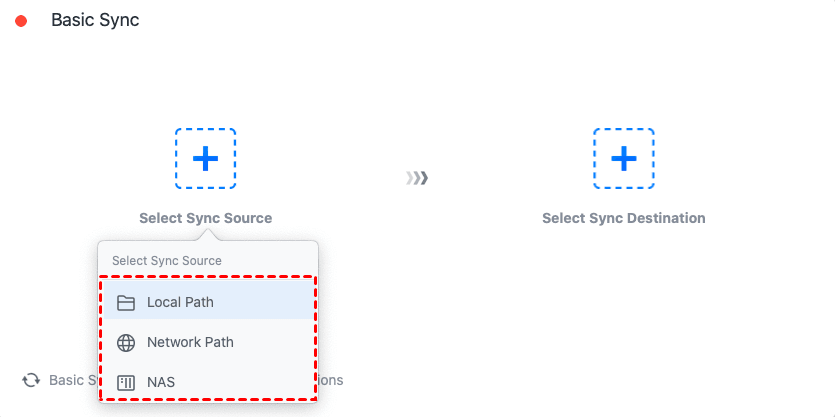
Step 3. Tap on Select Sync Source and then Local Path to add the items you wish to transfer.
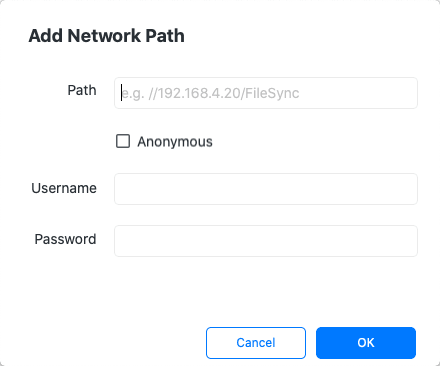
Step 4. Hit Select Sync Destination > Network Path, then input the shared folder path, username and password to specify the shared folder as the sync destination.
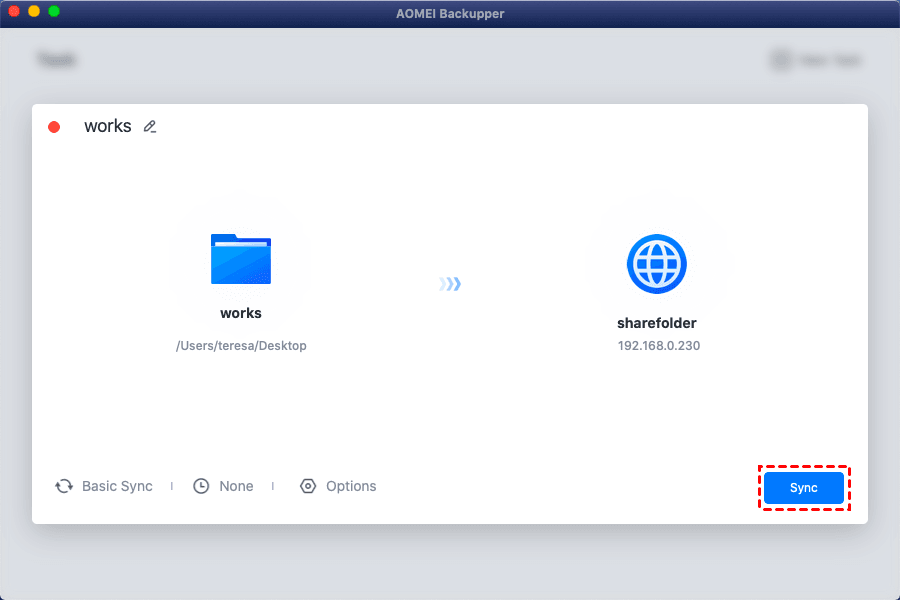
Step 5. Configure automatic sync if needed. Then, click on Sync to migrate files from Mac to Mac easily.
Way 2. Transfer Documents from Mac to Mac with Migration Assistant
Migration Assistant is a built-in macOS utility designed to transfer files, applications, and settings from one Mac to another. It is one of the most straightforward methods for document transfer from Mac to Mac.
Step 1. Open Migration Assistant from Applications > Utilities, and enter your administrator password.
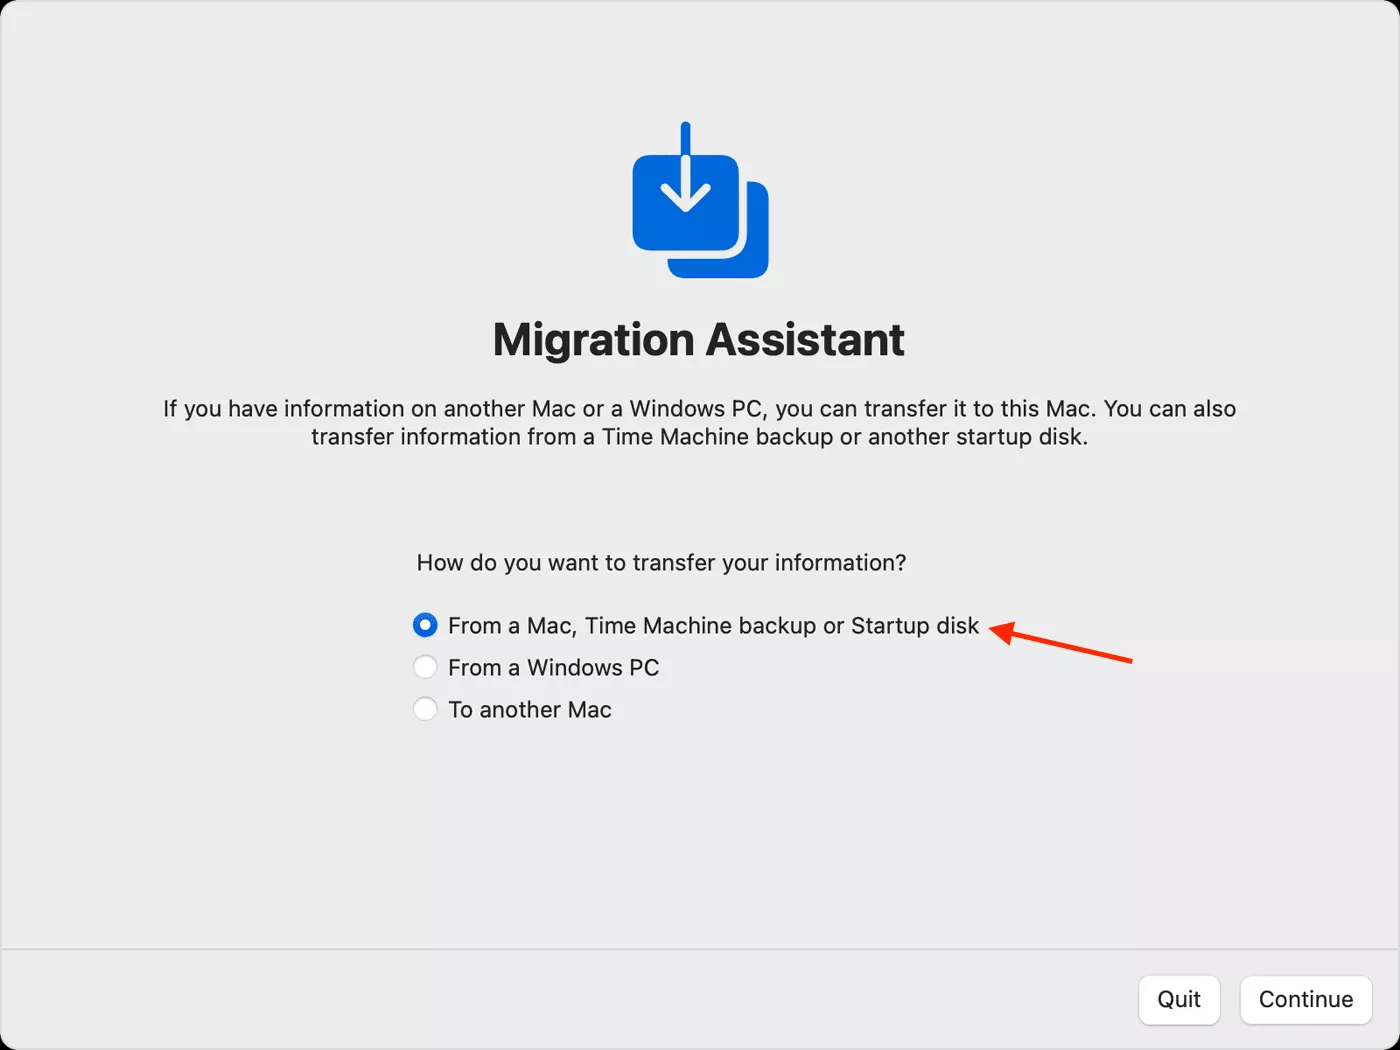
Step 2. Access Migration Assistant on your new Mac, and choose From a Mac, Time Machine backup or Startup disk, then click Continue.
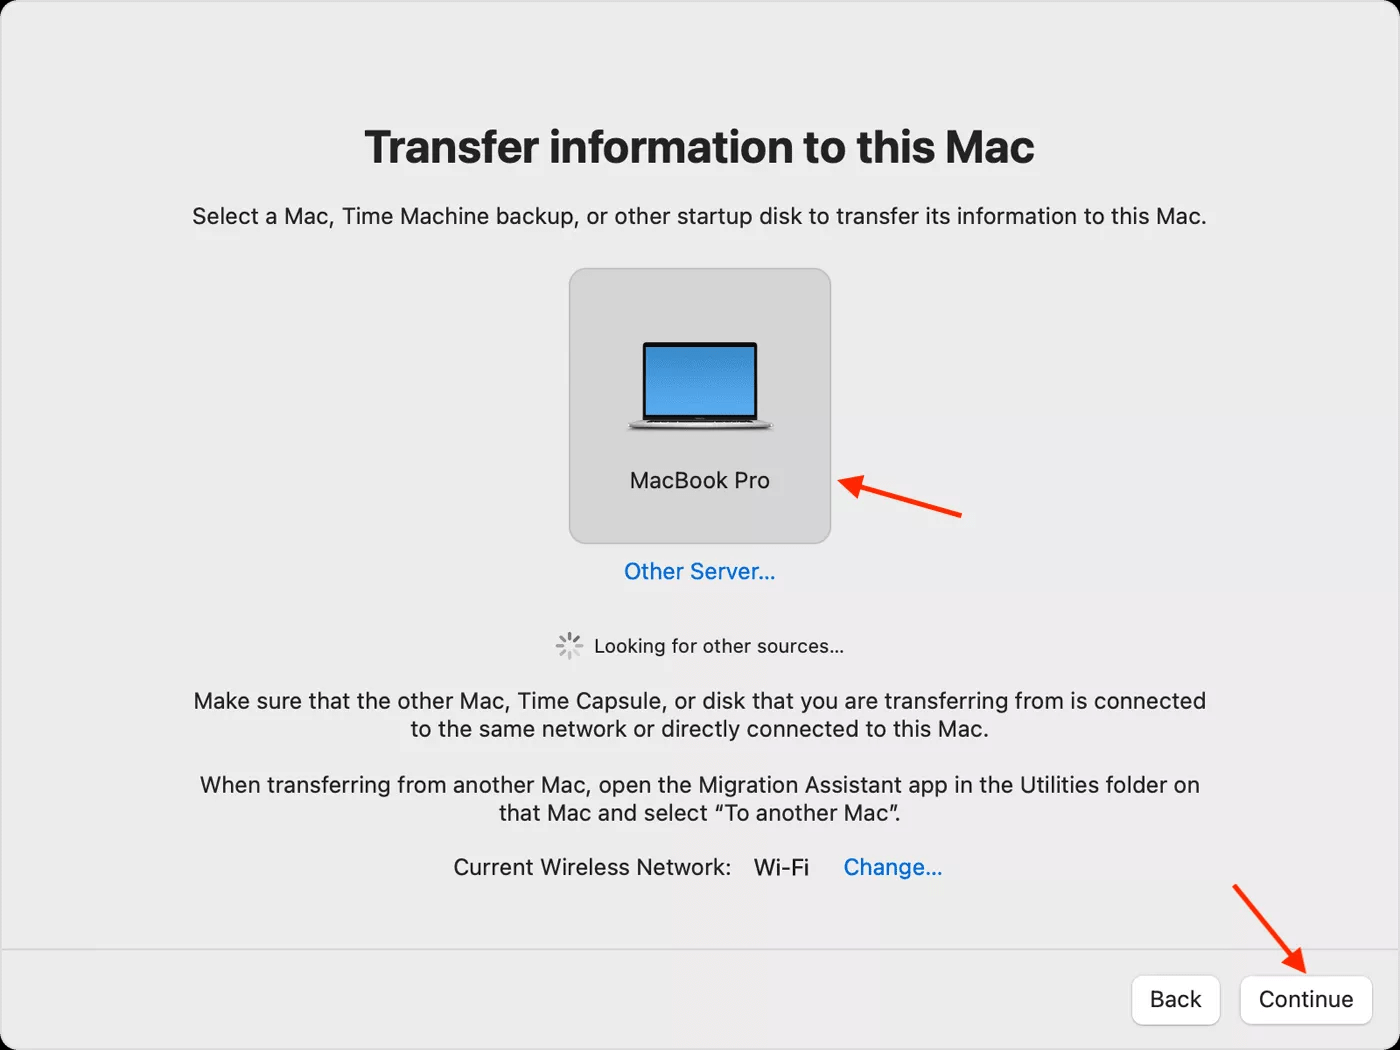
Step 3. On your old Mac, select To another Mac on the Migration Assistant screen, and hit Continue.
Step 4. On your new Mac, select your old computer, choose the information you want to transfer, and click on Continue to start file transfer with Migration Assistant from Mac to Mac.
Way 3. Move Files from Mac to Mac via AirDrop
AirDrop is a quick and convenient way to transfer files wirelessly between Macs, available on Mac OS X Lion or later versions, using Bluetooth and Wi-Fi.
Step 1. Turn on Bluetooth on both Macs and ensure they are connected to the same network.
Step 2. Go to System Settings > General > AirDrop & Handoff and set AirDrop to either Everyone or Contacts Only.
Step 3. Select the files you want to transfer on the old Mac, click Share, and select AirDrop.
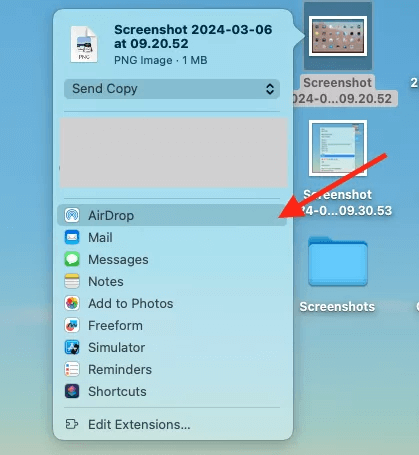
Step 4. Choose the new Mac you want to send files to and click Accept on the new Mac.
Way 4. Copy Files Between Macs with iCloud
iCloud is Apple's cloud storage service that allows you to store and sync files across all your Apple devices. Using iCloud Drive, you can easily transfer documents from Mac to Mac. One thing is that you should make sure that you are logging in with the same account on both Macs.
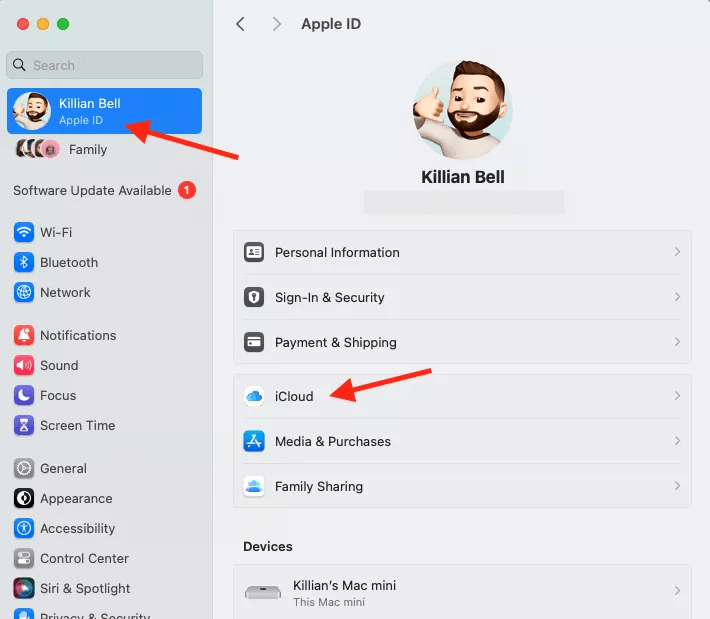
Step 1. On both Macs, go to System Preferences > Apple ID > iCloud and ensure that iCloud Drive is enabled.
Step 2. On the source Mac, open Finder and navigate to the iCloud Drive folder. Drag and drop the files you want to transfer into this folder.
Step 3. On the target Mac, navigate to the iCloud Drive folder as well, and your uploaded files will automatically appear here, ready for download.
Way 5. Transfer Files from Mac to Mac using USB Cable
Using a USB cable to transfer files is a fast and reliable method, especially if you prefer a wired connection. This allows you to link two Macs, and make one Mac shows up as an external hard drive on the second Mac, which is known as target disk mode. The following is how to transfer files from Mac to Mac using a USB cable:
Step 1. Use a USB-C or Thunderbolt cable to connect the two Macs.
Step 2. On one of the Macs, restart and hold down the T key until the Thunderbolt or USB icon appears. This Mac will now act as an external drive.
Step 3. On the other Mac, open Finder and access the connected Mac as if it were an external drive. Copy and paste the files you want to transfer.
FAQs about Mac to Mac File Transfer
#1. Does Migration Assistant transfer everything?
Yes, Migration Assistant can transfer everything, including documents, applications, user accounts, and settings. You can choose exactly what you want to transfer during the setup process.
#2. How to transfer Mac to Mac without Migration Assistant?
If you prefer not to use Migration Assistant, you can use methods such as the free and professional file transfer software AOMEI Backupper Mac, AirDrop, iCloud, or a USB cable to transfer your files instead.
#3. Why can't I send files through AirDrop?
If you can't send files through AirDrop, ensure both Macs have AirDrop enabled and are within range. Also, check that both devices are discoverable and connected to the same Wi-Fi network.
Conclusion
That's all about how to transfer documents from Mac to Mac in 5 different ways. But for what is the fastest way to transfer files between two Macs, the specialized file transfer software AOMEI Backupper Mac is the option.
Whether you prefer using software like AOMEI Backupper Mac, built-in utilities like Migration Assistant and AirDrop, or more traditional methods like USB cables, you can easily keep your files synchronized and accessible. Choose the method that best fits your workflow and enjoy seamless file transfers between your Macs.