Transfer Files Between Two Mac Computers Using Target Disk
This comprehensive guide explores the method of transferring files between two Mac computers using Target Disk Mode. It provides step-by-step solutions and answers faqs. Users will have a thorough understanding of using Target Disk Mode for efficient file transfers.
By Sebastian Updated on July 30, 2024
Introduction
Transferring files between two Mac computers can sometimes be a cumbersome task, especially when dealing with large amounts of data. Fortunately, Apple offers a powerful feature called Target Disk Mode that simplifies this process. This guide will delve into how to transfer files between two Mac computers using Target Disk Mode, providing you with the knowledge and tools to execute this task seamlessly.
Understanding Target Disk Mode
What is the Target Disk Mode?
Target Disk Mode is a feature available on some Mac computers that allows one Mac to act as an external hard drive for another Mac. This can be particularly useful for transferring files between two Macs, performing diagnostics, or accessing data from a Mac that cannot boot normally. Here's how it works and what you need to know:
-
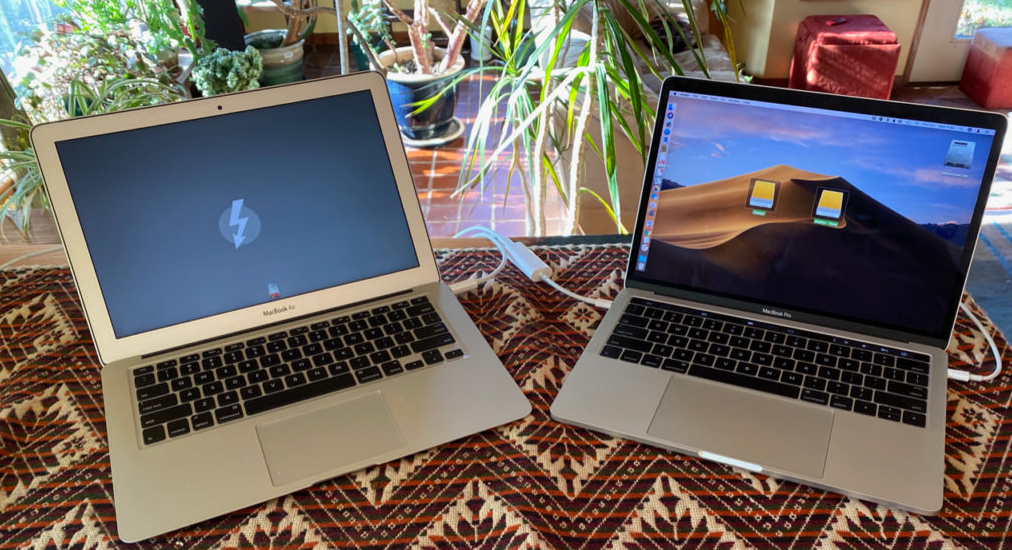
Connecting Macs: To use Target Disk Mode, you'll need two Macs and a Thunderbolt, USB-C, FireWire, or USB cable (depending on the models of the Macs involved). Connect the two Macs using the appropriate cable.
-
Enabling Target Disk Mode: The Mac will boot into Target Disk Mode and display a large Thunderbolt, FireWire, or USB icon on its screen.
-
Accessing the Drive: The Mac in Target Disk Mode will appear as an external drive on the desktop of the other Mac. You can then access, transfer, or manage files just as you would with any other external storage device.
-
Ejecting Safely: Once you've completed your tasks, eject the external drive properly from the Mac you're working on. Then, turn off the Mac in Target Disk Mode and disconnect the cable.
The Benefits of the Target Disk Mode
🚩Easy Data Transfer: Target Disk Mode allows for swift and efficient transfer of large files between two Macs. This is especially useful when migrating data from an old Mac to a new one.
🚩Troubleshooting and Recovery: If a Mac cannot boot normally, you can use Target Disk Mode to access its hard drive and retrieve important data, making it an invaluable tool for data recovery.
🚩System Migration: When upgrading to a new Mac, Target Disk Mode simplifies the migration of all your files and settings, ensuring a seamless transition.
🚩Improved Performance: File transfers using Target Disk Mode can be significantly faster than transferring files over a network, especially for large files or batches of files.
🚩Convenient Setup: Requires minimal setup—connect the two Macs with a compatible cable and boot into Target Disk Mode, making it accessible even to non-technical users.
These benefits make Target Disk Mode an essential tool for anyone needing to transfer files, recover data, or troubleshoot a Mac system efficiently.
How to Transfer Files Between Two Mac Computers Using Target Disk
1. Connect the two Macs with a USB, USB-C, or Thunderbolt cable. If either Mac runs macOS 11 Big Sur or later, use a Thunderbolt cable.
2. Click the Apple menu, select System Settings, and then choose General.
4. Navigate to Startup Disk, and then select Restart in Target Disk Mode.
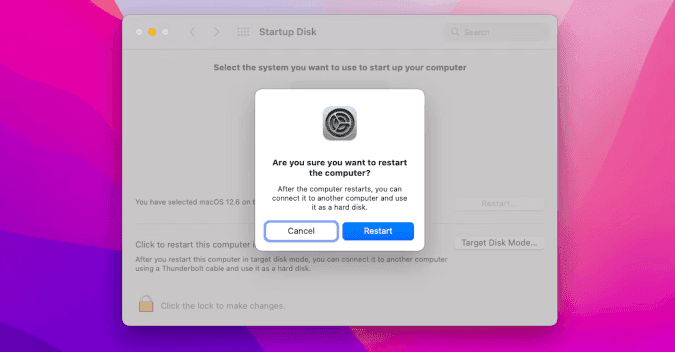
5. If the Mac is off, press and hold the T key, then press the power button to start it in Target Disk Mode.
6. After transferring files, eject the target disk from the Finder on the other Mac by hovering over it in the sidebar and clicking the eject icon.
7. Turn off the Mac used as the target disk by pressing the power button, and then disconnect the cable.
Alternatives to Target Disk Mode
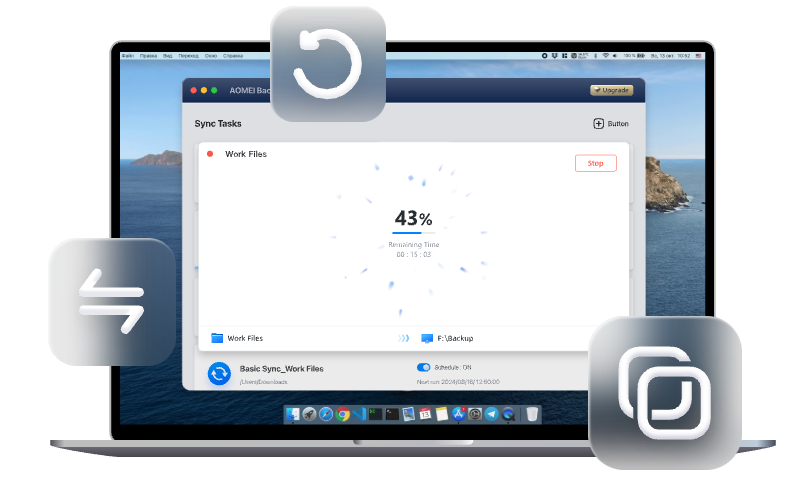
If you’re having trouble using the Target Disk mode, consider using third-party file sync software for an easier process. AOMEI Backupper Mac is a great solution for syncing files between two Macs. With its intuitive design and powerful features, it makes data protection straightforward. This software ensures your important files are always synced and secure, offering a reliable and efficient way to manage your data.
-
Seamless Mac Syncing: Easily sync any files on your Mac to keep your data fully protected.
-
Flexible Sync Options: Select from Basic Sync, Mirror Sync, or Two-Way Sync to meet your specific synchronization needs.
-
Multiple Storage Solutions: Sync files to local storage, cloud services, NAS devices, external hard drives, USB flash drives, SD cards, and more.
-
Quick and Secure Syncing: Benefit from high-speed synchronization with cutting-edge technology, ensuring your data is encrypted and secure throughout the process.
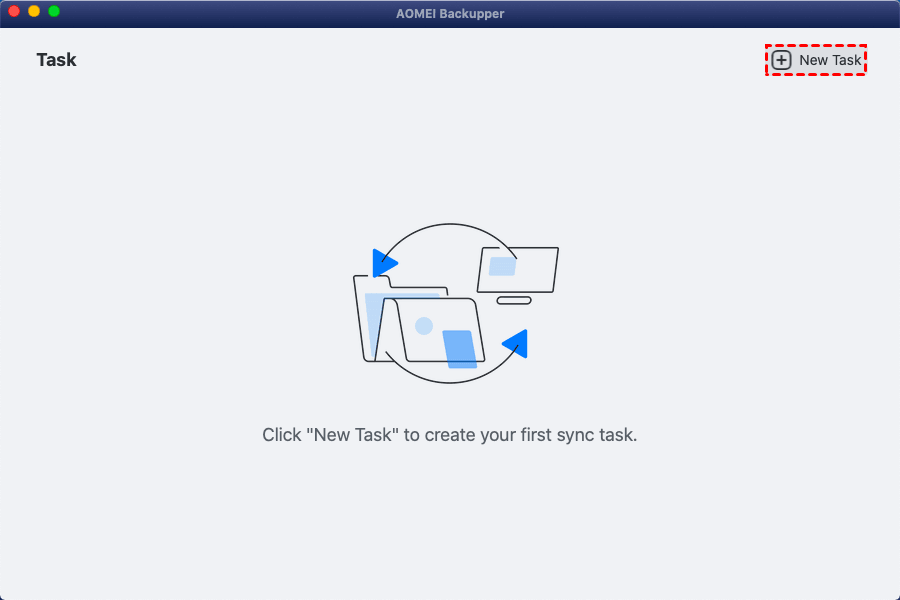
Step 1: Download and install AOMEI Backupper Mac software on your Mac. Start a new task by clicking "New Task."
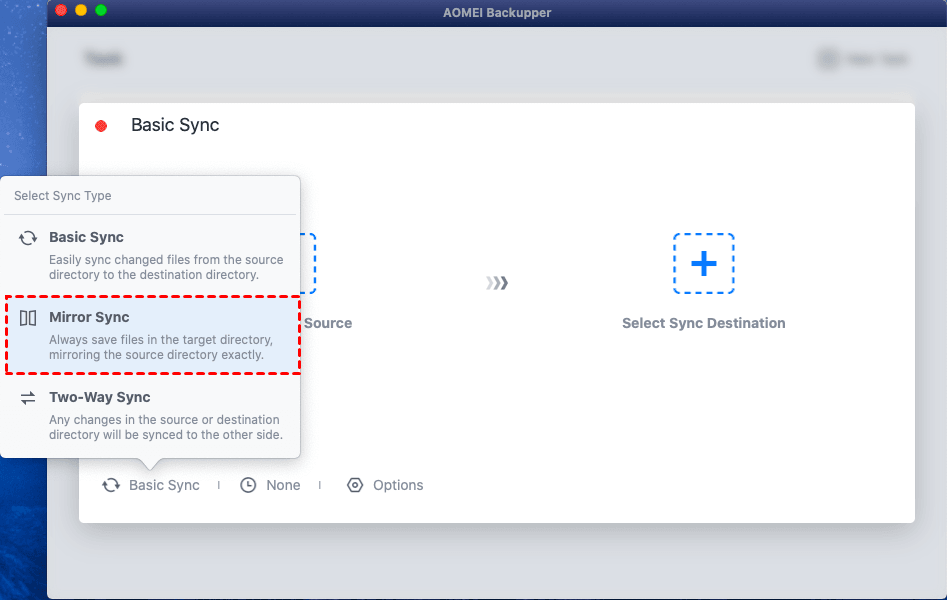
Step 2: Select the synchronization type that suits your needs. For syncing between two Macs, choose Mirror Sync or Two-Way Sync.
Basic Sync: Transfers files from one location to another without deleting the original files in the source location.
Mirror Sync: Replicates the source files exactly at the destination, including deleting any files at the destination that do not exist in the source.
Two-Way Sync: Ensures that any changes made in either the source or destination location are mirrored, keeping both locations updated.
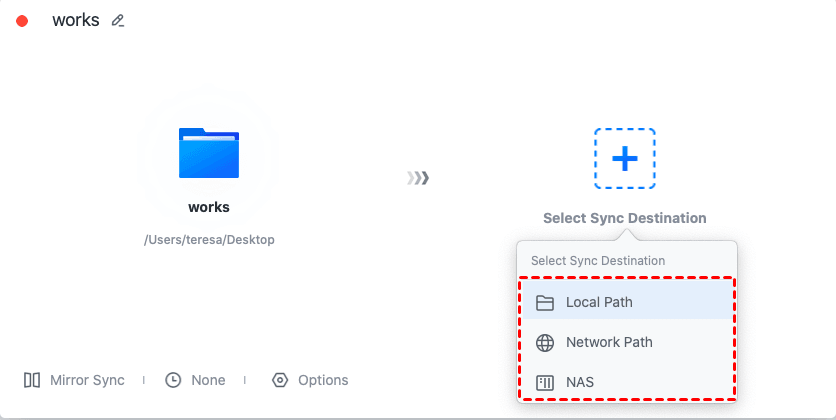
Step 3: Pick the source Mac and destination Mac for your sync.
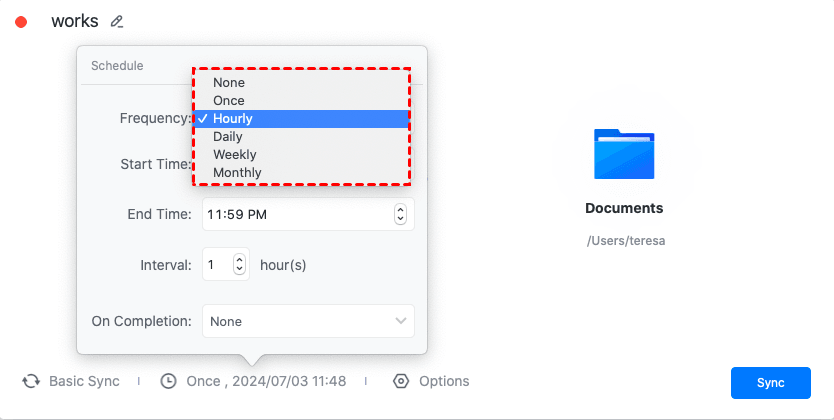
Step 4: Adjust the schedule and options to fit your preferences.
Choose how often you want to sync your files—options include once, hourly, daily, weekly, or monthly. You can also set a specific start time and decide if the system should hibernate or shut down after syncing.
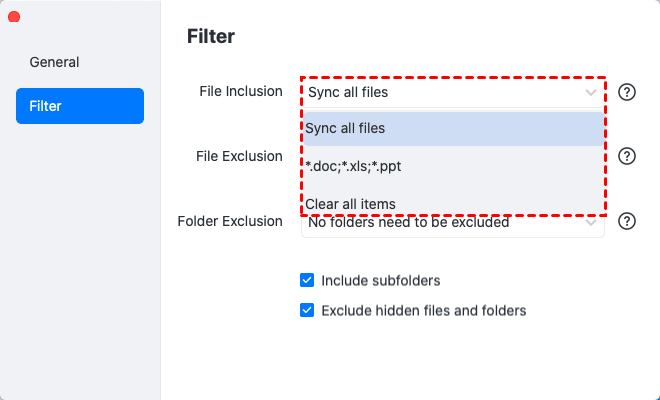
Customize the sync process with settings like File Inclusion, File Exclusion, and Folder Exclusion to tailor it to your needs.
Step 5: Once everything is set, click "Sync" and wait for the process to complete.
Frequently Asked Questions
Q 1: How do I exit Target Disk Mode?
A 1: To exit Target Disk Mode, eject the Target Mac’s drive from the Host Mac by dragging it to the Trash or using the "Eject" button in Finder. Then, press the power button on the Target Mac to shut it down.
Q 2: Can I use Target Disk Mode with a Windows PC?
A 2: Target Disk Mode is designed for Mac-to-Mac transfers. For Mac-to-Windows transfers, other methods such as using external drives or network transfers are recommended.
Q 3: Can I use Target Disk Mode to recover data from a non-bootable Mac?
A 3: Yes, Target Disk Mode is an effective method for accessing and recovering data from a Mac that cannot boot. It allows you to connect the non-bootable Mac as an external drive to another Mac for data retrieval.
Practical Tips for Using Target Disk Mode
- Use Quality Cables: Invest in high-quality Thunderbolt, FireWire, or USB-C cables to ensure stable and fast data transfer.
- Backup Before Transfer: Always create a backup of important data before initiating transfers to prevent data loss.
- Keep Software Updated: Ensure both Macs are running the latest macOS version for compatibility and performance enhancements.
Conclusion
Transferring files between two Mac computers using Target Disk Mode is a straightforward and efficient method that leverages the inherent capabilities of macOS. By following the detailed steps provided in this guide, you can ensure a smooth and hassle-free transfer process. Whether using Thunderbolt, FireWire, or USB-C, Target Disk Mode remains a valuable tool for Mac users looking to optimize their data management and transfer workflows. Enhance your experience further by integrating robust backup solutions like AOMEI Backupper, ensuring your data remains secure and easily recoverable.