How to Restore iPad from iCloud/iTunes Backup [Full Guide]
You may use iCloud or iTunes backup your iPad and now you need to restore the backup to your iPad. This article will guide you how to restore iPad from backup using iCloud or iTunes, and a third-party tool to make it.
By Demi / Updated on September 10, 2024
You will never know when disaster will strike and you'll need to restore all of your data on a new or current device. That's why you should backup your iPad and all of your data.
Restoring a backup from an iOS device is simple, and the process is the same whether you have an iPhone, iPad, or iPod touch. In this tutorial, we will walk you through how to restore iPad from backup.
Part 1. How to Restore iPad from Backup - iCloud
Restoring your iPad from iCloud is a reasonably quick process. Before you do that, however, there are a few things you should take to ensure that your data is backed up and that you do not lose anything on your device. To begin, connect to a WiFi network.
Preparations Before Restoring iPad from iCloud Backup
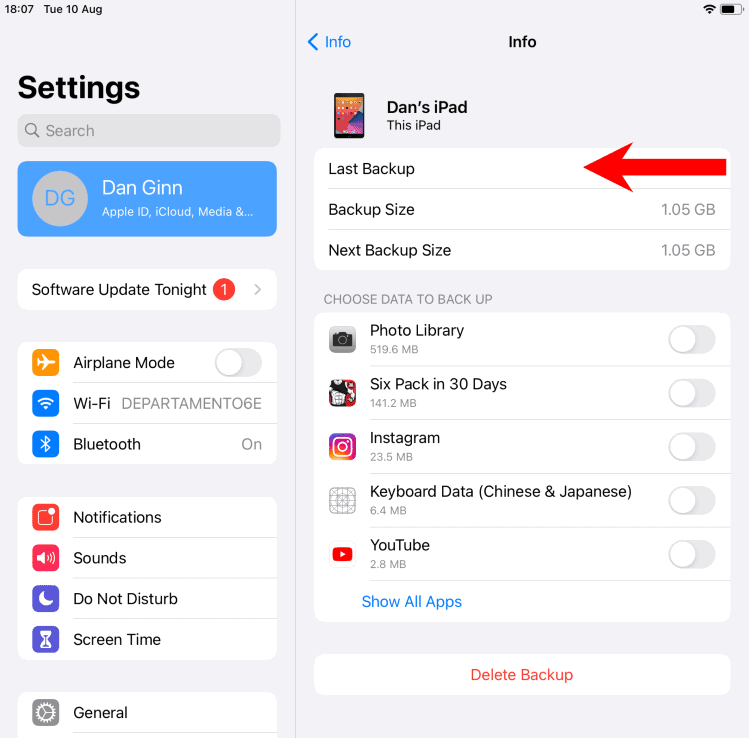
• Check iCloud Backup for iPad:
On your iPad, go to the Settings app > Click [your name] > iCloud > Click Manage Storage. From here, you should access your iPad backup. You can also tap the name of the iPad to check the last backup for your iPad.
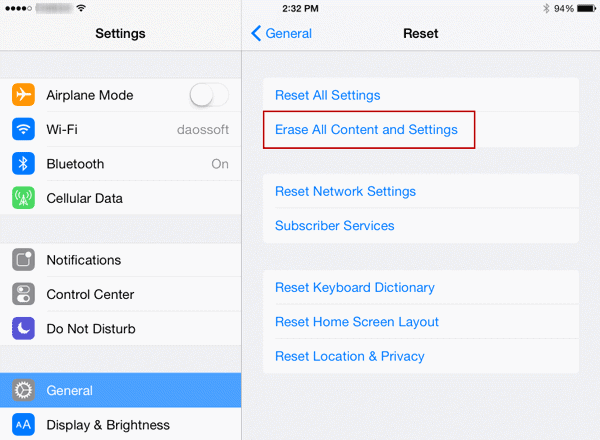
• Reset iPad to Factory Settings:
If you have set up your iPad, you need to reset iPad to factory settings by going to Settings > General > Reset > Tap Erase All Content and Settings.
How to Restore iPad from iCloud Backup
To restore iPad from iCloud backup, set up your iPad until you get to the Apps & Data screen > Choose Restore from iCloud Backup > Sign in with your iCloud account, and choose the latest iPad backup to restore.

Part 2. How to Restore iPad from Backup - iTunes
If you used to backup iPad to computer using iTunes, you can restore the whole iTunes backup to iPad. What makes it different from iCloud is that you don’t need to reset iPad.
While please be noted that the previous data on iPad will be overwritten. Make sure the iTunes backup contains all your iPad data, and follow the steps below to restore iPad from iTunes backup.
Step 1. Connect your iPad to computer with USB > Run the latest iTunes on your computer.
Step 2. Click the device icon > Under the Settings bar, choose Summary > Click Restore Backup.
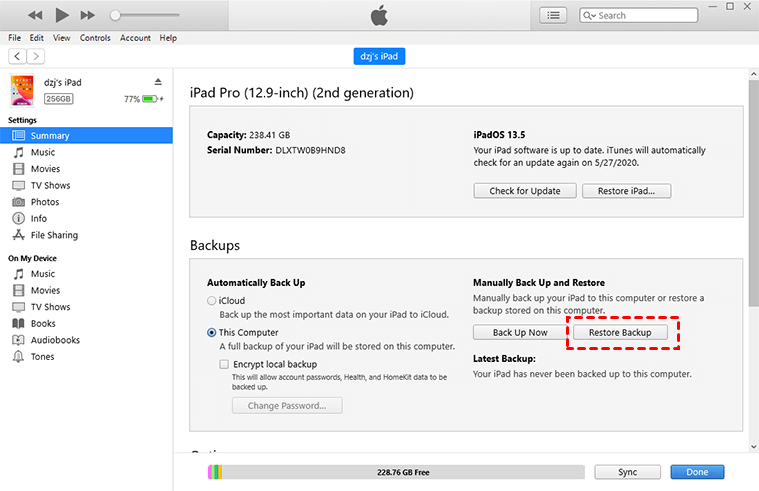
Step 3. Finally, choose the latest backup file for iPad, and click Restore to begin the task.
Chances are that iTunes restore backup greyed out, you can try the tool in the next part to restore iTunes backup to iPad.
Part 3. How to Restore iPad from Backup - AOMEI FoneBackup
AOMEI FoneBackup, a professional iOS data management tool, enabling you to restore iTunes backup, and also backup and restore your iOS devices selectively or fully.
👍 Restore iPad from backups after setup. It allows you to backup or transfer data between iOS devices after setup.
👍 Backup and restore without data loss. It can back up everything on your iPad. And you may restore them on your iPad without losing any data.
👍 Unlimited storage capacity. You may backup your iPad to an external hard drive, local folders on your PC, USB, and other locations by altering the backup storage path.
👍 Broad compatibility. AOMEI FoneBackup is compatible with models of iPad, as well as iPhone and iPod. It works great on Windows 11/10/8/7/XP.
Download AOMEI FoneBackup to your computer by clicking the icon, and let’s have an overview how you can utilize AOMEI FoneBackup to keep iPad data safe.
1# Restore iPad from iTunes Backup via AOMEI FoneBackup
As mentioned, you can utilize AOMEI FoneBackup to restore iTunes backup. You can simply locate iTunes backup file in AOMEI FoneBackup, and restore it to your iPad smoothly.
Step 1. Connect your iPad to computer > Open AOMEI FoneBackup, and click the three-line icon from the upper-right corner > Click Import Backup Files to choose your iTunes backup.
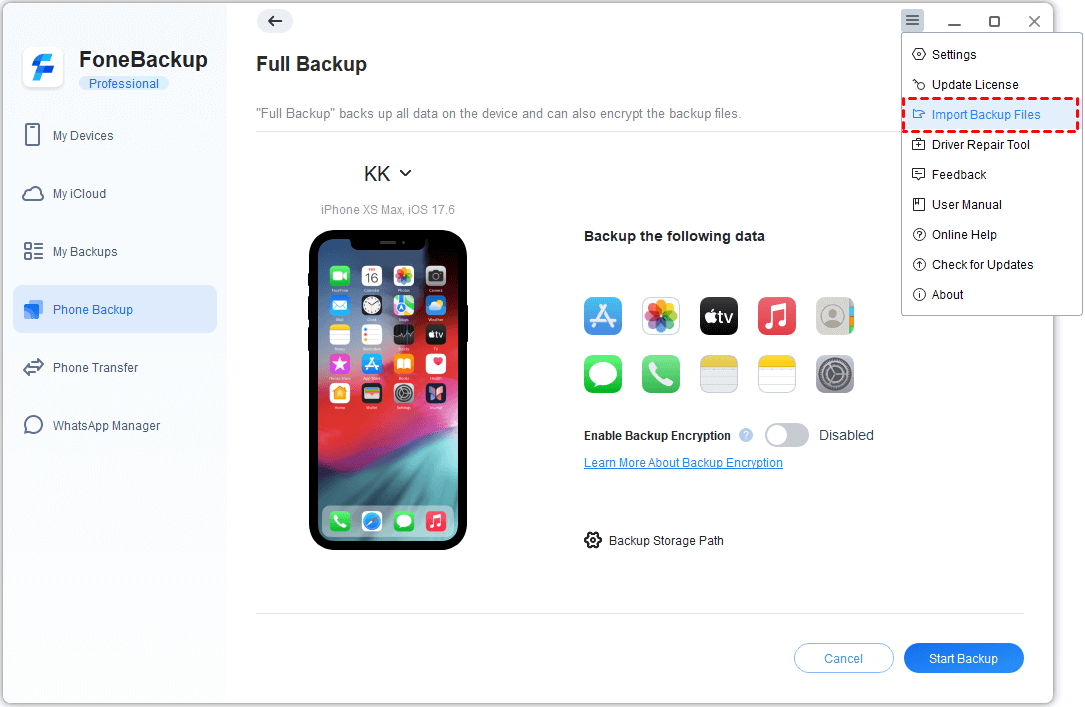
Note: The default folder to save your iTunes backup is C:\Users\[PC name]\AppData\Roaming\Apple Computer\ MobileSync.
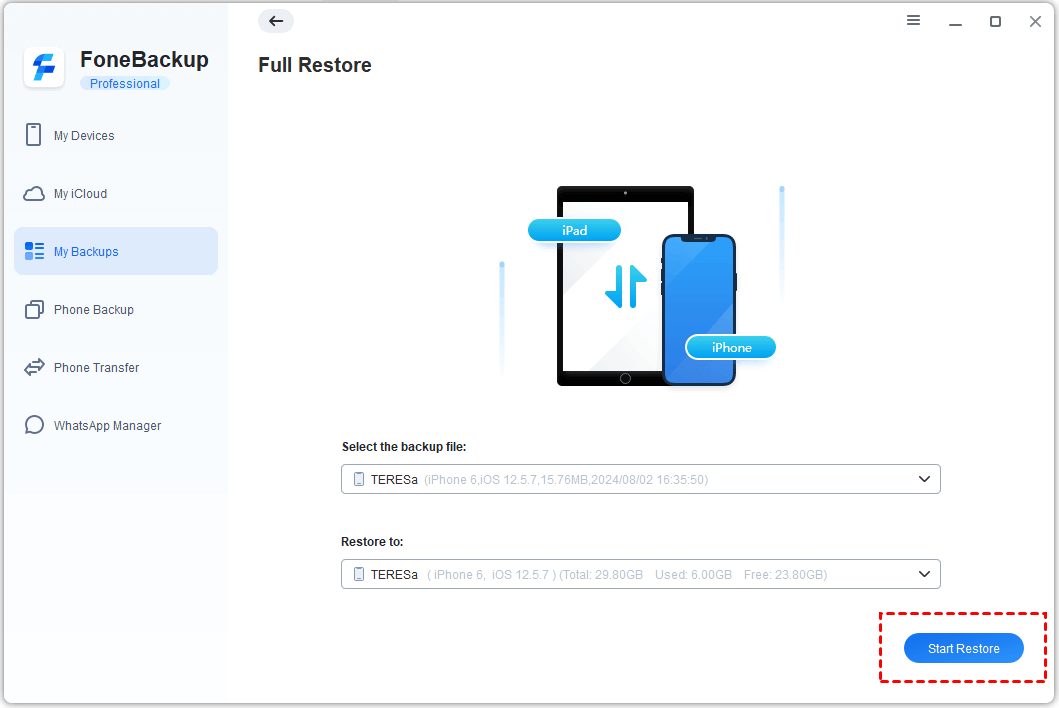
Step 2. After confirming your iTunes backup version > Click Restore from this page to continue > Finally, click Start Restore to restore iTunes backup to your iPad.
2# Backup & Restore iPad via AOMEI FoneBackup
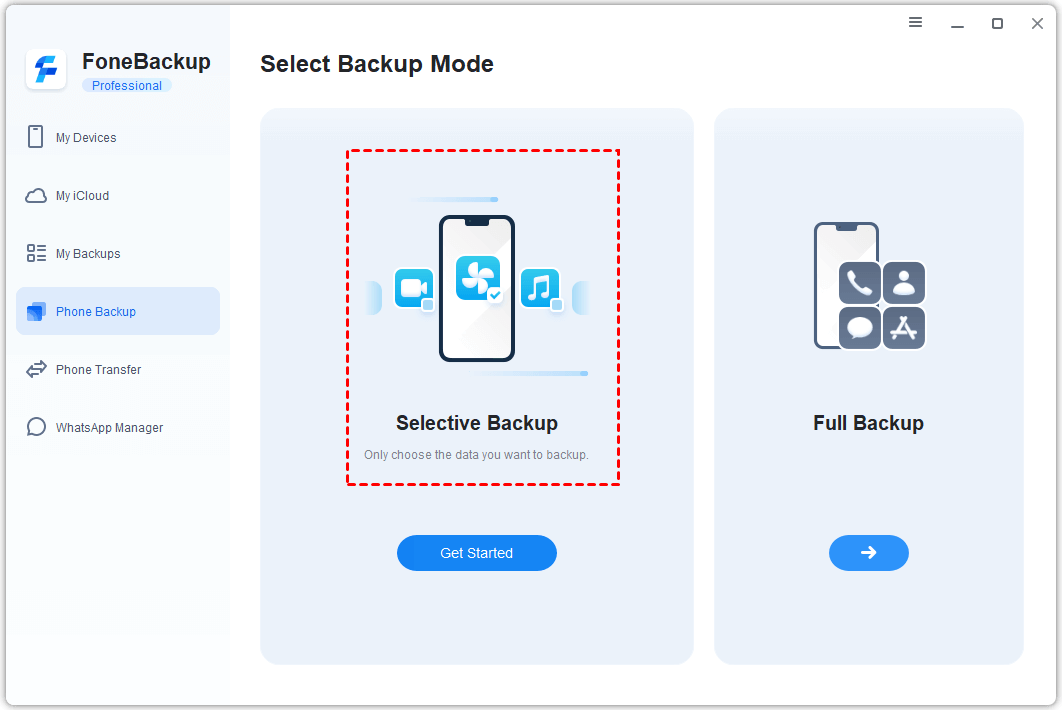
Giving up using iCloud or iTunes, you can try AOMEI FoneBackup’s effective backup functions: Selective Backup & Full Backup. Literally, Selective Backup service enables you to selectively backup iPhone/iPad files to PC, like photos, contacts, videos, music, and messages on PC. You can also use iTunes’s alternative feature, Full Backup, to back up all the data on your iPad. Here we’d take selectively backup iPad as an example.
Step 1. Connect your iPad to your computer via USB > Launch AOMEI FoneBackup, and go to Phone Backup > Click Get Started under Selective Backup.
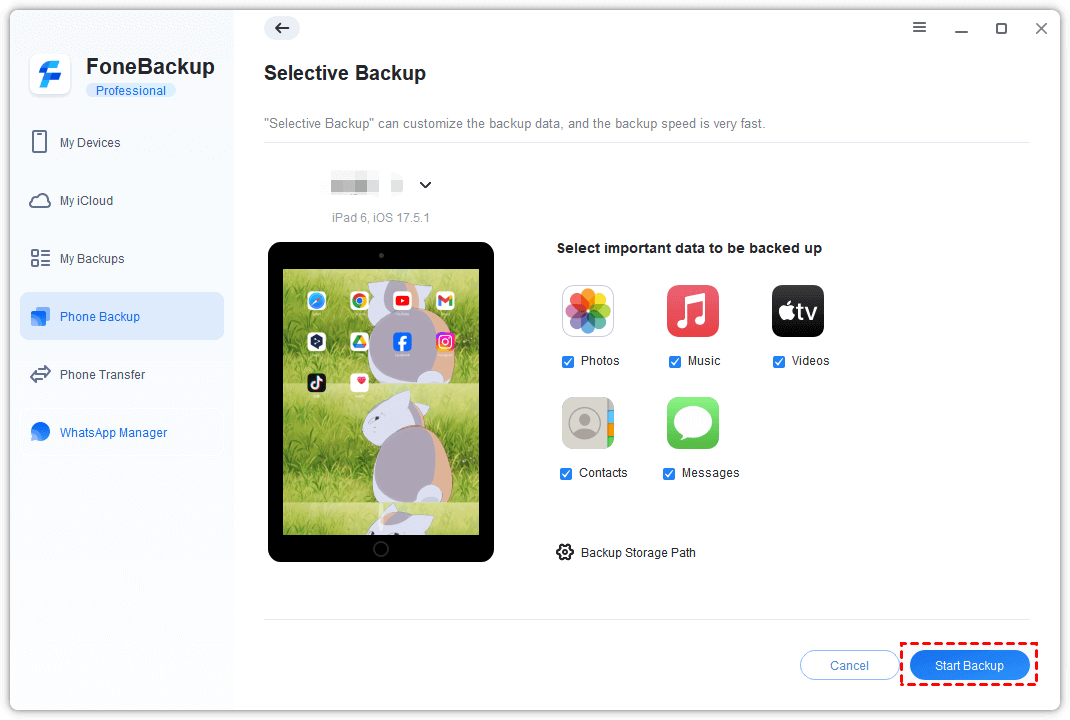
Step 2. Check each icon to preview and choose the files on your iPad you’d like to backup to computer.
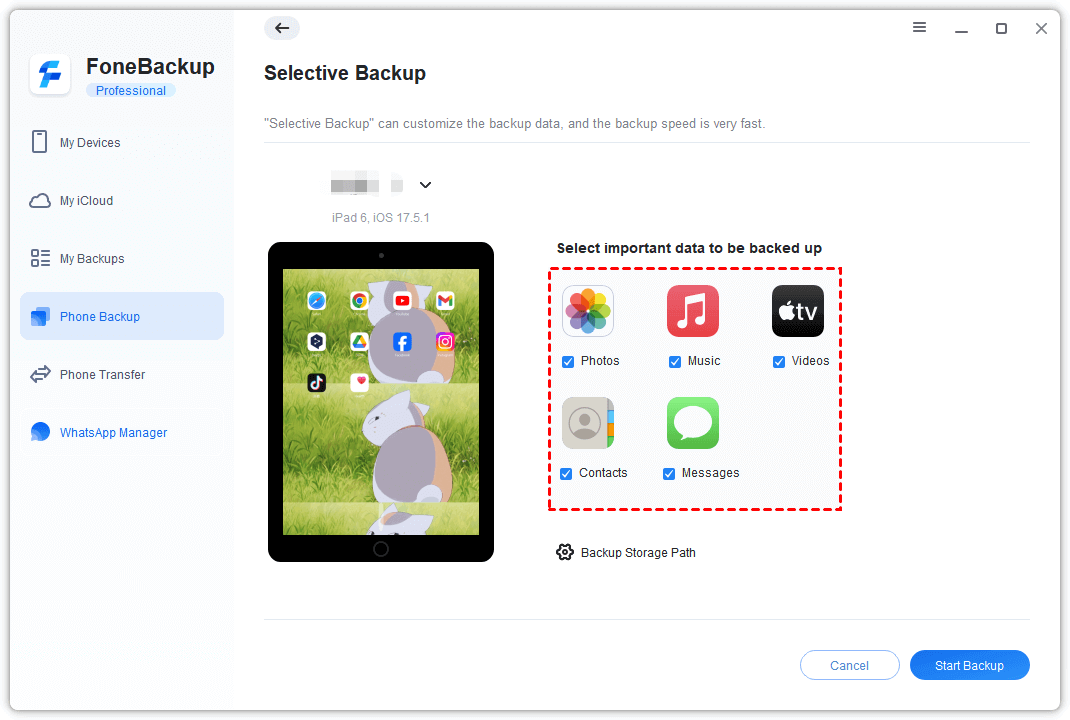
Step 3. Optionally, you can choose a desired folder to save the backup file from Backup Storage Path. Click Start Backup to start backup your iPad files to computer.
To check or restore your iPad files, you can go to the My Backups in AOMEI FoneBackup.
Summary
That’s all for how to restore iPad from backup. No matter whether you backed up iPad using iCloud or iTunes, this guide offers you detailed instructions to restore backup to iPad.
Besides, if you’re looking for a better way to manage your iPad files, try AOMEI FoneBackup, an easy-to-use tool for all iOS devices.