[3 Ways] How to Transfer Photos from Google Photos to iCloud
Want to switch photos from Google Photos to iCloud? No matter whether you have a computer or not, you can get 3 effective tools and instructions of how to transfer photos from Google Photos to iCloud.
By Demi / Updated on September 10, 2024
With the increasing importance of cloud storage in managing files, many users find themselves needing to transfer photos between platforms. Google Photos and iCloud are two of the most popular cloud services for photo storage, but moving photos between them can be a challenge for those unfamiliar with the process.
This guide will walk you through three effective tools, together with detailed instructions on how to transfer photos from Google Photos to iCloud. Let’s get started.
Part 1. How to Transfer Photos from Google Photos to iCloud on PC
If you have a computer at hand, you can choose to download photos from Google Photos to PC, and then upload them to iCloud with the methods listed below.
Preparation: Download Photos from Google Photos to PC
Google Takeout is a powerful tool offered by Google that allows users to download a copy of their data from various Google services, including Google Photos. This method is ideal for users who want to transfer large quantities of photos at once. Follow steps below to utilize Google Takeout to complete Google Photos to iCloud transfer.
Step 1. Open Google Takeout, and sign in with your Google account > Choose Google Photos. Click Next.
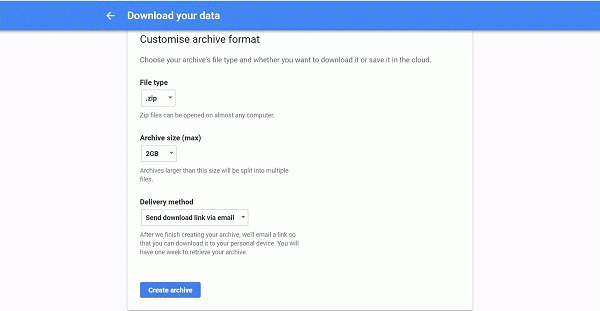
Step 2. You can choose the file type, size to save the Google photos and how you would like to receive the photos.
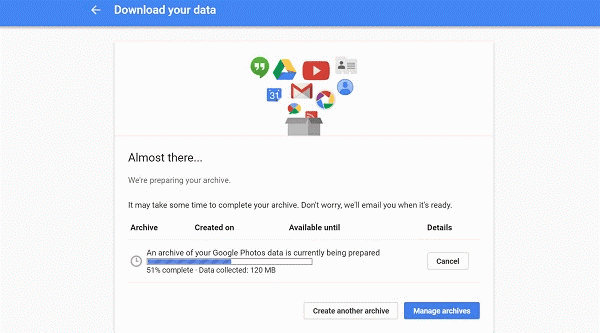
Step 3. An archive of photos from your Google Photos will be created. Click Download to save all the photos from Google Photos to your computer.
Way 1. Upload Google Photos to iCloud from iCloud web
You can directly access your iCloud files by visiting the official website of iCloud. Follow the simple steps to upload photos to iCloud.
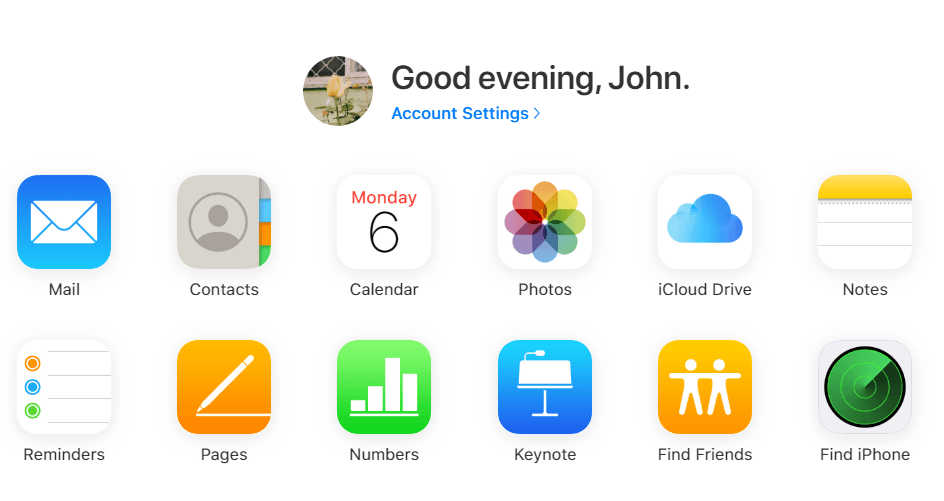
Step 1. Go to the iCloud.com on your web browser > Sign in with your iCloud account > Click Photos.
Step 2. On the next page, tap the upload icon > Upload the photos downloaded from Google Takeout.

Way 2. Upload Google Photos to iCloud via AOMEI FoneBackup
For a more stable and fast upload process, you can also utilize AOMEI FoneBackup, a powerful iOS and iCloud data management tool. With no data loss, you can upload photos in seconds, like 100 photos for just 3 seconds.
Click the icon below to download AOMEI FoneBackup to your computer, and follow the simple steps to upload photos to iCloud.
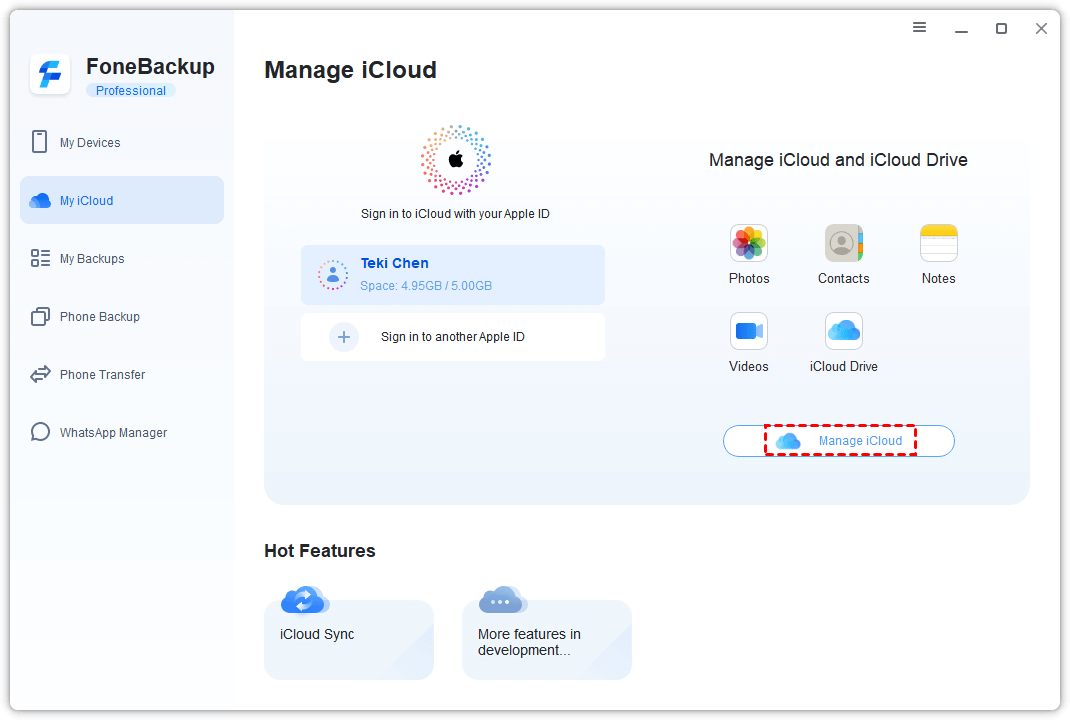
Step 1. Launch AOMEI FoneBackup, and click My iCloud > Sign in with your iCloud account > Choose Manage iCloud.
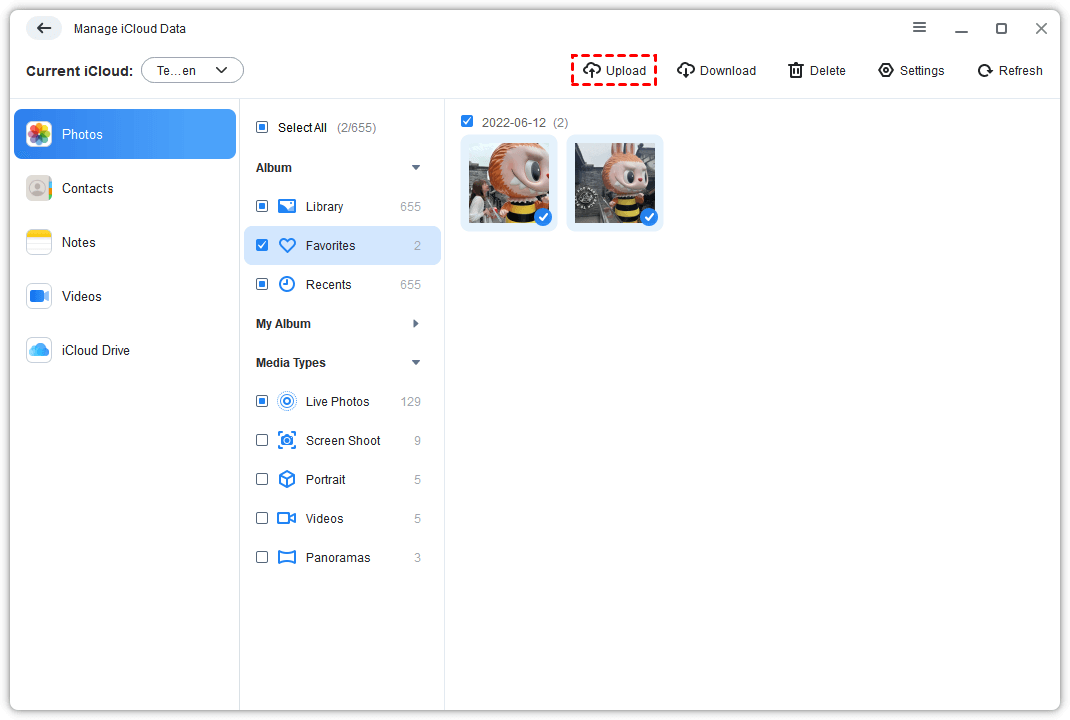
Step 2. Choose Photos > Tap the Upload button to preview and choose the Google photos you’d like to upload to iCloud.
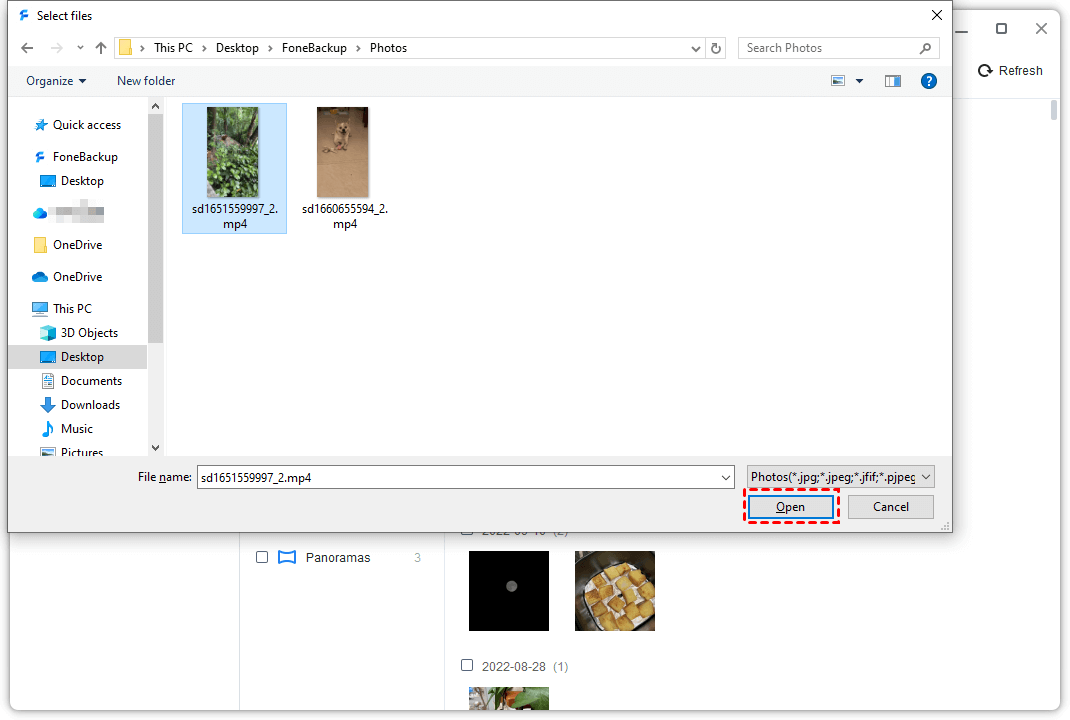
Step 3. Finally, click Open, and the upload process will finish in a short time.
As you can see, AOMEI FoneBackup also provides iCloud sync function, which allows you to transfer iCloud data to new iCloud account in one-click.
Part 2. How to Upload Photos from Google Photos to iCloud on iPhone
Without utilizing a computer, you can also download Google photos to iPhone, and backup them to your iPhone directly. This method is ideal if you prefer managing their photos entirely on your iPhone. Here’s how to transfer photos from Google Photos to iCloud on iPhone.
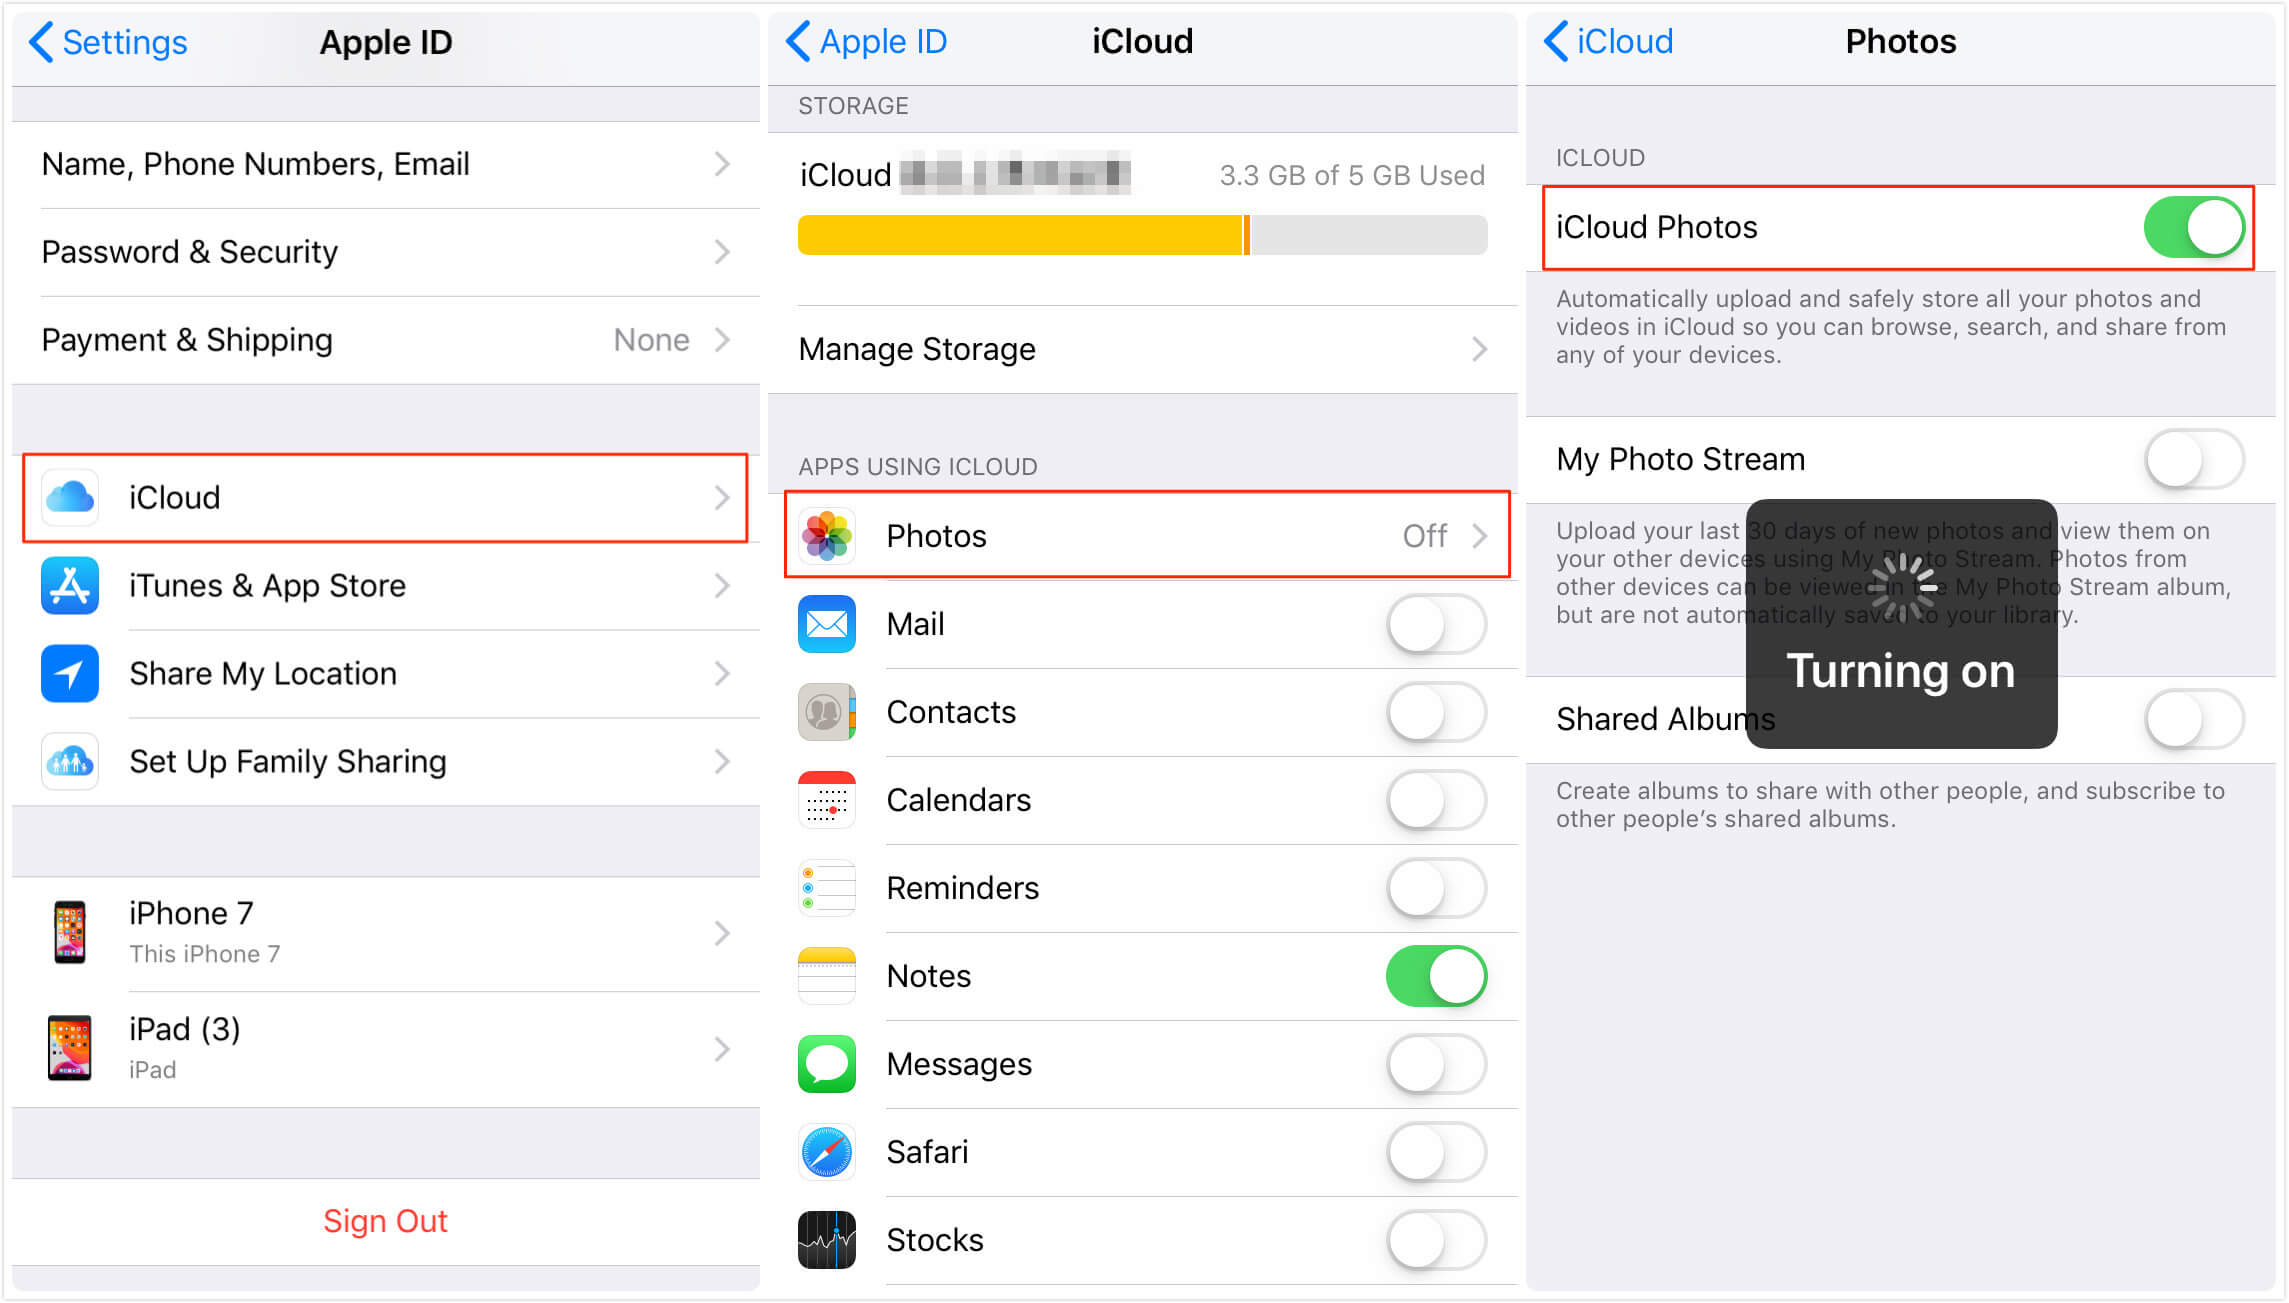
Step 1. Make sure you’ve enabled iCloud Photos on iPhone by going to Settings > [your name] > iCloud > Photos.
Step 2. Skip to the Google Photos app> Select the photos you’d like to upload to iCloud.
Step 3. Click the Share icon on the upper side > Click Save to device to save them to your iPhone.
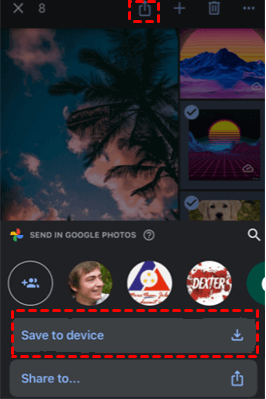
Now, the photos you save to your iPhone will be automatically synced to your iCloud account.
Bonus: Backup iPhone Photos to Computer Locally via AOMEI FoneBackup
While cloud services like iCloud and Google Photos offer convenient ways to store photos, having a local backup is a reliable way to ensure your photos are safe. AOMEI FoneBackup is a powerful tool that allows you to backup iPhone photos to your computer, offering a secure and efficient alternative to cloud storage. Let’s see how to backup iPhone photos to computer via AOMEI FoneBackup.
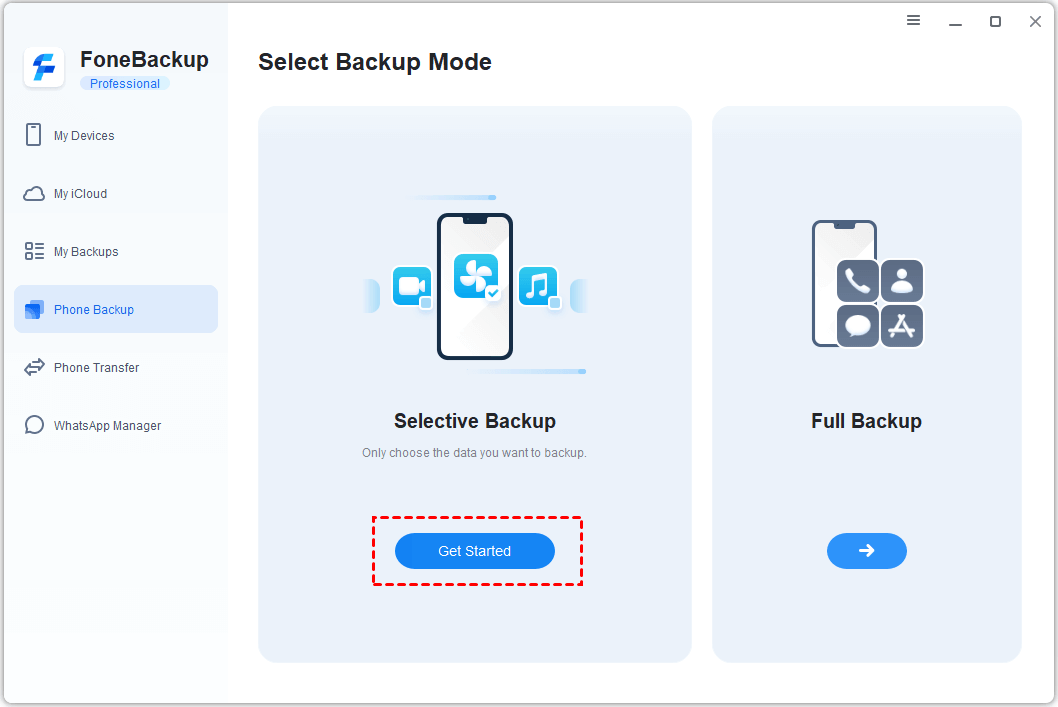
Step 1. Launch AOMEI FoneBackup on your computer > Connect your iPhone to PC > Choose Phone Backup in AOMEI FoneBackup > Choose Selective Backup and click Get Started.
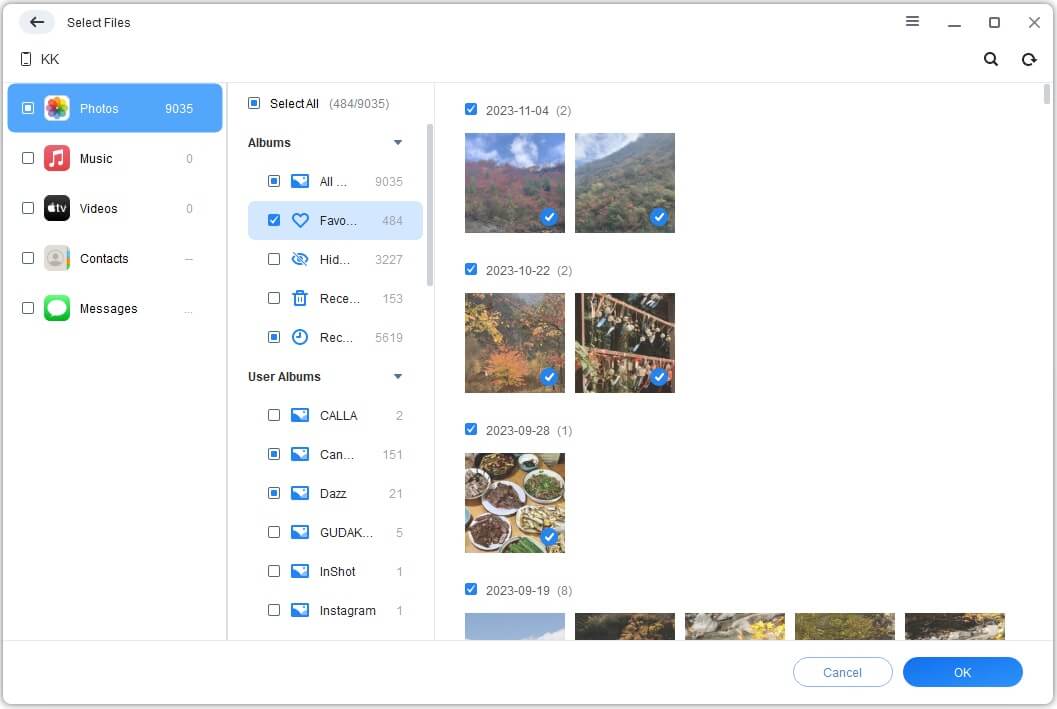
Step 3. Click the Photos icon to preview and select the needed photos if you want and click OK to return.
Step 4. You can click the Backup Storage Path to select a location to save your photos. Then click Start Backup button to backup iPhone photos to PC.
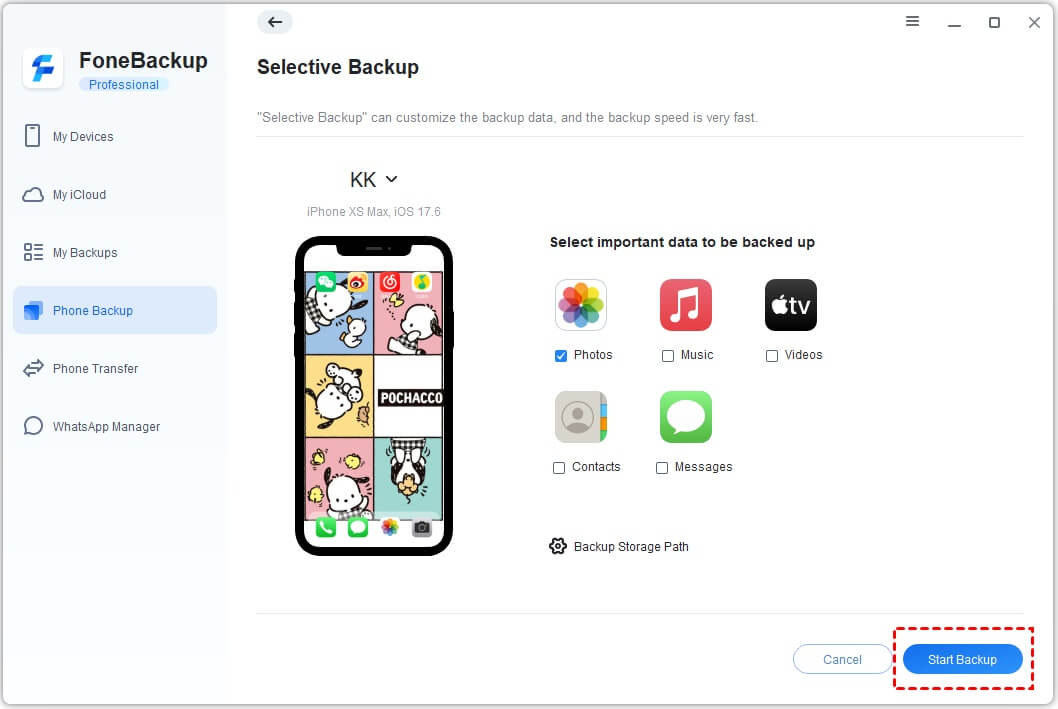
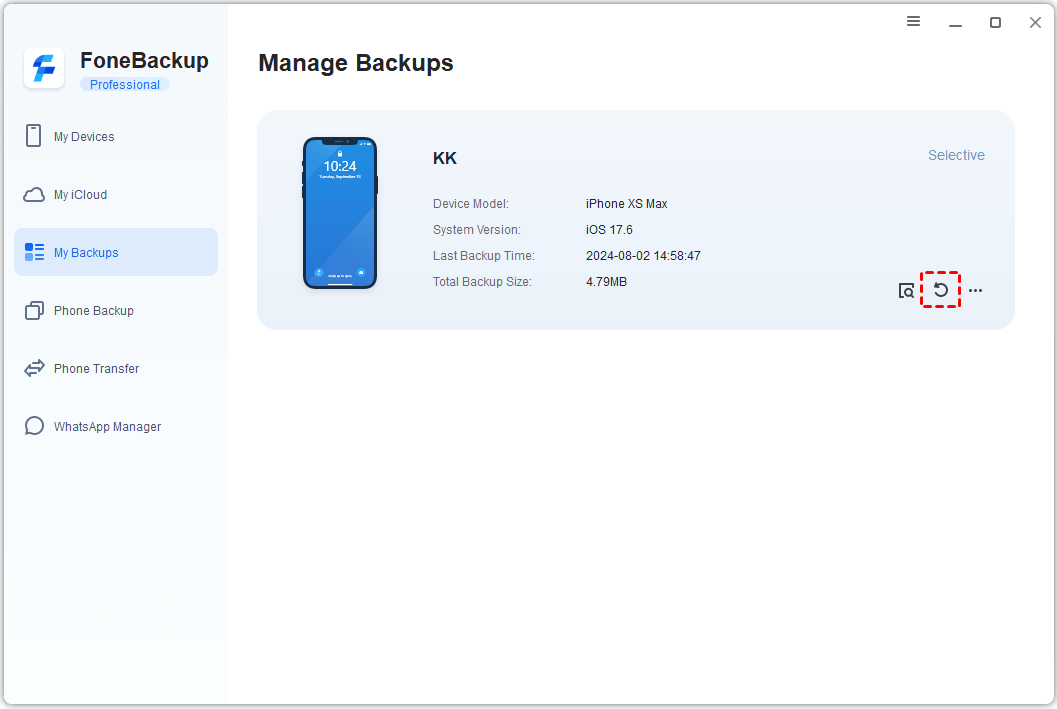
Wait for the process to get finished. When the backup is completed, you can enter My Backups to manage your backup files. Here you can view, locate, restore, and delete your backup files.
Conclusion
That’s all for how to transfer photos from Google Photos to iCloud. Whether you choose to use Google Takeout for a comprehensive transfer and manually select photos to upload, or do it directly on your iPhone, the methods outlined in this guide offer clear steps to make it.
Additionally, using AOMEI FoneBackup to create a local backup adds an extra layer of security for your precious photos. By following these methods, you can efficiently manage your photo storage, ensuring that your digital memories are always accessible and securely stored.