How to Transfer Old Ringtones to New iPhone: Easy & Free
How to transfer ringtones from iPhone to iPhone via AirDrop, iTunes or without iTunes? All ways are listed here and you can choose the most suitable one as you like!
By Kathy / Updated on September 4, 2024
I can't transfer custom ringtones to my iPhone!
I'm an iPhone 13 Pro Max user. I'm trying to transfer some custom ringtones to the new iPhone with my Windows PC and Mac, but constantly failed. I couldn't find the "Tones" tab on both the music library and my device. Please help me to drop the m4r files savely in my iPhone 13 Pro. Many thanks in advance!
- Question from Apple Community
When you switch to a new iPhone, there may be lots of data that need to be transferred from old iPhone to your new device. For people who love to customize their iPhones, setting a favorite ringtone is a good way.
But how can you easily transfer your targeted ringtones from iPhone to another iPhone even if they are using different Apple IDs. All ways are listed in this useful guide, just keep on reading to choose someone you need!
Method 1. How to transfer old ringtones to new iPhone [Best free way]
When you need the easiest and free way to move ringtones from iPhone to iPhone, the best iPhone transfer software - AOMEI FoneBackup will be your nice choice! And its powerful features can help you a lot!
- Easily move 1000 + ringtones within 10 minutes.
- Flexibly preview and select iPhone audio files you need.
- All audio files can be converted to M4R automatically during the process.
- Supports transferring purchased or non-purchased ringtones.
- Fully supported various iOS models and versions(iPhone 15/iOS 18).
Now just launch AOMEI FoneBackup on your computer to see how to transfer ringtones from iPhone to iPhone without Tunes.
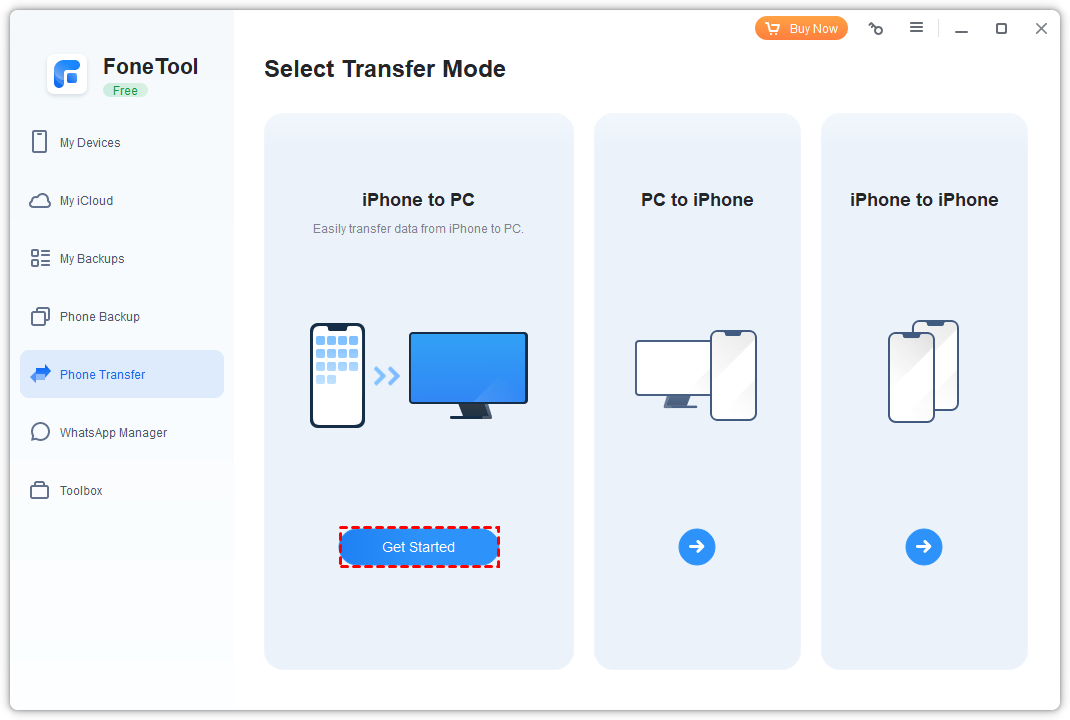
Step 1. Connect old iPhone to the PC
Connect your source iPhone to the PC via a USB cable > Go to Phone Transfer > Choose iPhone to PC and click Get Started.
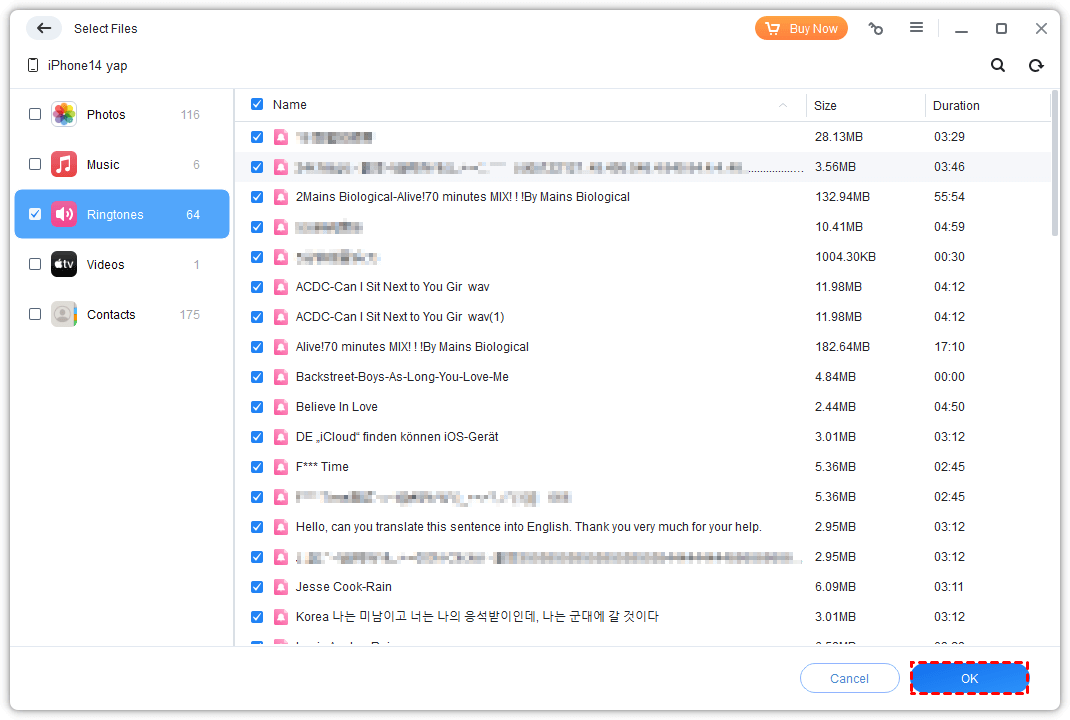
Step 2. Choose ringtones to transfer
Go to the Ringtones icon > Choose the ringtones you need and click OK.
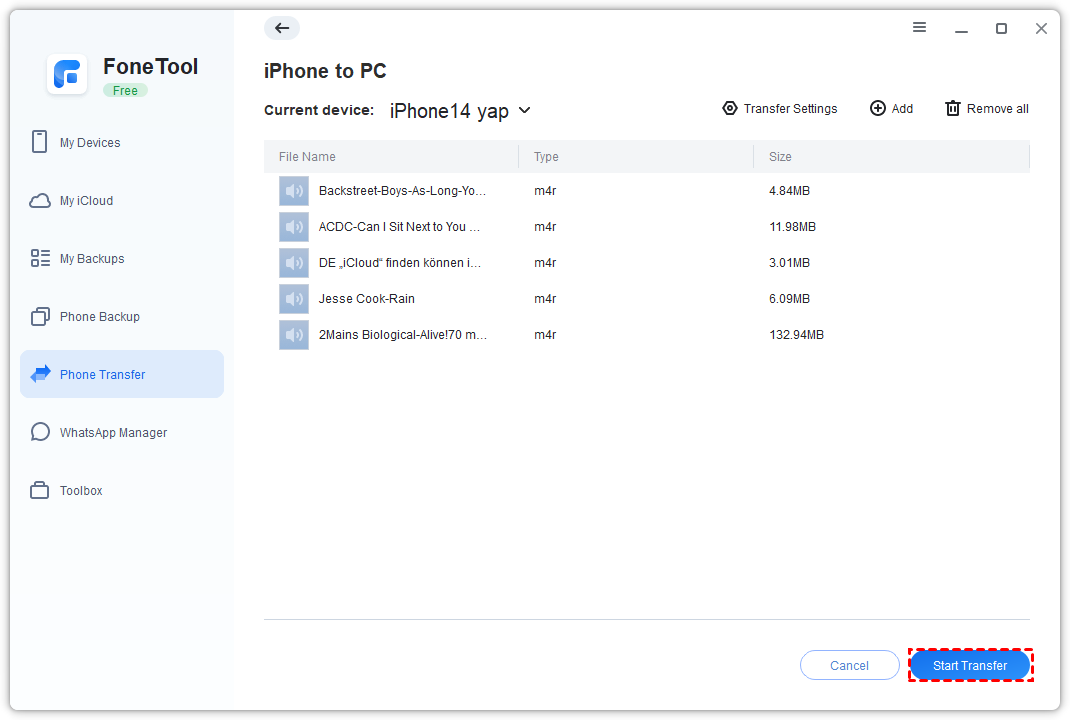
Step 3. Change settings to transfer ringtones
Change storage location from the Transfer Settings option > Click Start Transfer to put iPhone ringtones on your computer temporarily.
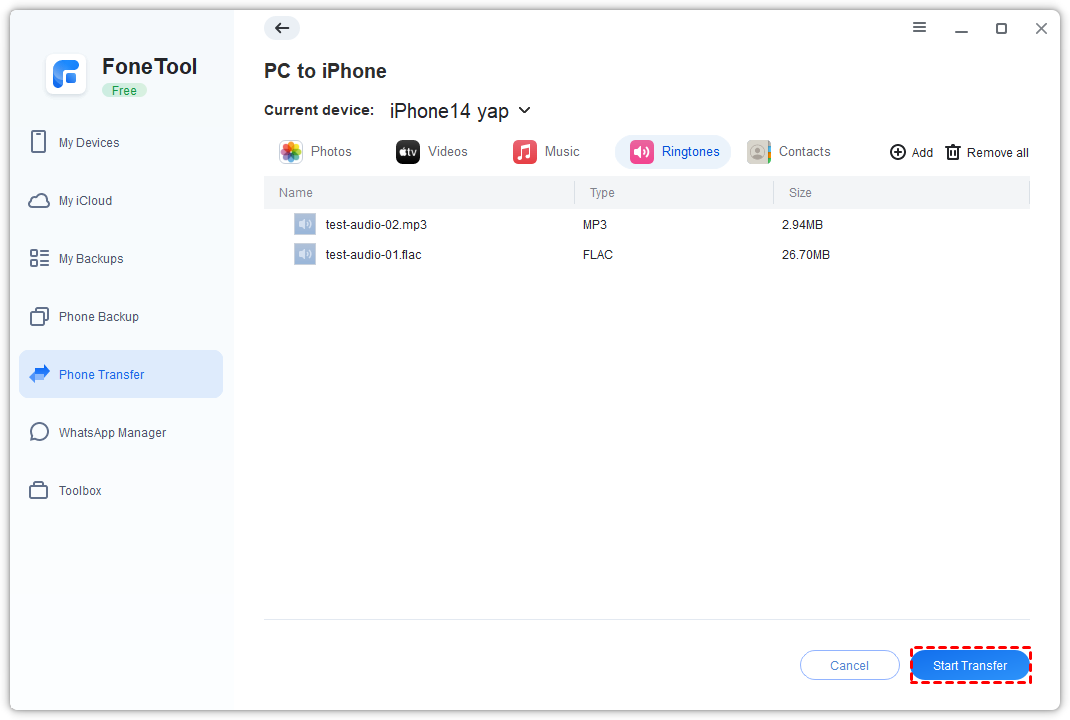
Step 4. Send custom ringtones to your new iPhone
Once all ringtones were moved to your computer, now you can unplug your source iPhone and plug your target iPhone and go to Phone Transfer > Choose PC to iPhone to transfer ringtone to iPhone without iTunes.
Step 5. How to get old ringtones on new iPhone
Wait for a while, all ringtones will be moved to your new iPhone, now you can go to the Settings app on your iPhone > Choose Sounds & Haptics > Ringtone to set custom ringtones for your iPhone.
Method 2. Transfer purchased ringtones to new iPhone with iTunes Store
How to transfer old ringtones to new iPhone, especially for your purchased ringtones? Downloading them from the Tone Store in Settings is a right way:
Go to Settings> Select Sounds & Haptics> Select Ringtones> Scroll to the top and tap Tone Store.
If you can’t find your previous purchases, tap Download All Purchased Tones.
-
You might not see this option if you've already downloaded all purchased tones or if you haven't purchased any tones. You also might not be able to re-download some previously purchased tones.
Method 3. How to transfer ringtones from iPhone to iPhone via AirDrop
If you just need to transfer a few ringtones to your new iPhone, using AirDrop is also an available way.
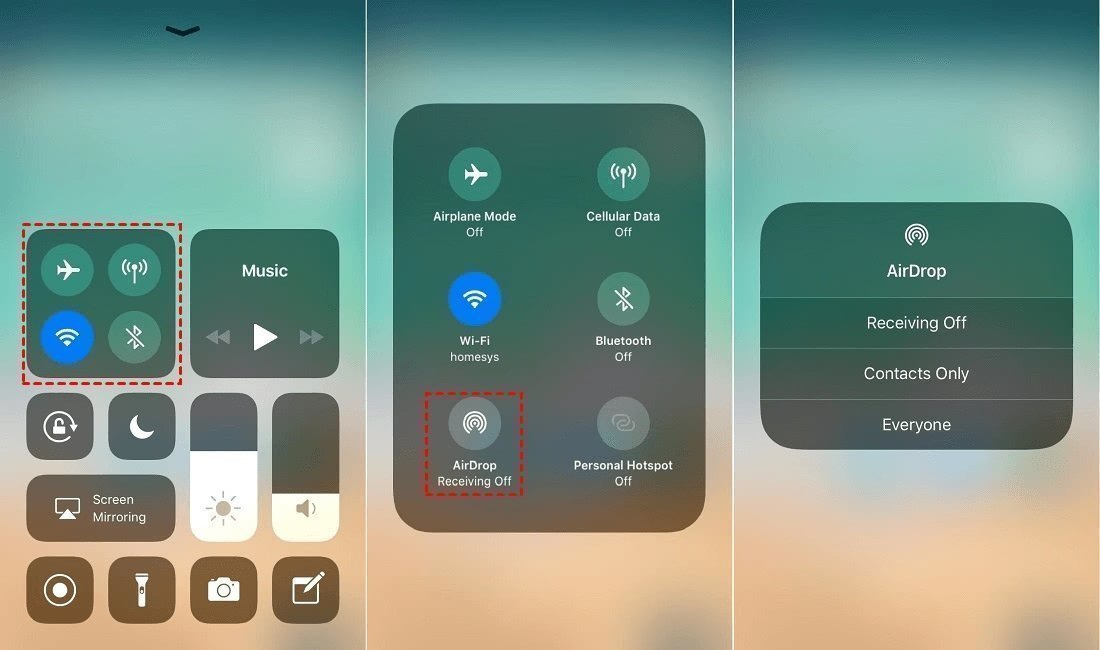
Step 1. Enable the Wi-Fi and Bluetooth option on both devices
Before using AirDrop, it’s vital to enable the Wi-Fi network and Bluetooth option. Just go to Settings > Choose Wi-Fi and turn it on. Then find Bluetooth and enable it. Or you can swipe down your iPhone screen from the right upper corner and click the Wi-Fi and Bluetooth icon to turn them on.
Step 2. Disable the Personal Hotspot option
If you have turned on the Person Hotspot option, it may slow down or fail the AirDrop transfer. You can go to Settings > Choose Personal Hotspot to disable it.
Step 3. Change your AirDrop settings
You can set your device to be received by nobody, contacts only, or everyone. To make the process smoother, it is better to set your iPhone to share data with everyone. Just go to Settings > Choose General > AirDrop > Tap on Everyone to make it.
-
If it was set to Receive Off and you can't tap to change it, you can go to Settings > Screen Time > Click Content & Privacy Restrictions and disable it.
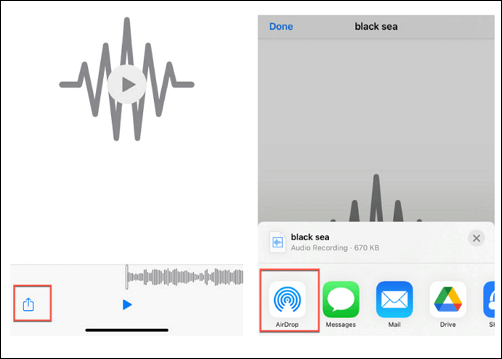
Step 4. AirDrop old ringtones to new iPhone
Open the app (usually the File app), where you store your ringtones and play it. Tap the Share icon and click AirDrop. All discovered Apple devices will show up and you can choose the targeted iPhone's name to send the ringtones.
Step 5. Receive old ringtones on your new iPhone
Now you can tap Accept from the pop-up window on your new iPhone and you can find your data in the same app from which the ringtone is sent.
Method 4. How to transfer ringtone to iPhone with iTunes
If you don’t want to rely on any third-party software, iTunes is also useful!
Step 1. Download and install iTunes 12.6 or lower version and open it on your computer > Connect your source iPhone to your PC via a USB cable.
-
New iTunes versions on 12.7 and later don’t support syncing ringtones.
Step 2. Click on Files > Choose Devices from the interface > Select Transfer Purchases from iPhone from the drop-down menu> Tap on Apply.
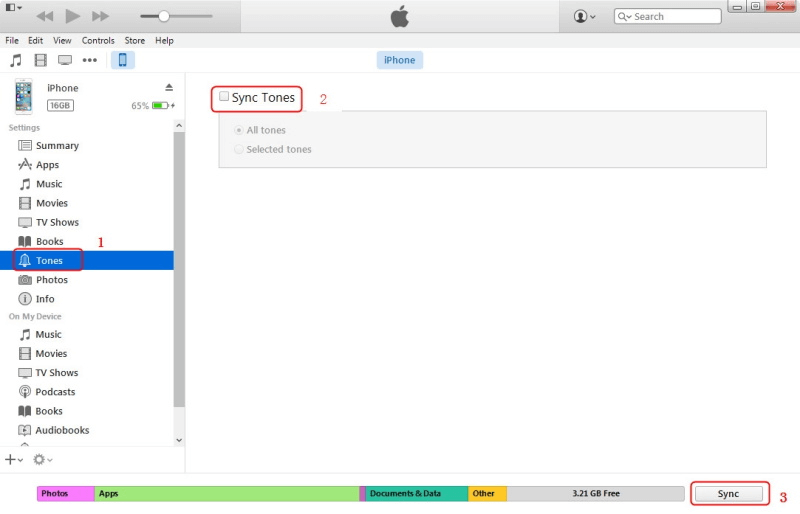
Step 3. Connect your target iPhone to your computer via a USB cable. Choose the iPhone icon and select Tones.
Step 4. Check the Sync Tones option and choose All Tones or Selected Tones option as you like. Now tap the Sync button to share ringtones from iPhone to iPhone.
-
With this way, you can only transfer purchased ringtones, if you need to move non-purchased ringtones to your new iPhone, use the professional tool mentioned in Method 1 to make it!
Conclusion
Now you can know how to transfer old ringtones to new iPhone. For people who want to use official tool to make it, downloading from the iTunes store, moving with AirDrop or iTunes are available.
If you want to know how to transfer ringtones from iPhone to iPhone without iTunes. The best iPhone ringtone transfer software mentioned in method 1 is your ideal choice.
With its fast transfer speed, you can easily move purchased and non-purchased ringtones from iPhone to iPhone. Just go and download AOMEI FoneBackup to have a try!

