FreeFileSync Automatic Sync and Its Alternative
If you want to set a FreeFileSync automatic sync task, or find simpler file sync software, please read patiently to get them.
By Yuka Updated on November 10, 2022
About FreeFileSync
FreeFileSync is a folder comparison and synchronization software that creates and manages backup copies of all your important files. Instead of copying every file every time, FreeFileSync determines the differences between the source and destination folders and transfers only the minimum amount of data required.
It has many advanced functions, such as mirror sync, two-way sync, and real-time sync. FreeFileSync supports copying multiple files in parallel. During the synchronization process, FreeFileSync will generate multiple tasks accordingly instead of processing one file one by one.
Why Need FreeFileSync Automatic Sync?
Nowadays, as people need to store more and more data and files in their lives or work, the way they store data is also changing. For convenience, many people choose to store files on portable devices such as USB. Some users also back up their files to different cloud storage for safety. More importantly, this way avoids the loss of mobile devices such as USB, and they can easily access files no matter where they are or what device they use.
In this case, freefilesync automatic sync plays a very important role. Automatic file synchronization (or syncing) in computing is the process of ensuring that computer files in two or more locations are updated constantly via certain rules. It is usually used for home backups on external hard drives or transfer updates on USB flash drives. Automatic file synchronization will also save you a lot of time to transfer files.
Complete Guide to Set Up FreeFileSync Automatic Sync Tasks
After knowing some basic information about FreeFileSync, I will show you how does FreeFileSync run automatic backup or sync on Windows. Here you will use the RealTimeSync function, which is to execute a command line each time it detects changes in one of the monitored directories, or when a directory becomes available. Follow the steps below to create one.
Part 1. Save Sync Job as a Batch File
- Install FreeFileSync on your computer. You will have 2 shortcuts on your desktop: FreeFileSync (green arrows icon) and RealTimeSync (red arrows icon).
- After installation, open FreeFileSync. Click Save as batch jobs in the upper left corner of the program to create a new sync task.
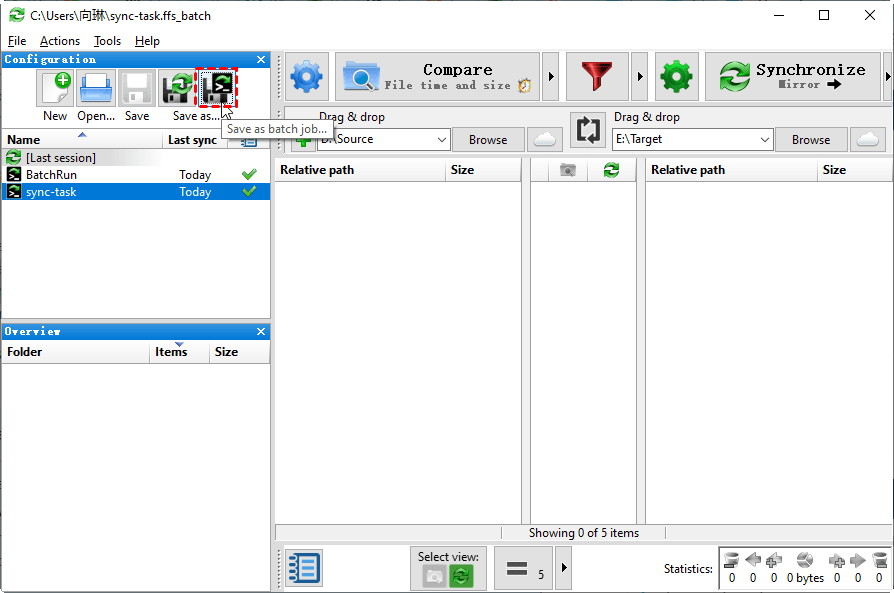
- Then give a name to your sync task and choose a location to save it on your computer.
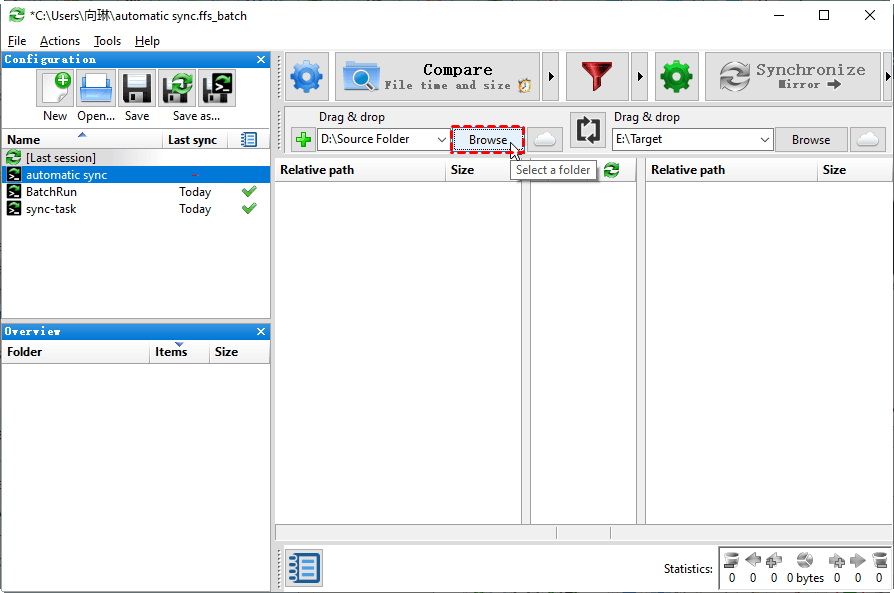
- Click Browse on the left to select the source folder to sync. Then click Browse on the right and select the destination folder where you want to store the file.
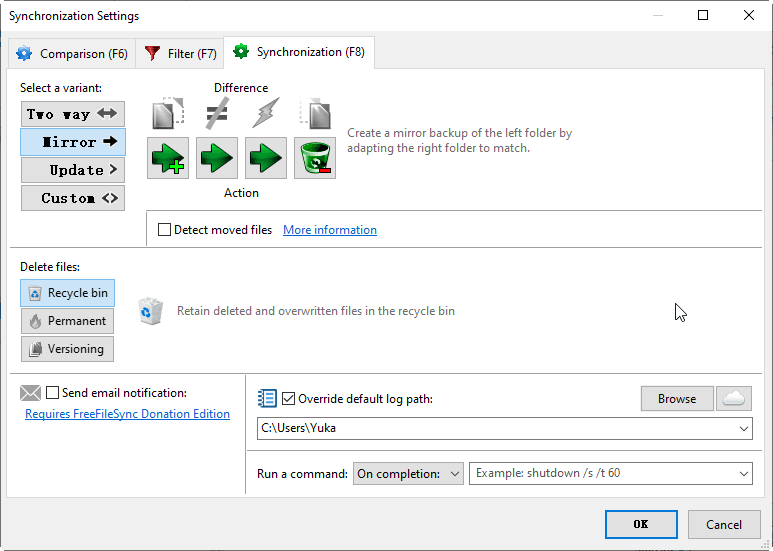
- Next, you can click the green settings button to customize your sync task.
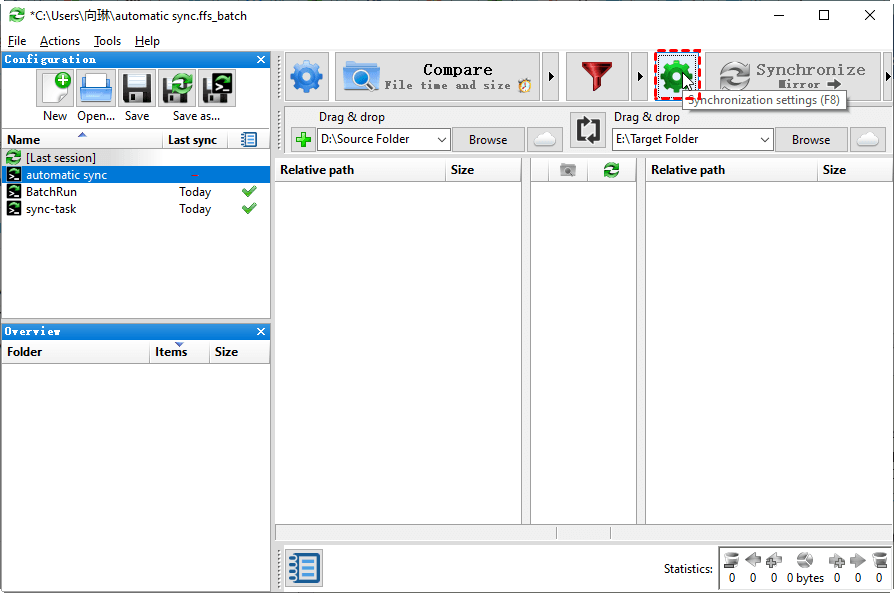
- You can choose the sync modes there. There are 4 choices: Two way, Mirror, Update and Custom. You can select one as per your needs, here I take Mirror as an example. You can also set up the Comparison and Filter here. Confirm all your settings and click OK.
- Two way: Identify and propagate changes on both sides. Deletions, moves, and conflicts are detected automatically using a database.
- Mirror: Create a mirror backup of the left folder by adapting the right folder to match.
- Update: Copy new and updated files to the right folder.
- Custom: Configure your own synchronization rules.
- Then, click Compare to see the difference between the source folder and the target folder.
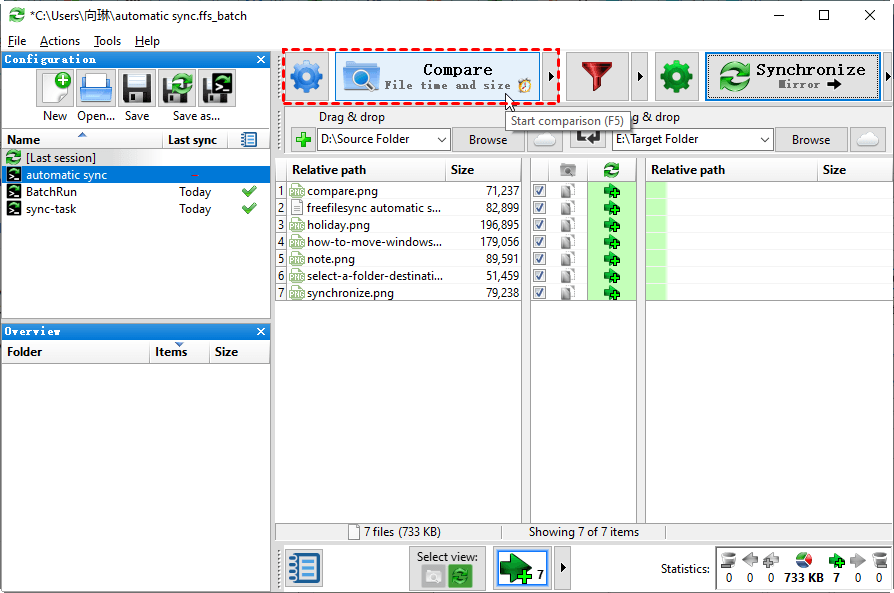
- After confirming the files you want to sync, click Synchronize to start the process.
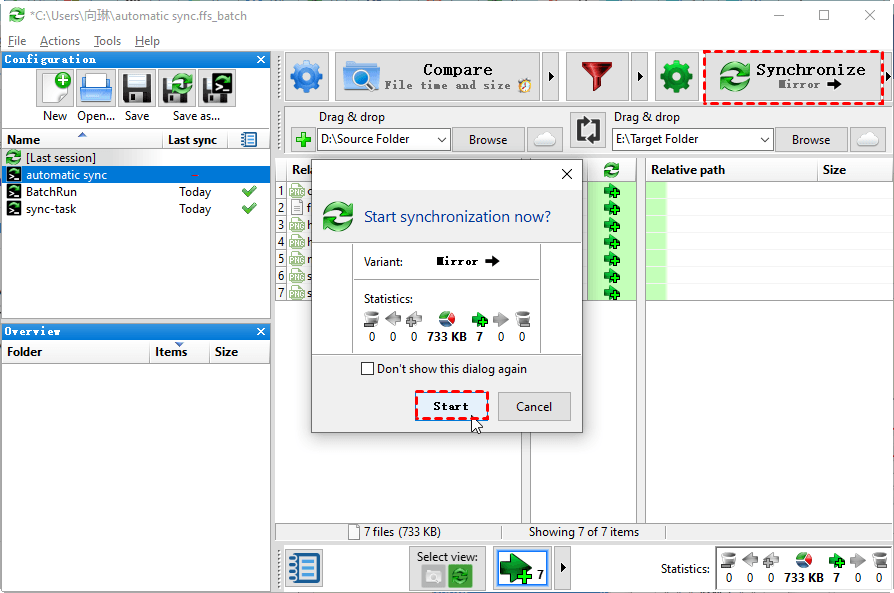
- Wait for the synchronization process to complete, then click Close.
Part 2. Run Realtimesync.Exe to Set Up Automatic Sync
If you want the sync task you just created to run automatically in the background, automatically sync to the destination when there are any changes, you need to use Realtimesync of FreeFileSync to set the automated synchronization.
- Open RealTimeSync app. You have 2 options to add the FreeFileSync automatic synchronization task you want to set up. New settings will be automatically filled into all relevant fields.
- Click on File -> Open… to load above created BatchRun.ffs_batch file into RealTimeSync.
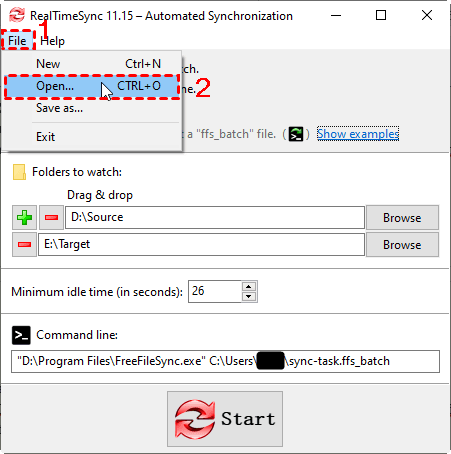
- Drag the batch job you just created directly to the FreeFileSync Command Line box.
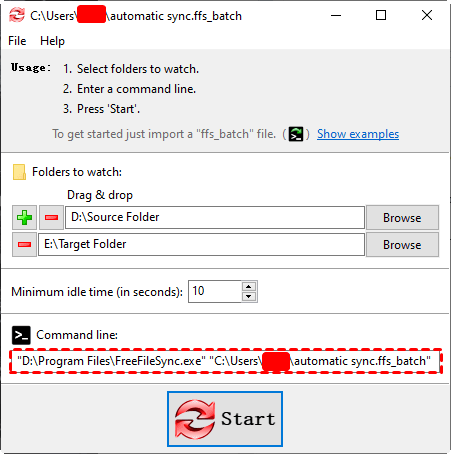
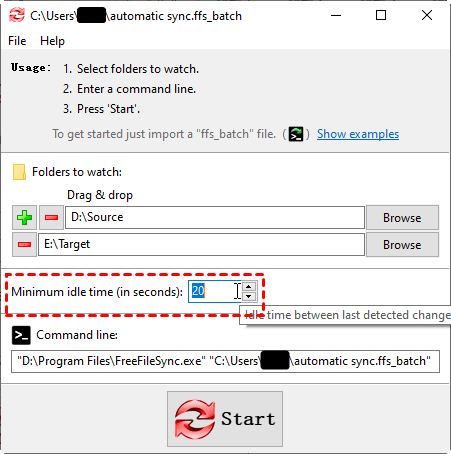
- You can change minimum idle time delay between actual folder change and sync trigger.
- Confirm all your settings and click Start. After the FreeFileSync automatic synchronization task is set, it will automatically detect the changes between the source folder and the destination folder and execute the sync task within the time interval you set.
Best FreeFileSync Alternative to Avoid Any Sync Issues
As can be seen from the above graphic tutorial, setting up a FreeFileSync automatic synchronization is a bit troublesome. And its idle time is calculated in seconds, which is not very convenient for some users. According to some users, there are still some problems in the use of the software. For instance, the exclude folders/files function does not work, or FFS issue with OneDrive file status, etc.
Here, I recommend you a simpler file synchronization software—AOMEI Backupper Standard. It has an intuitive graphical user interface, so you don't need to be familiar with the command line, especially for computer novices. With its help, you only need a few steps to set up free file sync automatic sync task (daily, weekly, monthly).
Step 1. Click the download button below to install AOMEI Backupper Standard on your computer. For server users, try AOMEI Backupper Server!
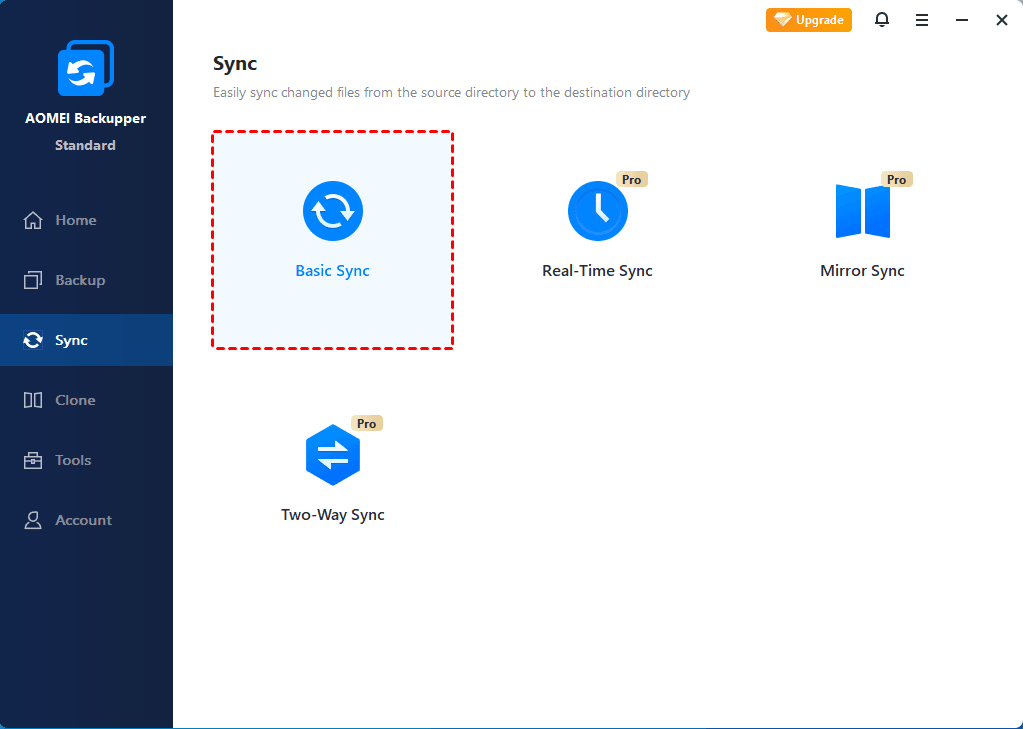
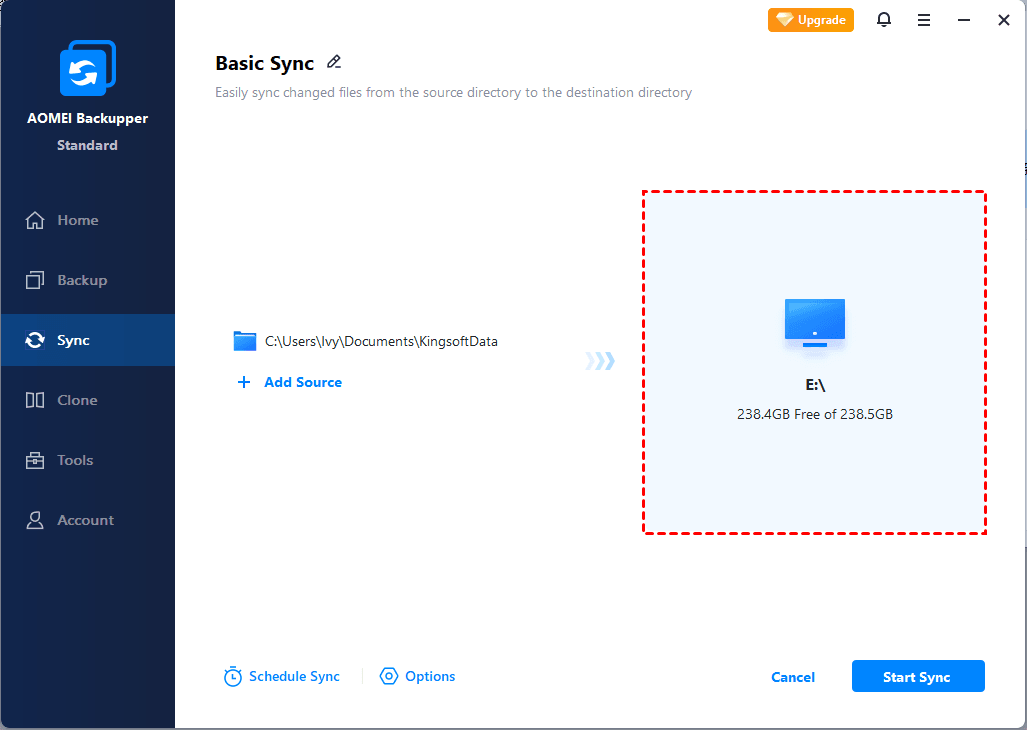
Step 2. Lauch AOMEI Backupper. You will enter the dark blue interface. Navigate to the Sync tab and select Basic Sync.
Tips:
✍ Besides Basic Sync, you still can sync files reguarly with "Mirror Sync" and "Two-way Sync". The previous one focuses more on data integrity while the later is more concerned about changes on both sides, not only modifications, but also deletion and new files.
✍ To real time sync folder in Windows 10, you can upgrade to higher versions to enjoy "Real-time Sync". By default, it will sync changes at once when detected.
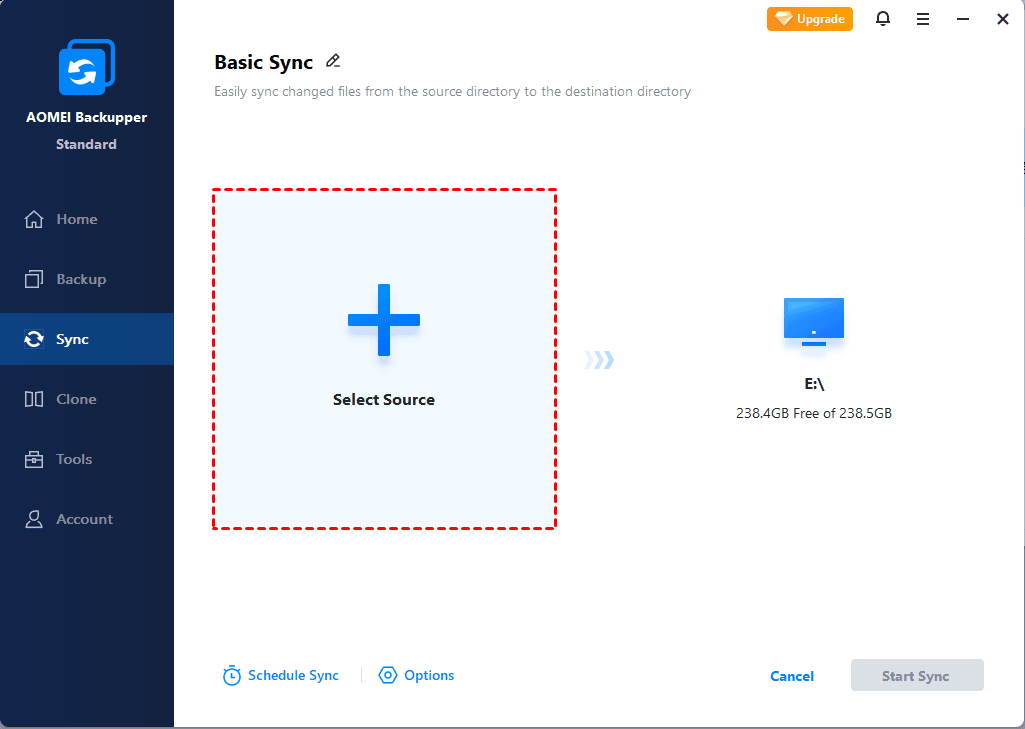
Step 3. Next, you need to click on the option of Add Folder to choose the files you want to sync. If you want to sync multiple folders simultaneously, click the “+” icon after you add the first source folder. Then you can click the second box below the arrow to select the destination folder.
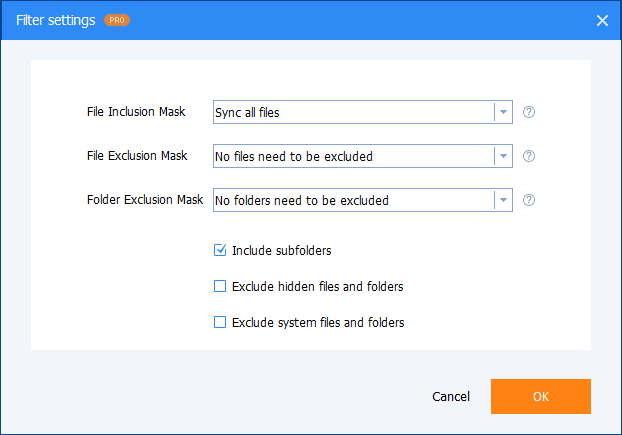
Tip✍: When needing to filter files or folders after you add the folders, you can click the "funnel" icon to open the "Filter Settings", then directly type file extension or name. Note that this feature is only available for paid versions.
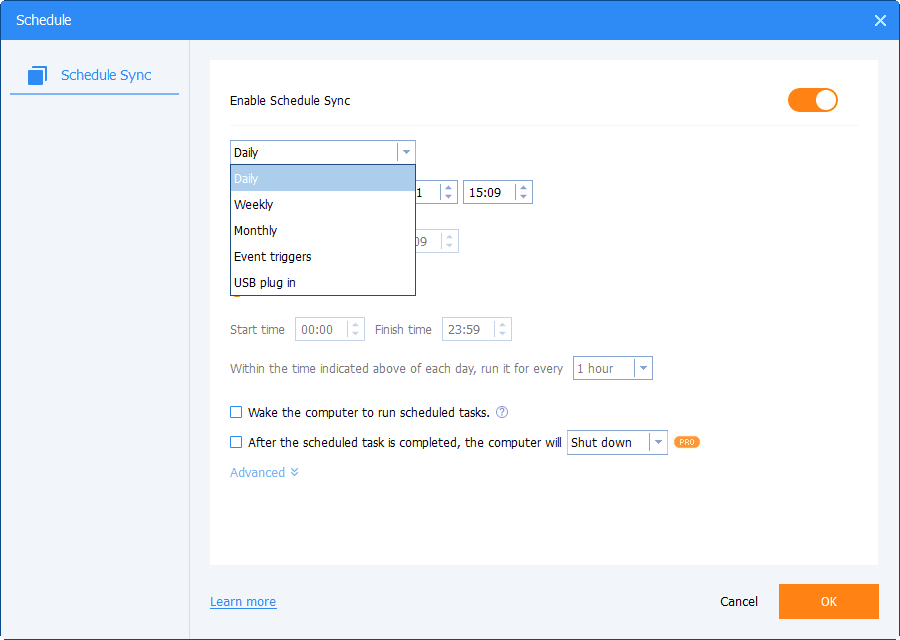
Step 4. Next, click Schedule Sync in the lower left corner to set free file sync automatic sync. You can choose Daily, Weekly, and Monthly in the free version. For premium features (Event triggers and USB plug in), you need to upgrade to the Professional version or higher.
Tip✍:
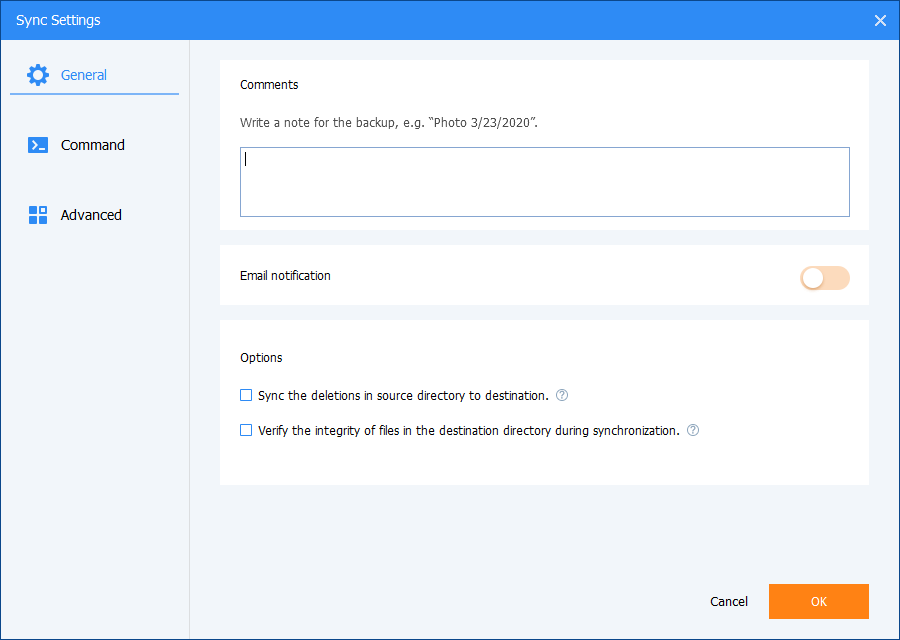
Options: you can write a note for your task to help you distinguish it from other backup tasks. In unattended operations, a notification can be emailed containing the result of each backup. You can also sync the deletions in the source directory to destination.
Step 5. Then you can click Start Sync to run free file sync automatic sync task.
Notes:
- Don't modify the source folder name, otherwise, it will not sync files anymore.
- The Sync feature in this software does not sync single files larger than 2GB or 4GB unless the disk is formatted with NTFS file system. To copy large files smoothly, try the file backup feature instead.
- To sync files on multiple computers, try AOMEI Backupper Technician or TechPlus edition. It allows you to create a portable version of this software and run it off a flash drive, then sync files automatically.
- If you create an AOMEI account, you are able to backup files to AOMEI Cloud. It offers you 1TB free storage for 15 days after you sign up for an AOMEI account.
Conclusion
That’s all for how to create a FreeFileSync automatic sync task on Windows. From the details tutorial, it is not difficult to see that setting up automatic synchronization with this software seems a bit troublesome. Its interface is not so modern. At the same time, there are still some problems in the process of use.
In order to avoid these problems, I suggest you use AOMEI Backupper to set up automatic sync tasks. Its operation is simpler than FreeFileSync and has a friendly interface. With its help, you can also sync files with Google Drive. In addition to the sync function, it also has recovery, clone, utility, etc. Download it now and try it.

