[4 Ways] How to Backup Windows 10 to Network Drive or Share
You will learn how to backup Windows 10 backup to network drive or share easily, even do it automatically using free Windows backup software like File History, AOMEI Backupper, and more.
By Ivy Updated on March 21, 2025
“I want to save my Windows 10 backup on a network shared drive. I'm able to do a "map network drive" and "add a network location" to this location. However, when I want to select this location from Backup and Restore (Windows 7) I get an error message, saying "The specified network location cannot be used". Any assistance is greatly appreciated. Thanks & Regards” – From answer.microsoft.com forum

What is Network Drive?
A network drive is a storage device on a local access network (LAN) within a business or home.
No matter what are the types of network drive, you can store files without consuming local disk space on your computer. This is the biggest reason why users want to backup Windows 10 to network drive or NAS.
Overview of Windows 10 Backup Software
Before backing up Windows 10 to network drive or share, you can take a quick overview of backup software.
| Backup Software | Description | Methods |
|---|---|---|
| File History | It will automatically backup files to network drive (hourly by default). | Method 1 |
| Backup and Restore (Windows 7) | It will backup users' data as well as allow you to include a system image backup (including the operating system, systems files, applications, etc). | Method 2 |
| AOMEI Backupper Standard | It's an all-in-one Windows backup software that can backup system, entire disk, specific partitions, files, etc., with a variety of convenient features. | Method 3 |
| AOMEI Cyber Backup | It can centrally backup a bunch of Windows PCs, from Windows 7 to Windows 10/11 as well as server computers, especially for enterprises. | Method 4 |
Perform Windows 10 Backup to Network Drive Step by Step
Four ways to back up Windows 10 to network drive or NAS will be illustrated below, either built-in tools or 3rd-party ones. Before starting, you need to be sure there is an available network drive or NAS. If not, try the following two methods to create one.
#1: Directly access the network drive. You need to type its IP address and Windows credentials (if required).
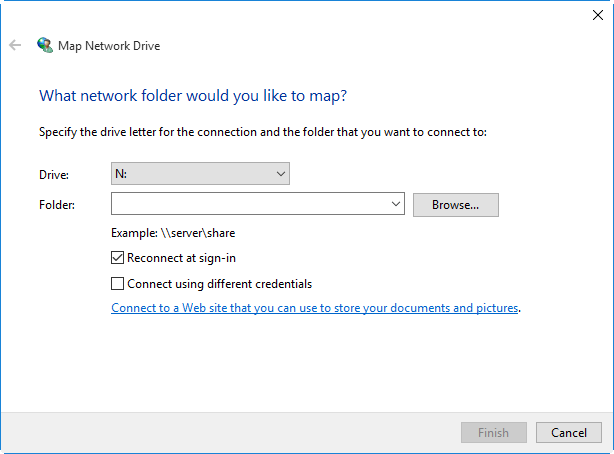
#2: Map network drive locally. You need to specify the network path and assign a drive letter to map a network drive. Afterward, you can access it on the local computer. Note that mapped drives are also a type of network drive.
Method 1: Windows 10 Backup to Network Drive via File History
File History is the primary file backup software in Windows 10, by default, it only backs up all the user's folders and you can save them on a network drive. Also, you are still able to backup specific folders in Windows 10 by clicking the Add a folder option to browse and select. Please follow the steps below:
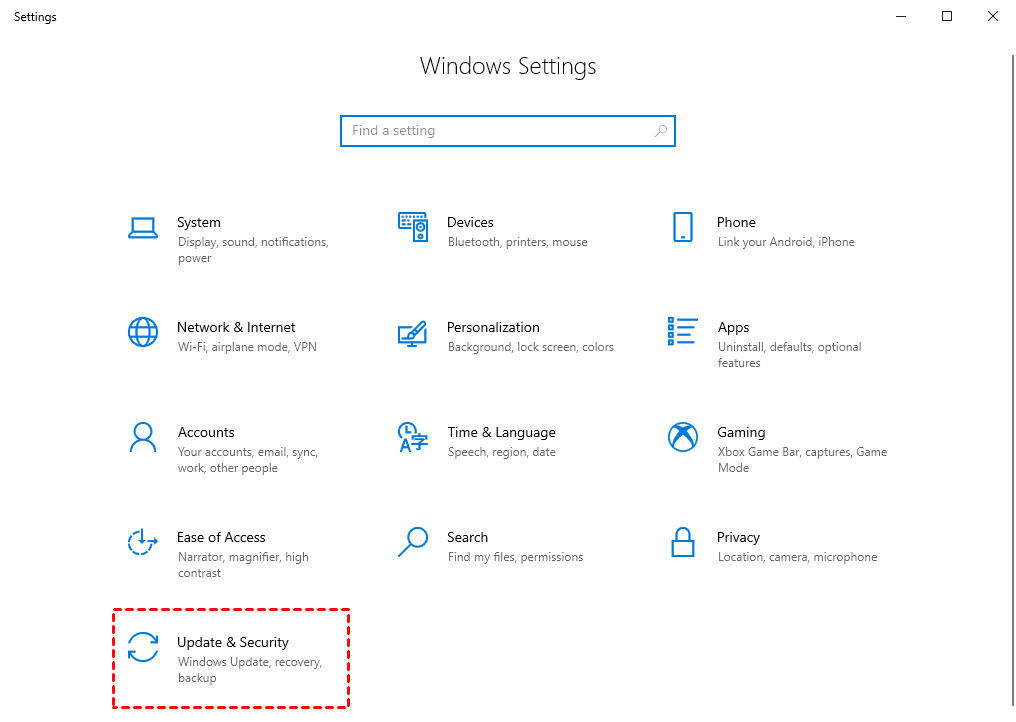
Step 1. Click Start > Click Settings option > choose Update & security.
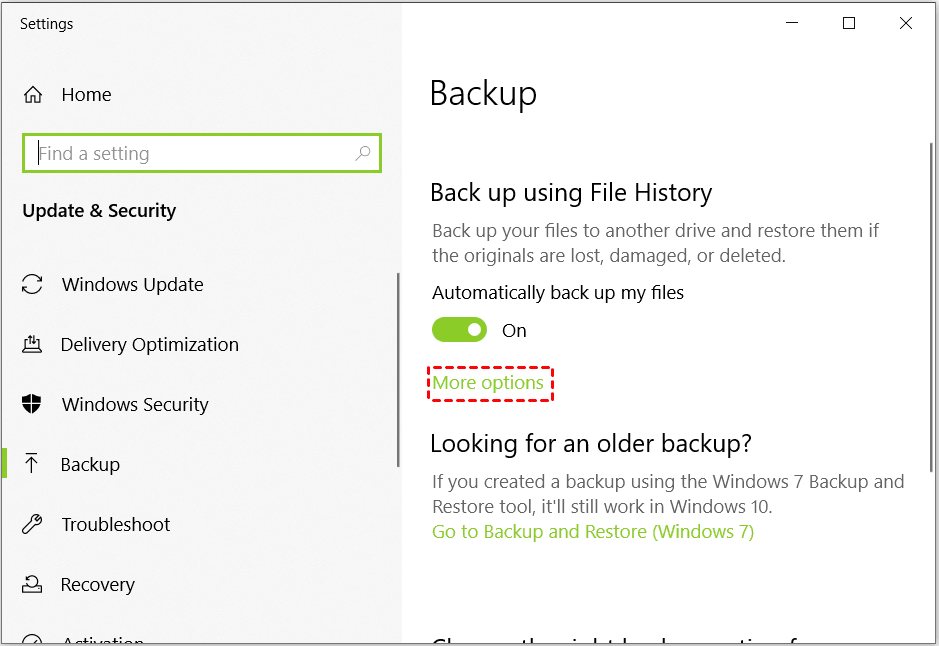
Step 2. Select Backup from the left panel. Then, click Add a drive > Show all network locations. Wait until you see the network drive and select it to back up files using File History.

Step 3. Click More options to access the Backup options screen.
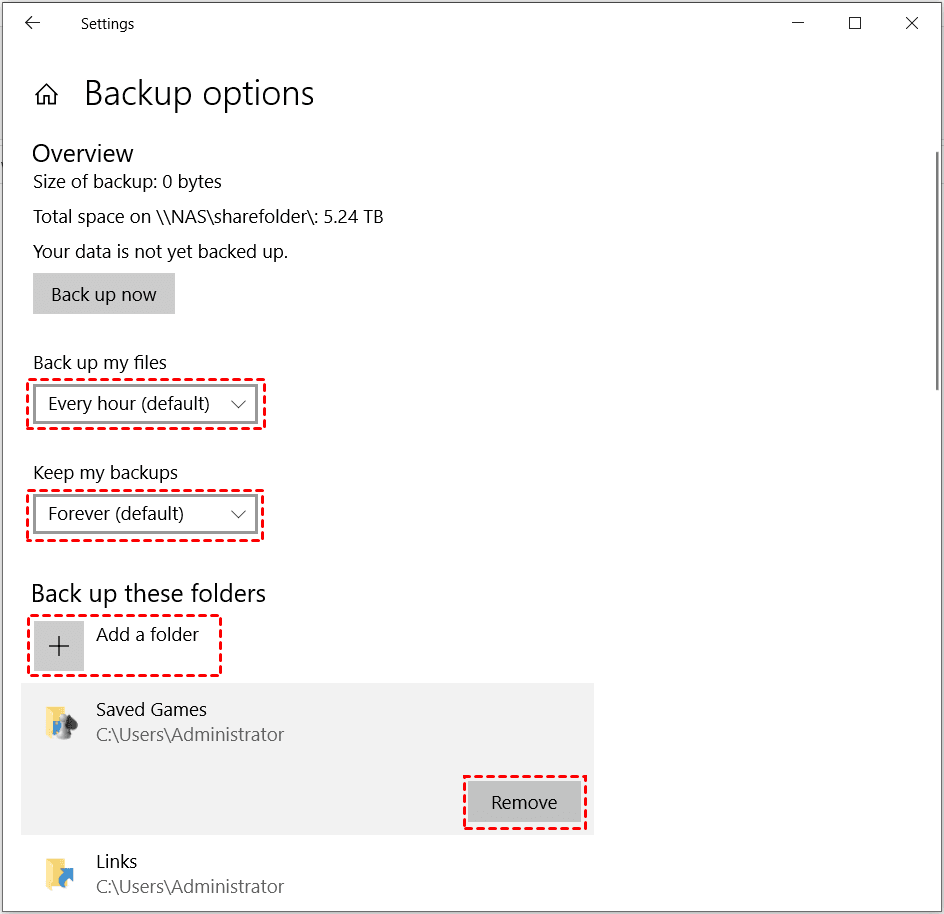
Step 4. Scroll down to set up backup options in the following window.
① Backup frequency and retention: By default, File History back up your files every hour and keep the backups forever. You can click the slide-out arrow to change it to your favorite.
② Add or remove a folder:
> Scroll down to Back up these folders, click Add a folder and select any folder you want to back up.
> Scroll down to the folder you want to remove, e.g. Saved Games, and click Remove.
③ Exclude these folders: Keep sliding your mouse down, you will see the Exclude these folders section. Click Add a folder to select the one you want to exclude.
④ Back up to a different drive: Scroll down to this section and click Stop using drive. It will not delete any files from the current backup drive. You can then go back and add a new drive to backup files.

One day, you may need to restore files or folders. With File History, you have two ways the following:
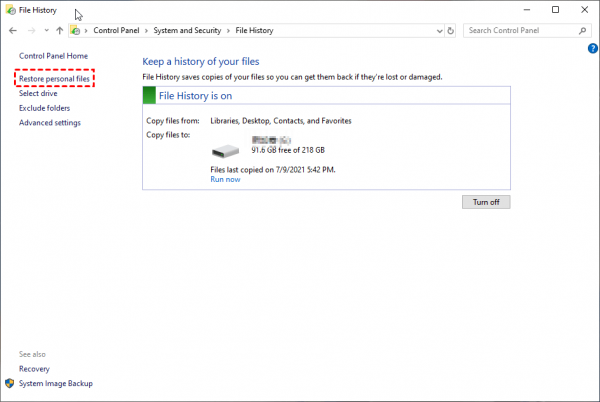
#1: Restore entire files: Go to Control Panel > System and Security > File History > Restore personal files. Click Browse to find the files you want to restore.
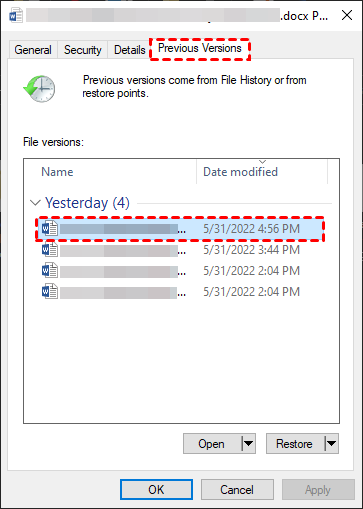
#2: Restore a previous version of a file: Right-click the folder containing deleted files, and select Properties. Then, go to the Previous Versions tab and choose a folder version to restore.
Method 2: Windows 10 Backup to Network Drive via Backup and Restore
Windows 10 follows Backup and Restore in Windows 7. It can help you create a system image and save it on network location or NAS, then restore your computer to a previous good status when your computer goes wrong. Here are the detailed steps for you:
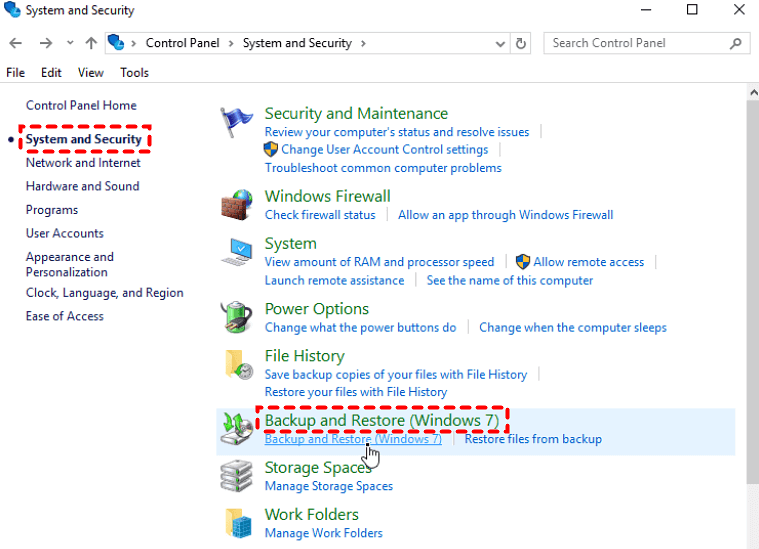
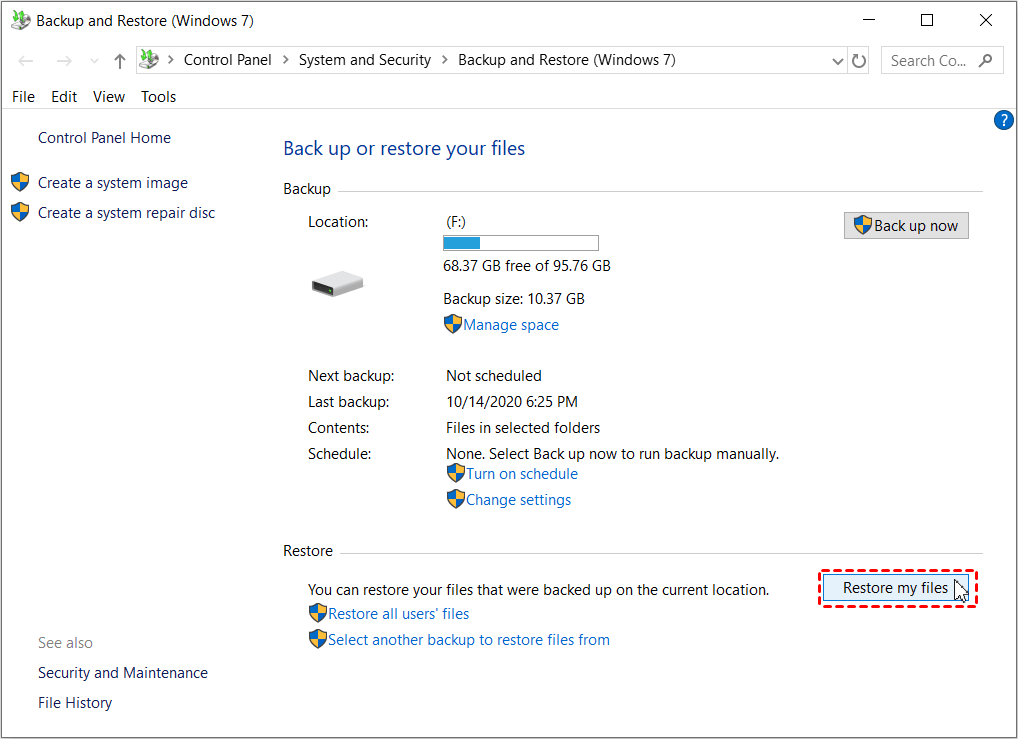
Step 1. Go to Control Panel > System and Security > Backup and Restore (Windows 7).
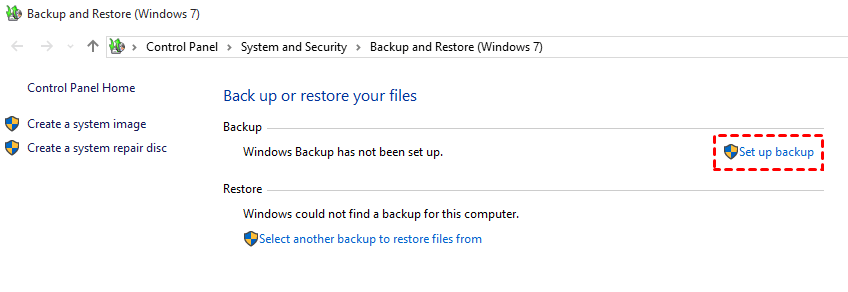
Step 2. Click Set up backup on the right side.
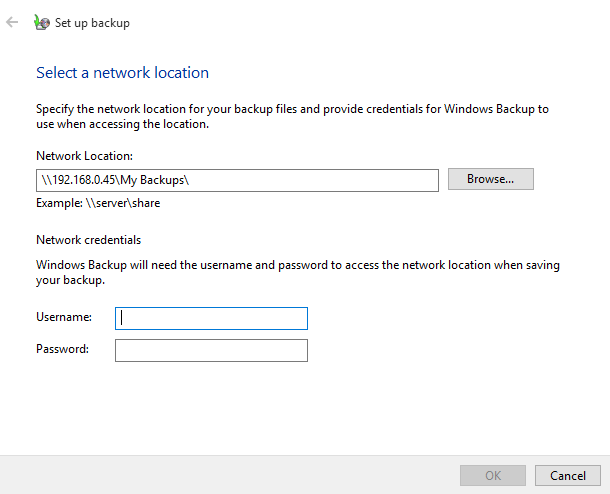
Step 3. Choose Save on a network...

Step 4. Click Browse to add the network drive or directly type the network location you want to store the system image. Then, enter your username and password and click OK to confirm this operation.
Step 5. Click Next to continue.
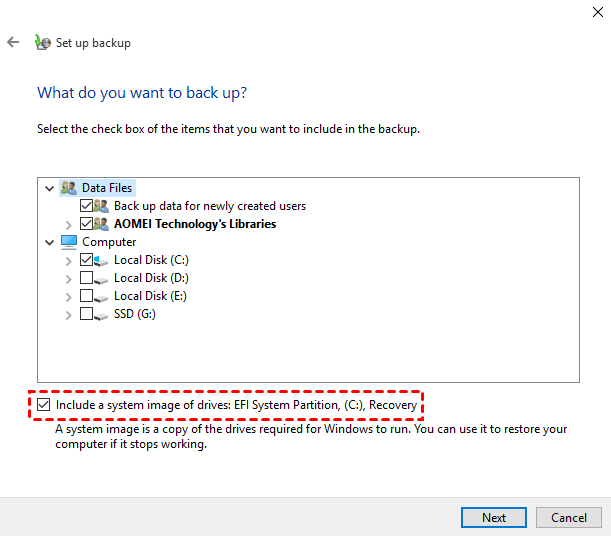
Step 6. Choose whether or not you want Windows to handle everything. If you choose Let me choose, please remember to check the option Include a system image of drives.
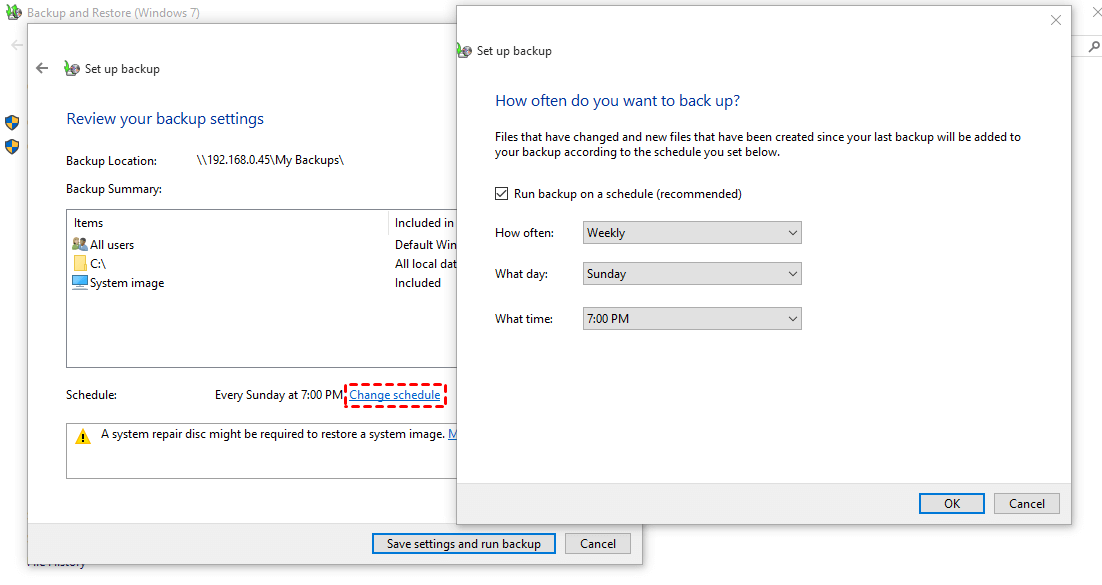
Step 7. At the Review backup settings window, click Change schedule to let Windows 10 automatic backup to network drive or NAS. Then, click Save settings and run the backup.
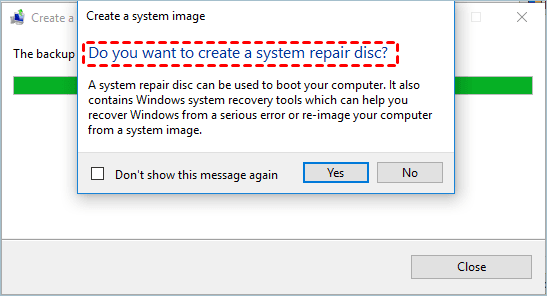
When the process completes, you will be asked if you want to create a system repair disc that can help to boot your computer. Try it if your computer has an optical drive. If not, you can also create a system repair disk with your USB flash drive.
#2: Restore system image to new hard drive or SSD
Sometimes you need to restore system image to new hard drive or SSD, especially when your system crashes or your disk is damaged. Note it requires you to use a drive larger than or equal to the original ones.
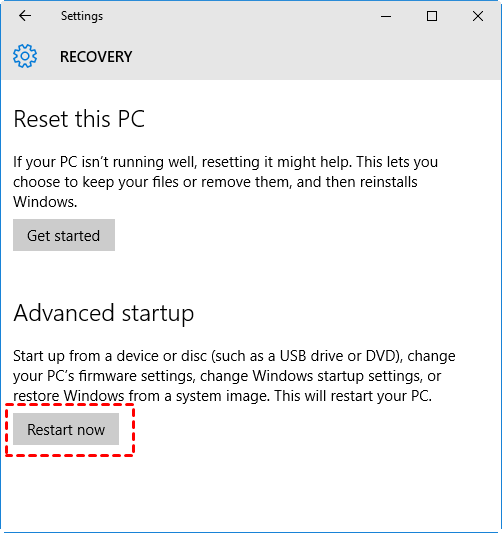
- Go to Settings > Update & security > Recovery > Advanced startup > Restart now.
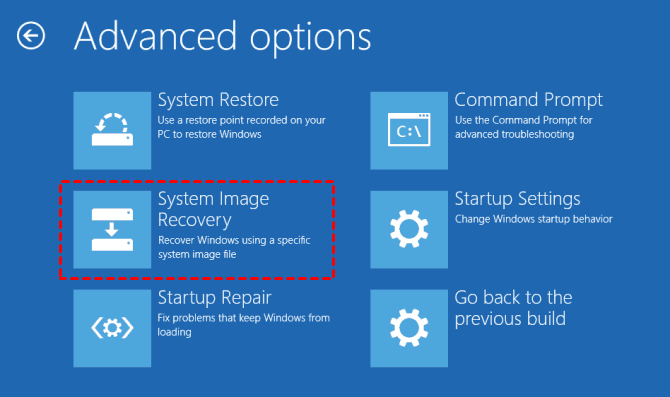
- Then, in the recovery environment, select Troubleshoot > Advanced Options > System image recovery and follow the instructions.
Method 3: Windows 10 Backup to Network Drive via AOMEI Backupper
AOMEI Backupper Standard is the best free auto backup software to backup Windows 10 to network drive or NAS in simple steps.

- All-in-one backup solutions: It is able to backup system, disk, partition, files, etc., automatically.
- Multiple backup options: It allows you to schedule backup Windows 10 daily (hourly), weekly, monthly, etc.
- Save much disk space automatically: By default, this software will compress or split backup images, etc. For scheduled tasks, it will enable incremental backup to backup only changed files.
- Create a system image for another computer: It includes the Universal Restore feature to ensure you can restore system image to different computers, even with dissimilar hardware.
- Create bootable USB or CD/DVD. It helps to boot computer and restore system that is not working.
Here are 4-step guide to backup Windows 10 to network drive automatically.
Please download, install, and launch this free network or NAS backup software - AOMEI Backupper Standard.
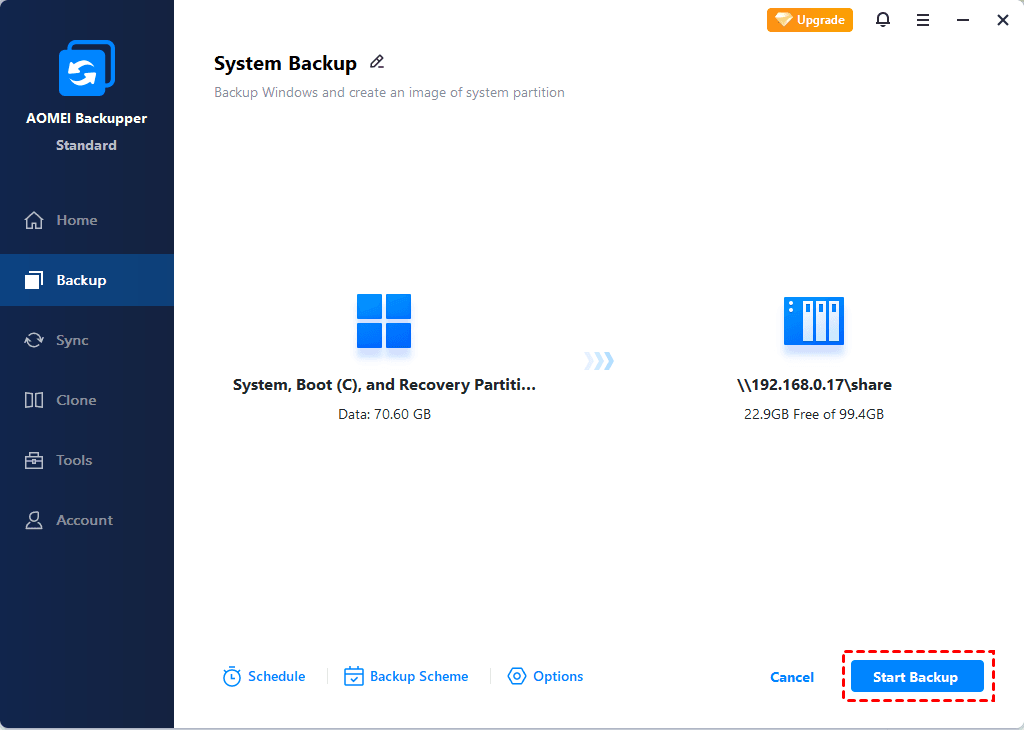
Step 1. Click System Backup under the Backup tab.

Step 2. The software will automatically choose the boot-required partitions, especially useful for novices. Then, you need to select a network location to save the image file in the following steps.
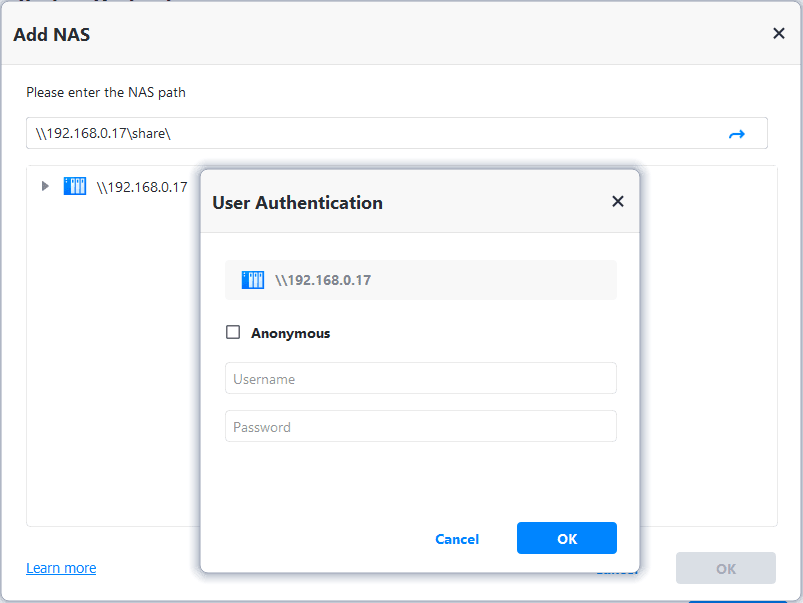
① Click the inverted triangle and select Add Share or NAS Devices.
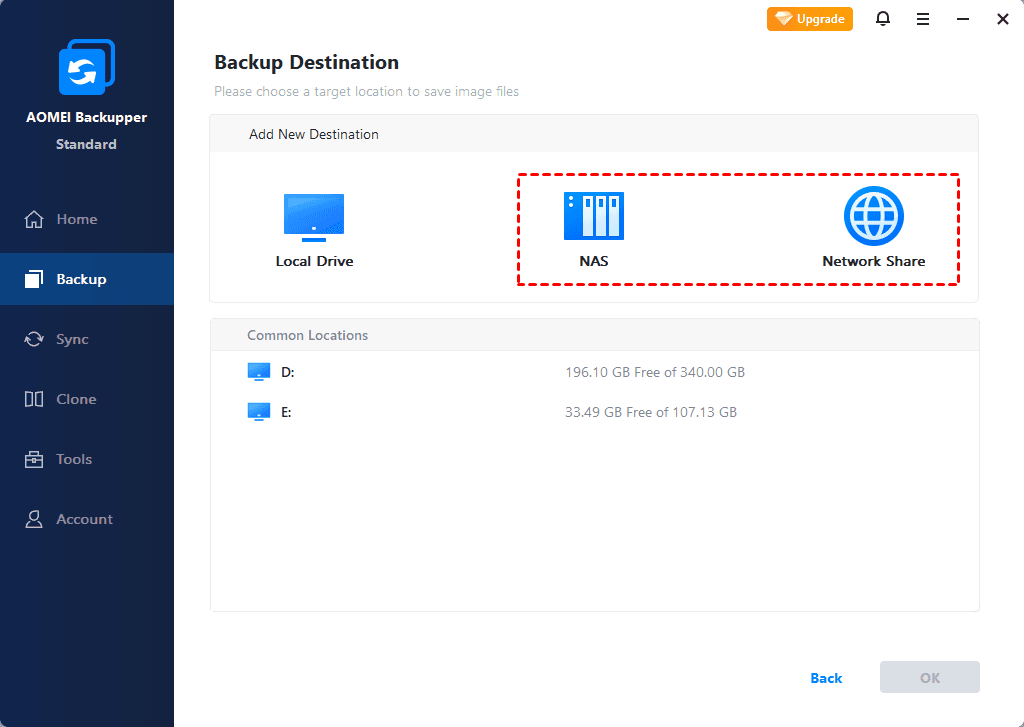
② In the Open window, click Share/NAS.

③ In the following window, type the network path and select a network shared folder there.

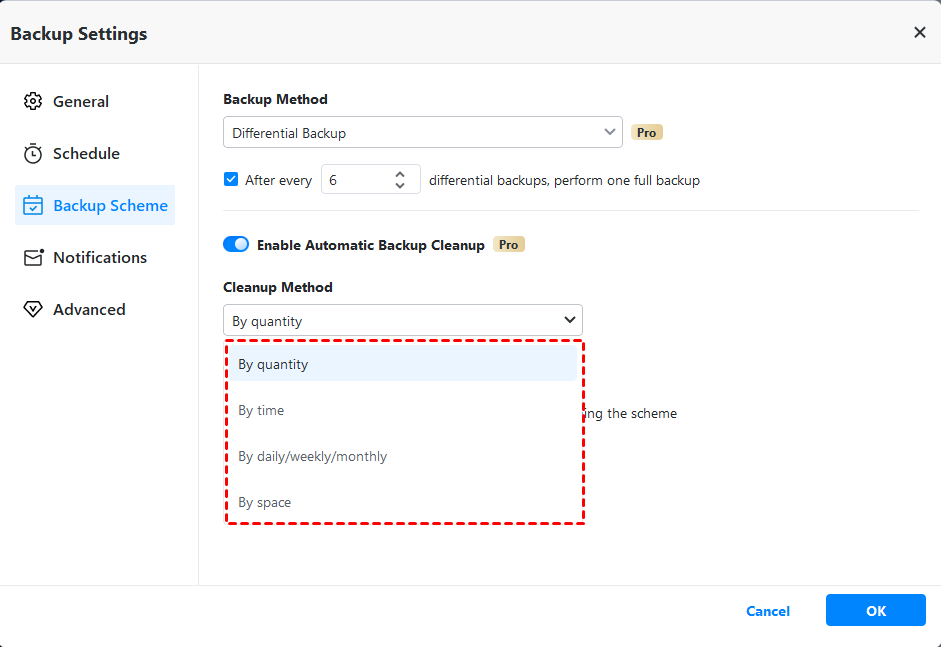
Step 3. Set up an automatic backup task. To automatically backup Windows 10 to network drive or NAS, click “Schedule Backup” > "Enable Schedule Backup" and select "Daily", "Weekly", or "Monthly".

- Select "Event trigger" in a specific event, e.g. system shutdown, or use "USB plug in" if the backup drive is a USB drive or thumb drive.
- Set a "High" compression level to compress the backup image to smaller with less space.
- Try "Differential Backup" to backup only new or changed files based on the last full backup.
- Enable "Cleanup Methods" to delete old backup images automatically, especially useful in a scheduled task.
- ...
Step 4. Confirm backup settings and click Start Backup to backup Windows 10 to network drive or NAS automatically.
One day, you need to restore Windows 10 image to bring your computer back to normal. Here are 3 different situations you may encounter:
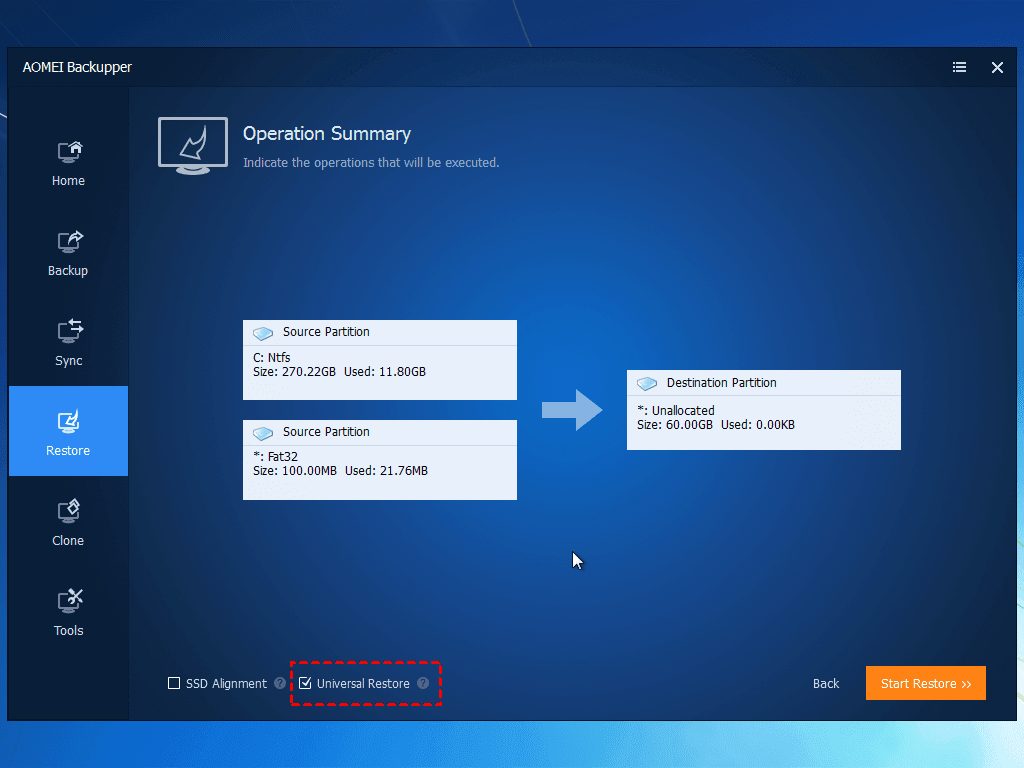
#1: Restore Windows image to new hard drive. Switch the Restore tab, choose Select Task or Select Image File to find backup image > Restore entire image and to other location, and finally click Start Restore. Click Restore Windows 10 to new hard drive to learn more.
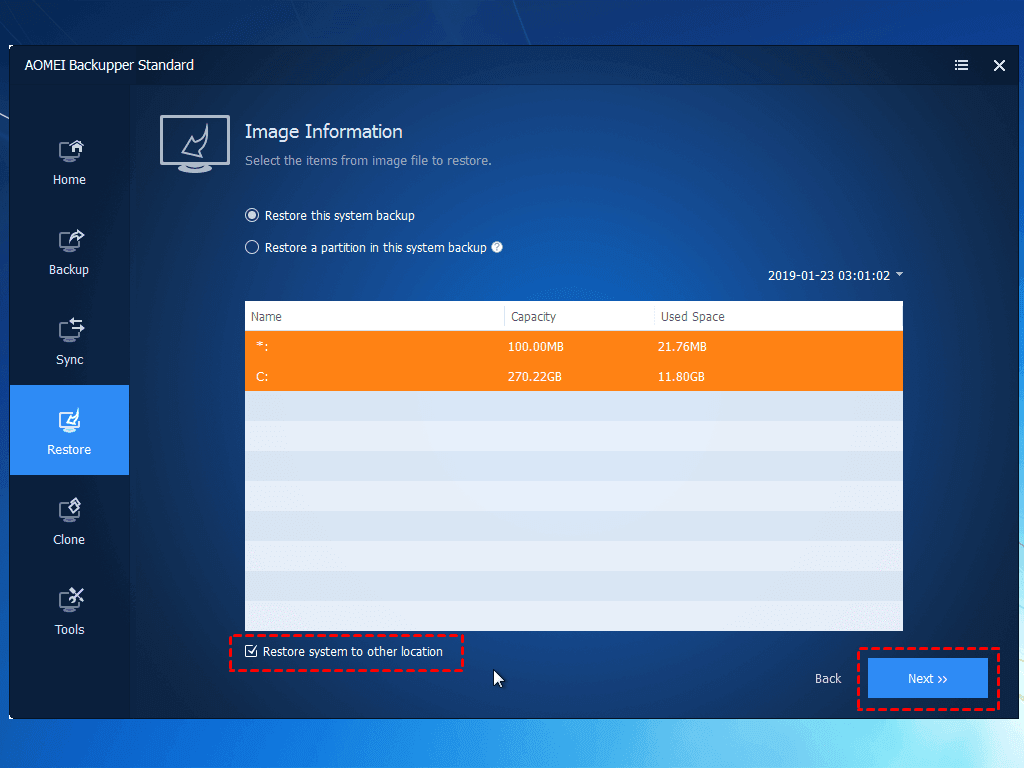
#2: Move Windows 10 to a new computer with dissimilar hardware. The steps are almost the same as in the previous situation, only the last step is different, in this situation, the Universal Restore feature is checked.
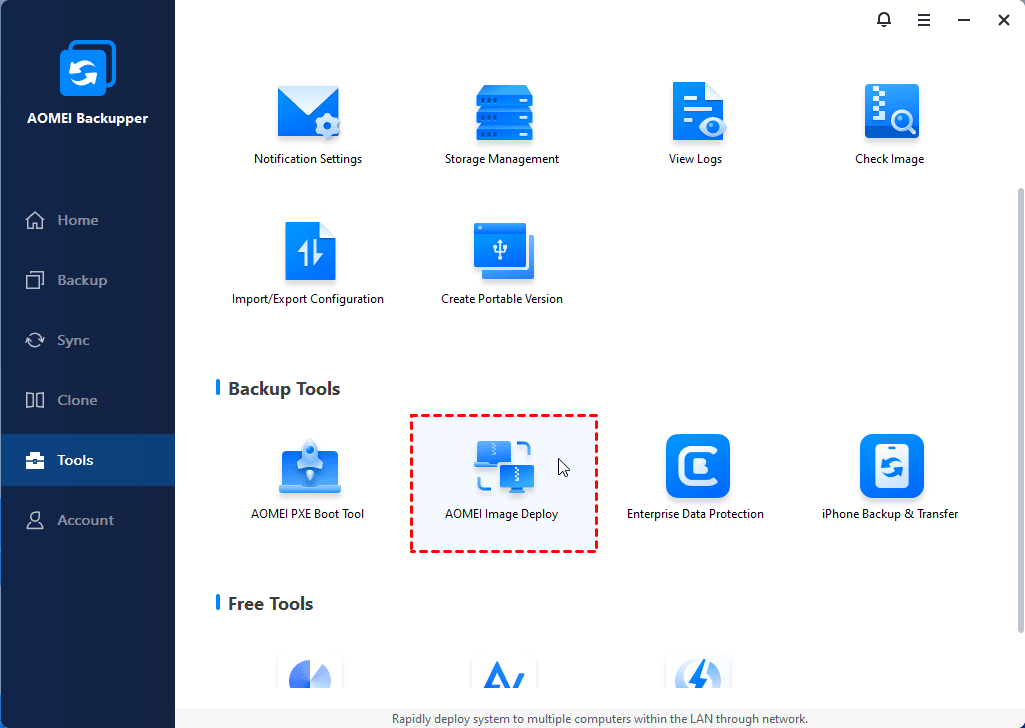
#3: Deploy images to multiple computers at a time. Like the previous two situations, it requires a system image but needs the help of AOMEI Image Deploy (supported by the technician or techplus edition) to boot multiple computers over a network.
Method 4. Windows 10 Backup to Network Drive via AOMEI Cyber Backup
The best enterprise backup software - AOMEI Cyber Backup provides a convenient and reliable solution for centralized backup management of all Windows operating systems.
- It enables you to create system/disk/partition backup for a bunch of Windows PCs, supporting Windows 11/10/8.1/8/7.
- You are allowed to save backup images on a local disk, external hard drive, network share or NAS device, etc.
- You can schedule a backup task to run daily/weekly/monthly using the full/incremental/differential backup method.
Download AOMEI Cyber Backup now to try it out!
Learn how to backup Windows 10 to network drive as follows:
Step 1. Run AOMEI Cyber Backup. Log in with AOMEI Cyber Backup account or Windows account.
Step 2. Click Source Device > Windows > Add Windows Device to add the Windows 10 device that you want to backup. You need to enter the IP address, username and password of it.
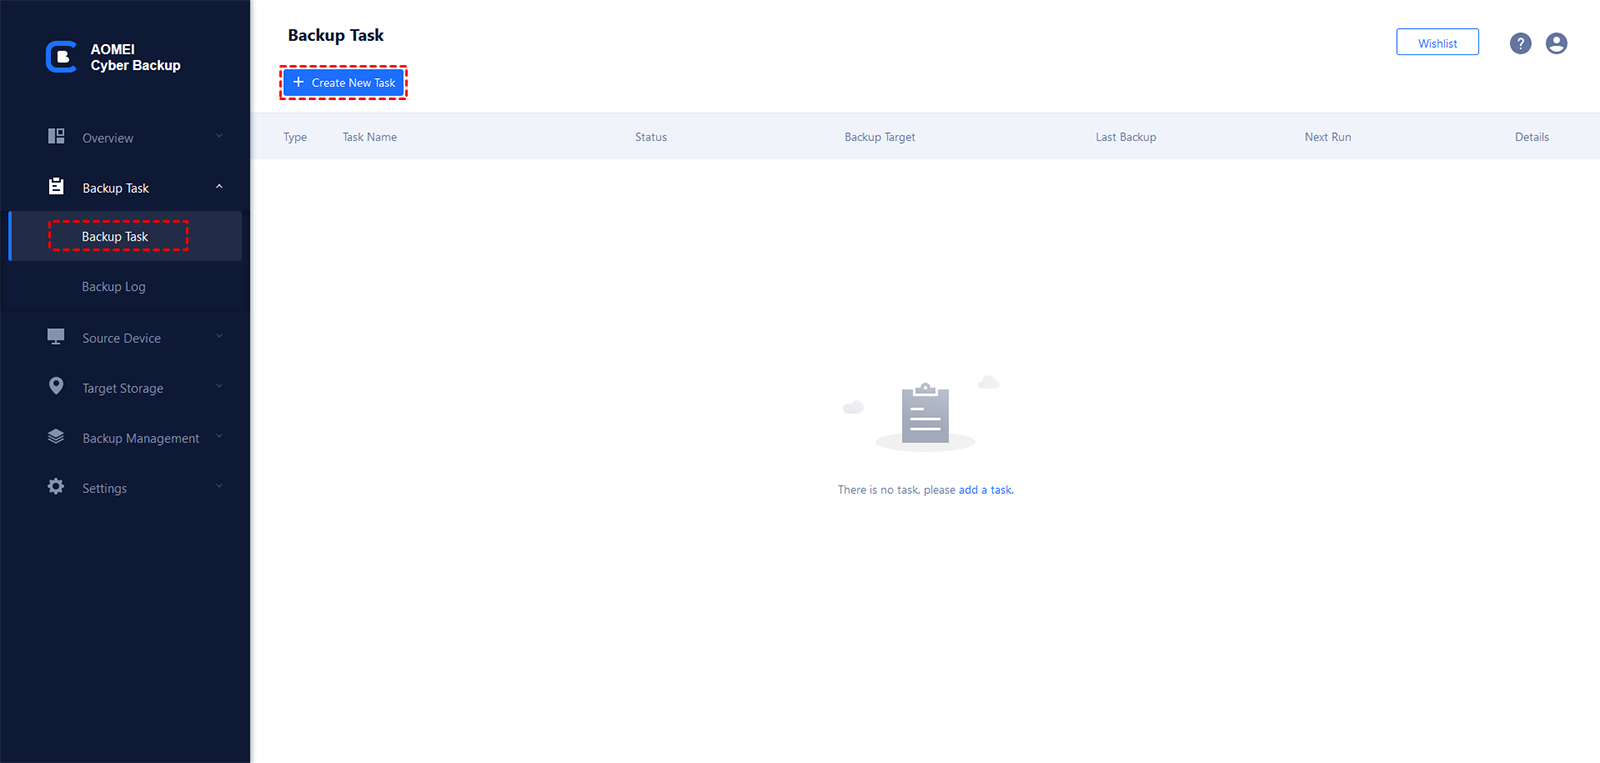
Step 3. Create a new backup task.
① Click Backup Task on the left menu bar and select Backup Task > Create New Task.
② Choose System Backup as the Backup Type.
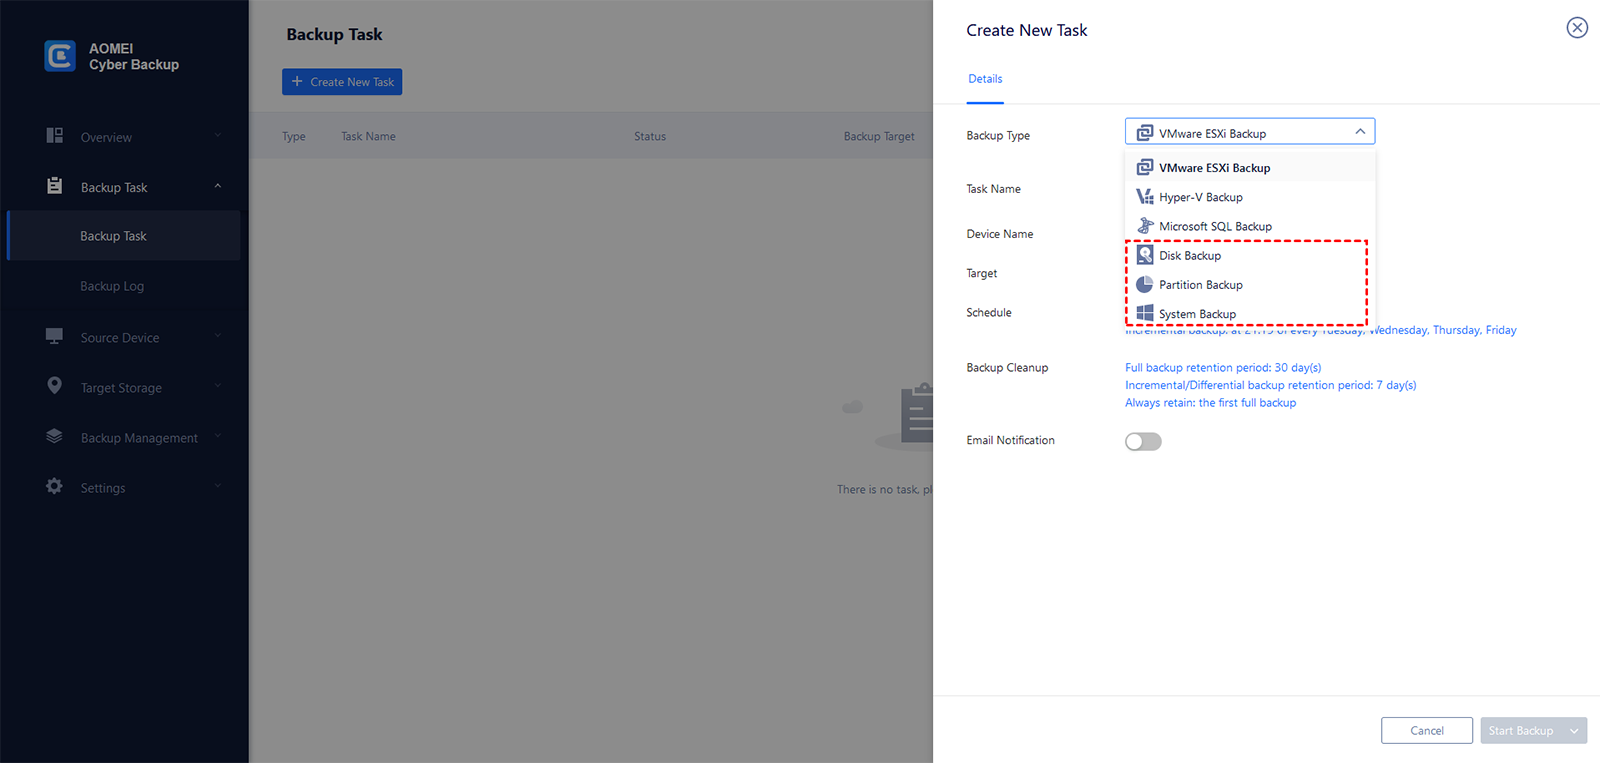
③ Edit Task Name based on your need.
④ In the Device Name field, click Select + to select the device you just added.
⑤ In the Target field, click Select + > Add a new network storage to choose a network folder as the backup target.
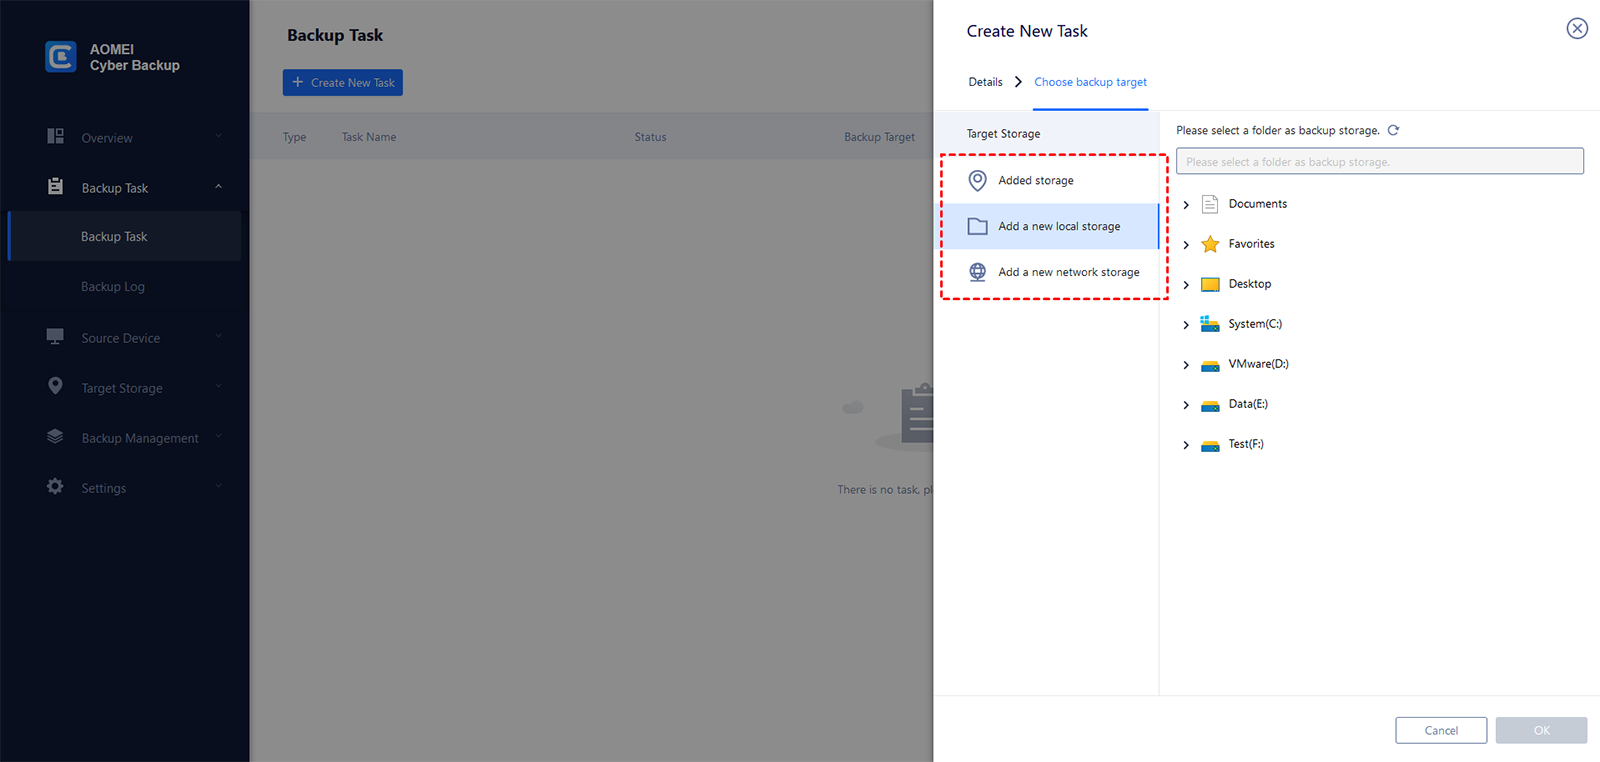
⑥ Change the default schedule settings in the Schedule field.
⑦ Click Start Backup > Add the schedule and start backup now to run your first backup.
Further Reading
If you are using Windows 11, you still can use Backup and Restore (Windows 7), File History, AOMEI Backupper, and AOMEI Cyber Backup to backup your operating system.
The core steps of built-in software are the same, the only difference is Windows 11 changes its location. Also, if you want an easier way or for enterprise backup, install AOMEI Backupper or AOMEI Cyber on Windows 11 and follow the steps above.
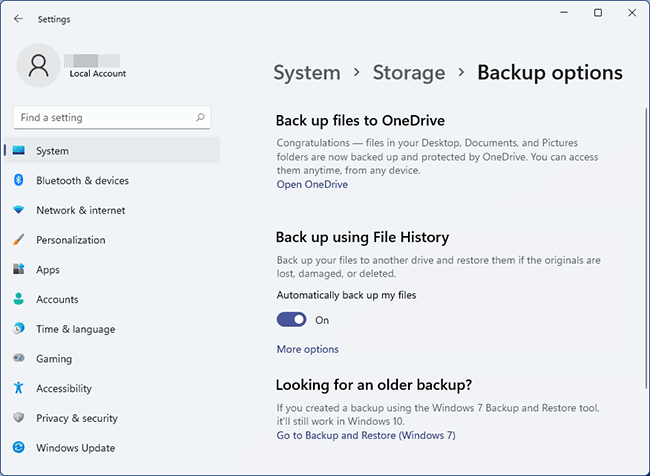
❤ For Backup and Restore (Windows 7): To find it, go to Start > Settings > System > Storage, scroll down to Storage Management, select Advanced storage settings > Backup options > Go to Backup and Restore (Windows 7).
❤ For File History: To find it, go to Start > Settings > System > Storage, scroll down to Storage Management, select Advanced storage settings > Backup options, and then you will see Back up with File History.
Conclusion
Now you know how to let Windows 10 backup to network drive or NAS, you can use Backup and Restore (Windows 7), File History, or comprehensive software - AOMEI Backupper and AOMEI Cyber Backup.
Among them, AOMEI Backupper Standard is the best suits one for individuals, which can automatically backup system, disk, partition, files, etc., to network drive. It also helps to backup network drive to local drive. Try it now to discover more!