Guide: Lenovo IdeaPad 3 15ITL6 Install Windows 10 from USB
Installing Windows 10 on the Lenovo IdeaPad 3 15ITL6 is simple with the right steps. This guide covers preparation, BIOS settings, installation, and troubleshooting tips.
By Lily Updated on March 25, 2025
The Lenovo IdeaPad 3 15ITL6 is a reliable and budget-friendly laptop, but if you need to install Windows 10—whether for an upgrade, a clean install, or system recovery—you’ll need to follow the right steps to ensure a smooth process. This guide will walk you through everything from preparing a bootable USB to configuring BIOS settings and installing Windows.
After installing Windows 10 on your Lenovo IdeaPad 3 15ITL6, it is recommended to backup Windows before errors occur.
Prepare for Lenovo IdeaPad 3 15ITL6 Windows 10 install
A bootable USB drive is required to install Windows 10. You can create one using Microsoft’s Media Creation Tool. Follow the instructions below:
✍ Notes:
- You’ll require a USB flash drive with a minimum of 8GB storage capacity. Make sure the drive is empty or back up any important files beforehand, as the process will overwrite the USB drive.
- If there is no preload operating system on your IdeaPad 3 15ITL6, you can create a bootable USB drive on another working PC.
1. Insert your USB drive into an available USB port on your laptop.
2. Go to the official Microsoft Windows download page. Under the "Create Windows 10 installation media" section, click the Download Now button.
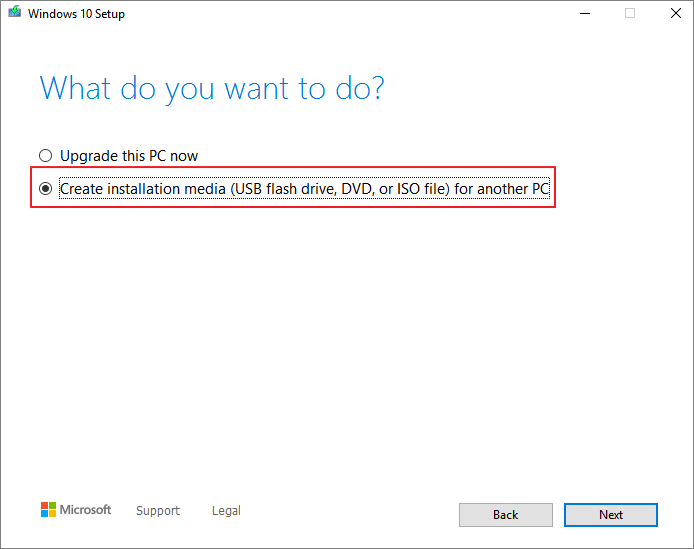
3. Open the Media Creation Tool you just downloaded. Accept the license terms, then select the option to Create installation media (USB flash drive, DVD, or ISO file) for another PC.
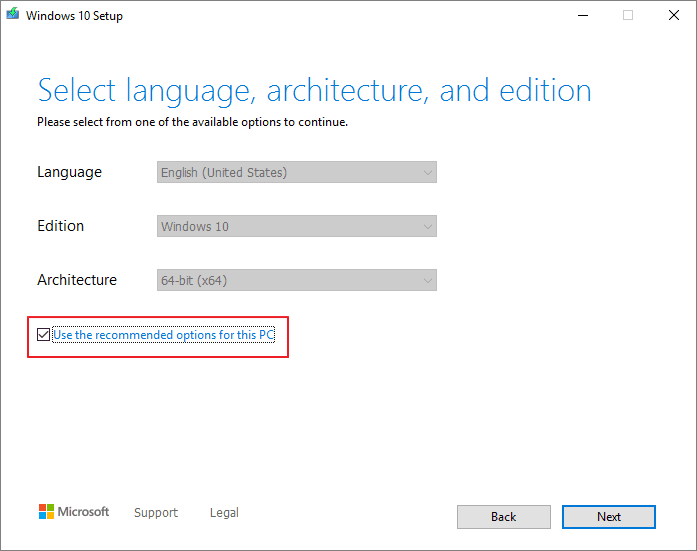
4. Pick your preferred language, edition, and architecture (the default settings are typically suitable for most users).
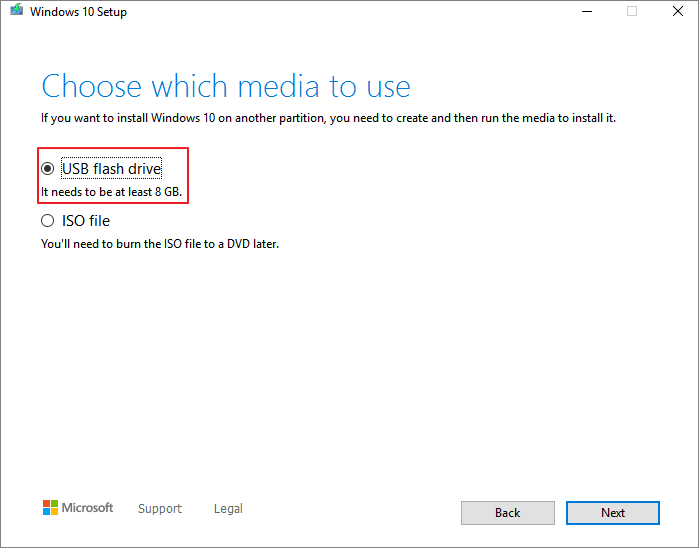
5. Select USB flash drive as the media type and choose your connected USB drive from the list.
6. Click Next and allow the tool to download Windows and create the bootable USB drive. This process may take some time, so be patient.
Detailed steps: Lenovo IdeaPad 3 15ITL6 install Windows 10 from USB
Once you’ve prepared your bootable USB drive, it's time to install Windows 10 on your Lenovo IdeaPad 3 15ITL6. Follow the guidance below to complete the installation successfully.
1. Insert the Windows 10 bootable USB into your Lenovo IdeaPad 3 15ITL6.
2. Shut down your laptop completely and change BIOS settings:
- Press the Novo Button (a small pinhole next to the power button) using a paperclip or SIM ejector tool.
- Select BIOS Setup from the Novo Button menu.
- Navigate to the Configure tab > Intel VMD Controller. Then set the status as Disabled.
- Press F10, select Yes to save changes, and exit BIOS.
3. Restart your laptop and press F12 during startup to open the Boot Manager. Select the USB drive from the list and press Enter. Windows 10 setup will start loading.
4. Select your language, time format, and keyboard layout, then click Next. Click Install Now when prompted.

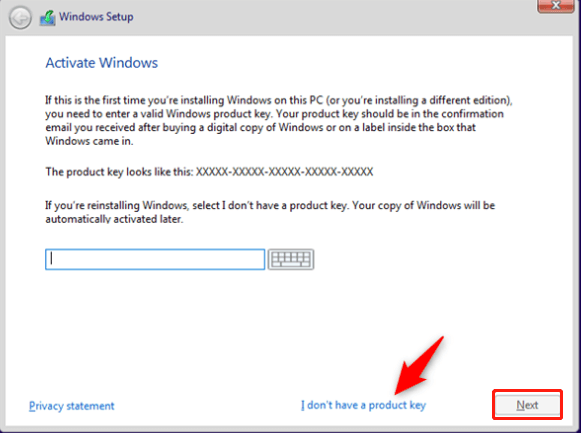
5. Enter your Windows 10 product key (or click I don’t have a product key to activate later).
6. Choose the Windows 10 edition that matches your license.
7. Accept the license terms and click Next.
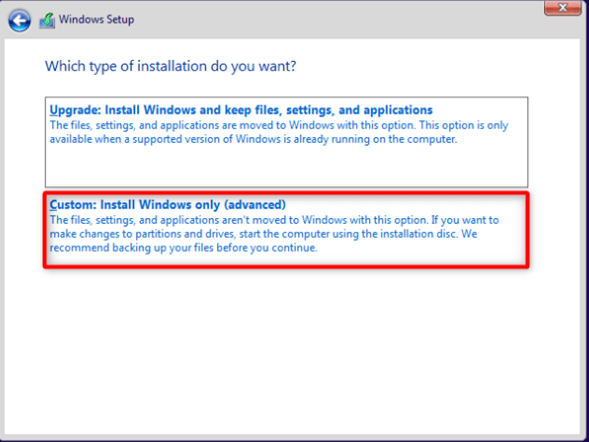
8. Select Custom: Install Windows only (advanced).
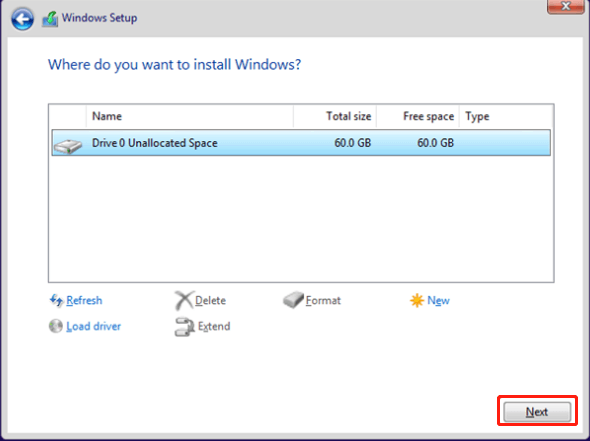
9. If you want a clean install, delete all existing partitions by selecting each partition and clicking Delete. Then select the unallocated space and click Next to start installing Windows 10.
10. The setup will copy files and restart your laptop multiple times.
11. After restarting, follow the on-screen prompts to finish your configuration. Let Windows finalize the setup.
Note: After installation, download and install Lenovo Vantage from the Microsoft Store to update firmware and necessary Lenovo drivers.
Fixed: Lenovo IdeaPad 3 15ITL6 can’t install Windows 10
If you’re having trouble installing Windows 10 on your Lenovo IdeaPad 3 15ITL6, don’t worry—you’re not alone. Below are troubleshooting steps to help you fix the problem and successfully install Windows 10.
1. Lenovo IdeaPad 3 15ITL6 Won’t Boot from USB
If your laptop doesn’t recognize the bootable USB or skips straight to Windows (or an error screen), try these steps to fix it:
- Restart your laptop and press the Novo Button. Select BIOS Setup from the menu.
- Navigate to the Security tab and ensure Secure Boot is Disabled.
- Navigate to the Boot tab and ensure Boot Mode is set to UEFI.
- Press F10 to save changes and exit.
2. Windows 10 Installation Stuck or Fails
If the installation process freezes, restarts endlessly, or shows errors, follow these solutions:
👉 Solution 1: Disconnect unnecessary peripherals and only keep the bootable USB and power adapter connected.
👉 Solution 2: Convert your hard drive to GPT.
Ⅰ. Boot into Windows Setup. At the Install Now page, press Shift + F10 to open Command Prompt.
Ⅱ. Type the following commands and press Enter after each line:
- diskpart
- list disk
- select disk 0 (replace “0” with the number of disk where you want to install Windows)
- clean
- convert gpt
- exit
Ⅲ. Restart and try the installation again.
Bonus: Backup Windows before errors occur
Protect your Windows system by creating a backup before errors or crashes occur. Taking this proactive step ensures your data and system settings are safe, allowing you to restore everything quickly in case of unexpected issues. The best free backup software AOMEI Backupper Standard is your reliable solution for data protection.

-
Multiple Backup Types: Choose from system backup, disk backup, partition backup, or file backup to suit your specific needs.
-
Versatile Backup Locations: Save your backup images to a local disk, external hard drive, USB flash drive, network share, or cloud storage for added convenience.
-
Flexible Backup Options: Customize your backups with features like scheduled backups, image compression, and splitting to optimize storage and efficiency.
Download and install AOMEI Backupper on your IdeaPad 3 15ITL6. Run the program, and click Backup > System Backup to backup Windows 10 on your Lenovo laptop.

To sum up
It is a straightforward process to perform Lenovo IdeaPad 3 15ITL6 install Windows 10 from USB. This guide walks you through creating a bootable USB, configuring BIOS settings, and completing the Windows 10 installation. You can also get some troubleshooting steps if you encounter issues.
To ensure your data and system settings are safe, you may make a backup with AOMEI Backupper. It offers all-around backup solutions with flexible backup settings. What’s more, AOMEI Backupper allows you to seamlessly replace C drive with SSD. Discover even more powerful features for yourself!