How to Disable Sign-In on Windows 11 and Help Your Workflow
This comprehensive guide will walk you through methods to disable the sign-in feature in Windows 11. We’ll also cover key terms, answer faqs, and provide expert tips to help streamline your Windows experience while maintaining security where necessary.
By Sebastian Updated on December 23, 2024
How to Remove Windows 11 Password Login?
“I am trying to set up my new HP LAPTOP and it asks to create Windows11 - Hello PIN, I didn't want to have the PIN but there was no option to skip it. It now asks for the password I have for my Microsoft account. I want to make it so that I don't need to enter any password or Windows Hello PIN to access the laptop. Can someone help me out, please?”
– Microsoft Community
Situation 1: Disable Sign-In for Microsoft Accounts
The simplest way to disable sign-in on Windows 11 is by adjusting the user account settings. This method works for Microsoft-linked accounts.
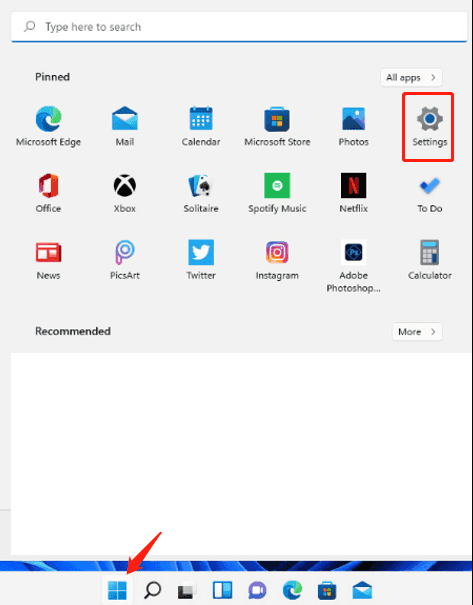
1. Ensure Windows Hello sign-in is turned off. Go to Start > Settings.
2. Select Accounts from the left-hand menu. Disable the option For improved security, only allow Windows Hello sign-in for Microsoft accounts on this device (Recommended).
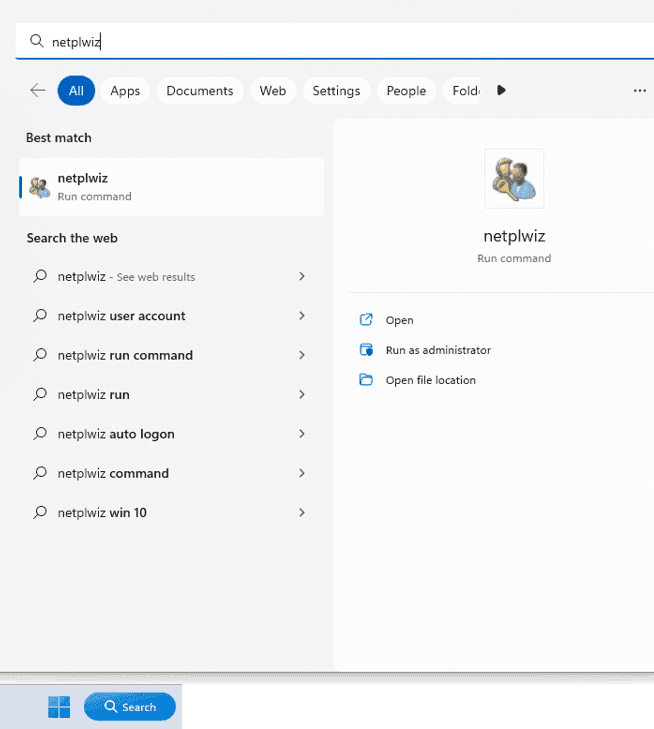
3. Search for netplwiz in the Start menu, then click the top result to open it.
4. Uncheck the box labeled Users must enter a username and password to use this computer, then click Apply.
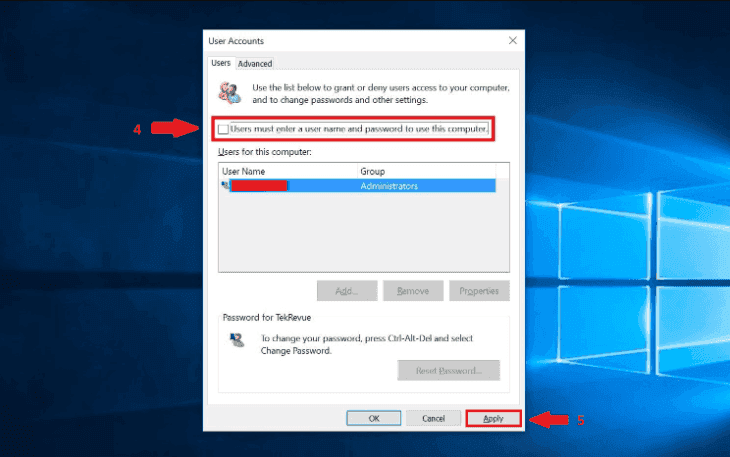
5. Enter your username and password, then confirm the password. Click OK.
6. Press OK again to confirm your changes.

7. Restart your computer to apply the new settings.
Situation 2: Remove login password for Local Accounts
The following two methods work for local accounts.
Through User Accounts Settings
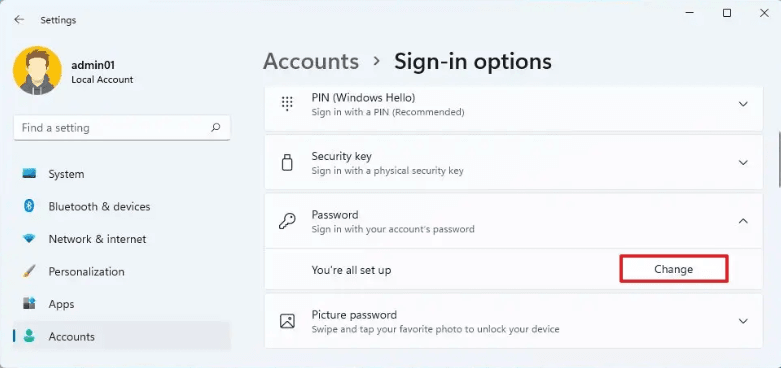
1. Go to Start > Settings > Accounts > Sign-in options.
2. Under the Password section, click Change.
3. Enter your Current password and click Next.
4. Leave New password, Confirm password and Password hint blank and click Next.
5. Click Finish to exit.
Using Command Prompt
To remove the Windows 11 account password using commands, follow these steps:
1. Open Start. Search for Command Prompt, right-click the result, and choose Run as administrator.
2. To change the password, type net user USERNAME * and press Enter. Replace USERNAME with the name of the user or admin account you want to modify.
3. When you see "Type a password for the user", leave it blank and press Enter.
4. When you see "Retype the password to confirm", leave it blank and press Enter.
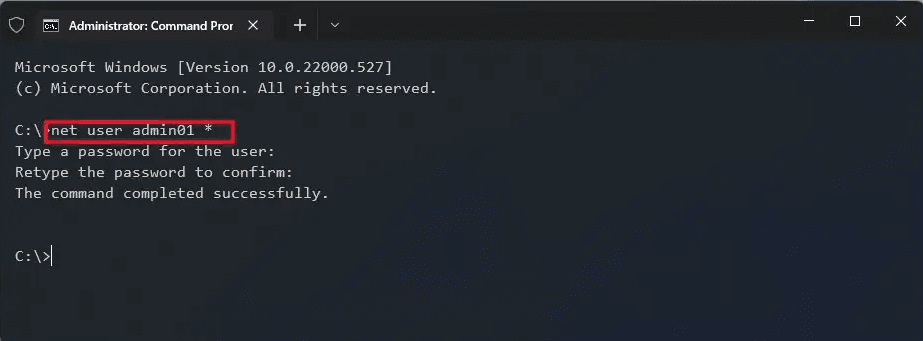
5. If successful, you'll see a message: "The command completed successfully." Restart your PC and check if you're prompted for a password. It should now log in automatically.
Bonus: Backup files with Windows 11 free backup software
If you’re not using a password to secure your computer, it’s a good idea to think about safeguarding your data. One way to do this is by using free professional backup software, such as AOMEI Backupper Standard. This powerful yet free tool helps you back up your data or system with ease on Windows 10.
◑ Whether it’s a file, folder, disk, partition, or even system backup, AOMEI Backupper Standard has you covered with an easy-to-use interface that completes backups in just three steps.
◑ You can store backups on external or internal drives, NAS, USB/DVD/CD, and if you create an AOMEI account, you can even backup files to AOMEI Cloud.
◑ Set automatic backup on a daily, weekly, or monthly schedule to ensure your data stays up to date.
◑ Alongside scheduled backups, the software also supports incremental and differential backups to handle newly added or modified files.
◑ Additional options let you add comments to your backup, compress data, split backup files, encrypt backups, or receive email notifications once the process is complete.
With its simple interface, setting up a backup task takes only a few clicks. For example, you can perform a system backup quickly. If you’re looking to back up data on Windows Servers, you may want to try the AOMEI Backupper Server for advanced features.
- Download and install the software for free.
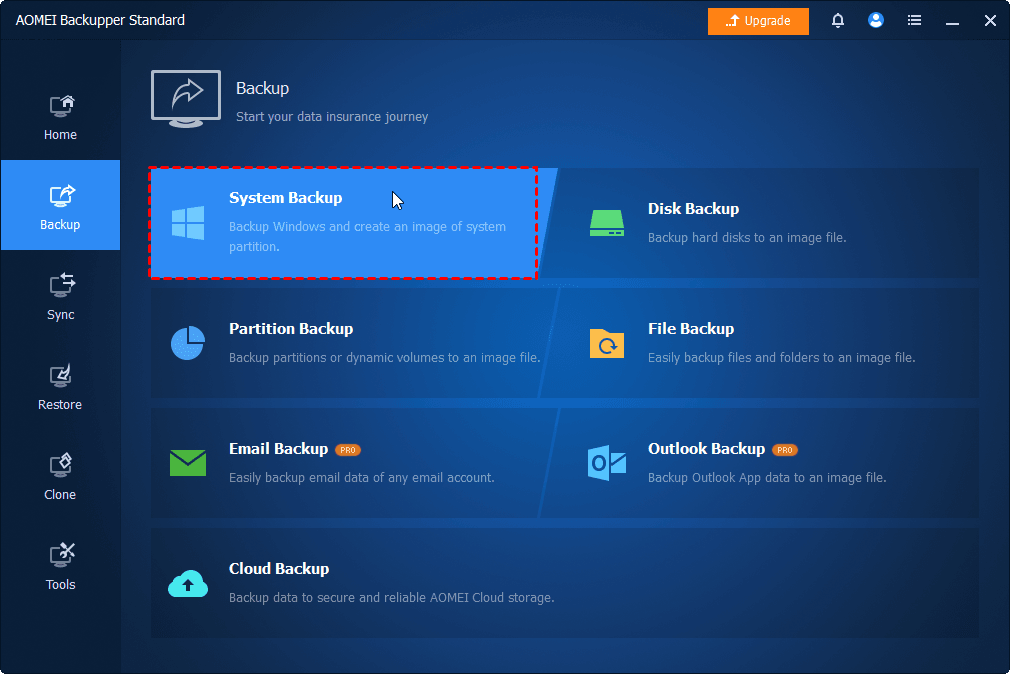
- On the Home screen, click Backup, then choose System Backup.
- Click the second box to pick where you want to save the backup file. You can choose an external hard drive, an internal drive, or a network location.
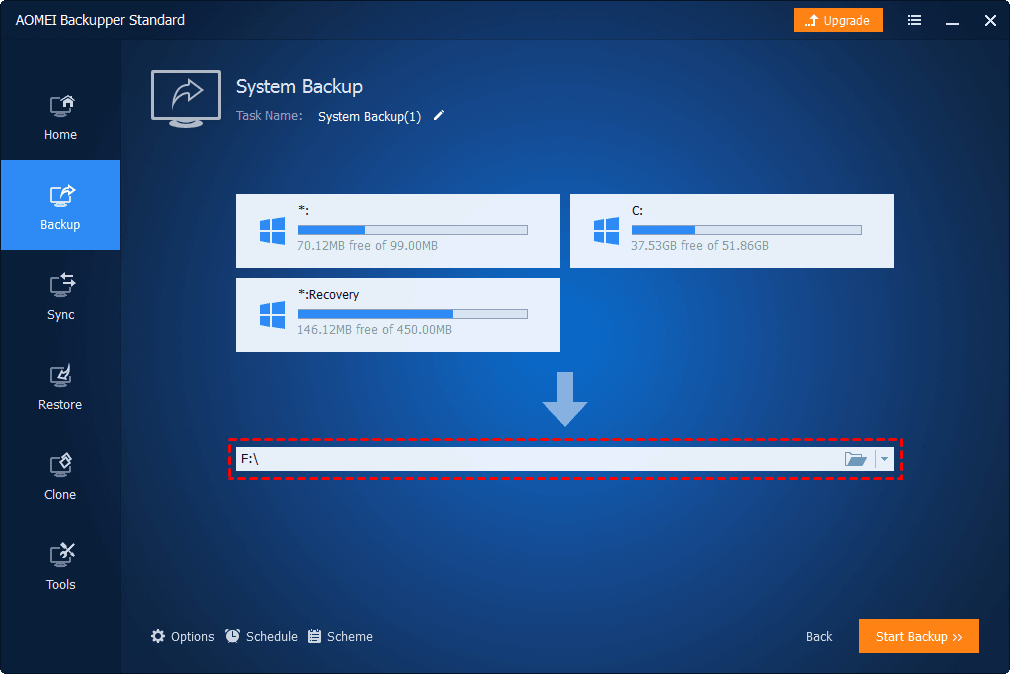
- Hit Start Backup to begin the process.

✍ Tips:
>> Options: Here, you can add comments, adjust the compression level of your backup, and for extra security, upgrade to AOMEI Backupper Professional to encrypt your backups.
>> Schedule: Set up automatic and regular backups with options like Daily, Weekly, Monthly, Event triggers, or USB plug-ins.
>> Backup Scheme: Choose your backup method here. Differential backup is recommended over incremental backup because it doesn't rely on previous backups to restore data. The program also automatically deletes old backup files to free up space, available in AOMEI Backupper Professional.
FAQs About Disabling Sign-In on Windows 11
Q 1: Can I disable sign-in for specific accounts only?
A 1: Yes, you can disable sign-in for specific local accounts while keeping it active for others. This is done through the netplwiz method by selecting individual accounts and unchecking the password requirement.
Q 2: How do I enable sign-in again if I change my mind?
A 2: To re-enable the sign-in screen, follow the same steps outlined above, but recheck the option that requires users to enter a password.
Q 3: Can I disable sign-in without removing my password?
A 3: Yes, disabling sign-in doesn’t mean removing your password. The password remains active, but Windows will no longer prompt for it at startup.
Expert Tips for Disabling Sign-In on Windows 11
- Tip 1: If you're disabling sign-in on a device used by multiple people, consider setting up separate user accounts instead of completely removing the sign-in screen.
- Tip 2: Always back up your system before making significant changes to account settings, especially if you’re modifying system-level security.
- Tip 3: If you want the convenience of automatic sign-in but still require security, use Windows Hello to configure a quick fingerprint or face unlock.
Conclusion
Disabling the sign-in screen in Windows 11 can significantly enhance the convenience of your computing experience, especially if you're a sole user who prioritizes speed and ease of access. While there are various methods available, each comes with its considerations regarding security and personal preference. Whether using the netplwiz method or the command prompt, this guide equips you with all the tools necessary to streamline access to your desktop. Just ensure you balance convenience with the security needs of your specific environment.